Server-Side Development
ASP.NET offers three main server-side development models for building Web applications:
Web Forms was the original Web development model in .NET and is now in version 4.5. MVC was first released in March 2009 and is now in version 4. Web Pages (and the associated Razor view engine) was first released in January 2011 and is now in version 2.
Web Forms
The goal of Web Forms is to make the Web development experience as close to the Windows Forms (or Classic VB) development experience as possible. You build pages by dragging and dropping controls on a design surface, you set properties of those controls though the Properties window, and you add event handlers by double-clicking the controls. This gives separation between the code generated by the designer and the code you write.
Following the premise that the most effective way to learn a new technology is to use it, you'll now walk through a sample application of the core features of Web Forms. You can follow along with the instructions below or you can examine the project included with the code downloads for the book.
Open Visual Studio and select File ⇒ New ⇒ Project. In the New Project dialog, select the ASP.NET Web Forms Application template, set the Name to WebFormsDemo, and click the OK button (see Figure 14.1).
Figure 14.1 New Web Forms project

The project created by the template is a working Web application containing several sample pages. The project is designed to be a starting point you can use for your custom applications, and that is exactly how you will use it. Run the application by pressing the F5 key to see how it looks (see Figure 14.2).
Figure 14.2 Default page of sample site generated by the project template

Pages
Web Forms applications are made up of one or more pages. Pages are also known as Web Forms because they are designed to emulate a form in a Windows Forms application. Pages consist of a combination of markup and code. The code can use the classic ASP style and be placed inline in the same file as your markup, but the more common approach is to use a code-behind file. The idea of using the code-behind model is to separate the business logic and presentation into their own files. This makes it easier to work with your pages, especially if you are working in a team environment where visual designers work on the UI of the page and coders work on the business logic that sits behind the presentation pieces.
Add a page to the sample project by right-clicking on the project and select Add ⇒ New Item. In the Add New Item dialog, select the Web Form template, set the Name to ServerControls.aspx, and click the Add button (see Figure 14.3).
Figure 14.3 Adding a Web Form to the project

A new item will be added in the Solution Explorer to represent your page, but three files were actually created: ServerControls.aspx, which contains the markup; ServerControls.aspx.designer.vb, which contains code generated by Visual Studio as you work with the markup (you will very rarely have to look at or edit this file); and ServerControls.aspx.vb, which contains the VB code-behind for the page.
To see the code-behind, right-click on ServerControls.aspx in the Solution Explorer and select View Code. At the top of the file you will find the declaration of the ServerControls class. Note that this class inherits from System.Web.UI.Page, which is the base class for pages in Web Forms (see Figure 14.4).
Figure 14.4 Code-behind for the ServerControls page

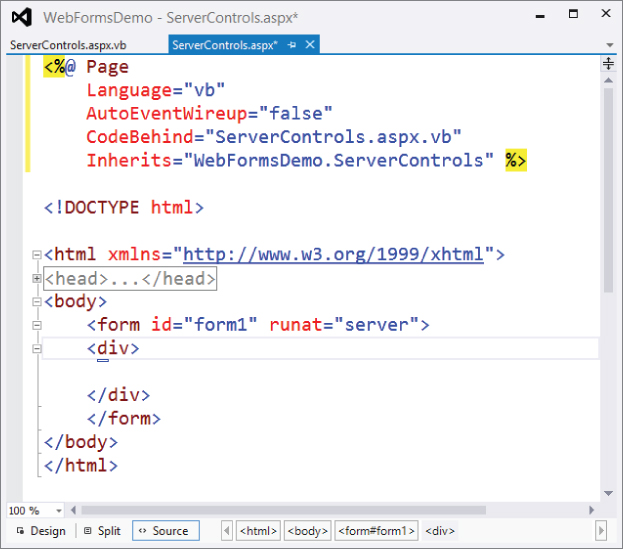
Now switch back to the markup. If the file is not already open, you can open it by right-clicking on ServerControls.aspx in the Solution Explorer and selecting View Markup. At the top of the markup you will find a <% Page %> directive. It is the CodeBehind and Inherits attributes of this directive that link the markup file with the code-behind file. In this file you will also find the Form control which will contain the other controls you place on the page (see Figure 14.5).
Figure 14.5 Markup for the ServerControls page
Server Controls
Server controls are logical elements that represent user interface and behavior when rendered on a page. You add the control to the page and configure its properties, and ASP.NET determines the appropriate HTML tags (and quite often JavaScript) to send to the browser to implement desired functionality. The control can be something simple like a button, or something complex like a grid that supports sorting and filtering.
To use drag-and-drop to add controls to your page, click the Design or Split tab at the bottom of the design area in the IDE. When either of these views is active, you can drag and drop controls from the Toolbox onto the design surface, or you can place the cursor in the location where you want the control to appear and then double-click the control.
You also can work directly in the markup. Because many developers prefer this, it is the default view of a page. Hand-coding your pages may seem to be a slower approach than simply dragging and dropping controls onto a design surface, but it isn't as slow as you might think. Many of the same productivity features available when editing Visual Basic code, such as IntelliSense and Code Snippets, are also available when editing page markup. Also, like Design view, the Source view enables you to drag and drop controls from the Toolbox into the markup itself.
Whether you are in Design view or Source view, you can highlight a control to edit its properties in the Properties window. Changing the properties will change the appearance or behavior of the highlighted control. Because all controls inherit from a specific base class (WebControl), you can highlight multiple controls at the same time and change the base properties of all the controls at once by holding down the Ctrl key as you make your control selections.
On the ServerControls.aspx page you want to add a DropDownList and set the ID to FruitDropDown; add a Button and set the ID to SubmitButton and Text to Submit; and add a Label and set the ID to ResultLabel. Also set the title of the page by setting the value of the <title> element in the markup to Server Control Example.
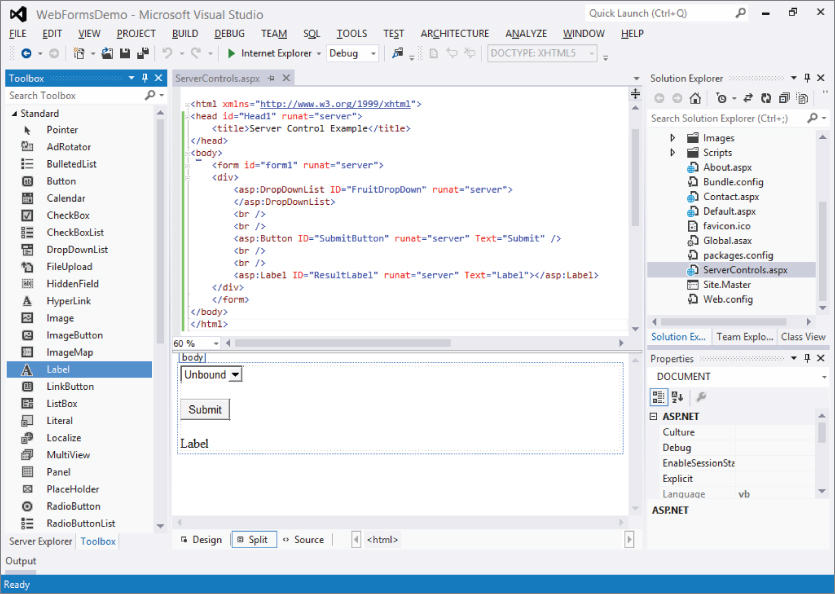
Use the techniques described in this section to add these controls and set their properties so that the page looks like Figure 14.6.
Figure 14.6 Split view of ServerControls.aspx with controls added
If you chose to add the markup using the code editor instead of the designer, the contents of the page should look something like this (code file: ServerControls-Step01.aspx):
<html xmlns="http://www.w3.org/1999/xhtml">
<head runat="server">
    <title>Server Control Example</title>
</head>
<body>
    <form id="form1" runat="server">
    <div>
        <asp:DropDownList ID="FruitDropDown" runat="server">
        </asp:DropDownList>
        <br />
        <br />
        <asp:Button ID="SubmitButton" runat="server" Text="Button" />
        <br />
        <br />
        <asp:Label ID="ResultLabel" runat="server" Text="Label"></asp:Label>
    </div>
    </form>
</body>
</html>
At this point you could view the page by selecting ServerControls.aspx in the Solution Explorer and pressing F5, but there won't be any data or behavior. You'll add those next using page and control events.
Page Events
You will often want to handle the events raised as the page is being generated. This enables you to tailor the generation of the page to suit your needs.
Here is a list of the commonly used events in the page life cycle. Additional events are possible, but those are primarily used by developers creating custom server controls.
- PreInit
- Init
- InitComplete
- PreLoad
- Load
- LoadComplete
- PreRender
- SaveStateComplete
- Unload
Of these, the most frequently used is the Load event, which is generally used to initialize the properties of the page and its child controls. You'll use the Load event to add some data into the dropdown.
Right-click on the ServerControls.aspx file and select View Code to open the Code view of the page. Notice that the shell for the method that handles the Load event (Page_Load) is already there. Inside this method, write the code to populate the choices in the drop-down by adding the names of a few of your favorite fruits into the Items collection of the FruitDropDown control. Also, the ResultLabel shouldn't show any text when the page is first loaded, so set its Text property to an empty string (code file: ServerControls-Step02.aspx.vb).
Protected Sub Page_Load(ByVal sender As Object, _
    ByVal e As System.EventArgs) Handles Me.Load
    FruitDropDown.Items.Add("Apple")
    FruitDropDown.Items.Add("Banana")
    FruitDropDown.Items.Add("Grape")
    FruitDropDown.Items.Add("Orange")
    ResultLabel.Text = String.Empty
End Sub
Next, you need to add the code to handle the event raised when the SubmitButton is clicked.
Control Events
ASP.NET Web Forms uses an event-driven model similar to that used with Windows Forms. The key difference between ASP.NET Web Forms events and those of Windows Forms is what happens when an event occurs. The objects that make up a Windows Form exist as long as the form exists; thus, they maintain state across user interactions. Because of the stateless model of the Web, the objects that make up the page (in the sample project that means the page, the drop-down, the button, and the label) only live long enough to generate the markup for that page. Once a request is complete and the final markup has been sent to the client browser, the objects that comprise the page are orphaned, and they await garbage collection.
Since the original objects are no longer available, new objects will need to be created for the event code to run. Therefore, when a user interaction triggers a server-side event, a request is sent to the server that includes information about the event; the page and the control objects are created on the server; the internal state of these objects is set using information passed in the request; the event handler executes; and an updated version of the page is sent back to the client browser. This process is called a postback.
How do you hook up these events for server controls? Again, the model is similar to that seen in Windows Forms. You can double-click a control in the Design view to add the handler for the default event for that control, you can use Event view in the Properties window (see Figure 14.7), or you can use the drop-downs at the top of the Code Editor (see Figure 14.8).
Figure 14.7 Adding an event handler using the Properties window

Figure 14.8 Adding an event handler using the drop-downs in the code editor

Add the event handler for the Click event of the SubmitButton. In the event handler, show the value the user selected from the FruitDropDown in the ResultLabel (code file: ServerControls-Step02.aspx.vb).
Private Sub SubmitButton_Click(sender As Object, e As EventArgs) _
    Handles SubmitButton.Click
    ResultLabel.Text = "You selected: " & FruitDropDown.Text
End Sub
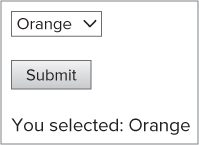
Figure 14.9 shows the page after a fruit has been selected and the Submit button has been clicked.
Figure 14.9 Running page after the Submit button has been clicked
The sample application seems to work correctly, but if you inspect the items in the FruitDropDown after clicking the SubmitButton at least once, you'll notice that the options appear multiple times (see Figure 14.10).
Figure 14.10 Contents of the drop-down after the Submit button has been pressed twice

It seems that the values in the control are being persisted across page requests, and that the code in the Page_Load event handler is adding to the existing items instead of populating the Items collection from scratch. It turns out that this is exactly what is happening through a mechanism known as ViewState.
ViewState
As previously mentioned, the Page object and each of its child controls are constructed on each request. The ASP.NET team needed a way to persist some of the properties of the controls across postbacks to maintain the illusion that pages were living across requests. What they came up with is a somewhat ingenious trick called ViewState.
The properties that need to be persisted across calls are packaged up and encoded and then placed in a hidden field within the page. When a postback occurs, these values are unpackaged and placed into the properties of the newly created server controls. The ViewState for a page will look something like this:
<input type="hidden" name="____VIEWSTATE" id="____VIEWSTATE"
value="/wEPDwUKMjAxNDUzMTQ4NA9kFgICAw9kFgQCEQ8QZA8WAYCAQICFg
MQBQhOZXcgWW9yawUITmV3IFlvcmtnEAUKQ2FsaWZvcm5pYQUKQ2FsaWZvcm5
pYWcQBQdGbG9yaWRhBQdGbG9yaWRhZ2RkAhUPDxYCHgRUZXh0ZWRkZFU1smgJ
JtYR8JfiZ/9yASSM5EIp" />
ViewState can be turned off at the page or the control level via the EnableViewState property. The ASP.NET team has gone to great lengths to keep the size of ViewState as small as possible but it still needs to be monitored and managed. Unchecked, ViewState can get large enough to affect the load times of your pages.
With these facts in mind, a simple adjustment is all that is required to address the issue with the sample project. In the Page_Load event handler, you need to check if the current request is a postback. If it is, the items will be populated automatically from the ViewState; otherwise, you need to execute your code as follows to get the items into the control (code file: ServerControls-Step03.aspx.vb):
Protected Sub Page_Load(ByVal sender As Object, ByVal e As System.EventArgs) _
    Handles Me.Load
    If Not IsPostBack Then
        FruitDropDown.Items.Add("Apple")
        FruitDropDown.Items.Add("Banana")
        FruitDropDown.Items.Add("Grape")
        FruitDropDown.Items.Add("Orange")
        ResultLabel.Text = String.Empty
    End If
End Sub
Now, no matter how many times you click the button, the list will have the proper number of items.
Master and Content Pages
Many Web applications are built so that each page of the application has a similar look and feel; and there may be common page elements such as a header, navigation sections, advertisements, footers, and more. Most people prefer uniformity in their applications in order to give end users a consistent experience across pages.
Web Forms includes a feature called master pages that enable you to create a template (or a set of templates) that define the common elements for a set of pages. Once a master page is created, you can then create a content page that defines the content specific to a single page. The content page and the master page are associated by attributes in the Page directive so ASP.NET can combine the two files into a single web page to display in a browser (see Figure 14.11).
Figure 14.11 Relationship between master and content pages

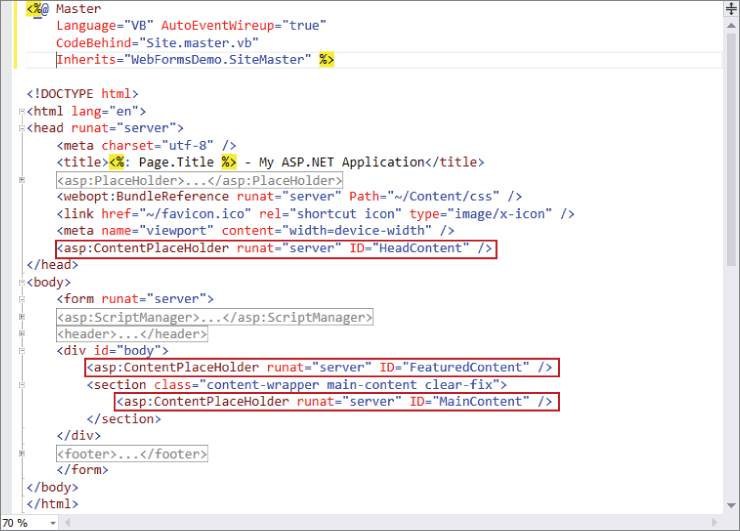
A master page contains one or more ContentPlaceHolder controls that will be “filled in” by the associated content pages. The master page included in your project (Site.Master) contains three of these placeholders (see Figure 14.12).
Figure 14.12 ContentPlaceHolder controls in the master page
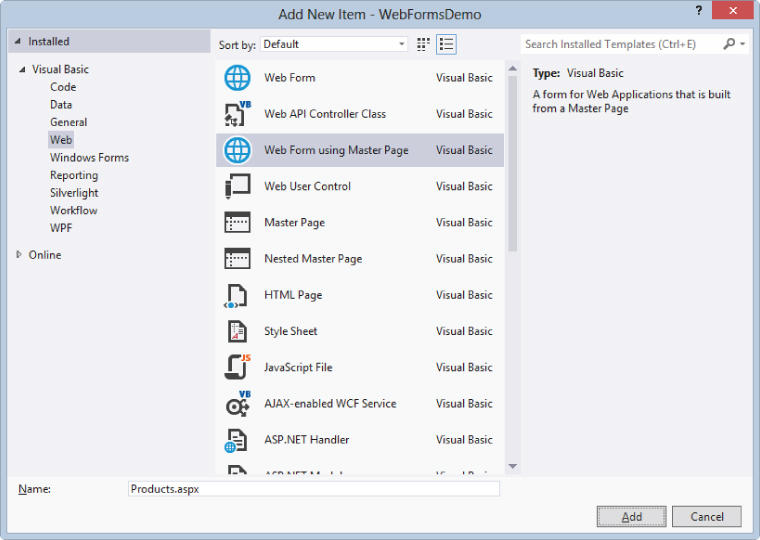
You'll create a content page using this master page. Right-click on the project in the Solution Explorer and select Add ⇒ New Item. In the Add New Item dialog select the Web Form using Master Page template, setting the Name to Products.aspx, and click the Add button (see Figure 14.13).
Figure 14.13 Adding a new content page
You will then be presented with the Select a Master Page dialog. Your project has only one master page (Site.Master); select it and click the OK button (see Figure 14.14).
Figure 14.14 Selecting the master page

Visual Studio will examine the selected master page and generate a content page with one Content control for each of the ContentPlaceHolder controls in the master. The content controls are linked to the placeholder in the master by the ContentPlaceHolderID attribute. Visual Studio will also add a MasterPageFile attribute to the Page directive that links the content page to the master page.
<%@ Page Title="" Language="vb" AutoEventWireup="false"
    MasterPageFile="~/Site.Master"
    CodeBehind="Products.aspx.vb"
    Inherits="WebFormsDemo.Products" %>

<asp:Content ID="Content1" ContentPlaceHolderID="HeadContent" runat="server">
</asp:Content>

<asp:Content ID="Content2" ContentPlaceHolderID="FeaturedContent" runat="server">
</asp:Content>

<asp:Content ID="Content3" ContentPlaceHolderID="MainContent" runat="server">
</asp:Content>
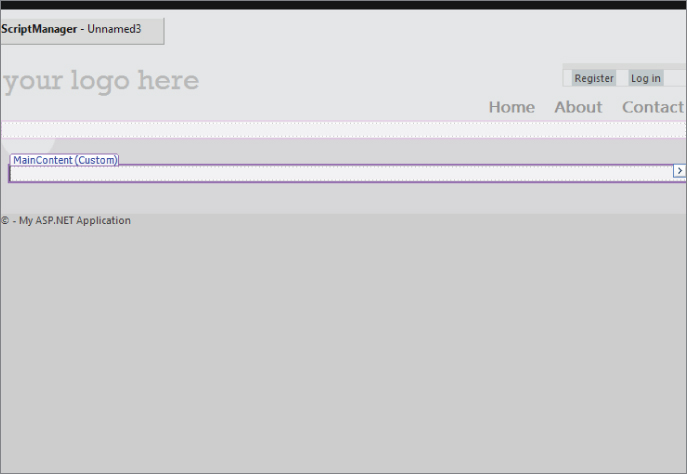
Now go into the Design view for the page. The designer shows the full page, but you will only be able to add controls to the content areas (see Figure 14.15).
Figure 14.15 Content page in Design view
In this page, you are going to show data from the Northwind SQL Server sample database. Specifically, you are going to have the user select a category of products from a drop-down and show the products for the selected category in a grid. Using the designer or the markup, add a DropDownList and a GridView control inside the main content. Set the ID of the DropDownList to CategoryDropDown and the ID of the GridView to ProductsGrid. Also set the Title attribute of the Page directive to Products. The resulting markup should look something like the following (code file: Products-Step01.aspx).
<%@ Page Title="Products" Language="vb" AutoEventWireup="false"
MasterPageFile="~/Site.Master"
CodeBehind="Products.aspx.vb"
Inherits="WebFormsDemo.Products" %>
<asp:Content ID="Content1" ContentPlaceHolderID="HeadContent" runat="server">
</asp:Content>
<asp:Content ID="Content2" ContentPlaceHolderID="FeaturedContent" runat="server">
</asp:Content>
<asp:Content ID="Content3" ContentPlaceHolderID="MainContent" runat="server">
Category:
<asp:DropDownList ID="CategoryDropDown" runat="server"></asp:DropDownList>
<br />
<br />
<asp:GridView ID="ProductsGrid" runat="server"></asp:GridView>
</asp:Content>
Simple Data Binding
ASP.NET provides a number of server controls that you can use to display and interact with data on a page. These controls have sophisticated two-way data-binding, enabling you to attach to the data by setting a few properties. In addition to the standard controls such as the TextBox, ListBox, and CheckBox, there are more complex controls such as the GridView, FormView, and ListView.
Data access is covered in other chapters in this book, so you will use a pre-created project to interact with the Northwind database. The project, which is included in the downloadable code for the course, is called Northwind.Services and the assembly it produces is called Northwind.Services.dll. Add a reference to this assembly by right-clicking on the WebFormsDemo project and selecting Add Reference. In the Reference Manager dialog, click the Browse button (at the bottom), navigate to the Northwind.Services.dll, click the Add button, and click the OK button.
This discussion doesn't go into great detail of how the Northwind.Service code works, but you will get enough information to use it effectively. The service exposes data transfer objects for categories (CategoryDto) and products (ProductDto). Note the properties of the ProductDto have been attributed with some validation information. These attributes will come into play later in the chapter.
The following code snippets show the declarations of the properties exposed by the data transfer objects (code files: Northwind.Services.CategoryDto.vb and Northwind.Services.ProductDto.vb):
CATEGORYDTO
Public Class CategoryDto
    Public Property CategoryID As Integer
    Public Property CategoryName As String
End Class
PRODUCTDTO
Imports System.ComponentModel.DataAnnotations

Public Class ProductDto
    Public Property ProductID As Integer
    <Required(), StringLength(40)>
    Public Property ProductName As String
    <StringLength(20)>
    Public Property QuantityPerUnit As String
    <DataType(DataType.Currency)>
    Public Property UnitPrice As Decimal?
    <Range(0, Short.MaxValue)>
    Public Property UnitsInStock As Short?
    <Range(0, Short.MaxValue)>
    Public Property UnitsOnOrder As Short?
    Public Property CategoryID As Integer
    Public Property CategoryName As String
End Class
You retrieve and send the data transfer objects using methods of two classes. Not surprisingly, one for categories (CategoryService) and one for products (ProductsService). The category service has one method that enables us to get the list of categories. The products service has four methods: one to get all the products, one to get the products for a given category, one to get a single product by ID, and one to update a product.
The following code snippets show the signatures of the methods exposed by the services (code files: Northwind.Services.CategoryService.vb and Northwind.Services.ProductService.vb):
CATEGORYSERVICE
Public Class CategoryService
    Public Function GetCategoryList() As IEnumerable(Of CategoryDto)
    End Function
End Class
PRODUCTSERVICE
Public Class ProductService

    Public Function GetProducts() As IEnumerable(Of ProductDto)
    End Function

    Public Function GetProducts(categoryID As Integer) As
        IEnumerable(Of ProductDto)
    End Function

    Public Function GetProducts(categoryName As String) As
        IEnumerable(Of ProductDto)
    End Function

    Public Function GetProduct(productID As Integer) As ProductDto
    End Function

    Public Sub UpdateProduct(ByVal productDto As ProductDto)
    End Sub

End Class
With the reference to Northwind.Services assembly added you can now modify the code-behind for your page to populate the controls. Server controls that support data binding have a DataSource property and a DataBind method. You set the DataSource property to an object containing the data you wish to use in the control and then you call the DataBind method. Modify the code-behind for the Products.aspx page to look like the following code snippet. Don't forget to add the Imports statement at the top to avoid syntax errors (code file: Products-Step02.aspx.vb):
Imports Northwind.Services

Public Class Products
    Inherits System.Web.UI.Page

    Protected Sub Page_Load(ByVal sender As Object, _
        ByVal e As System.EventArgs) Handles Me.Load
        If Not IsPostBack Then
            Dim service As New CategoryService()
            CategoryDropDown.DataSource = service.GetCategoryList()
            CategoryDropDown.DataBind()
        End If

        ShowProducts()
    End Sub

    Protected Sub CategoryDropDown_SelectedIndexChanged(sender As Object, _
        e As EventArgs) Handles CategoryDropDown.SelectedIndexChanged
        ShowProducts()
    End Sub

    Private Sub ShowProducts()
        Dim service As New ProductService()
        Dim categoryID = CInt(CategoryDropDown.SelectedValue)
        ProductsGrid.DataSource = service.GetProducts(categoryID)
        ProductsGrid.DataBind()
    End Sub

End Class
Most controls will have additional properties (beyond DataSource) you need to set to indicate how the data should be displayed in and retrieved from the control. These properties can be set in the code-behind or in the markup. You'll set them in the markup.
You are binding a collection of CategoryDto objects to the CategoryDropDown. You need to indicate which property of the data transfer object should be shown in the drop-down and which property should be returned as the selected value. You can do this by setting the DataTextField and DataValueField properties to CategoryName and CategoryID consecutively. You also need to set the AutoPostBack property to true so that the SelectedIndexChanged event will fire when the user selects an item.
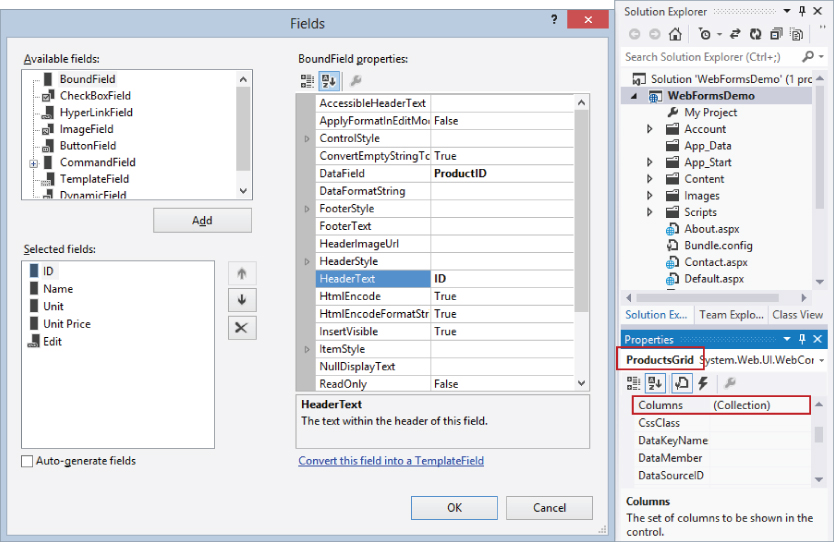
You are binding a collection of ProductDto objects to the ProductsGridView. Instead of using the default rendering of the grid you will explicitly define the columns you want and how they should look. You do this by setting the AutoGenerateColumns property to false and then defining the columns you want using Field controls. If you are using the designer, you can configure the fields by clicking the ellipses button in the Columns property of the Properties Window and using the Fields designer (see Figure 14.16).
Figure 14.16 Adding columns to the Products grid using the Fields designer
Note that the last column in the grid uses a HyperLinkField to create a link to a page where you can edit the selected item. You'll create this page in the next section.
Whether you use the designer or add it by hand, the markup to implement the tasks described above will look something like this (code file: Products-Step02.aspx):
<asp:Content ID="Content3" ContentPlaceHolderID="MainContent" runat="server">
Category:
<asp:DropDownList
ID="CategoryDropDown"
AutoPostBack="true"
DataTextField="CategoryName"
DataValueField="CategoryID"
runat="server">
</asp:DropDownList>
<br />
<br />
<asp:GridView
ID="ProductsGrid"
AutoGenerateColumns="false"
runat="server">
<Columns>
<asp:BoundField DataField="ProductID" HeaderText="ID" />
<asp:BoundField DataField="ProductName" HeaderText="Name" />
<asp:BoundField DataField="QuantityPerUnit" HeaderText="Unit" />
<asp:BoundField DataField="UnitPrice" HeaderText="Unit Price" />
<asp:HyperLinkField
Text="Edit"
DataNavigateUrlFields="ProductID"
DataNavigateUrlFormatString="ProductDetails.aspx?id={0}" />
</Columns>
</asp:GridView>
</asp:Content>
Select Products.aspx in the Solution Explorer and press F5 to run the application. You should see a page like the one shown in Figure 14.17.
Figure 14.17 Running site showing a list of dairy products

Data Source Controls
In the previous section you bound data directly to the server controls (the drop-down and the grid). As an alternative you could have bound the data to a data source control and then set that control as the data source for the server controls. The advantage to this technique is that the data source controls provide additional functionality you won't get when binding data directly to server controls. Table 14.1 presents several data source controls included in ASP.NET.
Table 14.1 DataSource Controls
| Control | Description |
| SqlDataSource | Enables you to work with any SQL-based database, such as Microsoft SQL Server or Oracle |
| ObjectDataSource | Enables you to work with custom business objects |
| LinqDataSource | Enables you to use LINQ to query everything from in-memory collections to databases |
| EntityDataSource | Enables you to work with an Entity Data Model |
| XmlDataSource | Enables you to work with the information from an XML source (e.g., a file or an RSS feed) |
| SiteMapDataSource | Enables you to work with the hierarchical data represented in the site map file (.sitemap) |
You could use these data source controls in your application (in fact that's exactly what you did in previous editions of this book) but instead you are going to use a new data-binding technology known as model binding.
Model Binding
Model binding, which first appeared in MVC, not only simplifies data access code, it significantly reduces the amount of code you need to write. To use model binding you write methods in the code-behind for a page and then attach those methods to controls by setting the appropriate properties. The controls will then call the methods when they need to get data or when data needs to be updated.
You'll use model binding to create a page that will enable us to edit a product. Right-click on the project in the Solution Explorer and select Add ⇒ New Item. In the Add New Item dialog select the Web Form using Master Page template, setting the Name to ProductDetails.aspx, and click the Add button. You will then be presented with the Select a Master Page dialog. Select Site.Master and click the OK button.
Set the Title attribute of the Page directive to Product Details and then add a FormView control to the main content of the page. The properties of the FormView control that enable model binding are ItemType, SelectMethod, and UpdateMethod. ItemType tells the FormView the type of objects it will be displaying/editing. This enables strongly typed data-binding within templates. The SelectMethod and UpdateMethod properties indicate the names of the methods that should be called to retrieve or update a product. You will implement these methods in the code-behind of the page later in this section. You also need to define the form that will be used to edit a product. You do this inside the EditItemTemplate of the FormView control.
A TextBox control will be added for each of the editable properties of the product. Inside the binding expression used to set the Text property of each of these controls, you choose a property of the BindItem object. This is strongly typed to ProductDto because you set the ItemType of the FormView to that value.
You also need a HiddenField to store the value of the ProductID of the item you are editing and a Button the user can click to initiate the save process.
To implement the user interface described above, add the following markup to the main content of the Product Details page (code file: ProductDetails-Step01.aspx):
<asp:Content ID="Content3" ContentPlaceHolderID="MainContent" runat="server">
    <asp:FormView
        ID="ProductFormView"
        DefaultMode="Edit"
        ItemType="Northwind.Services.ProductDto"
        SelectMethod="GetProduct"
        UpdateMethod="UpdateProduct"
        runat="server">
        <EditItemTemplate>
            <div>
                <h2>
                    Product ID: <%# Item.ProductID%>
                </h2>
            </div>
            <asp:HiddenField
                ID="IDHidden"
                Value='<%# BindItem.ProductID %>’
                runat="server" />
            <table>
                <tr>
                    <td>Name</td>
                    <td>
                        <asp:TextBox
                            ID="NameTextBox"
                            Text='<%# BindItem.ProductName%>’
                            runat="server" />
                    </td>
                </tr>
                <tr>
                    <td>Quantity per Unit</td>
                    <td>
                        <asp:TextBox
                            ID="UnitTextBox"
                            Text='<%# BindItem.QuantityPerUnit%>’
                            runat="server" />
                    </td>
                </tr>
                <tr>
                    <td>Unit Price</td>
                    <td>
                        <asp:TextBox
                            ID="PriceTextBox"
                            Text='<%# BindItem.UnitPrice%>’
                            runat="server" />
                    </td>
                </tr>
                <tr>
                    <td>Units in Stock</td>
                    <td>
                        <asp:TextBox
                            ID="UnitsInStockTextBox"
                            Text='<%# BindItem.UnitsInStock %>’
                            runat="server" />
                    </td>
                </tr>
                <tr>
                    <td>Units on Order</td>
                    <td>
                        <asp:TextBox
                            ID="UnitsOnOrderTextBox"
                            Text='<%# BindItem.UnitsOnOrder %>’
                            runat="server" />
                    </td>
                </tr>
            </table>
            <br />
            <asp:Button
                ID="SaveButton"
                CommandName="Update"
                Text="Save"
                runat="server" />
        </EditItemTemplate>
    </asp:FormView>
</asp:Content>
When you are done the design view of the page should look like Figure 14.18.
Figure 14.18 Design view of the Product Details page

Now you need to add the code-behind for the page. The ID of the product you will be editing in the form is passed to us in the query string (e.g., ProductDetails.aspx?id=6). You use this value as a parameter to the GetProduct method using the <QueryString> attribute. Notice the type of the parameter is nullable as there is no guarantee that the query string will contain a value for “id". In the body of the method you'll check to see if the productID parameter has a value. If it does you'll get and return the associated product; if it doesn't you'll return Nothing. The model binding system will take the return value and populate the controls on the page.
When the user clicks the Save button, the model binding system will call UpdateProduct passing the edited instance of the ProductDto as a parameter. You just need to save it.
Update the code-behind for the Product Details page with the following code to implement the functionality described above (code file: ProductDetails-Step01.aspx.vb):
Imports Northwind.Services
Imports System.Web.ModelBinding

Public Class ProductDetails
    Inherits System.Web.UI.Page

    Protected Sub Page_Load(ByVal sender As Object, _
        ByVal e As System.EventArgs) Handles Me.Load

    End Sub

    Public Function GetProduct( _
        <QueryString("id")> ByVal productID As Integer?) _
        As ProductDto
        Dim result As ProductDto = Nothing

        If (productID.HasValue) Then
            Dim service As New ProductService()
            result = service.GetProduct(productID.Value)
        End If

        Return result
    End Function

    Public Sub UpdateProduct(ByVal product As ProductDto)
        Dim service As New ProductService()
        service.UpdateProduct(product)
        Server.Transfer("Products.aspx")
    End Sub

End Class
In the Solution Explorer, select ProductsDetails.aspx and press F5 to open the page. Once the browser is open, add ?id=43 to the end of the URL and press Enter. You should be redirected to the Product Details page for Ipoh Coffee. Change the Units in Stock to some number between 20 and 50 and then click Save. You should be redirected back to the Product List page. Click the Edit link for Ipoh Coffee one more time, and you should see that the change has been persisted.
Validation
To try one more update, add a breakpoint on the line that calls the UpdateProduct method on the service object inside the page's UpdateProduct method. Then in the Solution Explorer, select ProductsDetails.aspx and press F5 to open the page. Once the browser is open, add ?id=43 to the end of the URL and press Enter. You should be redirected to the Product Details page for Ipoh Coffee. Change the Units in Stock to 100000 and then click Save. The breakpoint should be hit and Visual Studio should get focus. Now open the data tip for the product parameter and you should see that value is 0 (see Figure 14.19). This happened because the value 100000 was too large to fit in the UnitsInStock property and, instead of throwing an exception, the process that created the product object just put the default value for a Short.
Figure 14.19 Debugging the Product Details page

Now you'll modify the UpdateProduct method to check for validation errors and to only persist the updates if there are none. To do this you'll use a couple features of the model binding system. First you'll change the parameter to the UpdateProduct method from a ProductDto object to the ProductID. You'll then retrieve the existing product from the data-access layer and attempt to push the changes the user has made into it using TryUpdateModel.
Recall that the properties in the ProductDto type have been attributed with validation information. The model binding system will check if the data the user has entered is invalid and, if so, it will record the validation errors in the ModelState property. You can then check ModelState's IsValid property to determine if you should push the users changes back to the data-access layer. Replace the existing implementation of the UpdateProduct method with the following (code file: ProductDetails-Step02.aspx.vb):
Public Sub UpdateProduct(ByVal productID As Integer)
    Dim service As New ProductService()
    Dim product = service.GetProduct(productID)

    TryUpdateModel(product)

    If (ModelState.IsValid) Then
        service.UpdateProduct(product)
        Server.Transfer("Products.aspx")
    End If
End Sub
In the page markup you need to set the DataKeyNames property of the FormView so the model binding system will know which property to pass as a parameter to the UpdateMethod. You'll also add a ValidationSummary control which will show a summary of any errors that have been recorded in the ModelState. In the following code snippet, the markup you need to add is shown in bold (code file: ProductDetails-Step02.aspx):
<asp:FormView
    ID="ProductFormView"
    DefaultMode="Edit"
    DataKeyNames="ProductID"
    ItemType="Northwind.Services.ProductDto"
    SelectMethod="GetProduct"
    UpdateMethod="UpdateProduct"
    runat="server">
    <EditItemTemplate>
        <!-- Removed for brevity -->
    </EditItemTemplate>
</asp:FormView>
<asp:ValidationSummary
    ID="ValidationSummary1"
    ShowModelStateErrors="true"
    ForeColor="Red"
    HeaderText="Please check the following errors:"
    runat="server" />
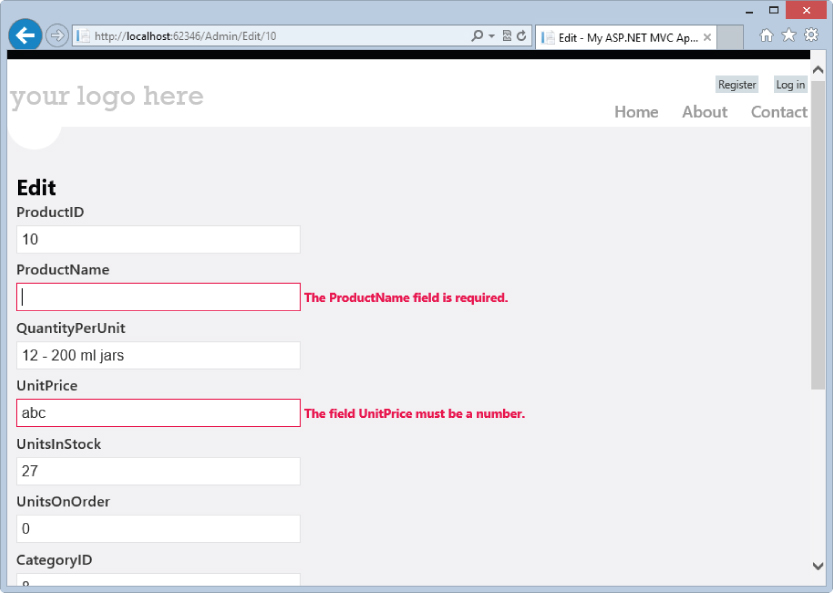
Run the application and get to the Product Details page for Ipoh Coffee (ID 43). Enter some invalid values and click the Save button. You should see a result similar to the one shown in Figure 14.20.
Figure 14.20 Product Details page showing validation errors

Web Pages and Razor
If you were to cover the ASP.NET development models in chronological order, MVC would be next. But you are going to look at Web Pages before MVC because it will allow us to examine the very important topic of the Razor View Engine.
In the summer of 2010, Scott Guthrie announced on his blog (http: weblogs.asp.net/scottgu/archive/2010/07/06/introducing-webmatrix.aspx and http: weblogs.asp.net/scottgu/archive/2010/07/02/introducing-razor.aspx) that Microsoft was working on a new Web development tool named WebMatrix and a new view engine named Razor. The goals of WebMatrix and Razor were to provide a simple, easy-to-learn development experience for those new to Web development and for those coming from languages like PHP. The use of the term Web Pages to describe Web development using Razor came later on.
In this book you'll examine Web development with Web Pages and Razor using Visual Studio. For more information on WebMatrix, check out Beginning ASP.NET Web Pages with WebMatrix by Mike Brind and Imar Spaanjaars (Wiley, 2011).
There are no Web Application Project templates for Web Pages, so you'll create a Web Site Project instead. Open Visual Studio and select File ⇒ New ⇒ Web Site. In the New Web Site dialog, select the ASP.NET Web Site (Razor v2) template, set the name of the folder that will contain the website to WebPagesDemo, and click the OK button (see Figure 14.21).
Figure 14.21 Creating a Razor Web Site project

The project template generates a working website, one very similar to the one generated by the Web Forms project template. Run the application and take a brief look around (see Figure 14.22).
Figure 14.22 Default page of sample site generated by the project template

Razor View Engine
In addition to being simple and easy to learn, Razor was designed to be compact and fluid. This is important because there is no code-behind in a Razor page. The code and markup all go in the same file and are quite often combined together.
Now compare what it's like to write markup combined with code in a Web Forms (ASPX) and a Razor (VBHTML) page. Open the WebFormsDemo project you created in the last section and add a new content page named Simple.aspx (recall that you create a content page using the Web Form using Master Page item template). In the placeholder for the main content add the following code (code file: Simple.aspx):
<asp:Content ID="Content3" ContentPlaceHolderID="MainContent" runat="server">
    <% For size = 18 To 30 Step 2%>
        <div style="font-size:<%= size %>px">Hello, World</div>
    <% Next%>
</asp:Content>
The <% %> symbols, sometimes referred to as “bee stings,” surround any managed code embedded inside the page markup. When you run the application you should see a page similar to the one shown in Figure 14.23.
Figure 14.23 Web Form with mixed code and markup running in the browser

Now you'll come back to the WebPagesDemo project and do something similar. In the Solution Explorer, right-click on the project and select Add ⇒ Add New Item. In the Add New Item dialog select the Content Page (Razor v2) template, set the Name to Simple.vbhtml, and click the Add button. Then add this code (code file: Simple.vbhtml):
@Code
    PageData("Title") = "Simple Page"
    Layout = "~/_SiteLayout.vbhtml"
End Code

<div>
    @For size = 18 To 30 Step 2
        @<div style="font-size:@(size)px">Hello, World</div>
    Next
</div>
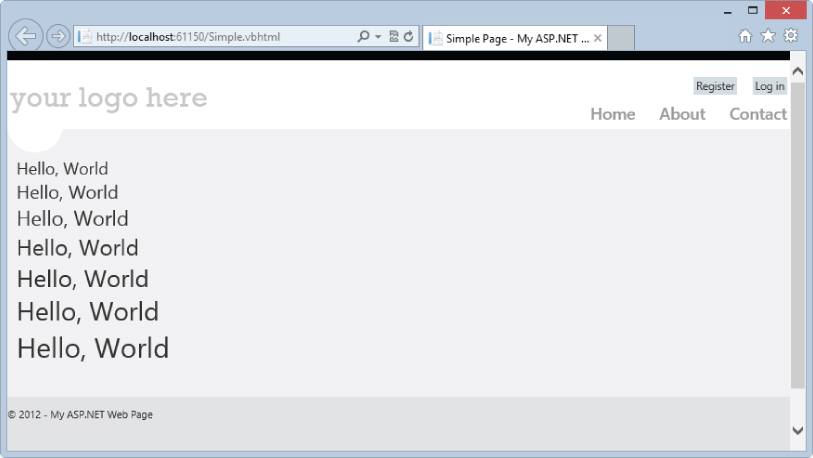
Don't worry about the values being set in the @Code section (you'll look at what's happening there in a moment). The important code is inside the <div> tag. This code does the same thing as the code you added to the ASPX page, but it's much cleaner and easy to read. When you run the application you should see a page similar to the one shown in Figure 14.24.
Figure 14.24 Razor page with mixed code and markup running in the browser
Layout Pages
In Web Forms you used master pages to define the overall layout of the site and content pages to define the content of individual pages. Web Pages have a similar concept with a somewhat simplified implementation. Instead of a master page you have a layout page. The name of this page should start with an underscore as the Web Pages infrastructure will not allow users to navigate to pages named this way.
The layout page included in the project template is named _SiteLayout.vbhtml. The interesting markup is contained inside the body div tag. Here you have two place holders for content marked by @RenderSection and @RenderBody. (code file: _SiteLayout.vbhtml)
<div id="body">
    @RenderSection("featured", required:=false)
    <section class="content-wrapper main-content clear-fix">
        @RenderBody()
    </section>
</div>
One of the content pages included in the project template is Default.vbhtml. This content page is linked to the layout page by the Layout property. Each @Section section defines the content for the corresponding @RenderSection in the layout page–in this case it's the featured section. Note that this section has been marked as optional so it did not have to be defined. Finally you have markup outside a @Section section. This content corresponds to the @RenderBody in the layout page (code file: Default.vbhtml):
@Code
    Layout = "~/_SiteLayout.vbhtml"
    PageData("Title") = "Home Page"
End Code
@Section featured
    <section class="featured">
        <!-- Removed for brevity -->
    </section>
End Section
<h3>
    We suggest the following:</h3>
<ol class="round">
    <!-- Removed for brevity -->
</ol>
Database Access
Software architecture best practices indicate that you should separate applications into logical layers: user interface, business logic, data access, and data storage. The Web Forms application you just built only implemented the user interface; you didn't have any business logic to speak of, so you did not implement that layer; you used the pre-created Northwind.Services assembly for data access; and you used SQL Server Express for data storage. There are many benefits to using this kind of logical architecture, but to do so adds some complexity to the application development process.
As mentioned earlier, Web Pages and Razor are designed to be simple, easy to learn, and easy to use. To achieve these goals the general development practice is to build self-contained pages where all the data access, business logic, and user interface needed for a page is included in the page itself. You'll follow this practice while building this Web Pages application.
To be able to connect to a database you need to add a database connection string to the Web.config file. Open this file and add the <add> element inside the <connectionStrings> element shown in bold (code file: Web.config):
<connectionStrings>
  <add name="StarterSite"
    connectionString="Data Source=|DataDirectory|StarterSite.sdf" ... />
  <add name="Northwind"
    connectionString="Data Source=localhostsqlexpress;
      Initial Catalog=Northwind;Integrated Security=True"
    providerName="System.Data.SqlClient" />
</connectionStrings>
With the connection string configured you'll now add a page that shows data from the Categories table. Add a new Razor content page named CategoryList.vbhtml and set the page title and layout page to “Category List” and “~/_SiteLayout.vbhtml” respectively (code file: CategoryList-Step01.vbhtml).
@Code
    PageData("Title") = "Category List"
    Layout = "~/_SiteLayout.vbhtml"
End Code
Now add the following code to open a connection to the Northwind database and retrieve the CategoryID and CategoryName for each of the rows in the Category table. You can do this inside the existing @Code section or you can add the code inside a new @Code section. Notice the very simple syntax used to perform these operations. The call to the Query method returns an IEnumerable(Of Object), where each object in the collection has properties representing the values of the columns returned from the query. These properties are late-bound so they will not appear in Intellisense (code file: CategoryList-Step01.vbhtml).
@Code
    Dim db = Database.Open("Northwind")
    Dim categories = db.Query(
        "SELECT CategoryID, CategoryName FROM Categories")
End Code
Now add the markup to show each of the category names in an unordered list. As mentioned earlier, the CategoryName property is late-bound and will not appear in Intellisense (code file: CategoryList-Step01.vbhtml).
<div>
    <h2>Product Categories</h2>
    <ul>
        @For Each category In categories
            @<li>
                @category.CategoryName
             </li>
        Next
    </ul>
</div>
The complete page should look like that in Listing 14-1. If you run the application you should see a page similar to the one shown in Figure 14.25 (code file: categoryList-Step01.vbhtml).
Figure 14.25 Category List page running in the browser

@Code
    PageData("Title") = "Category List"
    Layout = "~/_SiteLayout.vbhtml"
End Code

@Code
    Dim db = Database.Open("Northwind")
    Dim categories = db.Query(
        "SELECT CategoryID, CategoryName FROM Categories")
End Code

<div>
    <h2>Product Categories</h2>
    <ul>
        @For Each category In categories
            @<li>
                @category.CategoryName
             </li>
        Next
    </ul>
</div>
Helpers
In lieu of controls, Razor uses Helpers. The two are similar in that they are reusable components that assist you in implementing common functionality, but Helpers are simpler–they do not expose events and do not have a design experience. They weren't identified as such, but the code you used in the Category List page used Database Helpers. Now you'll create a page that uses the WebGrid Helper to show product information.
Add a new Razor content page named ProductList.vbhtml. Set the page title and layout page and then add code to retrieve the ProductID, ProductName, QuantityPerUnit, and UnitPrice from the Products table in the Northwind database. Your code should look something like this (code file: ProductList-Step01.vbhtml):
@Code
    Layout = "~/_SiteLayout.vbhtml"
    PageData("Title") = "Product List"
End Code

@Code
    Dim db = Database.Open("Northwind")

    Dim sql = "SELECT ProductID, ProductName, QuantityPerUnit, UnitPrice " +
        "FROM Products "
    Dim products = db.Query(sql)
End Code
Now add the following code to create an instance of the WebGrid Helper, and have it generate the HTML markup representing the grid in the page body (code file: ProductList-Step01.vbhtml).
@Code
    @* Code removed for brevity *@

    Dim grid As New WebGrid(source:=products, rowsPerPage:=20)
End Code

<div>
    <h2>All Products</h2>
    <br />
    @grid.GetHtml(
        tableStyle:="grid",
        columns:=grid.Columns(
            grid.Column("ProductID", "ID"),
            grid.Column("ProductName", "Name"),
            grid.Column("QuantityPerUnit", "Unit"),
            grid.Column("UnitPrice", "Unit Price")
        )
    )
</div>
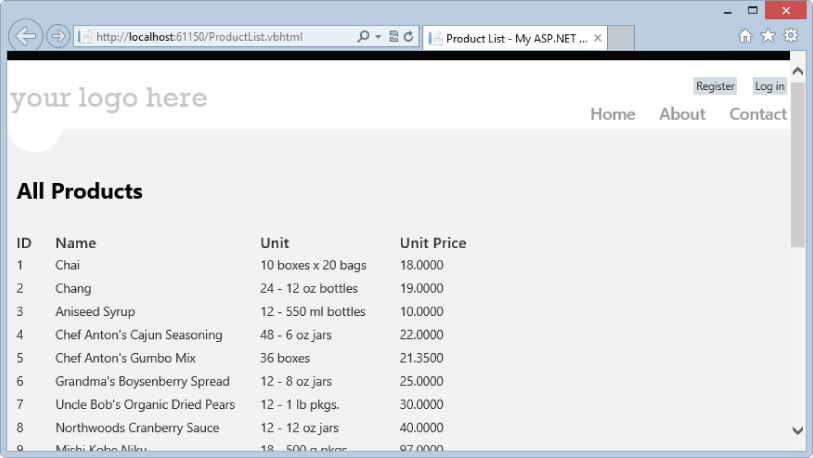
If you run the application you should see a page similar to the one shown in Figure 14.26.
Figure 14.26 Product List page running in the browser
Passing Information between Pages
Now that you have both Category and Product List pages, you can tie the two together. You can change the items in the category list to links and, when one of the links is clicked, navigate to the Product List page showing the items in the selected category.
Start by modifying the code and markup in CategoryList.vbhtml to render a link to ProductList (in Web Pages you do not need to include the extension on the page name in the URL). Add a query string parameter named catid and set it to the current category's ID (code file: CategoryList-Step02.vbhtml).
@For Each category In categories
    @<li>
        <a href="~/[email protected]" />
            @category.CategoryName
        </li>
Next
Back in ProductList.vbhtml you need to check to see if a parameter named catid has been passed to you. If it has then you'll show the products for the associated category; if it hasn't then you'll show all products. You can use the Request object to get the value of the query string parameter. You also need to update the <h2> tag above the grid to show the appropriate category name. Modify the code in Products.vbhtml to look like the following (code file: ProductList-Step02.vbhtml):
@Code
    Dim categoryID = 0
    Dim categoryName = "All Categories"
    Dim sql = String.Empty

    Dim temp = Request("catid")
    If Not temp.IsEmpty() AndAlso temp.IsInt() Then
        categoryID = temp.AsInt
    End If

    Dim db = Database.Open("Northwind")

    If categoryID > 0 Then
        sql = "SELECT CategoryName FROM Categories WHERE CategoryID = @0"
        Dim category = db.QuerySingle(sql, categoryID)
        categoryName = category.CategoryName
    End If

    sql = "SELECT ProductID, ProductName, QuantityPerUnit, UnitPrice " +
        "FROM Products "
    If categoryID > 0 Then
        sql &= "WHERE CategoryID = " & categoryID
    End If
    Dim products = db.Query(sql)

    Dim grid As New WebGrid(source:=products, rowsPerPage:=20)
End Code

<div>
    <h2>@categoryName</h2>
    <br />
    @* Grid removed for brevity *@
</div>
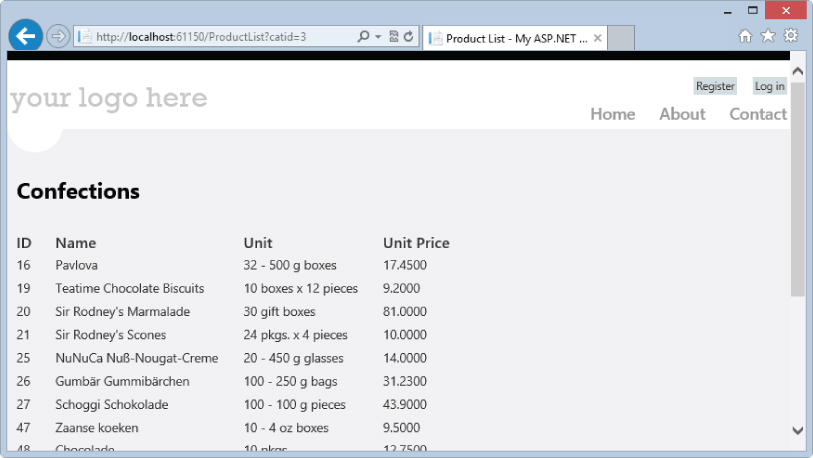
In the Solution Explorer, select CategoryList.vbhtml and press F5. In the Category List page, click the link for Confections. The browser should navigate to the Products List page and the URL should have catid=3 in the query string (see Figure-27).
Figure 14-27 Product List page showing Confections
In this example you used a query string variable to pass information from one page to the other. This is a very simple and common way to perform the task. In Web Pages you can also use UrlData, which is just as simple but more SEO (search engine optimization) friendly. You'll see how to use UrlData in the next section.
Working with Forms
Repeating what you did in the last sample application, you'll now create a form that will enable you to edit a product. You'll do it in two parts, first retrieving the appropriate product and showing it in the form, and then updating the product when the user chooses to save.
Open ProductList.vbhtml and add one more column to the grid. This column should be a link to ProductDetail.vbhtml (which you will create next) that includes the ID of the product you want to edit. Now, you could pass the ID as a parameter on the query string (like ProductDetail?id=5) but instead you'll include the ID in the URL itself (like ProductDetail/5). You'll be able to retrieve the ID of the product in the target page using the UrlData object (code file: ProductList-Step03.vbhtml).
@grid.GetHtml(
    tableStyle:="grid",
    columns:=grid.Columns(
        grid.Column("ProductID", "ID"),
        grid.Column("ProductName", "Name"),
        grid.Column("QuantityPerUnit", "Unit"),
        grid.Column("UnitPrice", "Unit Price"),
        grid.Column(format:= _
            @@<a href="~/ProductDetail/@item.ProductID">Edit</a>)
    )
)
Now create a new Razor content page named ProductDetail.vbhtml. In this page you are going to check the UrlData object for the ID of the product to edit. UrlData is a collection with each index representing a part of the URL. For example, if the URL was ProductDetail/5/a/22/foo, UrlData(0) would be 5, UrlData(1) would be a, and so on. If there is no item at the index UrlData will return an empty string.
Figure 14.27 Product List page showing Confections
If you aren't given an ID you'll redirect back to the Product List page. If you are then you'll query the database for the appropriate product. Finally you'll copy the column values into variables (code file: ProductDetail-Step01.vbhtml).
@Code
    Layout = "~/_SiteLayout.vbhtml"
    PageData("Title") = "Product Detail"
End Code

@Code
    Dim id= UrlData(0)
    If id.IsEmpty() Then
        Response.Redirect("~/ProductList")
    End If

    Dim db = Database.Open("Northwind")
    Dim name, unit, price, stock, order As String

    Dim product = db.QuerySingle("SELECT * FROM Products " + _
        "WHERE ProductID = @0", id)
    name = product.ProductName
    unit = product.QuantityPerUnit
    price = product.UnitPrice
    stock = product.UnitsInStock
    order = product.UnitsOnOrder
End Code
Now that you have the data you can create the form used to view and edit it. You could use the TextBox Helper to build the form, but using HTML input tags is just as easy (code file: ProductDetail-Step01.vbhtml).
<div>
<form method="post">
<fieldset>
<legend>Product: @id</legend>
<div>
<label>Name</label>
<input name="ProductName" type="text" value="@name" />
</div>
<div>
<label>Quantity per Unit</label>
<input name="QuantityPerUnit" type="text" value="@unit" />
</div>
<div>
<label>Unit Price</label>
<input name="UnitPrice" type="text" value="@price" />
</div>
<div>
<label>Units in Stock</label>
<input name="UnitsInStock" type="text" value="@stock" />
</div>
<div>
<label>Units on Order</label>
<input name="UnitsOnOrder" type="text" value="@order" />
</div>
<div>
<label> </label>
<input type="submit" value="Save" />
</div>
</fieldset>
</form>
</div>
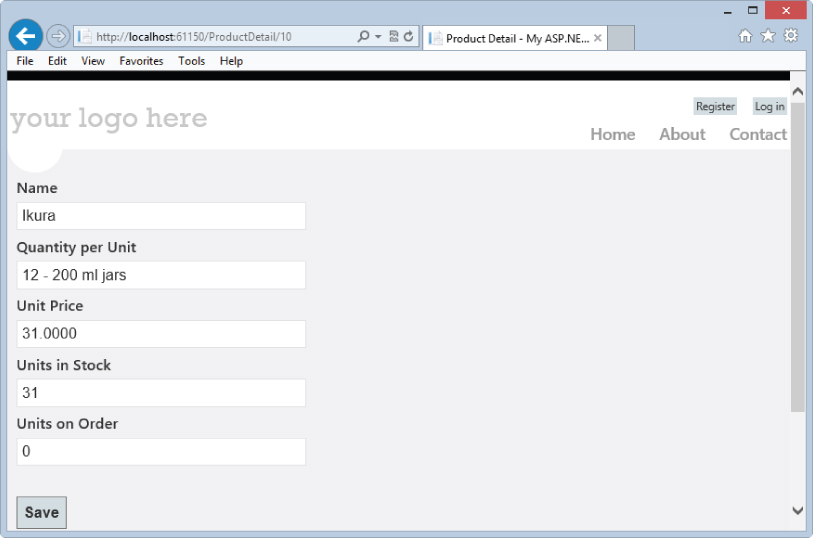
In the Solution Explorer, select ProductList.vbhtml and press F5 to open the page. Click the Edit link for Ikura (ID 10) and you should be redirected to a page similar to the one shown in Figure 14.28. If you make changes and try to submit the form nothing will happen, because you haven't added the code to deal with user input. You'll do that next.
Figure 14.28 Product Detail page running in the browser
Handling User Input
When you first request the Product Details page, the browser will issue a HTTP GET to the server. By setting the method attribute of the <form> tag to “post,” the browser will issue a HTTP POST with the form data in the body of the request when the Submit button is clicked.
So, in your page you need to check if there was a POST using the IsPost property. If there was, you will retrieve the form data from the Request object and update the appropriate Product in the database. Add the code shown in bold in the following snippet to implement the desired functionality (code file: ProductDetail-Step02.vbhtml):
@Code
    Dim id= UrlData(0)
    If id.IsEmpty() Then
        Response.Redirect("~/ProductList")
    End If

    Dim db = Database.Open("Northwind")
    Dim name, unit, price, stock, order As String

    If IsPost Then
        Dim sql = "UPDATE Products SET ProductName=@0, " + _
            "QuantityPerUnit=@1, UnitPrice=@2, " + _
            "UnitsInStock=@3, UnitsOnOrder=@4 " + _
            "WHERE ProductID=@5"
        name = Request("ProductName")
        unit = Request("QuantityPerUnit")
        price = Request("UnitPrice")
        stock = Request("UnitsInStock")
        order = Request("UnitsOnOrder")
        db.Execute(sql, name, unit, price, stock, order, id)
        Response.Redirect("~/ProductList")
    Else
        Dim product = db.QuerySingle("SELECT * FROM Products " +
            "WHERE ProductID = @0", id)
        name = product.ProductName
        unit = product.QuantityPerUnit
        price = product.UnitPrice
        stock = product.UnitsInStock
        order = product.UnitsOnOrder
    End If
End Code
In the Solution Explorer, select ProductList.vbhtml and press F5 to open the page. Click the Edit link for Ikura and you should be redirected to the Product Details page. Change the Units in Stock to some number between 20 and 50 and then click Save. You should be redirected back to the Product List page. Click the Edit link for Ikura one more time, and you should see that the change has been persisted.
Validation
To try one more update, in the Solution Explorer, select ProductList.vbhtml and press F5 to open the page. Click the Edit link for Ikura and you should be redirected to the Product Details page. Change the Units in Stock to 100000 and then click Save. You should see an error similar to the one shown in Figure 14.29, because 100000 is too large to fit into the UnitsInStock column.
To help prevent these kinds of errors from happening, you'll add some Validation Helpers to check for data entry errors. You can use these helpers to check that values of submitted form fields meet certain criteria: field is not empty, field is of a certain type, field is in a certain range, etc. Once you've defined the validation rules, you can then check the value of the IsValid method to determine if any of the rules have been broken before trying to update the database. Finally, you can use the ValidationSummary Html Helper to show the error messages for the rules that have been broken.
Note that even if there are validation errors, you still want to populate the controls with the invalid values so the user can see why there were errors, correct the data they entered, and resubmit the form.
Figure 14.29 Visual Studio error dialog

Add the code shown in bold below to your page (including the ValidationSummary at the bottom) to implement validation for the form (code file: ProductDetail-Step03.vbhtml):
@Code
    Layout = "~/_SiteLayout.vbhtml"
    PageData("Title") = "Product Detail"
End Code

@Code
    Dim id= UrlData(0)
    If id.IsEmpty() Then
        Response.Redirect("~/ProductList")
    End If

    Validation.RequireField("ProductName",
        "Product name is required")
    Validation.Add("ProductName",
        Validator.StringLength(40, 0,
        "Product name must be 40 characters or less"))
    Validation.Add("QuantityPerUnit",
        Validator.StringLength(20, 0,
        "Quantity per unit must be 20 characters or less"))
    Validation.Add("UnitPrice",
        Validator.Decimal("Unit price must be a number"))
    Validation.Add("UnitsInStock",
        Validator.Range(0, Short.MaxValue,
        "Units in stock must be less than 32767"))
    Validation.Add("UnitsOnOrder",
        Validator.Range(0, Short.MaxValue,
        "Units on order must be less than 32767"))

    Dim db = Database.Open("Northwind")
    Dim name, unit, price, stock, order As String

    If IsPost Then
        Dim sql = "UPDATE Products SET ProductName=@0, " + _
            "QuantityPerUnit=@1, UnitPrice=@2, " + _
            "UnitsInStock=@3, UnitsOnOrder=@4 " + _
            "WHERE ProductID=@5"
        name = Request("ProductName")
        unit = Request("QuantityPerUnit")
        price = Request("UnitPrice")
        stock = Request("UnitsInStock")
        order = Request("UnitsOnOrder")
        If Validation.IsValid() Then
            db.Execute(sql, name, unit, price, stock, order, id)
            Response.Redirect("~/ProductList")
        End If
    Else
        Dim product = db.QuerySingle("SELECT * FROM Products " +
            "WHERE ProductID = @0", id)
        name = product.ProductName
        unit = product.QuantityPerUnit
        price = product.UnitPrice
        stock = product.UnitsInStock
        order = product.UnitsOnOrder
    End If

End Code

<div>
    <form method="post">
        <fieldset>
            <!-- Controls removed for brevity  -->
        </fieldset>
    </form>
    @Html.ValidationSummary()
</div>
Run the application and get to the Product Details page for Ikura (ID 10). Enter some invalid values and click the Save button. You should see a result similar to the one shown in Figure 14.30.
Figure 14.30 Submitted form with errors

ASP.NET MVC
ASP.NET MVC is a Web framework that was originally released in March 2009 as an alternative to ASP.NET Web Forms. It was designed to limit abstractions and give developers a great deal of control over the creation of pages in an application. Specifically, ASP.NET MVC was designed to do the following:
- Provide complete control over HTML markup–With Web Forms, the final markup is mostly determined by the server controls on a page.
- Have intuitive website URLs–With Web Forms, the URL is determined by the location and name of the file being addressed.
- Have a clear separation of concerns–The Web Forms programming model encourages developers to put business logic and database access code in the code-behind for a page.
- Be testable by default–Several aspects of the Web Forms model make it difficult to write unit tests for user interface layer logic.
Model-View-Controller and ASP.NET
The Model-View-Controller pattern was conceived in the late 1970s by Trygve Reenskaug, a Norwegian computer scientist. It provides a powerful and elegant means of separating concerns within an application, and it applies extremely well to Web development.
The pattern separates an application into three components:
In the ASP.NET implementation of the pattern, requests are routed to controller classes that generally apply application logic (authorization, for example), interact with the model to retrieve or update data, determine the data that needs to be rendered in the response, and then pass control to a view to format the data and render the final markup to the user.
Another important aspect of the implementation of ASP.NET MVC is the use of convention over configuration. As you build an application you will see that conventions are used to determine the names and locations of files in a project, or to determine which class or file to load at runtime. You are not forced to follow these conventions, but doing so allows for a consistent experience across ASP.NET MVC applications.
In keeping with the practice you've been using, you will explore MVC by creating a sample application. Open Visual Studio and create a new ASP.NET MVC 4 Web Application named MvcDemo. You will be asked three things: what MVC template you want to use, what view-engine you want to use, and if you want to create an associated unit test project (see Figure 14.31). Choose the Internet Application template (this will create a project similar to the ones you saw in the Web Forms and Web Pages demos), choose the Razor view engine, and check the checkbox to create a unit test project keeping the default test project name.
Figure 14.31 Setting properties of the ASP.NET MVC project

If you look at the MVC project in the Solution Explorer (see Figure 14.32), you'll see that several files and folders have been created by default. Three of the folders should jump out at you immediately: Models, Views, and Controllers. These folders map to the three components of the pattern on which this style of application is based.
Figure 14.32 Files included in the MVC Internet Application template

As you've seen in the two previous examples, the project template generates a working website. Run the application and take a brief look around (see Figure 14.33).
Figure 14.33 Home page of the ASP.MVC site generated by the Internet Application template

Controllers and Actions
In traditional Web application frameworks, requests are mapped to files containing markup for pages. In ASP.NET MVC, requests are mapped to methods on classes. The classes are the previously mentioned controller classes, and the methods are known as actions. Action methods are responsible for receiving user input, retrieving or saving data to the model, and passing control to the appropriate view. The view will typically return the markup for a page, but it could also return other content types such as a binary file or JSON (native JavaScript object) formatted data. Typical actions will handle requests to list, add, edit, or delete entities from the model.
Now you can examine these concepts further by creating a new controller. In the Solution Explorer, right-click on the Controllers folder and select Add ⇒ Controller. By convention, the names of controller classes should end with “Controller.” The Add Controller dialog even encourages the use of this convention, as shown in Figure 14.34. Set the name to SimpleController and click the Add button.
Figure 14.34 Adding a controller

The class that's created will inherit from the base Controller class (System.Web.Mvc.Controller) and will have the shell for a default action method named Index (code file: ControllersSimpleController.vb):
Namespace MvcDemo
    Public Class SimpleController
        Inherits System.Web.Mvc.Controller

        '
        ' GET: /Simple

        Function Index() As ActionResult
            Return View()
        End Function

    End Class
End Namespace
The Index action method is about as simple as it gets. When a request comes in for this action it just passes control to a view without any application logic or data access. Because the action method has not specified which view to show, convention states that ASP.NET MVC should look for a file matching the pattern /Views/{Controller}/{Action}.aspx. In the case of the Index action, that would be /Views/Simple/Index.aspx, which does not exist at this point.
The comment above the method (i.e., GET: /Simple) is not required, but it is something you'll typically see in code generated by Visual Studio. It indicates that this action will be accessed via an HTTP GET request to /Simple. This illustrates another convention. The default routing rules used by MVC expect something in the form of /{Controller}/{Action}. If the action is not specified, then ASP.NET MVC will default to calling the Index action method, so a request to /Simple or /Simple/Index will be routed to the Index action. You will learn about routing and how to add or modify routing rules later in this chapter.
Although the view for the Index action does not exist, you can create it. You could do this rather easily by hand, but there's no need to; Visual Studio will create it for us. In the Code Editor, right-click anywhere in the code for the Index method and select the Add View option in the context menu. In the Add View dialog you will use the default values as they are (see Figure 14.35), but before you click the Add button note that the Use layout or master page option is checked but no value has been specified. The comment about leaving the value empty if you want to use the setting in the Razor _ViewStart file applies here. You can find this file in the Views folder. Looking inside you'll see the default layout page has been set to ViewsShared\_Layout.vbthml.
Figure 14.35 Adding a View for the Index action

After clicking the Add button you will be presented with a new content page that looks something like the following (code file: ViewsSimpleIndex.vbhtml):
@Code
    ViewData("Title") = "Index"
End Code

<h2>Index</h2>
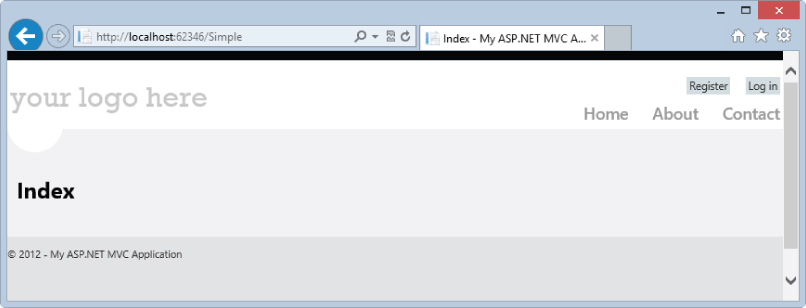
At this point you should be able to run the application. Once it is loaded in the browser, navigate to /Simple and you'll see a page like the one shown in Figure 14.36.
Figure 14.36 View for the Index action running in the browser
Now you'll look at an example in which data is passed from the action method to the view. You'll create an action that takes the name parameter from the query string and passes the value of this parameter to the view where it will displayed to the user. Back in the SimpleController class, add a new action method called SayHello that takes a string parameter called name. When a request is made, ASP.NET will match parameters on the query string to parameters of the method. The action method can pass the value of the parameter to the view by adding it to the built-in ViewData collection (code file: ControllersSimpleController.vb).
’ GET: /Simple/SayHello?name=Rob

Function SayHello(ByVal name As String) As ActionResult
    ViewData("Name") = name
    Return View()
End Function
Create the view by right-clicking anywhere in the code for the SayHello function, selecting Add View in the context menu, and clicking the Add button. In the content page that's created, modify the value of the <h2> element to output the value of the name parameter stored in the ViewData. Note that Razor automatically HTML-encodes output so it's safe to write out parameters from the query string this way (code file: ViewsSimpleSayHello.vbhtml).
@Code
    ViewData("Title") = "SayHello"
End Code

<h2>Hello @ViewData("Name")</h2>
If you run the application and navigate to /Simple/SayHello?name=Rob, you should see a page similar to the one shown in Figure 14.37.
Figure 14.37 SayHello view showing data passed from the controller

Adding the Model
In MVC, the model typically refers to the business or domain objects. These are classes that represent the data in the application, along with the corresponding business rules and validation. For your sample application you will use the types in the pre-created Northwind.Services assembly for your model.
Add a reference to this assembly by right-clicking on the project in the Solution Explorer and selecting Add Reference. The assembly should show in the Recent category–check it and click OK. If it isn't there, click the Browse button (at the bottom), navigate to the Northwind.Services.dll, click the Add button, and then click the OK button.
Views
Now that you have a model, you can create some controllers, actions, and views that are more like those you would create in a traditional business application. To start off, you will look at views that display data from the database; later in the chapter you will add views that let us modify the data.
Create a new controller called ProductsController. The Index action should be modified to get the list of categories and return a view that will display them (code file: ControllersProductsController.vb):
Imports Northwind.Services

Namespace MvcDemo
    Public Class ProductsController
        Inherits System.Web.Mvc.Controller

        Private _catService As New CategoryService()
        Private _prodService As New ProductService()

        '
        ' GET: /Products

        Function Index() As ActionResult
            Dim categories = _catService.GetCategoryList()
            Return View(categories)
        End Function

    End Class
End Namespace
You've seen that you can use ViewData to pass information from the controller to the view. ViewData is flexible; it enables you to pass any type of data to the view, but it can also be error prone. You retrieve items from the collection by passing in the string name of the key associated with the item. Also, because the collection is weakly typed, you will most likely need to do a cast to perform operations on the values returned from the collection. ASP.NET MVC offers a second mechanism you can use when you know the type of data that will be sent to the view at design time. This mechanism enables us to create a strongly typed view.
When using a strongly typed view you pass the data from the controller to the view using the first parameter to the View method. Then you specify the type of data being passed in the wizard that creates the view. In the view there will be a variable named Model, which is a strongly typed reference to the data passed from the controller.
Bring up the Add View dialog as before, but this time check the “Create a strongly typed view” check box and select CategoryDto (Northwind.Services) from the Model class drop-down (see Figure 14.38). For now you'll keep the default value of Empty in the Scaffold template drop-down. You'll see the effect of using the other values in this drop-down later in the chapter.
Figure 14.38 Creating a strongly typed view

Modify the generated view page to show the category names in an unordered list (code file: ViewsProductsIndex.vbhtml).
@ModelType IEnumerable(Of Northwind.Services.CategoryDto)

@Code
    ViewData("Title") = "Product Categories"
End Code

<h2>Product Categories</h2>

<ul>
    @For Each category In Model
        @<li>
            @category.CategoryName
         </li>
    Next
</ul>
Notice the @ModelType at the top of the page has picked up the type you specified in the wizard that created the page. Since you are working with a list of categories instead of an individual category, this needs to be manually changed to IEnumerable(Of Northwind.Services.CategoryDto).
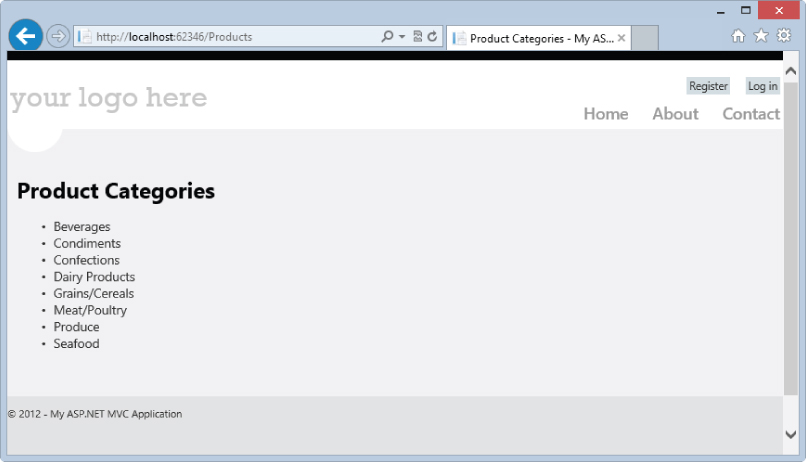
If you run the application and navigate to /Products, you should see a page similar to the one shown in Figure 14.39.
Figure 14.39 Showing a list of categories
Now that you have a way to create a list of categories, you can repeat the process to create a list of products. Because there are a lot of products, you can show them by category to limit the number shown on a page. In the ProductsController, create a new action method called Browse. It should use the repository to get the products for the category passed in as a parameter and then pass control to the Browse view (code file: ControllersProductsController.vb):
'
’ GET: /Products/Browse?category=beverages

Function Browse(ByVal category As String) As ActionResult
    Dim products = _prodService.GetProducts(category)
    Return View(products.ToList())
End Function
Create the strongly typed view for this action using the same steps you used for the Index action. In this case, set the Model class option to ProductDto (Northwind.Services).
As before, the @ModelType in the generated view page must be manually modified (the type parameter needs to be IEnumerable(Of Northwind.Services.ProductDto)). This view will show an unordered list of products and their corresponding unit prices (code file: ViewsProductsBrowse.vbhtml):
@ModelType IEnumerable(Of Northwind.Services.ProductDto)

@Code
    ViewData("Title") = "Browse Products"
End Code

<h2>Browse Products</h2>

<ul>
    @For Each prod In Model
        @Code
        Dim item = String.Format("{0} (${1:F})", _
            prod.ProductName, prod.UnitPrice)
        End Code
        @<li>
            @item
         </li>
    Next
</ul>
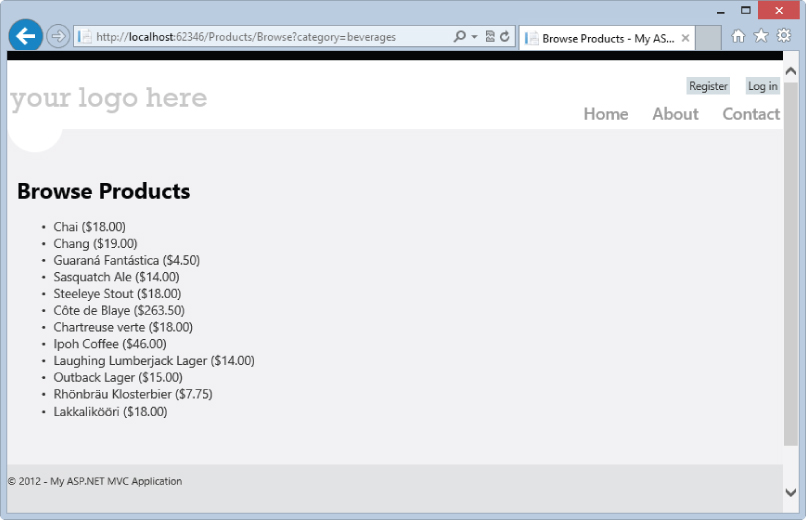
Running the application and navigating to /Products/Browse?category=beverages should render a page similar to the one shown in Figure 14.40.
Figure 14.40 Showing a list of beverages
To complete this section, you'll tie the list of categories and products together. You'll modify the Index view (i.e., the list of categories), changing the items in the unordered list to links that will take us to the page showing the products for the selected category. Instead of creating anchor tags directly, you'll use the ActionLink HTML Helper to build the links for us; specifically, you'll use the overloaded version that takes the link text, the target action, and the parameters to pass to the action (code file: ViewsProductsIndex.vbhtml):
<ul>
    @For Each category In Model
        @<li>
            @* category.CategoryName *@
            @Html.ActionLink(category.CategoryName, _
                "Browse", New With { .category = category.CategoryName })
         </li>
    Next
</ul>
You should now be able to navigate to the list of categories, click one of the links, and get the list of products for the category you selected.
Routing
One of the goals of ASP.NET MVC is to enable developers to create “friendly” URLs for their users. In your application, it would be nice to get a list of products in the beverage category by navigating to /Products/Browse/Beverages instead of using the query string as you are now.
This change can be accomplished through the routing engine included in ASP.NET. This engine enables us to map a URL template to a controller (and potentially an action and parameters). When a request comes in, the engine uses pattern-matching algorithms to find a template that matches the “shape” of the request and then routes the request to the corresponding controller.
Open the App_StartRouteConfig.vb file and look for the method named RegisterRoutes. In it you will see the code that has been routing the requests you've been making so far to controllers and actions:
routes.MapRoute( _
    name:="Default", _
    url:="{controller}/{action}/{id}", _
    defaults:=New With {.controller = "Home", .action = "Index", _
        .id= UrlParameter.Optional} _
)
The first parameter is the route name used as the key in the route table. The second parameter is the URL template. This template indicates there are potentially three segments: the first mapping to the controller name, the second mapping to the action name, and the third mapping to an id. The final parameter is an anonymous type that defines the default values of the segments.
Add the following code (above the existing call to MapRoute) to add a mapping that allows us to include the category name as part of the URL when you browse products (code file: App_StartRouteConfig.vb):
routes.MapRoute(
    name:="BrowseProducts", _
    url:="Products/Browse/{Category}", _
    defaults:=New With {.controller = "Products", .action = "Browse", _
        .Category = UrlParameter.Optional} _
)
You should now be able to run the application and navigate to /Products/Browse/Beverages or /Products/Browse/Condiments to see products in those categories.
Scaffolding and CRUD Operations
You've used the tooling in Visual Studio to assist us in creating controllers and views, but you haven't explored these tools fully. They have additional functionality to assist in creating the action methods and views for a slightly modified version of the CRUD (create, read, update, and delete) operations.
These tools work in a very similar way to the data server controls in Web Forms. By indicating the type of data to render and the type of view you desire (list, edit, create, etc.), Visual Studio can use reflection to determine the properties of the object being rendered and generate the appropriate markup and code.
To see this in action, create a new controller called AdminController, but this time set the scaffolding template to MVC controller with empty read/write actions, as shown in Figure 14.41. The generated code contains base implementations of Index, Details, Create, and Edit action methods.
Figure 14.41 Creating a controller with CRUD operations shelled in

You'll start by modifying the Index action method. When it is requested you'll return a view showing a grid with the data for all products. Modify the action method to get all products from the ProductService and pass the resulting list to the Index view. You'll also need to add Imports Northwind.Services at the top of the file (code file: ControllersAdminController.vb).
Private _prodService As New ProductService()

'
’ GET: /Admin

Function Index() As ActionResult
    Dim products = _prodService.GetProducts()
    Return View(products)
End Function
Add a strongly typed view for the Index action, choosing List from the Scaffold template drop-down, as shown in Figure 14.42.
Figure 14.42 Adding a view with scaffolding
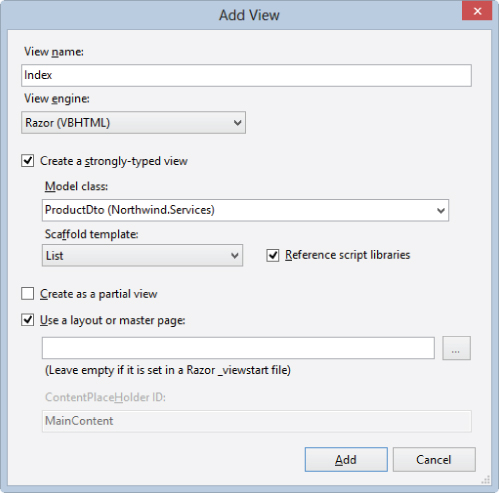
Choosing List will cause Visual Studio to generate a table to show the product data along with links to create, edit, or display the product data. You won't be implementing the functionality to create or delete products, so comment out the ActionLink helpers for those. For edit and details, the ActionLink helper needs to know what property to pass on the query string so the target controller can retrieve the selected item. The generated code will always use currentItem.PrimaryKey because the actual property cannot be determined during code generation. You'll be retrieving products using the ProductID, so change PrimaryKey to this property for the edit and details links (code file: ViewsAdminIndex.vbhtml).
@ModelType IEnumerable(Of Northwind.Services.ProductDto)

@Code
    ViewData("Title") = "Product Index"
End Code

<h2>Product Index</h2>

<p>
    @*Html.ActionLink("Create New", "Create")*@
</p>
<table>
    <tr>
        <th>
            @Html.DisplayNameFor(Function(model) model.ProductID)
        </th>
        <th>
            @Html.DisplayNameFor(Function(model) model.ProductName)
        </th>
        <th>
            @Html.DisplayNameFor(Function(model) model.QuantityPerUnit)
        </th>
        <th>
            @Html.DisplayNameFor(Function(model) model.UnitPrice)
        </th>
        <th>
            @Html.DisplayNameFor(Function(model) model.UnitsInStock)
        </th>
        <th>
            @Html.DisplayNameFor(Function(model) model.UnitsOnOrder)
        </th>
        <th></th>
    </tr>

@For Each item In Model
    Dim currentItem = item
    @<tr>
        <td>
            @Html.DisplayFor(Function(modelItem) currentItem.ProductID)
        </td>
        <td>
            @Html.DisplayFor(Function(modelItem) currentItem.ProductName)
        </td>
        <td>
            @Html.DisplayFor(Function(modelItem) currentItem.QuantityPerUnit)
        </td>
        <td>
            @Html.DisplayFor(Function(modelItem) currentItem.UnitPrice)
        </td>
        <td>
            @Html.DisplayFor(Function(modelItem) currentItem.UnitsInStock)
        </td>
        <td>
            @Html.DisplayFor(Function(modelItem) currentItem.UnitsOnOrder)
        </td>
        <td>
            @Html.ActionLink("Edit", "Edit", New With { _
                .id= currentItem.ProductID}) |
            @Html.ActionLink("Details", "Details", New With { _
                .id= currentItem.ProductID}) |
            @*@Html.ActionLink("Delete", "Delete", New With { _
                .id= currentItem.PrimaryKey})*@
        </td>
    </tr>
Next

</table>
Notice the assumptions based on the ASP.NET MVC conventions. The Create link assumes you will have a Create action method, the Edit link assumes you have an Edit action method, and so on. Without the conventions in place, these links would not be able to be code generated.
Also note the use of the strongly typed DisplayNameFor and DisplayFor helper methods. These helpers take data of different types and determine how to best display that data on the page.
Running the application and navigating to /Admin should render a page similar to the one shown in Figure 14.43.
Figure 14.43 Products shown in a grid

Moving to the Details action method, modify the code to get the requested product from the repository and pass it on to the Details view (code file: ControllersAdminController.vb):
'
’ GET: /Admin/Details/5

Function Details(ByVal id As Integer) As ActionResult
    Dim product = _prodService.GetProduct(id)
    Return View(product)
End Function
Generate the strongly typed view, this time selecting Details from the Scaffold template drop-down menu. Update the title and headers in the page as shown in bold below (code file: ViewsAdminDetails.vbhtml):
@ModelType Northwind.Services.ProductDto

@Code
    ViewData("Title") = "Product Details"
End Code

<h2>Product Details</h2>

<fieldset>
    <legend>Product</legend>

    <div class="display-label">
        @Html.DisplayNameFor(Function(model) model.ProductID)
    </div>
    <div class="display-field">
        @Html.DisplayFor(Function(model) model.ProductID)
    </div>

    <div class="display-label">
        @Html.DisplayNameFor(Function(model) model.ProductName)
    </div>
    <div class="display-field">
        @Html.DisplayFor(Function(model) model.ProductName)
    </div>

    <div class="display-label">
        @Html.DisplayNameFor(Function(model) model.QuantityPerUnit)
    </div>
    <div class="display-field">
        @Html.DisplayFor(Function(model) model.QuantityPerUnit)
    </div>

    <div class="display-label">
        @Html.DisplayNameFor(Function(model) model.UnitPrice)
    </div>
    <div class="display-field">
        @Html.DisplayFor(Function(model) model.UnitPrice)
    </div>

    <div class="display-label">
        @Html.DisplayNameFor(Function(model) model.UnitsInStock)
    </div>
    <div class="display-field">
        @Html.DisplayFor(Function(model) model.UnitsInStock)
    </div>

    <div class="display-label">
        @Html.DisplayNameFor(Function(model) model.UnitsOnOrder)
    </div>
    <div class="display-field">
        @Html.DisplayFor(Function(model) model.UnitsOnOrder)
    </div>
</fieldset>
<p>
    @*@Html.ActionLink("Edit", "Edit", New With {.id= Model.PrimaryKey}) |*@
    @Html.ActionLink("Back to List", "Index")
</p>
Run the application, navigate to /Admin, and click the Details link for one of the items. You should be taken to a page similar to the one shown in Figure 14.44. It's not the prettiest page, but that issue could be fairly easily addressed with the addition of some CSS. Clicking the Back to List link at the bottom of the page will take you back to the list of products.
Figure 14.44 Details for a product

You'll look at the Edit action in two parts. The first part involves generating a form that allows editing of product data; the second involves receiving the updated data when the user submits the form.
The Edit action method will have the same implementation as the Details action method. Modify it so that it retrieves the requested product and returns the appropriate view (code file: ControllersAdminController.vb):
'
’ GET: /Admin/Edit/5

Function Edit(ByVal id As Integer) As ActionResult
    Dim product = _prodService.GetProduct(id)
    Return View(product)
End Function
Generate a strongly typed view, selecting Edit from the Scaffold template drop-down (code file: ViewsAdminEdit.vbhtml).
@ModelType Northwind.Services.ProductDto

@Code
    ViewData("Title") = "Edit Product"
End Code

<h2>Edit Product</h2>

@Using Html.BeginForm()
    @Html.ValidationSummary(True)

    @<fieldset>
        <legend>Product</legend>

        <div class="editor-label">
            @Html.LabelFor(Function(model) model.ProductID)
        </div>
        <div class="editor-field">
            @Html.EditorFor(Function(model) model.ProductID)
            @Html.ValidationMessageFor(Function(model) model.ProductID)
        </div>

        <div class="editor-label">
            @Html.LabelFor(Function(model) model.ProductName)
        </div>
        <div class="editor-field">
            @Html.EditorFor(Function(model) model.ProductName)
            @Html.ValidationMessageFor(Function(model) model.ProductName)
        </div>

        <div class="editor-label">
            @Html.LabelFor(Function(model) model.QuantityPerUnit)
        </div>
        <div class="editor-field">
            @Html.EditorFor(Function(model) model.QuantityPerUnit)
            @Html.ValidationMessageFor(Function(model) model.QuantityPerUnit)
        </div>

        <div class="editor-label">
            @Html.LabelFor(Function(model) model.UnitPrice)
        </div>
        <div class="editor-field">
            @Html.EditorFor(Function(model) model.UnitPrice)
            @Html.ValidationMessageFor(Function(model) model.UnitPrice)
        </div>

        <div class="editor-label">
            @Html.LabelFor(Function(model) model.UnitsInStock)
        </div>
        <div class="editor-field">
            @Html.EditorFor(Function(model) model.UnitsInStock)
            @Html.ValidationMessageFor(Function(model) model.UnitsInStock)
        </div>

        <div class="editor-label">
            @Html.LabelFor(Function(model) model.UnitsOnOrder)
        </div>
        <div class="editor-field">
            @Html.EditorFor(Function(model) model.UnitsOnOrder)
            @Html.ValidationMessageFor(Function(model) model.UnitsOnOrder)
        </div>

        <p>
            <input type="submit" value="Save" />
        </p>
    </fieldset>
End Using

<div>
    @Html.ActionLink("Back to List", "Index")
</div>

@Section Scripts
    @Scripts.Render("~/bundles/jqueryval")
End Section
In addition to the strongly typed DisplayNameFor and DisplayFor helpers you saw earlier, you now see the EditorFor and ValidationMessageFor helpers. EditorFor looks at the type of the data and determines the appropriate UI element to use to let the user edit it. ValidationMessageFor looks at the ModelState to see if the data entered is invalid and reports any errors.
The final item of note is the BeginForm helper. This method is responsible for rendering the HTML form tag that will determine how updated data is sent to the client when the user submits the form. Calling BeginForm without any parameters will cause the form data to be sent via an HTTP POST to the current URL.
To handle the POST, you have a second Edit action method (code file: ControllersAdminController.vb):
'
’ POST: /Admin/Edit/5

<HttpPost()> _
Function Edit(ByVal id As Integer, ByVal collection As FormCollection) _
    As ActionResult
    Dim product = _prodService.GetProduct(id)
    Try
        UpdateModel(product)
        _prodService.UpdateProduct(product)
        Return RedirectToAction("Index")
    Catch
        Return View(product)
    End Try
End Function
Using the HttpPost attribute enables differentiation between action methods of the same name. Think of it as an additional form of method overloading.
If you look at the method implementation closely, you should notice that it looks very similar to what you saw in the Web Forms example. ASP.NET MVC uses model binding just like Web Forms does, so the implementation of the method is almost exactly the same. The only difference is that UpdateModel throws an exception if the ModelState is not valid.
Run the application, navigate to /Admin, and click the Edit link for one of the items. You should be taken to a page similar to the one shown in Figure 14.45.
Figure 14.45 Editing a product

Update a field or two with valid values and click the Save button. Verify the changes were persisted by navigating back to the Edit page for the same item. Now try to enter invalid values and you'll see the validation in action. You should see a page similar to the one shown in Figure 14.46.
Figure 14.46 Product edit page with validation errors