
3
Creating and Managing Leads
Leads are the first step of the sales and marketing cycle—they keep opportunities flowing into your sales funnel. Leads are prospects or people that may be interested in your product or service. The goal of working with them is to move them through the sales cycle and assess them as either unqualified or qualified for workable opportunities. Understanding how leads work is beneficial as it familiarizes you with how a lead starts off the sales cycle and how to move from a lead to the next step in the sales cycle.
The following topics are covered in this chapter:
- What are leads and what are they used for?
- What is lead status and how is it used in the sales cycle?
- What is lead conversion and what happens when you convert a lead?
- What is Web-to-Lead and how is this feature used?
- What are lead auto-response rules and how do you set them up?
- Lead settings and lead processes
In this chapter, we will learn the skills needed to create a lead, as well as learning what a lead record contains. We will also learn how to move a lead through the initial sales cycle, how to convert a qualified lead into an opportunity in order to move to the next step of the sales cycle, and how to create Web-to-Lead forms.
Technical requirements
For this chapter, log in to your development org and follow along as we create and convert a lead.
Understanding leads
Leads comprise anyone that is a potential customer. You can think of leads as the “catch-all” database from which you qualify potential deals. The goal is to convert the lead into a cleaner data set of high-probability sales. Converting leads into opportunities is the key to a successful business. Managing your leads effectively allows you to convert more leads into opportunities, which ultimately results in more business. Leads can be captured in many different ways, such as through conferences, websites, purchasing lists, and any other way you may come into contact with potential customers. Let’s look at a business use case where a lead may need to be created, then we’ll walk through the steps for creating a lead.
Business use case
You are a sales representative for your company, XYZ Widgets, and have been sent to a conference to talk to potential customers. While at the conference, you have a great conversation with Brenda Mcclure, the CFO of Cardinal Inc. Brenda is interested in potentially purchasing 1,000 widgets for Cardinal and gives you her card. This is a hot lead! Let’s see how you work this lead in Salesforce.
Creating leads
After this conversation, you take the business card and decide to enter the information into Salesforce right away. Usually, you would wait until after the conference and enter all of the leads’ information together, but this is a potentially big deal and you want to make sure you get it into Salesforce ASAP. Your manager always says, “If a lead doesn’t exist in Salesforce, it doesn’t exist!” Let’s see how the lead is created in Salesforce.
We will start with the main navigation page on your development org:
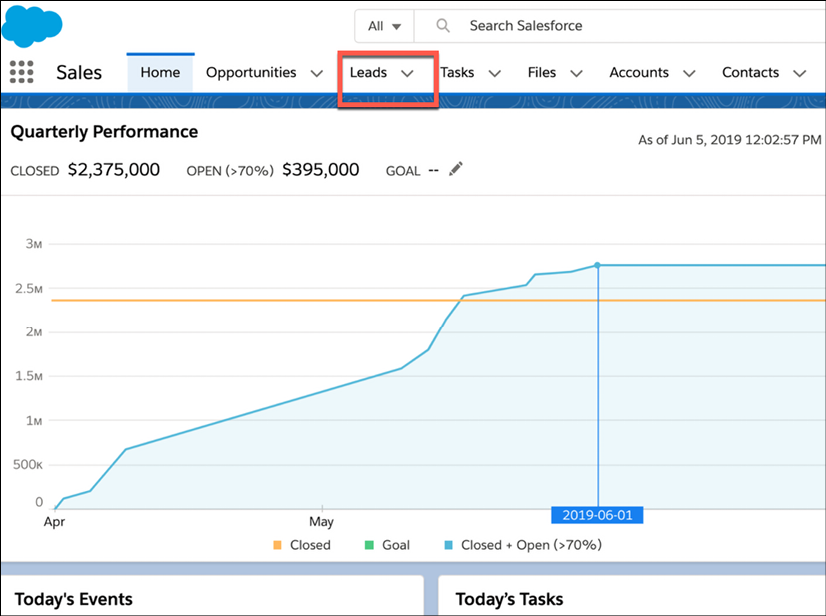
Figure 3.1: The Leads tab in the navigation bar
Let’s start creating our lead by clicking on the Leads tab, as seen in Figure 3.1.
From here, you will land on the following page:

Figure 3.2: The Leads page
In Figure 3.2, you can see the Recently Viewed view, as discussed in Chapter 1, Getting Started with Salesforce and CRM. Here, click on the New button to create a new lead.
In Figure 3.3, you can see the popup to create a lead. You should fill this out with the information from Brenda’s business card:

Figure 3.3: Creating a lead
Here, we have entered the details for the Salutation, First Name, Last Name, Company, Phone, Email, and Lead Status fields. The Lead Source field is set to Other by default; we will need to add Conference as a Lead Source value to this field. We will take a look at how to do this in the Salesforce Administration section of this book. Click on Save and you have now created your lead!
Let’s take a look at the newly created lead:

Figure 3.4: The newly created lead
When you first land on a lead, there are a few important sections. We will now cover each of these numbered areas:
- This section shows your summary fields. These fields include the title, company name, phone number, and email address of the lead. These are important for logging your activities, as discussed in Chapter 2, Understanding Salesforce Activities.
- In this section, you will notice a path with all of your lead status values, which we will discuss in more detail in Exploring the Lead Status field later in this chapter.
- Based on your business requirements, you may choose to enforce duplicate rules. If so, this section shows you any potential duplicates, which works by checking the email address of the lead against other lead email addresses to see whether it has already been entered into Salesforce.
- You will also see a Campaign History section that shows you whether this lead is associated with any marketing campaigns (we will cover campaigns in more detail in Chapter 6, Achieving Business Goals Using Campaigns).
Note that there is an Activity tab on the lead as well. This is where you log all calls, tasks, events, and emails, as discussed in Chapter 2, Understanding Salesforce Activities.
Now, we will look at the Details section of the lead by navigating to the Details sub-heading on the Leads page:

Figure 3.5: The Details tab for a lead
Looking at the Details section, you will see a few very important fields:
- Lead Owner: Who the lead is assigned to, which is the person working the lead
- Name: The first and last name of the person you are contacting
- Company: The name of the company that this person works for
- Lead Source: Where this lead came from
- Phone: The lead’s phone number
- Email: The email address of the lead
- Lead Status: Where you are in the process of this lead
- Rating: This can be set to Cold, Warm, or Hot and can be used by reps to tag leads for a quick reference on how the interaction is going
- Created By: This is a system field used for auditing purposes that is automatically set and displays the user that created the lead
- Last Modified By: This is a system field used for auditing purposes that is automatically set and displays the user that last edited the lead
There are also a few other fields in the Details section that are optional but used by many organizations. These include the following:
- Industry: This is a picklist with different customer industries
- Annual Revenue: This helps you determine the size of the prospect if you have this information
- Number of Employees: This helps you determine the size of the prospect as well
As you can see, the Details section shows you the primary fields on the lead’s record. One of the most important fields in this section is Lead Status. Let’s take a look at this in more detail.
Exploring the Lead Status field
The Lead Status field shows you where you are in the life cycle of working this lead. The lead life cycle is important as this is the beginning of the sales process for any organization. The following flowchart simplifies this process a bit:

Figure 3.6: The lead life cycle
From Figure 3.6, we can understand the following:
- Once the lead is created, you will contact the lead to present your product or service.
- The lead will either be interested in speaking further, or not. Depending on the response, there are two different outcomes.
- If not, the lead status is changed to Closed - Not Converted, or in some cases, this status is called Unqualified.
- If the lead is interested, the status reads Converted. The lead is converted into an account, contact, and optionally an opportunity.
We will cover conversion in more detail in the next section.
Let’s take a look at how these status values appear in Salesforce, and what happens when each lead status is chosen.

Figure 3.7: The lead path
From Figure 3.7, we learn the following:
- Open - Not Contacted: This is the default status when the lead is created and means that you have not logged any activities to this lead.
- Working - Contacted: This status means that you have reached out and logged activities but you have not received a definitive answer about whether the lead is interested.
- Closed - Not Converted: This is the status used if you make contact and the lead does not want to speak further. Typically, you would use this value to filter these leads out of the open leads list view that you are working with. Setting this status marks it as a dead lead, which you would want to keep in the system for reporting purposes, but would not want to see in the list view of the open leads that have a chance of being converted.
- Converted: This status means the lead is interested and would like to speak further.
In this section, we have learned about the importance of the Lead Status field and how the values in this field contribute to the sales process. Let’s take a look at what actually happens when a lead is interested in your services and you actually convert a lead.
Understanding how lead conversion takes place
When you call Brenda, she seems very interested, which is a good sign! You decide to convert the lead.
When a lead is converted, something very important happens. The lead disappears from the system (it disappears only on the frontend; it is still available for reporting on the backend) and it turns into three records. It becomes an account, an opportunity, and a contact. All the information about the company goes to the account, the information about the person goes to the contact, and the information about the actual sale goes to the opportunity. This is an important step in the sales process since this is the point where you stop working with a lead and instead start working with an opportunity.
Let’s look at how to convert a lead:
- To convert a lead, navigate to the lead record you created and click on Converted, then click on Select Converted Status. (Optionally, you can click on the arrow next to the Submit for Approval button and use the Convert button.)

Figure 3.8: First step of converting a lead
- After performing the previous step, a pop-up page will appear on your screen:

Figure 3.9: Second step of converting a lead
This is the page where you can update the Account name (see label 1 in the preceding screenshot), the Contact name (label 2), and the Opportunity name (label 3). Notice how everything on the left is used to create new records. If Salesforce detects possible duplicates, they show up on the right, where you can attach the lead to an existing account, contact, or opportunity (label 4).
- After filling in the fields shown in the preceding screenshot, click on Convert. Once you click on Convert, you will see links to the newly created account, contact, and opportunity, as follows:

Figure 3.10: Third step for converting a lead
You have now converted your first lead!
In this section, we learned how to convert a lead. Converting a lead is the happy-path goal of the sales process. The more leads you convert into opportunities, the more chance it will lead to sales. We will cover Account, Contact, and Opportunity objects in greater detail in later chapters of this book. Now that we have seen how to create and convert a lead, we will discuss a tool Salesforce provides for capturing leads online. This tool is called Web-to-Lead.
Working on forms with Web-to-Lead
Many organizations need an easy way to capture leads through their website. Using Web-to-Lead is an easy way to generate HTML code that your webmaster can drop into your website to create a lead capture form. A lead capture form is generated outside of Salesforce but creates a lead directly in Salesforce when the form is saved.
This can take the form of a Contact Us page on your website or any other form where you would want the information to be automatically added to Salesforce. Let’s see how this is done:
- Click on the gear at the top of the page (see label 1 in Figure 3.11) and choose Setup (label 2):

Figure 3.11: First step for navigating to Web-to-Lead
Clicking on Setup in Figure 3.11 brings you to the administration section of Salesforce.
- Next, type
webin the quick-find box (see label 1 in Figure 3.12). This will bring up Web-to-Lead. Click on the link (label 2):

Figure 3.12: Second step for navigating to Web-to-Lead
- Clicking on Web-to-Lead brings you to the Web-to-Lead settings page. On this page, click on Create Web-to-Lead Form:
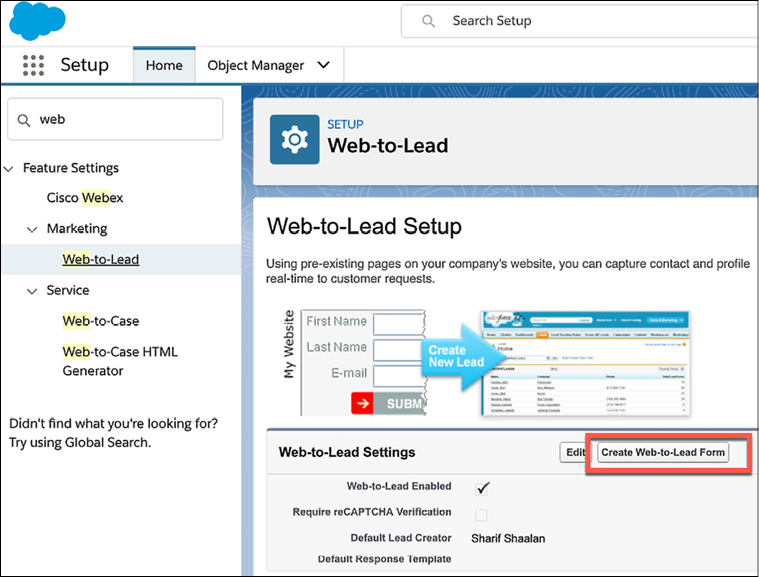
Figure 3.13: Create Web-to-Lead Form
- This brings you to the Web-to-Lead creation section. There are a few options on the next page to be filled in before you generate the code:
- Available Fields: These are all of the fields available on the Leads object. You can pull any of them into your form.
- Selected Fields: These are the fields that are included in the form once you generate the HTML code.
- Return URL: This is where the user lands after submitting the form.
- Include reCAPTCHA in HTML: This is optional—you can add a reCAPTCHA to the form.
After this, click on Generate. Figure 3.14 shows the steps we have taken:

Figure 3.14: Steps for generating HTML code
- Clicking on Generate is the final step that will generate the HTML code for you. Now, you have your HTML code! You can copy and paste this right into your website and start capturing leads:
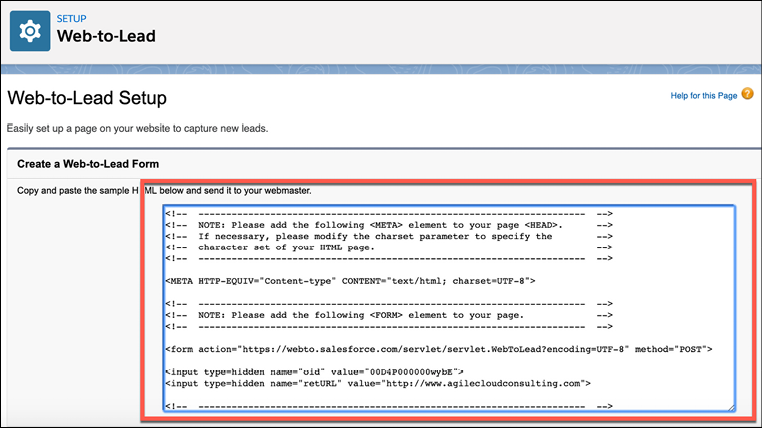
Figure 3.15: HTML code example
Your webmaster would take this code snippet and add it to an HTML block on your website. The output is a form that includes the selected fields in Figure 3.14. This form can now be filled out by website visitors and, when submitted, will create a new lead directly in Salesforce! You have now learned how to navigate to the Web-to-Lead setup section and how to generate the HTML code needed to add a Web-to-Lead form to an external website. Next, let’s take a look at setting up auto-response rules to support Web-to-Lead submissions.
Setting up auto-response rules
Now that we have set up the Web-to-Lead, an important function to support the submission of a form is auto-response rules. Auto-response rules allow you to automate the email that a user receives when a lead is submitted via a Web-to-Lead form based on specific criteria on the lead record, such as the lead source. Let’s see how auto-response rules are created:
- First, navigate to the Home tab of the Setup page (see label 1 in Figure 3.16):

Figure 3.16: Navigate to auto-response rules page
- From here, we move to Marketing (see label 2 in Figure 3.16), then click on Lead Auto-Response Rules (label 3). Figure 3.17 shows the Web-to-Lead Auto-Response Rules creation page:

Figure 3.17: Auto-response rules creation page

Figure 3.18: Auto-response rules creation detail
- We then check the Active checkbox (see label 1 in Figure 3.18), enter the Rule Name (label 2), and click on Save (label 3). This will lead you to the screen for new rule entries, as shown in Figure 3.19:
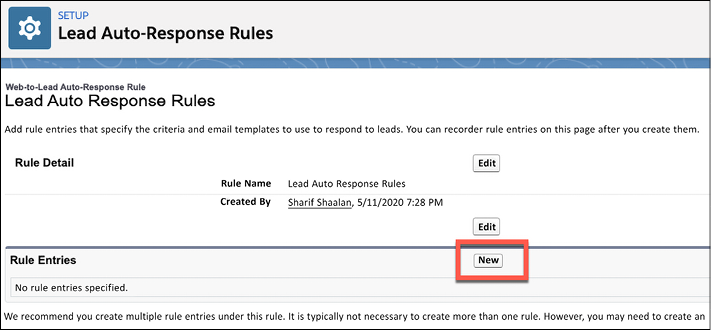
Figure 3.19: New rule entries
- Figure 3.19 shows you the created auto-response rule. Next, let’s click on New to create a rule entry. This leads to the following rule entry creation screen:

Figure 3.20: Rule entry creation screen
Figure 3.20 shows you the steps to add a rule entry:
- Sort Order: Salesforce evaluates all of the entries on an auto-response rule with this option. Once a match is found, the response is sent and the evaluation stops. This field allows you to determine the order in which the rule entries are evaluated.
- Select the criteria for this rule entry: For our business use case, the criterion for this rule is any lead where the Lead Source field is set to Web. Any leads created through the web meet this criterion and trigger this auto-response rule.
- Name and Email Address: This is the name and email address that show up on the response email.
- Email Template: This is the email template used for the auto-response rule.
- Save: Clicking Save completes the rule entry creation.
You can create many rule entries based on the complexity of your business use case. Next, we will move from understanding leads and how to capture them to additional options and settings that we may want to configure.
Lead settings and lead processes
In this section, we will cover some of the configuration options for leads.
Using the lead settings
The lead settings allow you to configure some options for your leads and how leads convert into opportunities. Let’s take a look at these options.
First, we will navigate to Home (see label 1 in Figure 3.21) | Marketing (label 2) | Lead Settings (label 3) from the Setup page:
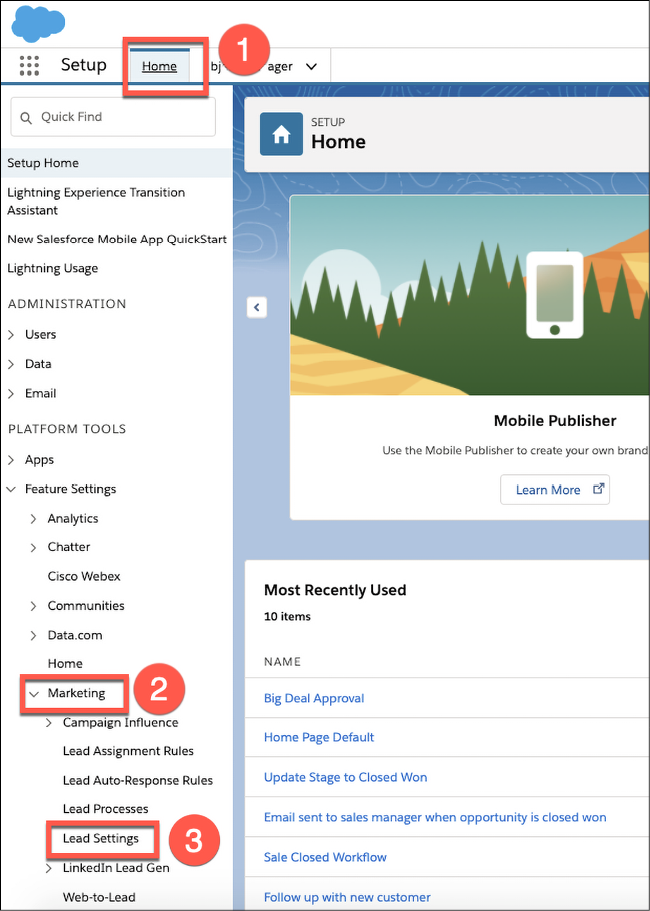
Figure 3.21: Navigating to Lead Settings
This brings us to the Lead Settings page:

Figure 3.22: Lead Settings page
Figure 3.22 shows you the three sections that contain the lead settings options:
- Lead Queue Settings has the following two options:
- Default Lead Owner: This is the user that owns all the new leads created through the web-to-lead feature and that are not assigned to another user based on criteria.
- Notify Default Lead Owner: This sends an email to the default lead owner when a lead is assigned to them.
- Lead Conversion Settings has the following options:
- Require Validation for Converted Leads: When a lead is converted, this option makes sure all validation and automation on the new account, contact, and opportunity is enforced.
- Preserve Lead Status: This preserves the lead status assigned to the original lead owner when converting the lead, rather than updating the new owner’s default lead status on conversion.
- Enable Conversions for Salesforce Mobile: Allows conversion using the mobile app.
- Hide Opportunity Section of Convert Lead Window: If this option is set up, an opportunity will not be created during lead conversion.
- Select “Don’t create an opportunity” by Default in Convert Lead Window: This makes not creating the opportunity the default option but gives the user the option to create the opportunity by checking a checkbox.
- Create a Task During Lead Conversion when Subject is Blank: This option applies to Salesforce Classic and automatically creates a follow-up task when a lead is converted.
- Lead Merge Settings has the following option:
- Org-Wide Merge and Delete: If your organization-wide default sharing option is set to Public Read/Write/Transfer for leads, checking this box allows users to also merge and delete leads.
Next, let’s take a look at lead processes.
Using lead processes
Lead processes allow you to assign different lead status values to different lead record types. We will cover record types in Chapter 13, Using Data Modeling to Configure Objects for Your Business. Let’s take a look at how to configure lead processes.
First, we will navigate to Home (see label 1 in Figure 3.23) | Marketing (label 2) | Lead Processes (label 3) from the Setup page, as shown:

Figure 3.23: Navigating to Lead Processes
This leads us to the Lead Processes page:

Figure 3.24: Master lead process on the Lead Processes page
As you can see in Figure 3.24, we have a Master lead process as well as the option to create New lead processes. Let’s take a look at what the Master process contains by clicking on Master:

Figure 3.25: Lead Processes details page for the Master lead process
Here, we have several steps to review:
- You can see all of the values in the Lead Status field. A lead process allows you to add and remove values as needed for a specific process, which is then assigned to a specific lead record type.
- You have the option to add a default lead status for this specific process.
- Click on Save to finish editing the lead process.
Lead processes are a powerful tool to allow you to display different options for different types of leads. This will work using record types, which we will cover in the Automate Business Processes Using Salesforce section of this book. Now that we have seen the lead configuration options, let’s review what we have learned in this chapter.
Summary
In this chapter, we learned what a lead is and how it is used to start the sales cycle. We understood what the Lead Status field is used for and how the values drive the process. We also understood how to convert a lead into an opportunity and that we can convert a lead when we think there is further potential for a sale. We saw the use case for Web-to-Lead and how to generate Web-to-Lead code in order to capture leads online, as well as setting up auto-response rules for these leads. Finally, we learned about the lead settings and lead processes, as well as how these configuration options can help us optimize the use of leads. These skills will help you organize and work your leads, as well as convert them into opportunities to continue the sales cycle. Understanding this process will result in efficiently working leads, which leads to more sales!
In the next chapter, we will look at the Accounts and Contacts objects and why they are used in Salesforce.
Questions
- What are some ways that leads can be captured?
- What determines whether a lead should be converted into an opportunity?
- What happens to a Closed - Not Converted (Unqualified) lead?
- What happens to a converted lead? Where does it go?
- Where does the company information go when a lead is converted?
- What is Web-to-Lead used for?
- Once you have generated the HTML code, what do you do with it?
- What does the Org-Wide Merge and Delete lead setting allow you to do?
Further reading
- Working with Leads and Opportunities Trailhead module: https://trailhead.salesforce.com/en/content/learn/modules/lex_salesforce_tour/lex_salesforce_tour_sales
- Convert and Assign Leads Trailhead module: https://trailhead.salesforce.com/content/learn/modules/lex_salesforce_tour/lex_salesforce_tour_sales
- Generate Leads from Your Website for Your Sales Teams article: https://help.salesforce.com/articleView?id=setting_up_web-to-lead.htm&type=5
- Setting up auto-response rules:https://help.salesforce.com/articleView?id=creating_auto-response_rules.htm&type=5
- Configuring lead management:https://help.salesforce.com/articleView?id=customize_leadmgmt.htm&type=5
Join our community on Discord
Join our community’s Discord space for discussions with the authors and other readers: https://packt.link/rlptF
