
Creating New Views
Project provides more than 20 standard single and combination views. You can edit or copy standard views that are available on the View menu or in the More Views dialog box to create new views. If none of the standard views are close to meeting your needs, you can create a new view from scratch. To create a new view by editing an existing one, you use the same techniques you use to create a view from scratch. When you are familiar with the basics, copying and editing views is easy.
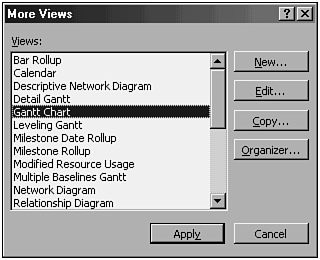
To create a new view, choose View, More Views. The More Views dialog box appears (see Figure 21.1).
Figure 21.1. You can create new views or edit existing ones in the More Views dialog box.
In earlier chapters, you used this dialog box to change from one view to another. This section discusses three buttons on the right side of the dialog box: New, Edit, and Copy. You use the New button when you want to create a new view from scratch. You use the Edit button when you want to make changes to an existing view, overwriting the original. Finally, you use the Copy button when you want to make changes to an existing view but don’t want to overwrite the original. The steps are the same whether you choose New, Edit, or Copy. For this example, choose New. The Define New View dialog box appears, as shown in Figure 21.2.
Figure 21.2. You can create a new view in the Define New View dialog box.

TIP
If you want to preserve the standard views in their original form, use the Copy button rather than the Edit button and edit the copy of the view. You will then have both the original and the revised copies to use.
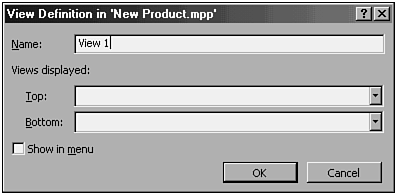
The new view can be a single-pane view or a combination view. As described in previous chapters, a combination view is simply a display of two views: one in the top pane and one in the bottom pane (see Figure 21.3). Two commonly used combination views are the Task Entry view (the Gantt Chart view over the Task Form view) and the Resource Allocation view (the Resource Usage view over the Leveling Gantt Chart view). When you often use two views in combination to perform standard tasks, it is advantageous to save the view combination for easy access. You can then make the new view be an option on the View menu. (See the section “Creating a Combination View,” later in this chapter, for step-by-step instructions on how to do this.) Before you can create a combination view, you must create or determine which single-pane views you want to display.
Figure 21.3. One form of the View Definition dialog box allows you to create combination views.
To create a new single-pane view, click the New button on the More Views dialog box. When the Define New View dialog box appears, choose Single View. The View Definition dialog box shown in Figure 21.4 appears.
Figure 21.4. You can create a new single-pane view in the View Definition dialog box.

The View Definition dialog box has text boxes and check boxes for defining the following options:
The Name of the new view
The basic Screen or general view format used
The Table used (if the chosen screen uses a table)
The Group display setting to be used
The Filter that should be used, and whether it is a highlight filter or a limited-display filter
Whether the new view name appears in the main View menu and on the View bar
NOTE
If you copy an existing view, you cannot change the Screen option.
Entering the Name of the View
In the Name field of the View Definition dialog box, you should enter a name that readily identifies the features you are incorporating into the view. If the view is to appear on the View menu, you must select the Show in Menu check box at the bottom of the dialog box. You can designate a hotkey letter that can be used to select the view from the View menu. To do so, type an ampersand (& ) before the chosen letter when you type the view name. When the view is displayed in the menu, this letter is underlined to indicate that this character is used to select the view. For example, if you enter &Dependencies in the Name text box, the Checking Task Dependencies view appears on the menu as Checking Task Dependencies; you can then type the letter D to select the view from the menu.
NOTE
Try to make sure that you designate a letter that is not already used by another view. If you choose a letter that is already being used by another menu command, you will have to press the letter twice and press the Enter key to select the view.
Selecting the Starting Format
Microsoft Project provides a number of basic screens, which can be used alone or in combi-nation to produce the standard views listed on the View menu and in the More Views dialog box. All views must use one of these basic, prefabricated screens.
You cannot change the screen assigned to one of the predefined views listed in the View menu. You can, however, create custom forms that resemble the basic screen formats.
→ For more information on creating custom forms, see “Using Custom Forms,” p. 951.
These are the basic screen formats:
| Calendar | Resource Sheet |
| Gantt Chart | Resource Usage |
| Network Diagram | Task Details Form |
| Relationship Diagram | Task Form |
| Resource Form | Task Name Form |
| Resource Graph | Task Sheet |
| Resource Name Form | Task Usage |
You can modify some of these screens extensively to customize a view; some screens, however, can be changed only in limited ways. Format choices can be customized in varying degrees for each of the views, and format settings can be saved as part of a view.
→ For more information on formatting, see Chapter 20, “Formatting Views,” p. 831.
To specify the basic style for a new view, make the appropriate selection from the Screen drop-down list in the View Definition dialog box.
Selecting the Table for the View
If the screen you choose displays a table of field columns, you must identify the table to use in the view. To select a table, choose from the Table drop-down list in the View Definition dialog box. This list contains all the tables included in the More Tables menu for the screen type (that is, task or resource) that you have chosen. If you want to include a customized table, it must exist before you can use it in a view. See the section “Using and Creating Tables,” later in this chapter, for more information.
Selecting the Group for the View
The Network Diagram view and all the views that display tables can also be displayed in groups based on selected fields. The group must have already been defined to be displayed in the Group drop-down list. A selection of No Group displays the tasks or resources in the view in sorted or ID order. See the section “Creating Custom Groups,” later in this chapter, for more information.
Selecting the Filter for the View
Every view has a filter attached, and the filter must be specified in the view definition. You need to select the Filter drop-down list in the View Definition dialog box to select one of the defined filters. In Figure 21.5, the Tasks With Fixed Dates filter is defined as a highlight filter for the view, which means that all tasks will be displayed, and tasks with fixed dates will be highlighted.
Figure 21.5. Choose a Filter to complete the View Definition.

A highlight filter shows all tasks or resources, and the ones that are selected by the filter are displayed with the highlight formatting (bold, italic, underline, and so on) that has been defined via the Format, Text Styles command for highlighted items.
If you want to apply a custom filter, you must first define the filter before you can use it in a view. See the section “Creating Custom Filters,” later in this chapter, for more information.
NOTE
The view definition cannot be “locked down.” That is, you simply specify the starting points for the view. Then, when the view is displayed onscreen, you can make changes, such as applying another filter, to change the underlying view definition.
Displaying the View Name in the Menu
To display the view name in the View menu and on the View bar, mark the Show in Menu check box in the View Definition dialog box. All view names always appear in the More Views dialog box.
Saving the View Definition
When you have finished making selections in the View Definition dialog box, click the OK button to save your definition. You are returned to the More Views dialog box, where you can take one of the following actions:
Click the Apply button to place the view onscreen immediately.
Click the Close button to leave the current view onscreen but save the view you have just defined.
Click the New, Copy, or Edit button to continue working with the list of views.
Click the Organizer button to save the newly defined view to the global file. See the section “Organizing Views and Other Custom Elements in Project Files,” later in this chapter, for more details.
Creating a Combination View
If the new view is to be a combination view, the views for each pane must be defined before you can define the combination view. To define a combination view, access the More Views dialog box by choosing View, More Views. Click the New button to display the Define New View dialog box (refer to Figure 21.2). Then, select the Combination View button. The View Definition dialog box that appears is designed for defining a combination view (see Figure 21.6).
Figure 21.6. A combination view displays two single-pane views.

In the Name field of the View Definition dialog box, enter a name for the view. Include an ampersand (& ) in front of a letter to designate a hotkey for the view when the name appears on the menu. From the Top drop-down list, choose the view to place in the top pane. All the single-pane views that have been defined are available here for selection. From the Bottom drop-down list, choose the view to place in the bottom pane. All the single-pane views can also appear in the bottom pane of a combination view. Select the Show in Menu check box if you want the view to appear on the View menu and on the View bar. Deselect this check box if you want the view to appear in the More Views dialog box only.
Figure 21.6 displays a definition for a new combination view that shows a customized Gantt Chart over the supplied Relationship Diagram view.
If you define a combination view that uses other customized views, and if these views use customized tables and filters you have defined, you must plan the order in which the customized components are developed. In other words, you must work from the bottom up. The following sequence shows the steps you’d take for a complex case:
1. |
Define all new tables that you plan to use. It doesn’t matter whether their names appear on the View, Table menu. |
2. |
Define any custom groups you might want to see. The group name does not have to appear on the Project, Group By menu, as long as it is a named group under More Groups. |
3. |
Define any new filters you plan to use. These filters do not have to appear on the Project, Filtered For menu; appearing on the More Filters menu is sufficient. |
4. |
Define the single-pane views you want to include in the combination view, using the appropriate basic screens. Assign to these individual views the tables, filters, and groups that you want the views to use. |
5. |
Format each of the views with any special formatting options you prefer. |
6. |
NOTE
If you later decide that you want to use this view in another project file, you can copy it to a single project file or to GLOBAL.MPT—a template that makes views, tables, groups, and filters available to all project files. See the section “Organizing Views and Other Custom Elements in Project Files,” later in this chapter, for more information.