
Archiving Content with WordPress
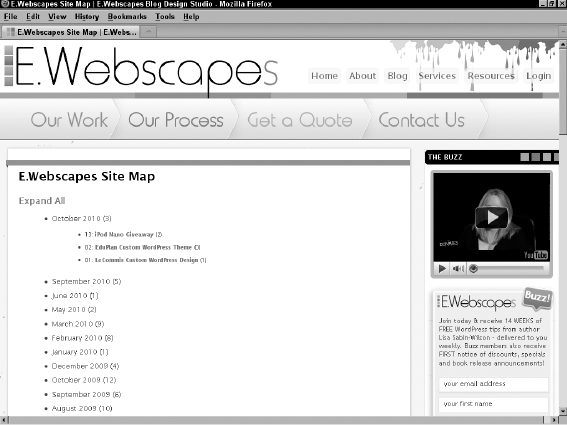
When you create a post on your WordPress blog, you can file that post under a category that you specify. This feature makes for a nifty archiving system in which you and your readers can find articles/posts that you've placed within a specific category. Articles you post are also sorted and organized by date (day/month/year) so that you can easily locate articles that you posted at a certain time. The archives page on Lisa's Web site (see it at http://ewebscapes.com/sitemap) contains a Chronological Archive section, which has a list of months followed by the content she published in that particular month and year. If you click a date on that page, a listing of articles from that month drops down, and each article title is linked to that article (see Figure 7-1).
![]() You can easily create an archive listing like the one on Lisa's Sitemap page (shown in Figure 7-1) by using a WordPress plugin called Clean Archives Reloaded, which you can find in the WordPress Plugin Directory at http://wordpress.org/extend/plugins/clean-archives-reloaded. This plugin is easy to install, and to use it, you just need to create a page and add a short code segment ([cleanarchivesreloaded]) to the page content; that code automatically builds a Chronological Archives page that links to all the content you've published on your site. Easy archives!
You can easily create an archive listing like the one on Lisa's Sitemap page (shown in Figure 7-1) by using a WordPress plugin called Clean Archives Reloaded, which you can find in the WordPress Plugin Directory at http://wordpress.org/extend/plugins/clean-archives-reloaded. This plugin is easy to install, and to use it, you just need to create a page and add a short code segment ([cleanarchivesreloaded]) to the page content; that code automatically builds a Chronological Archives page that links to all the content you've published on your site. Easy archives!
Figure 7-1: An archive listing of posts by month and year on Lisa's Web site.
WordPress archives and organizes your content for you in more ways than by date and by category. In this section, I give you an overview of the several other ways — then later in this chapter, I show you how you can leverage those archive types to create a dynamic Web site that's easy to navigate for your readers. The different types of archives and content include
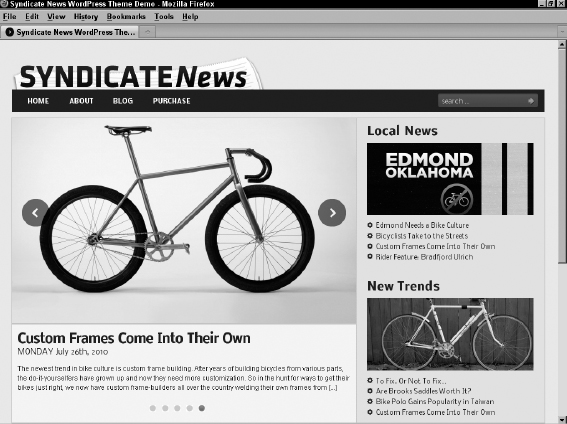
- Categories: Create categories of topics in which you can file your articles so that you can easily archive relevant topics. Many Web sites display content by category — typically referred to as a magazine theme, in which all content is displayed by topic, rather than in a simple chronological listing. Figure 7-2 shows an example of a magazine theme. You can find out how to create one of your own by using the information in Book VI; also be sure to check out Book VI, Chapter 6 to discover how to use template tags and category templates to display category-specific content — exciting stuff!
Figure 7-2: A magazine theme created with WordPress (Syndicate News Theme by iThemes.com).
- Tags: Tagging your posts with microkeywords, called tags, further defines related content within your site, which can improve your site for SEO purposes by assisting the search engines in finding related and relevant content, as well as provide additional navigation to help your readers find relevant content on your site.
- Date Based: Your content is automatically archived by date based on the day, month, year, and time of day you publish it.
- Author: Content is automatically archived by author based on the author of the post and/or page — you can create an author archive if your site has multiple content contributors.
- Keyword (or Search): WordPress has a built-in search function that allows you and your readers to search for keywords, which presents an archive listing of content that's relevant to your chosen keywords.
- Custom Post Types: You can build custom post types based on the kind of content your site offers — you can find detailed information on custom post types and how to create them in Book VI, Chapter 7.
- Attachments: WordPress has a built-in media library where you can upload different media files such as photos, images, documents, videos, and audio files (to name a few). You can build an archive of those files to create things such as photo galleries, eBook archives (PDFs), or video galleries.
- Links: Build your own link directory of resources by using the built-in Link Manager in the WordPress Dashboard, and then create a page to display the links on your site. You can find more information on links and link categories in Book III, Chapter 6.
Building categories
In WordPress, a category is what you determine to be the main topic of a blog post. By using categories, you can file your blog posts into topics by subject. To improve your readers' experiences in navigating through your blog, WordPress organizes posts by the categories you assign to them. Visitors can click the categories they're interested in to see the blog posts you've written on those particular topics. You can display the list of categories you set up on your blog in a few different places, including the following:
- Body of the post: In most WordPress themes, you see the title followed by a statement, such as Filed In: Category 1, Category 2. The reader can click the category name to go to a page that lists all the posts you've made in that particular category. You can assign a single post to more than one category.
- Sidebar of your blog theme: You can place a full list of category titles in the sidebar by using the Categories widget included in your WordPress installation. A reader can click any category to open a page on your site that lists the posts you made within that particular category.
Subcategories (also known as category children) can further refine the main category topic by listing specific topics related to the main (parent) category. In your WordPress Dashboard, on the Manage Categories page, subcategories appear directly below the main category. Here's an example:
Books I Enjoy (main category)
Fiction (subcategory)
Nonfiction (subcategory)
Trashy romance (subcategory)
Biographies (subcategory)
For Dummies (subcategory)
You can create as many levels of categories as you like. For example, Biographies and For Dummies could be subcategories of Nonfiction, which is a subcategory of the Books category. You aren't limited to the number of category levels you can create.
Changing the name of a category
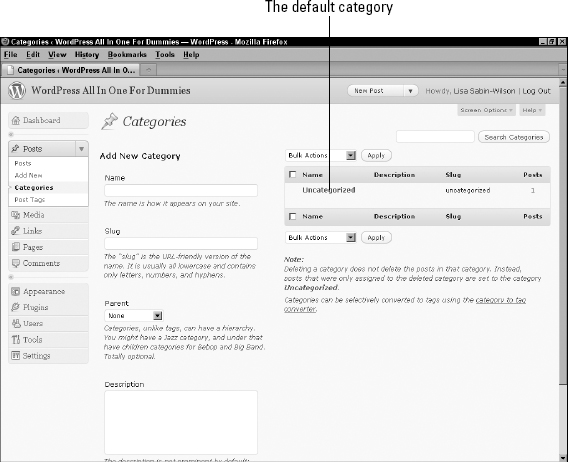
When you install WordPress, it gives you one default category called Uncategorized (see the Categories page shown in Figure 7-3). This category name is pretty generic, so you definitely want to change it to one that applies to you and your blog. (On Lisa's blog, she changed it to Life in General. Although that name's still a bit on the generic side, it doesn't sound quite so ... well, uncategorized.)
![]() The default category also serves as kind of a fail-safe. If you publish a post to your blog and don't assign that post to a category, the post is assigned to the default category automatically, no matter what you name the category.
The default category also serves as kind of a fail-safe. If you publish a post to your blog and don't assign that post to a category, the post is assigned to the default category automatically, no matter what you name the category.
Figure 7-3: The Categories page in the Dashboard of a brand-new blog shows the default Uncate-gorized category.
So, how do you change the name of that default category? When you're logged in to your WordPress Dashboard, just follow these steps:
- Click Categories in the Posts drop-down list.
The Categories page opens, containing all the tools you need to set up and edit category titles for your blog.
- Click the title of the category that you want to edit.
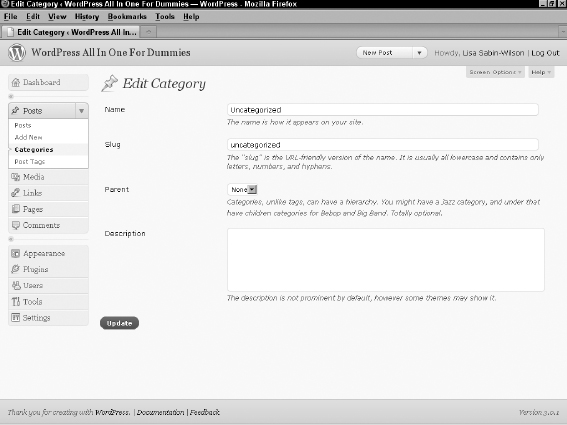
If you want to change the Uncategorized category, click the word Uncategorized to open the Edit Category page (see Figure 7-4).
Figure 7-4: Editing a category in WordPress on the Edit Category page.
- Type the new name for the category in the Name text box.
- Type the new slug in the Slug text box.
The term slug refers to the word(s) used in the Web address for the specific category. For example, the category of Books has a Web address of http://yourdomain.com/category/books; if you change the Category Slug to Books I Like, then the Web address is http://yourdomain.com/category/books-i-like (WordPress automatically inserts a dash between the slug words in the Web address).
- Select a parent category from the Parent drop-down list.
If you want this category to be a main category, not a subcategory, select None.
- (Optional) Type a description of the category in the Description text box.
Use this description to remind yourself what your category is about. Some WordPress themes display the category description right on your site, too, which your visitors may find helpful. (See Book VI for more about themes.) You know that your theme is coded in this way if your site displays the category description on the category page(s).
- Click the Update button.
The information you just edited is saved, and the Categories page reloads, showing your new category name.
Creating new categories
Today, tomorrow, next month, next year — while your blog grows in size and age, continuing to add new categories further defines and archives the history of your blog posts. You aren't limited in the number of categories and subcategories you can create in your blog.
Creating a new category is as easy as following these steps:
- Click Categories in the Posts drop-down list.
The Categories page opens.
- The left side of the Categories page displays the Add New Category section (see Figure 7-5).
Figure 7-5: Create a new category on your blog.
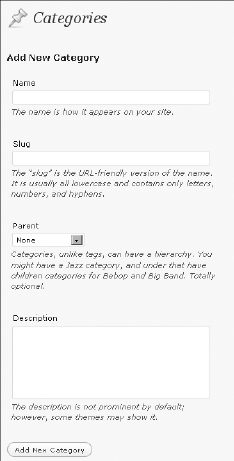
- Type the name of your new category in the Name text box.
Suppose that you want to create a category in which you file all your posts about the books you read. In the Name text box, type something like Books I Enjoy.
- Type a name in the Slug text box.
The slug creates the link to the category page that lists all the posts you made in this category. If you leave this field blank, WordPress automatically creates a slug based on the category name. If the category is Books I Enjoy, WordPress automatically creates a category slug like http://yourdomain.com/category/books-i-enjoy. If you want to shorten it, however, you can! Type books in the Category Slug text box, and the link to the category becomes http://yourdomain.com/category/books.
- Select the category's parent from the Parent drop-down list.
Select None if you want this new category to be a parent (or top-level) category. If you want to make this category a subcategory of another category, select the category that you want to be the parent of this one.
- (Optional) Type a description of the category in the Description text box.
Some WordPress templates are set up to actually display the category description directly beneath the category name (see Book VI). Providing a description further defines the category intent for your readers. The description can be as short or as long as you want.
- Click the Add New Category button.
That's it! You've added a new category to your blog. Armed with this information, you can add an unlimited number of categories to your blog.
You can delete a category on your blog by hovering your mouse pointer on the title of the category you want to delete, and then clicking the Delete link that appears below the category title.
![]() Deleting a category doesn't delete the posts and links in that category. Instead, posts in the deleted category are reassigned to the Uncategorized category (or whatever you've named the default category).
Deleting a category doesn't delete the posts and links in that category. Instead, posts in the deleted category are reassigned to the Uncategorized category (or whatever you've named the default category).
![]() If you have an established WordPress blog that has categories already created, you can convert some or all of your categories to tags. To do so, look for the Category to Tag Converter link on the right side of the Category page in your WordPress Dashboard — click it to convert your categories to tags. (See the nearby sidebar, “What are tags, and how/why do I use them?,” for more information on tags.)
If you have an established WordPress blog that has categories already created, you can convert some or all of your categories to tags. To do so, look for the Category to Tag Converter link on the right side of the Category page in your WordPress Dashboard — click it to convert your categories to tags. (See the nearby sidebar, “What are tags, and how/why do I use them?,” for more information on tags.)
What are tags, and how/why do I use them?
Don't confuse tags with categories (a lot of people do). Tags are clickable, comma-separated keywords that help you micro-categorize a post by defining the topics in it. Unlike WordPress categories, tags don't have a hierarchy; you don't assign parent tags and child tags. If you write a post about your dog, for example, you can put that post in the Pets category — but you can also add some specific tags that let you get a whole lot more specific, such as poodle or small dogs. If someone clicks your poodle tag, he finds all the posts you ever made that contain the poodle tag.
Besides defining your post topics for easy reference, you have another reason to use tags: Search-engine spiders harvest tags when they crawl your site, so tags help other people find your site when they search for specific words.
You can manage your tags in the WordPress Administration panel by clicking Tags on the Pages drop-down list. The Tags page, where you can view, edit, delete, and add new tags, opens.
Book VI, Chapter 6 takes you through the steps of really taking advantage of categories in WordPress to build a dynamic theme that displays your content in a way that highlights the different topics available on your site. Book VI describes how to use WordPress template tags to manipulate category archives for display and distribution on your Web site.