
Creating Your Own Workspace for Writing
Back in Book III, Chapter 2, you can discover how to organize the Dashboard to create your own customized workspace by rearranging modules and screen options for your Dashboard. The Add New Post page, where you write, edit, and publish your post, has the same options available, allowing you to fully control the workspace arrangement to create your own custom, unique space that suits your writing needs.
To start customizing your workspace, open the Add New Post page by clicking Add New in the Posts drop-down list on the Dashboard. One of the first things we do when we visit this page on a new WordPress site is make the Post text box (where you write the content of your post) bigger. You just need to click your mouse in the bottom corner of the box, and while holding down your mouse button, drag it until it's the length you want, and then release your mouse button (conversely, you can make the box smaller by dragging it up, rather than down). Figure 1-8 shows a large Post text box on Lisa's Add New Post page.
Adjusting screen options
Several items appear on the Add New Post page, as described in the section, “Composing Your Blog Post,” earlier in this chapter. You may not use all these items, and in fact, you may find that simply removing them from the Add New Post page (and the Edit Post page) makes writing your posts easier and more efficient. To remove an item, follow these steps:
- Click the Screen Options tab at the top of the screen.
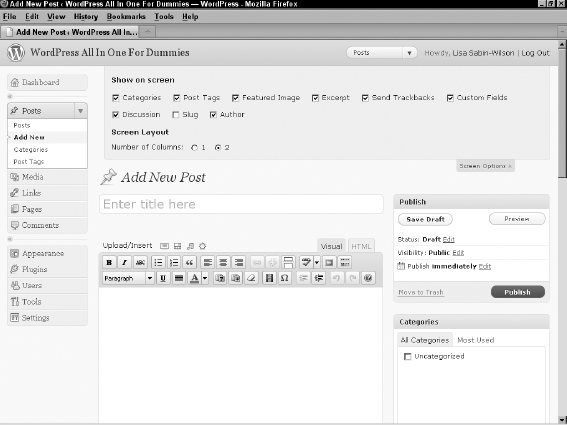
The Screen Options panel drops down, as shown in Figure 1-9.
Figure 1-8: Adjust the size of the Post text box on the Add New Post page.
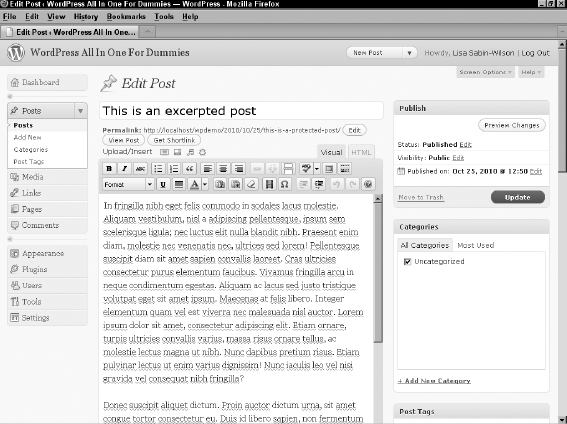
Figure 1-9: The Screen Options panel on the Add New Post page.
- Select or deselect items below the Show on Screen heading.
Select an item by placing a check mark in the check box to the left of its name; deselect it by removing the check mark. Selected items appear on the page, and deselected items are removed from the page.
 If you deselect an item that you want to include again on the Add New Post page, it's not gone forever! Revisit the Screen Options panel and reselect its check box to make that item appear on the page once again.
 - Select your preferred Screen Layout.
You can choose whether the layout appears in one column or two columns (the default option).
- Click the Screen Options tab when you're done.
The Screen Options panel closes and the options you've chosen are saved and remembered by WordPress.
Arranging post modules
Aside from being able to make the Post text box bigger (or smaller), as we discuss in the section “Creating Your Own Workspace for Writing,” earlier in this chapter, you can't edit the Post text box module. You can configure all other modules on the Add New Post page (and the Edit Post page); you can remove them (in the Screen Options panel, as we discuss in the preceding section), expand and collapse them, and drag them around to place them in a different spot on your screen.
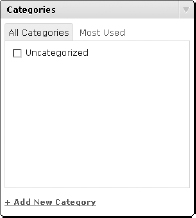
Collapse, or close, any of the modules by hovering your mouse over the module title and then clicking the down arrow that appears to the right of the module name, as shown in Figure 1-10 for the Categories module (likewise, you can expand, or open, a module by doing the same when it's collapsed).
Figure 1-10: Expand or collapse modules.
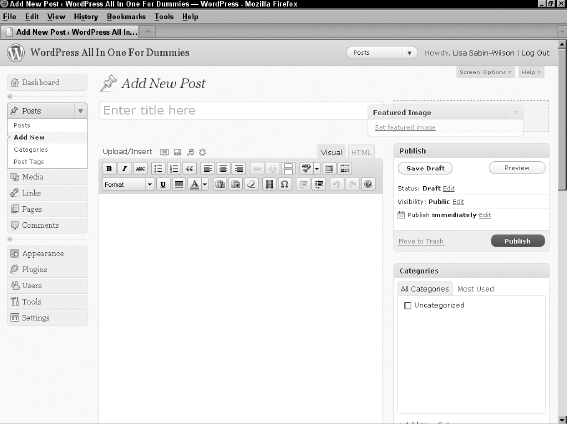
You can also drag and drop a module on the Add New Post screen to position it wherever you want. Just click a module and, while holding down the mouse button, drag it to different area on the screen. WordPress displays a dashed border around the area when you have the module hovering over a spot where you can drop it. Because Lisa uses the Featured Image module on every post she publishes, she's dragged that module to the top right of her writing space, as shown in Figure 1-11.
Figure 1-11: Drag and drop modules on the Add New Post page.
You can really configure your own custom workspace on the Post page within your Dashboard that suits your style, work habits, and needs. WordPress remembers all the changes you make to this page, including the screen options and modules, so you have to set up this page only once. You can drag and drop modules on any Dashboard page in the same way you do on the main Dashboard page, as covered in Book III, Chapter 2.