
Chapter 6
Talking to Siri and Dictating
One of the most exciting features in recent iPads is Siri, a voice-activated personal assistant that allows you to verbally ask questions and often get the answer you are looking for, or tell her or him to do a task and see it done. In this chapter you’ll see how to set up and use Siri to do many helpful things for you. After you’re done talking to Siri, you’ll see how to use dictation in general and for Notes in particular.
SET UP AND USE SIRI
Using Siri is quite easy once it is turned on, and there is little in the way of settings.
Open Siri’s settings and consider how you want them to be configured.
1. From the Home screen, tap Settings | General | Siri to open the Siri settings.
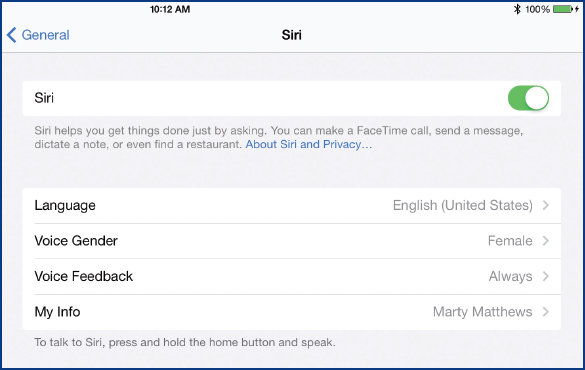
2. If Siri is not turned on, tap the On/Off button to do this.
3. If the default language, English in the U.S., is not what you want, tap the current language, tap the language you want to use, and then tap Siri at the top-left corner of the Language screen.
4. For some languages, U.S. English in particular, you can choose whether Siri has a female (the default) or male voice by tapping Voice Gender, tapping your choice, and tapping Siri at the top-left corner.
5. The default is for Siri to always provide voice feedback to your requests, including repeating your requests. If you do not want that—for example, in a noise-sensitive environment—tap Always and tap the alternative, Handsfree Only, which will not provide voice feedback when you are holding your iPad. Tap Siri at the top of the screen.
6. Tap My Info and tap your name in the All Contacts list, which should contain the information about you to which you want Siri to have access. Siri uses this when you refer to yourself, such as the request “call my home phone.” Of course, your name, address, phone number, and other information must be in Contacts to start with.
7. When you have made the changes to Siri’s settings that you want, press Home to return to the Home screen.
CAUTION! To operate and be responsive to your requests, Siri needs to know a lot of information about you, your contacts, your location, and much more. Siri does not reside in your iPad, but in Apple servers at some location. This means that your information is transmitted to Apple and stored on their computers. Apple, of course, does what it can to protect your data and not misuse it (see the Apple Privacy statements both in the Siri iPad settings and on the Apple website at Apple.com/privacy). |
Using Siri has few limits. Most of the default Apple apps that came with your iPad can be used verbally with Siri, and you can ask many questions that Siri can look up for you. In all cases, you start to use Siri with the following actions:
1. Press and hold Home until the Siri wavy line appears. After two beeps, a notice will pop up asking what Siri can help you with, as you can see in Figure 6-1.
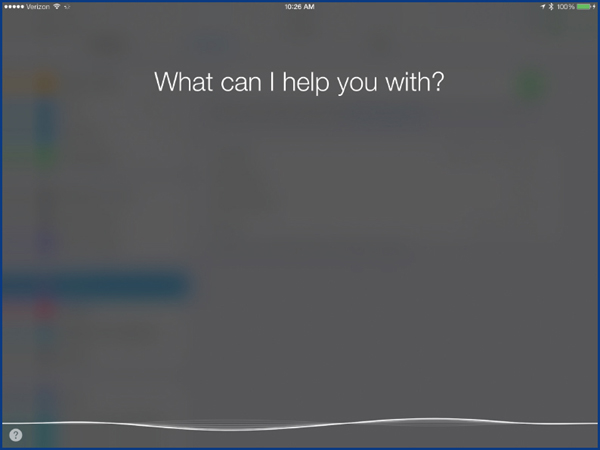
Figure 6-1: Siri is available to you at the press of the Home button.
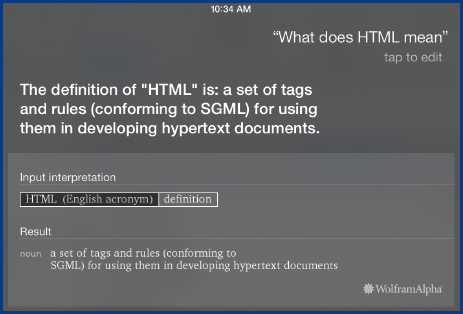
2. Before a second pair of beeps and while there is still a wavy line, tell Siri what you want. For example, I asked “What does HTML mean?” Here is the result:
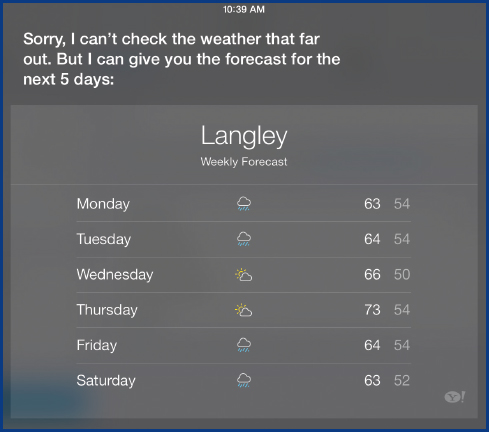
3. Another example is to ask Siri, “What will the weather be like this weekend?” Here is the response:
4. If you hear the second pair of beeps or see that the wavy line has disappeared, simply tap the microphone and you hear the opening beeps again.
NOTE Your iPad must be connected to the Internet for Siri to work, but the connection can use either Wi-Fi or cellular. If you use cellular, you will probably be charged for data usage while Siri is active. |
While you can use practically any words and any phrasing to talk to Siri, some words and phrases and techniques work better than others. Here are some pointers on how best to talk to Siri:
• Talk naturally as you would to another person, using common words generally understood by most people.
• Be clear and concise, using as few words as possible.
• Always ask what you want, never what you don’t want.
• To add punctuation, such as a question mark, say the punctuation at the end of the sentence or question.
• Try to be in a location with as little background noise or music as possible.
• It is very helpful to give Siri as much information about yourself as you can in your entry in Contacts, as discussed in “Set Up Siri.” If you provide this information, Siri will know what you mean by “work” and “home,” and if you add people like “mother,” “brother,” or “partner,” Siri can respond to those terms.

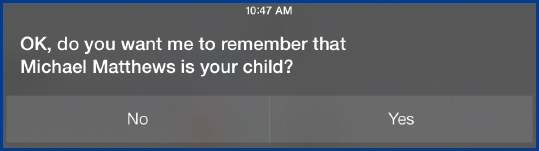
• Siri can help you use her. For example, if I ask Siri to text my son and I haven’t added his name to my contact information, Siri will ask for his name and then ask me if that can be added to my contact information.
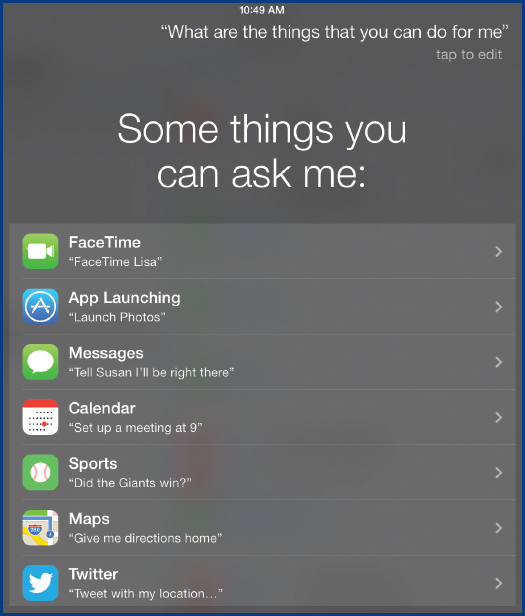
• If you ask Siri what she can do for you, you will get a scrollable list of commands and questions you can say or ask based on the standard apps on an iPad.
• Siri can only give you location-related information, like “Where is the nearest post office?” if you have a cellular-enabled iPad and if you have allowed Siri to use your current location. Apple says that it doesn’t track or store your location.
• You can use a headset, such as the Apple EarPods, with Siri, using the call button, or center button on the EarPods, to summon Siri.
In the following sections we’ll look at using Siri with a number of the iPad’s apps. In all cases, if Siri is not displayed, press and hold the Home button to bring up Siri. If the Siri microphone is on the screen, tap the microphone to get Siri’s attention. The following sections will assume that Siri is ready and waiting for you to say something.
Simply try any common phraseology and see how Siri responds. You can always try again, and Siri will often help you get what you need.
Use Siri to Set an Alarm
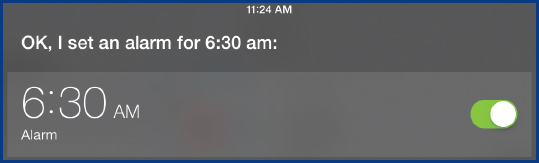
Siri can set, change, and cancel an alarm with these statements:
• “Set an alarm for tomorrow at 6:30 AM.”
• “Change my alarm to 7 AM.”
• “Set an alarm for weekdays at 7 AM” (see Figure 6-2).
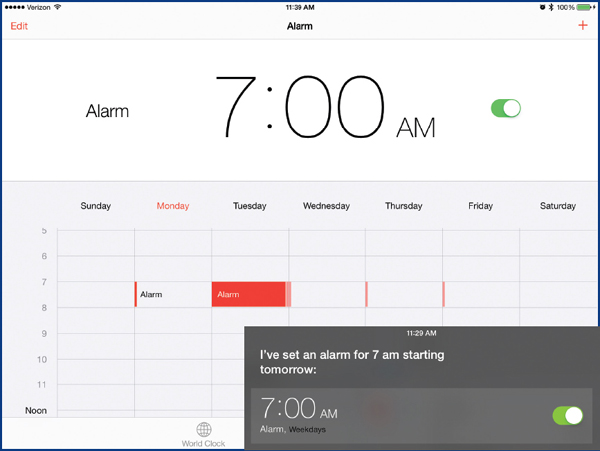
Figure 6-2: Siri can’t set an alarm for days of the week, but you can use “weekdays” and “everyday.”
• “Cancel my alarm at 7 AM” (this will cancel the 7 AM alarm for all weekdays).
The term “tomorrow” can be replaced with tomorrow’s specific day of the week, such as “Monday,” given that tomorrow is Monday. Finally, you can use “turn on” in place of “set” and “delete” instead of “cancel.”
NOTE Siri cannot set, change, or find an alarm for specific days except for the next day, but can create a reminder for any date and time. |
Use Siri to Add Calendar Events
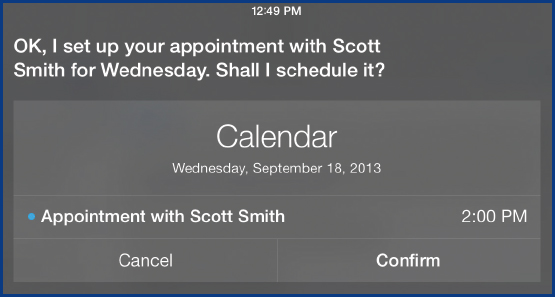
Siri can create, change, cancel, and find calendar events with these statements:
• “Set up an appointment with Scott Smith for Wednesday at 2 PM.”
• “Schedule lunch with Carole at noon on September 29th.”
• “Cancel the appointment with Scott Smith on Wednesday.”
• “Change the lunch with Carole to 1 PM on the 29th.”
• “When is my lunch with Carole?”

Use Siri to See a Map and Get Directions
Siri is particularly valuable for providing hands-free information and directions while you are driving, but be sure to keep your eyes on the road. Here are some of the questions you can ask Siri:
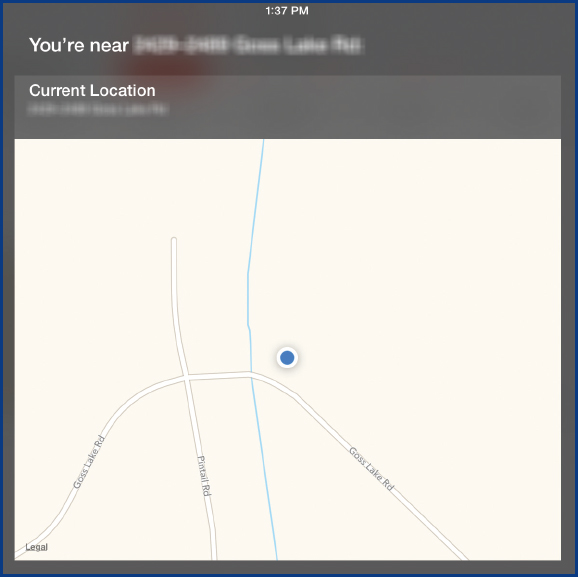
• “Where am I”?
• “Show me the location of the Pink Door in Seattle.”

• “Where is Cimarron, New Mexico?” Siri could not initially answer this question. When I rephrased it, “Show me where the city of Cimarron, New Mexico is?” I got a map.
• “How do I get to Castle Rock, Washington?” This gets me a map, and by tapping the directions icon (the set of lines in the bottom middle), it gives me the list of directions, as you see in Figure 6-3.

Figure 6-3: Siri can save a lot of time typing in search parameters.
• “Read me the directions to Castle Rock, Washington.” This gets me verbal directions based on the changes in my GPS location.
Use Siri to Search the Web
Searching the Web is one of Siri’s many strengths. Here are some of the many ways you can query the Web:
• “Search for Greek restaurants north of Seattle.” Figure 6-4 shows the results.

Figure 6-4: Using Siri is often faster and easier than opening Safari and typing a query.
• “Google all-electric automobiles.”
• “Search the Web for QuickSteps books.”

• “Show me the website for Taylor Thermometers.”
Use Siri to Play Music
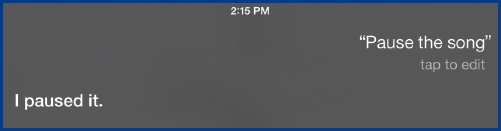
You can quickly play any music on your iPad, as well as skip a song and pause or stop play. You can say:
• “Play Santana.”
• “Play Twilight Time.
• “Pause the song.”
• “Stop.”
• “Skip this song.”
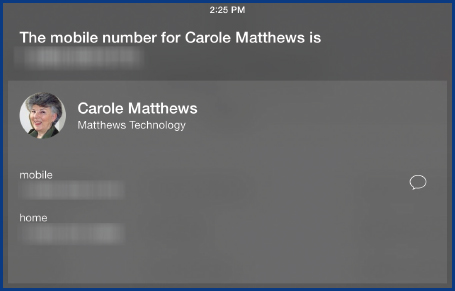
Use Siri to Locate Contacts
Depending on your Contacts list, Siri may find some ambiguities and give you a choice. For example, if I say “Find Roger,” Siri comes back with this response:

If you have identified your family—wife, son, mother, for example—you can have Siri search on any of those. For example, I can say, “What is my wife’s new mobile number?” and get this response:
Use Siri to Check for and Send Texts and Email
Siri is a pretty good stenographer when it comes to checking on and sending texts and email, but not perfect, although in my case, operator error is also a problem. Here are some examples:
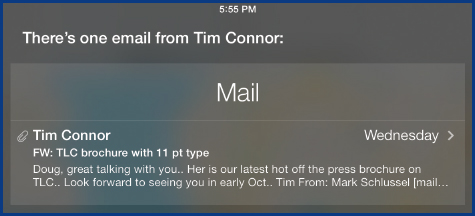
• “Check for email from Tim Connor” gives me a list of emails dating back a year. If I say, “When was my last email from Tim Connor?” I get the last message from him.
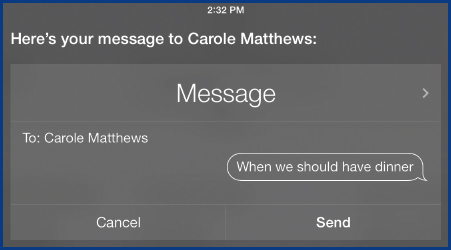
• “Send a text to my wife asking when we should have dinner” produces a valid text message to my wife, but with a literal transfer of the message I requested—an error on my part.
• “Send an email to my wife” causes Siri to ask “What is the subject?” After answering that, Siri asks for the message. With that, she asks if I am ready to send. If so, I say “yes,” and the message is sent. (Note that Siri doesn’t know the difference between “weeks” and “week’s.)

Getting Information with Siri
You can get a lot of information with Siri. You saw one example earlier in this chapter with questions about the weather and closest post office. Here are some other examples:
• “What is the current Dow average?” Siri responds with the correct information. Siri can do this for any widely traded stock. If she can’t immediately find the price of the stock in question, she will ask you if you want to search the Web for the stock.
• “What is the traffic on I-5 north of Seattle?” Siri responds with, “Here is the traffic around Seattle,” and provides a map of the Seattle area (see Figure 6-5) that shows the traffic congestion with a dotted red line next to roadways and construction with orange markers.

Figure 6-5: Siri can get you maps showing highway congestion and construction.
• “What is the name of the conductor of the Seattle Symphony?” Siri automatically searched the Web and returned a page with the correct answer.
• “What is the department store chain headquartered in Seattle?” Siri responded saying, “I found 15 department stores in Seattle,” and listed them.
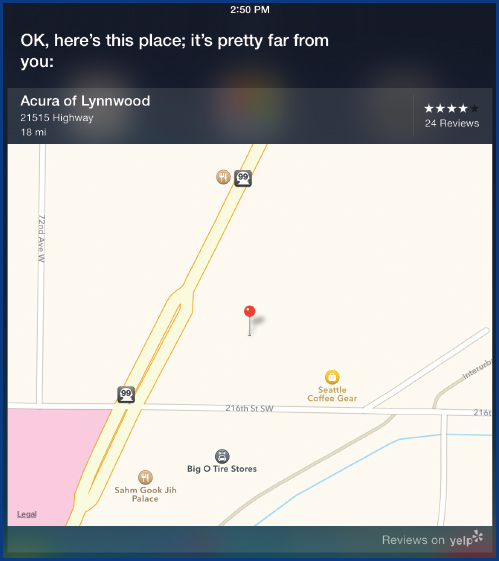
• “Where is the nearest Acura dealer?” Siri provides this response:
DICTATING
Dictating on your iPad is separate from using Siri, but is related. Like Siri, dictating uses the Internet to connect to Apple servers where the voice recognition is done. You must be connected with either Wi-Fi or cellular for dictating to work. Unlike Siri, though, dictation allows you to pause as long as you like and it does not talk back to you or answer questions.
You can dictate in any writing app where the onscreen keyboard has a microphone in the bottom left, as you can see in Figure 6-6. This includes Mail, Safari, Messages, Calendar, Contacts, Reminders, Notes, and Pages, among others. The key is the microphone in the onscreen keyboard, although some apps work better than others. In Contacts, with many short fields with names and numbers, dictation does not work as well as it does in Notes. Expect in any app that you may need to go back and edit what you dictated. On the other side, dictation has significantly improved from iOS 6 to iOS 7.

Figure 6-6: Dictation can quickly get information into your iPad, but it may need editing.
As you dictate, you can add punctuation by saying the words, such as “comma,” “period,” “question mark,” “quote…end quote,” “cap” for a capital letter, “exclamation mark,” “new paragraph,” “new line,” and others. Talk slowly and clearly and be in a quiet place. Use a headset, if possible, such as the Apple EarPods, with a built-in microphone.
To use dictation, you must turn on Siri in Settings | General as described earlier in this chapter. Then open the app where you want to use it, tap where you want the text to go, tap the microphone, and begin to dictate. As you dictate, the sound wave at the bottom of the screen will expand and contract vertically (the amplitude will get larger and smaller). The louder you speak, the greater the amplitude. If the amplitude is filling the vertical space, as you see in the first illustration that follows, you are probably talking too loud. If you don’t see more than the default sound wave, as you see in the second illustration, you are probably talking too softly. The ability to clearly understand your speech depends on having a moderate volume.

Here are two examples of using dictation, as best as I can present it in a book without you hearing my dictation.
Dictate a List in Notes
Here is a list of items I want to do to prepare for an upcoming vacation trip in Europe. I’ve left out the quote marks for clarity:
Trip to Europe To Do List newline
One Get and read the best travel books comma Rick Steves question mark newline
Two Layout an itinerary period newline
Three Make air comma hotel comma rental car reservations period newline
I tried this several times and here is result of the final time:
As you can see, dictating this list has its issues. I learned several things during the process:
• Speak slowly and enunciate clearly.
• Periodically pause to give the computer a chance to process the words.
• Break up what you are dictating into smaller chunks.
• Touch the screen to complete a section and see the result.
• Don’t expect perfection. Most people can type more accurately and faster.
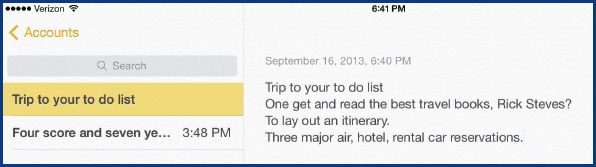
Dictate Paragraphs in Notes
Keeping the previous points in mind, I opened Notes, created a new document, and proceeded to dictate the second paragraph of the U.S. Declaration of Independence. The results are shown in Figure 6-7. The results are pretty good. Some of the mistakes are mine—I forgot the commas after “life” and “liberty.”

Figure 6-7: Dictating on the iPad is very promising.
As you type (or especially dictate) text, it is more than likely that you will want to or need to change the text that has been entered. To change text, you must first select what you want to change. You can identify where you are in a string of text by the blue insertion point on the right end of what you just typed or dictated. The task is to place the insertion point on the right end of the text that you want changed—and remember that your tool to do this is your finger, which is huge compared with the text on the iPad. Thankfully, Apple has provided a number of tools to help you do this.
NOTE The techniques described in the “Select, Change, and Move Text” section with Notes also work similarly with the other text-related standard apps on the iPad, including Mail, Messages, Contacts, Calendar, and Reminders. |
Select Text
Let’s start with the text pictured in Figure 6-7 and see how to select it to make the necessary changes and how to select and move it where you need it.
• Approximately place the insertion point by touching and holding on the piece of text to be changed. A magnifying glass will appear with the insertion point in it.

• Precisely place the insertion point, while still holding your finger on the text to be changed and displaying the magnifying glass, by slightly moving your finger left or right to move the insertion point exactly where you want it—this is not always easy.
–Or–
Lift your finger and swipe across the text in either direction with one finger to move the insertion point one character.
–Or–
Lift your finger and swipe across the text in either direction with two fingers to move the insertion point one word.
–Or–
Lift your finger and swipe across the text in either direction with three fingers to move the insertion point to the beginning or end of the current line.
• Select a word by double-tapping it.
–Or–
a. Touch and hold on a word until the magnifying glass appears and then release your finger to display the Select menu.
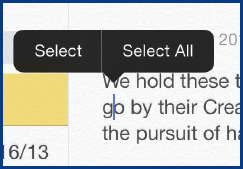
b. Tap Select to select the word and display the Cut/Copy menu.

• Select everything by following the previous step a. and then tapping Select All.
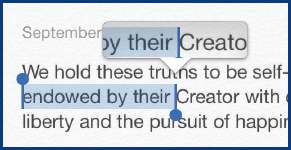
• Select more than a word by selecting a word and dragging the end points (the darker blue circles) in either direction as needed.
Change Selected Text
• Cut, copy, and paste text by selecting what you want to work with and, in that process, displaying the Cut/Copy menu. Then:
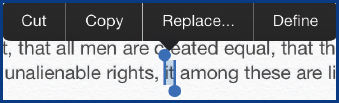
• Remove the text from its current location by tapping Cut.
• Leave the text in its current location by tapping Copy.
• Replace the text with a suggested word.
• Place the text at a new location by selecting the location and tapping Paste.

NOTE Many external keyboards have COMMAND, OPTION, and arrow keys that make selecting and moving in text much easier. See “Use an External Keyboard” QuickFacts next. |
Using an External Keyboard
An external keyboard, such as the Apple Wireless Keyboard or the Logitech Ultrathin Keyboard Cover, has additional keys not available with the onscreen keyboard, including the COMMAND, OPTION, and arrow keys. You can beneficially use these keys while editing text and elsewhere. Here are some of the ways that the extra keys can be used to move the insertion point and do other editing tasks:
• Move a character at a time using the arrow keys by themselves.
• Move a word at a time by pressing and holding the OPTION key while pressing the arrow keys.
• Move to the beginning or end of a line by pressing and holding COMMAND (CMD) while pressing the arrow keys.
• Select text and expand the selection by pressing and holding SHIFT while pressing the arrow keys.
• Delete to the beginning of the line by pressing and holding COMMAND (CMD) while pressing DELETE.
Check Spelling
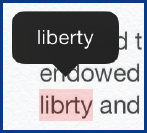
By default, the iPad checks your spelling as you enter text. (If you don’t want that, you can turn it off, from the Home screen, by tapping Settings | General | Keyboard | Check Spelling On/Off.) When you misspell a word, the iPad places a red dotted underline beneath it  . Tap the word and, if it can, Pages will offer suggestions for the misspelled word. If you want one of the suggestions, tap it.
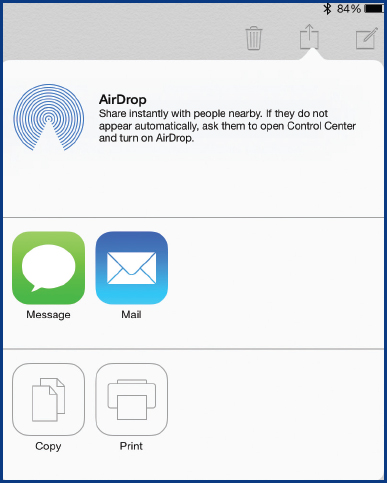
Share and Print Notes
If you want to share your notes with others, you can use the Share icon and the Share menu, as explained in earlier chapters.

Kathleen Landel
I use my iPad to separate my work life from my personal and household life. Since I’m on the desktop computer at home working for much of the day, I like being able to grab my iPad, which I can take anywhere, and catch up with my family and household computer tasks.
I keep in touch with my son and husband using messaging and email. We share photos, articles, and web links with each other, which helps keep us connected in spite of our busy lives. Several times a day I use the app to check our shared Google calendar. The iPad share feature makes it so easy to share any content. I especially like taking my iPad when I visit my elderly parents to share family photos with them.
After a busy day I relax with my iPad by reading The New York Times and other news media. I love seeing what is up with far-flung family and friends on Facebook, posting happy birthday wishes, and sharing old family photos. I keep up with my favorite public radio and television shows, like This American Life, RadioLab, and Masterpiece Theater, at my convenience. I’ve even improved my Scrabble skills playing online, and I always have several competitive games of Dice with Buddies going with my son and nephew.
Some of my other favorite apps include:
• CalenMob I can make appointments and keep up-to-date on our family Google Calendar anywhere.
• Bank App I can check my credit union balance, transfer funds, and even make deposits.
• Printer App I can print an email, attachment, or a favorite article wirelessly from anywhere in the house.
• 3M Cloud Library This app allows me to download books from my local library system in any format.
• PDFReaderLite I can read and save PDF articles from my research on the Internet.
• Calculator HD This is a great, multifeatured calculator.
..................Content has been hidden....................
You can't read the all page of ebook, please click here login for view all page.