Note
All code samples shown throughout the headings in this section are available in procedures in a module named PrimerSamples.bas, that is included in the sample files on the book’s CD. See "Saving and Sharing Macros" for help importing a module into your Visual Basic Editor.
Most of the features you’ll learn about in this section are programming basics. They’re written here specifically for VBA. However, it might be useful to know, should you ever want to learn another programming language, that many of the concepts and terms used throughout this section are fairly standard across common programming languages.
One of the most important differences between macros you record and macros you write is that, when you record a macro, you need to select an object to act on it. But, when you write macros, you can usually identify items to act on instead of selecting them. That apparently simple difference gives you tremendous power and flexibility. For example, you can write a macro to act on all tables in your document automatically, rather than recording a macro that you run from each table.
The section you’re beginning is the core of this primer. From creating a macro to reading and understanding essential VBA language constructs, the headings in this section progress in a logical order to help you learn in such a way that you can immediately put your knowledge into practice. I recommend reviewing the content under each heading and trying examples for yourself in the Visual Basic Editor. Be sure that you understand the content covered under each heading before progressing, and you’ll be using VBA comfortably before you know it.
To create a module, start by selecting the project (in Project Explorer) to which you want to add the module. Note that you can click any element contained in the project, such as the project name or the Modules folder (if one exists). Then, on the Insert menu, click Module.
Note
You can also insert a module from the Insert icon on the Standard toolbar. Notice that this icon defaults to what you last inserted (such as a module or a UserForm). Click the arrow beside the icon to select a different item from the available options, as you see here.

To rename the module, click into the name field in the Properties window, as mentioned earlier. Type the new module name and then press Enter.
Once you have a module in which to create your macros, you can just click in the Code window and begin typing to create a macro. As you saw in the sample recorded macro, every macro begins with the term Sub, followed by the name of the macro, and then followed by a pair of parentheses. Those parentheses can be used to hold instructions for the macro or information about references in the macro, but it’s rarely necessary to type anything between the parentheses for basic document production macros. Even if you type nothing between the parentheses, however, you must include the parentheses in this line.
Notice as well that every macro ends with the line End Sub. Many types of instructions you’ll learn throughout this section are paired (such as With and End With, demonstrated in "Grouping Statements"). When you type the first line of a macro (beginning with Sub and ending with the pair of parentheses) and then press Enter, VBA adds the End Sub line automatically. (If you prefer, you can omit the parentheses when you type the first line and VBA will add them as well.) But, with most paired terms, the end term isn’t added for you. It’s good practice to always type both ends of a paired structure at the same time, so that you don’t forget to later. When macros become longer or more complex, finding the missing end portion of a paired structure can be a frustrating use of time.
So, to start a macro in your new module, type the following:
Sub MacroName()
End Sub
The statements that comprise your macro will go between these two lines.
Note
Throughout the next several headings in this section, code samples are provided that show only the relevant code for the particular topic. Remember that, to run that code in the Visual Basic Editor, it needs to appear within a procedure, so you need to add the surrounding Sub and End Sub statements discussed here.
Just as the languages you speak are comprised of nouns, verbs, adjectives, and other parts of speech, VBA is comprised of objects, properties, and methods. Think of objects as nouns, properties as adjectives, and methods as verbs.
An object is just that—it’s a thing that can be acted on.
A property is a characteristic of an object—something that describes the object, such as its size or style.
A method is an action you can perform on an object. For example,
SaveandCloseare both available methods for theActiveDocumentobject.
The only difference between the sentence structure in a spoken language and in VBA is that, though you need a noun and a verb in any sentence, you need an object in every statement, but either a property or a method might be used to complete the statement. Let’s take a look at a few examples.
In the following statement,
ActiveDocumentis an object andSaveis a method.ActiveDocument.Save
In the following statement,
Selectionis the object (referring to the location of the insertion point—the actively selected content) andStyleis a property of that selection.Body Text, in this case, is the setting for the indicated property.Selection.Style = "Body Text"
Objects are often used as both objects and as properties of other objects, depending on where they’re placed in a statement. In the following statement,
Tables(1)refers to the first table in the active document. Though a table is an object, it’s also used here as a property of the active document.Style, in this statement, is a property of the specified table.ActiveDocument.Tables(1).Style = "Table Normal"
Even though
Tables(1)in this case is a property ofActiveDocument, it’s still an object. Notice that the style being set is a property of the specified table.You typically don’t need to think about whether an object is being used as an object or a property, similar to distinguishing whether an -ing verb (such as creating, editing, or dancing) is being used in a given sentence as a noun or a verb. What’s important is to see that many objects, such as a table, require a higher-level object to make the reference specific enough for VBA to understand. For example, you can’t write simply
Tables(1).Styleto indicate the style of the first table, because VBA needs to know what range you’re referring to when you tell it to act on the first table. Otherwise, you might be referring to the first table in the document, the first table in the selection, or a number of other possible ranges. Just keep the distinction in mind that many objects can also be used as properties of other objects, because this will come in handy when you reach "Getting Help".
Looking at the preceding list of examples, you might be wondering how you’re possibly supposed to memorize every possible object, property, and method name for each program in which you need to learn VBA. Well, relax. You hardly need to memorize anything at all when it comes to program-specific terms. When you understand the concept of using objects, properties, and methods to create statements, and you remember what you already know (the features of the program you’re automating), you’ll learn the names of the particular objects, properties, and methods the same way you learn vocabulary in a spoken language—simply by using it.
The set of VBA vocabulary that’s specific to a given program is known as the program’s object model. The Visual Basic Editor in each program also contains a "dictionary" of sorts for that object model, known as the Object Browser. You can use the Object Browser (available from the View menu or by pressing F2) to search for the correct terminology to use for a given feature, or to see what properties or methods are available to a given object. For example, take a look at the range of results you get when you use the Object Browser in the Word Visual Basic Editor to search for the term table.

Notice in the preceding image that the selected item in the search results is the table object. The heading Classes refers to items in an object model that can have an available set of members—such as objects or modules. Properties and methods are members of a specified class. Notice the headings Classes and Members Of ‘Table’ in the bottom panes of the Object Browser.
Note
When searching for terms in the Object Browser, remember that terms don’t get spaces between multiple words in VBA. Separate words in a single term are denoted by initial capital letters, such as the ActiveDocument object or the PageSetup property. Searching in the Object Browser isn’t case-sensitive, but the Object Browser won’t recognize multiple words as a single term. For example, searching for page setup in the Object Browser will return no results, but searching for pagesetup will return several.
In the following list, also notice the icons used in the Object Browser to denote objects, properties, methods, or library. These will also be seen while you’re writing code, as explained under the next heading.
Object
Property
Method
Library (An object model is a type of library. For example, the results shown in the image of the Object Browser were members of the Word library, which is the same as saying the Word object model.)
Troubleshooting: Why do I get an error when I try to set some properties?
The key to this question is to remember that you sometimes need to use VBA statements to get information about the document as well as to apply settings or execute actions. Many properties are read-only, meaning that you can only use them to return information and not to apply a setting.
For example, ActiveDocument.Name is a read-only property to tell you the name of the active document. You can’t set the name using this property, but that doesn’t mean you can’t name a document using VBA. Using this example, to change the name of the document, you’d use the SaveAs method (that is, ActiveDocument.SaveAs). With this method, it’s possible to specify several settings for how you want the document saved, including its name.
To learn whether a property is read-only, select that property in the Object Browser. At the bottom of the Object Browser is a pane where you see the hierarchy for the selected item (what class and library it belongs to). This pane also indicates when a property is read-only, as you see in the example that follows.

In the example shown here, Word is the library, and Document is the object to which the read-only property Name belongs. Learn more about ways to use read-only properties as this primer progresses.
One of the main reasons you don’t have to memorize the object model for the program you’re automating is that the Visual Basic Editor often gives you the available options as you write. When you type an object, for example, followed by a period, you automatically see a list of properties and methods available to that object, as shown in the following image.

Notice the icons, shown earlier, that appear in this Auto List to indicate properties or methods. All the members of a given object (that is, all properties and methods available to that object) appear in the Auto List.
To scroll through an Auto List, you can use the up or down arrows as well as the Page Up and Page Down keys. You can also begin to type the item you need, if you know at least the first character, to move to that position in the Auto List. For example, if you type the letter t immediately after the period that follows ActiveDocument, the Auto List would move to the image you see here.

When you select the item you need in the Auto List, press the Tab key to add the item to your statement. (You can also press the spacebar instead of using the Tab key. However, doing so will add a space in your code after the selected item.) Note that, if you press Enter once an item is selected in an Auto List, you’ll get an error unless the selected item was the last required term in the statement.
In addition to objects, properties, and methods, most macros use other types of terms as well, including variables and constants (the latter of which are discussed under the next heading in this section).
Variables are types of data used to represent objects, statements, or other elements required in your code. They’re often used to save time and make code more efficient, such as by using a single term in place of a statement that you have to reference several times. They are also often used when you need to refer to any instance of a given object type, rather than specifying an instance of an object. Consider the following examples.
If you need to refer to the full name (the
FullNameproperty includes the file path) of the active document in a few places within your macro, you might want to declare a variable to represent the full name of the document, as you see in the following statement.myName = ActiveDocument.FullName
The name of the variable in this case is
myName. Once you’ve typed this statement in your macro, you can use the termmyNamein place ofActiveDocument.FullNamewherever you need to use the full name of the document.When you use loops (discussed later in this section) to execute a command for several instances of an object (such as if you want to apply the table style named Table Contemporary to even-numbered tables in the document), you might use a variable as a counter, to help you accomplish that.
Dim myInt as Integer
For myInt = 2 To ActiveDocument.Tables.Count
   ActiveDocument.Tables(myInt).Style = "Table Contemporary"
Next
The preceding code uses a For...Next loop, explained in "Loops". However, notice how the variable myInt is used here.
First, you declare the variable as an integer.
Then, the start of the loop (the line that begins with the word
For), tells the code to begin executing with the variable equal to the number 2 and run until the variable equals the number of tables in the document. Each time the loop executes, the number is automatically increased by 1.Next, notice that the variable is used to denote the table number in the statement that applies the style to the table.
Using variables in place of a complete statement, or as counters, are common, useful tools. Other uses of variables are demonstrated under applicable headings later in this chapter, including "Conditional Structures" as well as "Loops."
Note
For code that’s easier to read, follow, and edit, use intuitive variable names. Variable names can’t contain spaces and can’t be a VBA term used for any other purpose (such as the name of an object, property, or method). Keeping those requirements in mind, make your variable names as short as possible, just to save yourself work.
As you saw in the preceding examples, variables can be used to represent different types of information, such as numbers, text strings, or objects. Several variable data types are available, and you can even create your own. However, to keep things simple as you begin using variables, following are commonly used variable data types.
Data Type | Possible Values |
|---|---|
Boolean | True or False |
Integer | An integer, ranging between −32,768 and 32,767 |
Long | A long integer, ranging between −2,147,483,648 and 2,147,483,647 |
Currency | A scaled integer, ranging from −922,337,203,685,477.5808 to 922,337,203,685,477.5807 |
String | A text string, such as a VBA statement (text strings are relatively unlimited—they can be up to approximately two billion characters in length) |
Variant | A variant can be a number or a text string (if you don’t specify the data type for a variable, it is a variant by default) |
Note
For a complete list of data types supported in VBA and their definitions, search the topic "Data Type Summary" in Visual Basic Help, available from the menu bar in any Visual Basic Editor.
Note
You can also declare variables as specific types of objects (such as a table, a style, or a document). Variables declared as a specific object type are called object variables, and they offer additional benefits, discussed under the heading that follows. Note that this is not the same as the object data type that you’ll see in complete lists of possible variable data types. The object data type was omitted from the preceding list because it’s not recommended. On the other hand, object variables are an invaluable tool.
When you specify a variable type, which is called declaring the variable, you can save time and reduce errors. For more complex macros, declaring variables is also important because undeclared variables default to the variant data type, which uses more storage space than other data types, creating more work for the program running your macro.
Additionally, when you require that variables be declared in your modules, VBA lets you know while you’re still working on your code if variables contain spelling errors that could cause an error when users run your macro. See "Running Macros and Compiling Projects" for more on this subject.
When you declare an object variable—that is, a variable declared as a specific type of object—VBA recognizes the object so that you get Auto Lists for completing statements that include the variable.
Caution!
When you declare a variable as a particular data type, you must use it as that data type. For example, if I declare myInt as a string, VBA won’t understand if I use it in a statement as if it was a number (such as For myInt = 2 to ActiveDocument.Tables.Count, as demonstrated earlier). Variables you want to use as numbers must be declared with an appropriate numeric data type (see the preceding table for the possible values available to different numeric data types). Similarly, to use a variable as a text string, the information after the equal sign when you set the value of that variable must either be a VBA statement or a text string enclosed in quotation marks.
To declare a variable, use a Dim statement. For example:
Dim myInt as Integer
Dim myName as String
Once you type the word as in a Dim statement, you get an Auto List of available options to help you complete the statement, such as you see in the following image.

To require variable declaration in a module, click in the very top of the module, type the words Option Explicit, and then press Enter. That statement is one of several you can place at the top of a module to apply to all procedures in your module. Notice that, when you press Enter after typing this statement, a line appears beneath it, just as a line automatically appears between macros. This section of the module is known as the General Declarations section.
If you have multiple macros that need to refer to the same variables, you can declare them publicly for the entire project, so that you don’t need to type out the declarations in each applicable macro.
To do this, type your variable declarations in the General Declarations section of any module in the project, and use the word Public instead of the word Dim to begin the statement. For example, the following statement makes myName a string variable, and myIn an integer variable, available to all procedures in the project.
Public myName as String, myIn as Integer
Note, however, that you must be in a procedure to assign a value to a variable. For example, you can declare myIn as an integer variable for use throughout the project, but the statement myIn = 1 must appear inside a procedure. The way to use one set of variable values for multiple macros across all modules in your project is to put all value assignments for public variables in one macro, and then access that macro from any procedure where you need to use those values. To learn how to get that done, see "Running One Macro from Another".
In addition to the variables that you use in your macros, there is an object type named Variable in the Word object model. These are known as document variables, because you use them to store information in the document that’s collected or created by your macros, rather than as a place to store data just while the macro is running—such as when you need the document to remember information from one use of a given macro to the next.
For example, in template automation projects I do for clients, I sometimes add document variables to store user preferences that are specific to the individual document, such as which of a selection of design choices the user wants for the active document. The document needs to store that information after the macro runs, so that the user’s preferences are remembered the next time they use the design macros.
In Word, information of this sort can be stored using either a document variable or a custom document property (which you’re most likely familiar with from the Document Properties dialog box). However, Excel and PowerPoint don’t offer a document variable object, so custom document properties are the way to go for storing document-level data in your workbooks and presentations.
In addition to document-level data, there are several ways to store data on the application or system level—that is, so that data can be accessed by your macros for use by more than an individual document. One of the most common and easiest of these methods is storing data in the Windows registry.
As you can imagine, there are many uses for storing data in variables, document properties, or system-level resources such as the registry. To explore this topic, use the Object Browser in your Visual Basic Editor to look up the Variable object, the property named CustomDocumentProperties, and the GetSetting and SaveSetting functions (these functions are used for storing information in the Windows registry).
In addition to the variables that you can declare for use in your procedures, many items in the VBA object models include elements that use the same data types as variables to specify settings for that item. The elements, known as arguments (similar to arguments in an Excel formula), can be required or optional, and are most commonly seen for methods. Take a look at a few examples.
When you use the
SaveAsmethod of theDocumentobject in a statement, you get the following options in the Quick Info ScreenTip that appears after you type the open parenthesis followingSaveAs.Most of the arguments shown in the preceding graphic are optional. Notice that optional arguments appear in the Quick Info inside brackets. Also notice that it’s common for optional arguments not to specify a data type in the Quick Info.
When you use the
Addmethod for aTableobject, you get the following arguments.The
Addmethod is used for many objects in Word, Excel, and PowerPoint. It has different arguments, of course, for each, based on the type of object being added. For theTableobject, the range argument (location where you want the new table to appear), number of rows, and number of columns are required. The range is an object variable (referring to theRangeobject), and the number of rows and columns both use the long data type (as noted in the Quick Info). Note that the optional AutoFit behavior setting is a variant data type, but it requires a value from an available set of constants. Learn about constants under the next heading in this section.The
HomeKeymethod, shown in the following image, is used with theSelectionobject. It’s the VBA equivalent of using the Home key on your keyboard.The two available arguments used here—both optional and both using the variant data type—determine how far your insertion point moves (Unit) and whether the selection is extended (equivalent of holding the Shift key when you press the Home key) or your insertion point is simply moved to the new location. Both of these arguments require selections from a set of available constants, discussed under the next heading in this section.
There are two ways to specify most arguments in statements such as those in the preceding list of examples. The first approach is to type the values for the arguments between parentheses immediately following the method (as you saw in the preceding images showing Quick Info ScreenTips for three sample methods). When you use that approach, type a comma after each value you add. You’ll see that the active argument (the one for which you can add a value at your insertion point) is shown as bold in the ScreenTip. If you don’t intend to include a value for each argument, type consecutive commas until the argument you want to specify is bolded. If you place an argument in the wrong position between parentheses, the method won’t work correctly. Notice, however, that this approach can be confusing and difficult to read when you need to edit or troubleshoot a macro.
Note
Note that some types of arguments can be specified simply in quotation marks after the statement name.
Instead, for methods that take more than a single argument, specify each by typing the argument name, followed by a colon and an equal sign, followed by the value you want to assign. Separate each argument you specify with a single comma, and note that argument order doesn’t matter when you use this approach. Take a look at the following two examples.
ActiveDocument.SaveAs FileName:="Sample.docx", WritePassword:="example"
Selection.HomeKey Unit:=wdStory, Extend:=wdExtend
Using the explicit approach shown here helps to keep your code easy to read, edit, and troubleshoot.
As mentioned under the preceding heading, many items in VBA require the use of another data type, known as a constant. Unlike variables that can change as needed, constants are used when a defined set of options exists for the feature. Most constants in VBA are either specific to the individual program object model or are available in VBA for any Microsoft Office program.
Note
It’s possible to define your own constants in VBA as well. However, the discussion of constants in this chapter is limited to built-in constants, generally referred to as intrinsic constants.
Constants specific to the Word object model start with the letters wd; those specific to the Excel object model start with the letters xl; those specific to PowerPoint start with pp; and those for use across the Microsoft Office programs start with mso. There are also sets of constants that are specific to Visual Basic language and available to VBA in all of the Microsoft Office programs—these constants begin with the letters vb.
Because constants are defined members of an object model, you can search for them in the Object Browser. For the purposes of searching the Object Browser, note that a set of constants is considered a class and the constants within that set are the members of that class. Sets of available constants for a given argument are also usually easy to find through VBA help. Additionally, Auto Lists are available for many constant sets, particularly object and property constants. Take a look at a few examples.
The
Typeproperty of theFieldobject is available as a set of constants, provided in an Auto List when you type a valid statement for using this property. The example shown here is the beginning of a conditional statement.Learn about conditional statements in "Conditional Structures".
Because different header or footer types are available in each section, the
HeaderandFooterobjects have a set of constants from which to select when you use those objects, as you see here.The first macro you saw in this primer recorded four consecutive statements for adding four paragraphs to the document. If you had written that macro instead, you could have used the constant
vbCr, which is the VBA constant to indicate a carriage return. In that case, that first macro could have been written with the following code, in just two statements instead of six.Selection.Style = ActiveDocument.Styles("Heading 1") Selection.TypeText("Company Overview—" & vbCr & vbCr & vbCr & vbCr)Note
The ampersand is used to combine the text and constant portions of the text string, just as you can do to combine text, functions, and cell references into a text string in Excel. Learn more about using operators in VBA in "Operators".
Many arguments for different methods use the same sets of constants, which often are not available in Auto Lists, but are easy enough to find. For example, the
HomeKeymethod shown earlier uses constants for both of its arguments. The Unit argument uses thewdUnitsset of constants; the Extend argument uses thewdMovementTypeset of constants.The easiest way to learn the constant set you need is to use the Type A Question For Help box in the Visual Basic Editor to look up the applicable method. This is because, in some cases, not all members of a constant set are available to all methods that use those constants. For example,
wdUnitsincludes 16 constants, but only four of these are available when used with theHomeKeymethod. (The four available in this case arewdLine[the default if you don’t specify the argument],wdStory,wdRow, andwdColumn—the last two of which apply only when your selection is in a table.) If you searched for theHomeKeymethod in VBA help, you’d see information about the available constants for both arguments. (Note that the heading later in this section that covers getting help shows you how to use the Object Browser and VBA help reference together to save time.)


Objects for which there can be many of the object type within a given scope are available as both an object and a collection object. A collection is the entire collection of all of a given object type within the specified scope. This distinction is important because the object and its collection object can have very different members (that is, a very different set of available properties and methods). For example, compare the two statements that follow.
Documents(1).Tables.Count
Documents(1).Tables(1).AllowAutoFit = True
The first of the two preceding statements uses the Tables collection object. The second uses the Table object, specifying the first table in the collection. Both statements also use the Document object, specifying the first document in the Documents collection. (Note that the Documents collection in the Word object model refers to all currently open documents. The first document in the collection refers to the most recently opened document.)
The Table object has a very broad set of members, as you see in the following image. It’s used whenever a single object is being referenced from the collection. Notice that only a fraction of this object’s member list is visible in a single screen.

In contrast, the Tables collection object has very few members (shown in the following image), including only those items that can apply to the entire collection at once.

Say that you’re in a restaurant and you need three things from the waiter. If you ask for some ketchup, then ask for a glass of wine when the waiter drops off your ketchup, and then ask for a glass for your friend when the waiter returns with your wine, that’s a lot of work for the waiter (not to mention that he might be tempted to sneeze in your soup).
Instead, if you say to the waiter, "I need some ketchup, please. I’d also like another glass of wine, and my friend will have one as well," you’ve given the waiter three tasks that he can execute together. That is, you’ve just grouped a set of statements (not to mention saving yourself from a possible cold).
Though VBA won’t sneeze in your soup, macros do run more slowly when you force the program to execute several related tasks independently. Instead, grouping related statements together helps make your code more efficient (and saves you time writing code, because you’ll be writing less).
Statements can be grouped using the With...End With structure, as you saw in the recorded macro example in the earlier Troubleshooting tip titled "Troubleshooting: Why does my recorded macro have so many lines of code, when I only did one thing?" You can use With...End With anywhere that two or more statements apply to the same object, or the same combination of objects, properties, and methods. For example, the very first macro looked at in this chapter contains six statements, all of which apply to the Selection object. So, if you had written that macro instead of recording it, you could have typed the following:
With Selection
   .Style = ActiveDocument.Styles("Heading 1")
   .TypeText "Company Overview—" & vbCr & vbCr & vbCr & vbCr
End With
Though you might not be saving much when the macro is just two lines long, imagine something a bit more lengthy. For example, say that you wanted to do several things to the first table in the document. Instead of starting each line with ActiveDocument.Tables(1), you can group the statements using a With...End With structure, as follows.
With ActiveDocument.Tables(1)
   .Style = "Table Contemporary"
   .Range.Style = "Table text"
   .Columns(4).Shading.ForegroundPatternColor = wdColorLavender
   .Rows(1).Range.Style = "Table heading"
   .Rows(1).HeadingFormat = True
End With
In fact, you can take that grouping a step further. Notice that the first row of the table is referred to more than once. You can add a nested With...End With structure for those rows, as follows.
With ActiveDocument.Tables(1)
   .Style = "Table Contemporary"
   .Range.Style = "Table text"
   .Columns(4).Shading.ForegroundPatternColor = wdColorLavender
   With .Rows(1)
         .Range.Style = "Table heading"
         .HeadingFormat = True
   End With
End With
The thing to remember with grouping structures is that all items in the With statement must apply to all statements between With and End With, if the statement starts with a period (indicating that it uses the object referred to in the With statement). For example, you can do some things directly to the Row object that you can’t do directly to the Column object, such as applying a style. In that case, you might want to first select the column for which you need to apply a paragraph style, as you see here.
With ActiveDocument.Tables(1)
   .Style = "Table Contemporary"
   .Range.Style = "Table text"
   With .Columns(4)
         .Shading.ForegroundPatternColor = wdColorLavender
         .Select
   End With
   Selection.Style = "Table Subheading"
   With .Rows(1)
         .Range.Style = "Table heading"
         .HeadingFormat = True
   End With
End With
In the preceding code, Selection.Style doesn’t have to refer to the object in the With statement, because it isn’t using that object.
Caution!
As mentioned earlier in this chapter, remember that With...End With structures (as well as the code structures that follow under the next two headings) require a pair of statements. For ease of editing and to reduce errors, whenever you type the first part of the structure (the With statement in this case), type its paired closing statement (End With) as well, so that you don’t forget to do so later.
Troubleshooting: How can I apply Theme fonts and colors with Word VBA?
In the preceding examples of grouping structures, you may have noticed that I used an intrinsic constant to apply a shading color. The set of constants you get when you apply colors in Word VBA code are from the standard Microsoft Office color palette that was available in earlier versions. These are not Theme colors.
However, if you find and try to use the wdThemeColor... constants, you’ll find that they don’t work as expected. (Note that in Excel VBA, the xlThemeColor... set of constants do work as expected.) So, how do you apply colors that will update if the document Theme changes?
If you record a macro in Word to apply a color from the Theme Colors palette, you’ll see a numeric value in the resulting code that appears to represent the color you selected. That value actually represents the position you selected in the Theme Colors palette. So, using that value in your own macros will consistently apply the Theme color at that palette position.
For example, in the preceding grouping structure code sample, if you wanted to apply the Theme Color palette position for the Accent 1 color instead of the standard color lavender, the line of code to apply the color would read as follows.
.Shading.ForegroundPatternColor = -738131969
But, you don’t have to take the time to discover the 60 values that comprise the 10 Theme colors in the palette and their variations. I’ve done it for you. Find a macro named ThemeColorReferenceTable in the file named Sample Macros.dotm that is included with the sample files on the book’s CD. That macro (available from the SampleMacros module in the referenced file) will generate a new document with a table representing the Theme Colors palette. The color and associated value number for each position in the palette are applied to the table, so that you can save that table and use it as a reference tool whenever you need it.
Applying Theme fonts in Word VBA is much simpler. Wherever you would specify the font name, you simply specify that name as "+Headings" or "+Body" to apply the Theme heading or body font, rather than using the name of a specific font. For example, the first line of code that follows applies the font "Cambria." The second line applies the active Theme’s heading font.
ActiveDocument.Paragraphs(1).Range.Font.Name = "Cambria"
ActiveDocument.Paragraphs(1).Range.Font.Name = "+Headings"
If I had to pick one feature of VBA that’s the most useful on a daily basis for document production and document troubleshooting, it would be loops. Loops enable you to act on several instances of a given object within one macro. Fortunately, as much as loops can do for you, they’re also extremely easy to use.
In this primer, we’re going to look at variations on two of the most common types of loops, For loops and Do loops.
A For Each...Next loop enables you to act on all instances of a given object within a specified range. For example, you might use this type of loop to format all tables in your document at once or to change the fill color of all text boxes in your document to a particular Theme color. Similarly, a For...Next loop enables you to specify a range of instances of the given object on which you want to act. For example, say that all tables in your document other than the first five need to have the same formatting. You can use a For...Next loop to specify that the formatting apply to only the tables you want.
To use a For Each...Next loop, start by declaring a variable of the object type upon which to act and then use that variable in your loop. Take a look at the code for the two examples given in the preceding paragraph.
Apply the style Table Contemporary to all tables in your document.
Dim atb as Table
For Each atb in ActiveDocument.Tables
   atb.Style = "Table Contemporary"
Next atb
The use of
atbas the variable name for the table object is just a personal choice. As mentioned earlier in this chapter, you can use any name for a variable that meets VBA naming requirements (such as no spaces and a letter for the first character) and isn’t the name of any member of an available object model.Remove any user-defined styles from the active document.
Dim ast as Style
For Each ast in ActiveDocument.Styles
   If ast.BuiltIn = False Then
         ast.Delete
   End If
Next ast
Specifying the variable in the
Nextstatement, as I do in both preceding examples, is optional. But, it’s good practice to do this to avoid confusing the statements you need to keep or alter when you edit a macro, particularly when you use multiple loops in the same procedure.
To use a For...Next loop, start by declaring a numeric variable data type to use for counting the instances upon which you want to act. The code for the example given earlier—formatting all but the first five tables in the document—follows.
Dim myI as Integer
For myI = 6 to ActiveDocument.Tables.Count
   ActiveDocument.Tables(myI).Style = "Table Contemporary"
Next
Notice that I could have used a With...End With structure instead of retyping ActiveDocument each time I needed it. Of course, that would be more helpful if I was doing more than just applying a table style, as you see in the following example.
Dim myI as Integer
With ActiveDocument
   For myI = 6 to .Tables.Count
      With .Tables(myI)
         .Style = "Table Contemporary"
         .AutoFitBehavior (wdAutoFitWindow)
      End With
   Next myI
End With
In the preceding code, notice that I use the For...Next loop with nested With...End With structures to make this macro as efficient as possible to write, and as efficient as possible for Word to execute.
A Do loop, aside from being fun to say, can be another useful way of creating a loop for specified instances of an object. (Note that this type of loop is usually referred to as a Do...Loop structure, which helps to clarify the fact that, like For...Next loops or With...End With structures, a Do...Loop actually requires a pair of statements.)
Do...Loop structures can either be executed while a qualification is true or until a qualification becomes true. Similar to For...Next loops, Do While...Loops are usually used with a numeric variable. Do Until...Loops may be used with a numeric variable or until a given condition is true. Take a look at a couple of examples.
Say that you’re troubleshooting a document. Using Open And Repair, you find that a floating object is causing the unstable document behavior. But, you don’t see any floating objects in the document (this would happen if floating objects were off the page or hidden behind opaque document elements because of the Behind Text wrapping style). Using a
Do...Loop, you can delete all floating objects in the body of the document, as follows.With ActiveDocument Do Until .Shapes.Count = 0 .Shapes(1).Delete Loop End WithIn the preceding code, notice that
ActiveDocument.Shapes(1)refers to the first shape in the document. I wouldn’t use aFor...Next loopin this case with a counter, because each time a shape is deleted, the shape object reference.Shapes(myI)would refer to a different object. Instead, if I continually delete the first shape until there are no more shapes, I don’t need to be concerned with the way VBA counts the shapes in the document as their number is being reduced.Note
In the case of deleting all shapes in a document, you may wonder why I didn’t use a
For Each...Nextloop for this, since I want to act on all instances of shapes in the document.For Each...Nextloops are an easy solution in most cases that require acting on all instances of an object type. However, there are two reasons why theDo...Loopwas the better choice here. First, there’s less code with aDo...Loopin this case because you don’t need to declare the object variable before executing the loop. Second, there’s an anomaly when you use aFor Each...Nextloop specifically to delete floating graphics (that is, members of theShapescollection object) and one or more shapes may be left behind. Using theDo...Loopstructure instead ensures that all shapes are deleted.The following code uses a
Do While...Loopinstead of aFor...Nextloop for formatting all tables with the Table Contemporary style and AutoFit To Window behavior.Dim myI as Integer myI = 6 With ActiveDocument Do While myI <=.Tables.Count With .Tables(myI) .Style = "Table Contemporary" .AutoFitBehavior (wdAutoFitWindow) End With myI = myI + 1 Loop End WithNotice in the preceding code that the integer variable was set to start counting at six, so the first five tables in the document would be ignored. The
Do Whilestatement says to execute the code in the loop while the integer value is less than or equal to the number of tables in the active document. Then, at the bottom of the commands that fall within the loop, I’ve added a counter for the integer variable to increase the number by one on each iteration of the loop.
In the first of the two preceding examples, a Do...Loop structure is a better choice than a For...Next loop (as explained in the text that follows that sample code). However, in the second of the preceding examples, a For...Next loop would have been the more efficient choice. Notice that, in the second example, if you use a For...Next loop, you don’t need a separate statement for the counter—the For statement is a built-in counter.
So, how do you decide whether to use a For...Next loop or a Do...Loop structure? You just need to ask yourself a few simple questions, as follows.
Note
I wish I had conceived the questions that follow, but I can’t take the credit. Many thanks to Beth Melton, this book’s technical reviewer, for sharing her clear and concise approach to this topic (and others).
Do you know the number of repetitions you need in the loop?
As demonstrated by the preceding code samples in this section, if the answer is yes, use a
For...Nextloop. If the answer is no, use aDo...Loop.If using a
Do...Loop structure, is the condition initially true?If the condition is initially true, you need a
Do Whilestatement to begin your loop. If, on the other hand, the loop needs to execute until the condition becomes true, start your loop with aDo Untilstatement.
There’s one more variable to consider when deciding on the loop type you need. You can evaluate the condition specified in a Do...Loop structure either at the top of the loop (as shown in the earlier example of a Do While...Loop structure) or at the bottom of the loop (with a Do...Loop Until or Do...Loop While structure).
A top evaluation loop is structured as follows.
Do While <condition>
   <statements>
Loop
A bottom evaluation loop, on the other hand, looks like the following.
Do
   <statements>
Loop While <condition>
(Remember, in the preceding structures, to substitute Until for While if you need to execute the code until the condition becomes true.)
So, to determine whether you need a top or bottom evaluation loop, ask the following question: Must the code execute at least once?
If the code must run at least once for your macro to do what you need, use a bottom evaluation loop so that the condition isn’t evaluated until after the first time the code runs. If the code doesn’t have to run at least once, use a top evaluation loop so that the condition is evaluated before the first time the code runs. For example, in the sample Do...Loop structure shown earlier, in which case the loop is used to delete all shapes from the active document, a top evaluation loop is appropriate because the code doesn’t need to run if the document contains no shapes from the outset.
The following diagram summarizes the decision process for selecting the best type of loop for your macro.

As demonstrated with For...Next and Do...Loop structures, there are several ways to apply conditions to the commands you want to execute with VBA. Frequently, however, the condition you need may be something other than the instances of an object. Conditional structures in VBA, other than loops, are formed using the paired If and End If statements. Much like the IF function in Excel and the IF field in Word, If...End If structures in VBA are used for executing actions only when specified criteria are met. Take a look at the following examples.
Say that you’re creating automation to help format new business presentation documents. Your branding specifies that any presentation of longer than three pages should use landscape orientation. If the user clicks the button to use your formatting macro, you may want the macro to first check the length of the document and then set the orientation to landscape if the document exceeds three pages.
With ActiveDocument
  If .RangeInformation(wdActiveEndPageNumber) > 3 Then
     .PageSetup.Orientation = wdOrientLandscape
  End If
End With
Say that you’re applying a template to a document that uses only built-in Word styles, such as Body Text and Heading 1–9. Once you’ve reformatted the document content as needed, you may want to clean up the document styles to help ensure that the document continues to be formatted with the styles you want. The following code removes any styles from the document that are not built-in styles.
Dim ast As Style
For Each ast In ActiveDocument.Styles
   If ast.BuiltIn = False Then
         ast.Delete
   End If
Next ast
If...End If structures are often used with multiple conditions, such as when you want to set one value if the condition is true and another if it’s false, as you see in the following example.
With ActiveDocument
  If .RangeInformation(wdActiveEndPageNumber) > 3 Then
     .PageSetup.Orientation = wdOrientLandscape
  Else
     .PageSetup.Orientation = wdOrientPortrait
  End If
End With
The preceding example adds an additional qualifier to the similar code shown earlier, so that if the document is three pages or shorter, your macro ensures that the document uses portrait orientation.
If statements can also include multiple conditions by including ElseIf statements. For example, say that you have many tables in your document with different layouts, but all financial tables have either four or six columns. Those financial tables with four columns should use the custom table style named Table Financial 4, those with six columns should use the style named Table Financial 6, and all other tables in the document should be formatted using Table Normal style.
Dim atb As Table
For Each atb In ActiveDocument.Tables
   With atb
         If .Columns.Count = 4 Then
               .Style = "Table Financial 4"
         ElseIf .Columns.Count = 6 Then
               .Style = "Table Financial 6"
         Else
               .Style = "Table Normal"
         End If
   End With
Next atb
Notice that both If and ElseIf statements require Then at the end of the line. Also notice that, regardless of the number of conditions in an If statement, End If is still required at the end of the complete structure.
Note
See "Trapping Individual Errors" for an example of another type of conditional structure known as Select Case. Though If structures are more common, Select Case can be an extremely efficient alternative and is definitely worth a look.
VBA uses both symbols (such as &, <, >, =, +, -, /, *) and terms (such as And, Or) for operators, depending on the usage. In all cases, however, operators follow standard mathematical syntax rules. Take a look at a few examples.
When I finish writing a chapter of this book, I need to copy all of the Heading 1 and Heading 2 paragraphs to update the table of contents. To do that, I make a copy of the document from which I delete any paragraphs that don’t have those two styles applied.
Dim apr as Paragraph
For each apr in ActiveDocument.Paragraphs
   If apr.Style <> "Heading 1" And apr.Style <> "Heading 2" Then
         apr.Range.Delete
   End If
Next apr
Notice that the less than and greater than operators can be used together to mean "is not equal to."
If, instead, I wanted to delete all paragraphs that match either of those criteria, I would have written the following code.
Dim apr as Paragraph
For each apr in ActiveDocument.Paragraphs
   If apr.Style = "Heading 1" Or apr.Style = "Heading 2" Then
         apr.Range.Delete
   End If
Next apr
What if I wanted to delete all paragraphs that use Heading 1 or Heading 2 style, but only if they don’t appear in a table?
Dim apr as Paragraph
For each apr in ActiveDocument.Paragraphs
   If (apr.Style = "Heading 1" Or apr.Style = "Heading 2") And _
   apr.Range.Information(wdWithinTable) = False Then
         apr.Range.Delete
   End If
Next apr
In the first line of the
Ifstructure, the space followed by an underscore at the end of the line is used to allow a single statement of code to break to a second line. Breaking the line is not required, but is used when the line of code is too wide to read in a single screen.Notice in the preceding code that the conditions that use the logical operator
Orare grouped in parentheses, with theAndoperator outside of the parentheses. Just as in a mathematical equation, that phrasing ensures that the condition within the parentheses is evaluated first.
As you’ve seen in examples throughout the primer to this point, an ampersand is used to combine arguments into a text string, and typical arithmetic operators can be used on numeric values as they are in Excel formulas, including +, -, *, and /. The plus sign can be used in some cases to combine text strings, but when you want to mix different types of variables in a text string, the plus sign can cause a "Type Mismatch" error, because it tries to calculate a result rather than combine the strings. So, using the ampersand to combine arguments into a string is always a good practice.
Notice also throughout these examples that comparison operators can be used either individually or together, such as < to indicate "less than" or <= to mean "less than or equal to."
The operators mentioned in this section are likely to be all that you need, but this isn’t an exhaustive list of every operator available in VBA. To learn about others, search for the topic Operator Summary in VBA help.
When creating macros for others to use, you’re likely to need to either give the user information or have the user specify information. Use message boxes to share information and input boxes to collect it.
A message box might just provide information, or it might require a response, such as Yes, No, Cancel, Abort, Retry, or Ignore.
The MsgBox command is one of several in VBA that can be used both as a statement and as a function. Use a MsgBox statement to provide information; use MsgBox as a function when you need a response from the user.
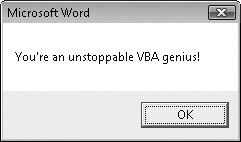
To create a message box statement, type
MsgBoxwith the string of text you want the user to see. For example, take a look at the following message box statement and the message box it produces when run in Word.MsgBox "You're an unstoppable VBA genius!"
Even if your message box doesn’t require a reply, however, you might want to get a bit more creative with it. The
MsgBoxcommand includes optional arguments that let you customize the title bar and add an information icon, such as in the following example.MsgBox "You're an unstoppable VBA genius!",vbInformation,"My Message Box"
The intrinsic constant
vbInformationis one of a set of options in the buttons argument that enables you to add both an icon (as you see here) and response buttons. The third argument customizes the title of the message box.Note
Note that both message box and input box functions also include optional arguments for adding help files to those boxes. To learn about creating help files for use with your VBA automation, see the MSDN Library. MSDN (Microsoft Developer Network) offers a free library resource at http://msdn.microsoft.com/library, which provides a number of tools for those who want to continue learning about Microsoft Office programming capabilities.
To use
MsgBoxas a function (that is, to require a response from the user), first declare an integer variable for your message box, so that you can use the response in the macro, as you see in the following example.Dim myRes As Integer myRes = Msgbox("Are you an unstoppable VBA genius?", vbQuestion _ + vbYesNo, "My Message Box") If myRes = vbYes Then Msgbox "I knew it!", vbExclamation, "My Message Box" Else Msgbox "Hang in there.", vbCritical, "My Message Box" End IfThe first message box in the preceding code looks like this:
Depending upon your response, you then get one of the following two message boxes.
Notice the constant
vbYesused to represent the response to the first message box. If you look upvbYesin the Object Browser, you find the set of constants that are available (shown in the following image) depending on the buttons you include in your message box.


Note
If you’re thinking that you don’t have to be a math whiz to know that a term comprised of several letters (such as vbYes) is not an integer, guess again. The seven constants that comprise the possible return values for a message box translate to the integers 1 through 7. So, you’ll get the same result if you use the integer value instead of the constant. Use Quick Info to find the integer value you want. For example, if you have a macro that includes the constant vbYes, right-click in that constant and then click Quick Info to see its value.
Input boxes are similar to messages boxes, except that they’re always used as a function because they always require a response. Take a look at the following example.
Dim myInp As String
myInp = InputBox("How would you score on a basic VBA exam?", _
"My Input Box", "Perfect")
Msgbox myInp & " is pretty good!", vbExclamation, "My Input Box"
The input box from the previous example looks like this:

The text of the preceding message box is referred to as the prompt, the title bar text is the title argument (as in a message box) and the value you see in this image is the default value of "Perfect" specified in the third argument. Note that input boxes also include optional arguments for vertical and horizontal position on the screen (not shown here), if you don’t want the box to automatically appear in the center of the screen.
Because the input box was declared as a string variable, notice that the response is used as part of a text string in a message box that looks like this:

If, instead, you need to use a response as a numeric value, declare the variable accordingly. In the following example, the input box asks for the number of columns to include in a new table being created by the macro. The variable defined as the input box reply is declared as an integer. (Notice that the input box in this case has only a prompt and a title bar—no default value is set, so the text box within the input box appears blank to the user.)
Dim myInp As Integer
myInp = InputBox("How many columns would you like?", "My Input Box")
With Selection
.Tables.Add Range:=.Range, NumRows:=5, NumColumns:=myInp
End With
Note
There is a possible problem, however, with the preceding code sample. If the response is not an integer (including if the user cancels the input box without adding a reply), the macro will end in an error. You can, however, add what’s known as an error handler to correct for any error that may occur. Error handlers are an important part of writing macros effectively. Learn to work with basic error handlers later in this chapter, in "Creating Error Handlers". You’ll find an example in that section of an error handler created specifically for the preceding macro.
When you create a solution, such as developing a set of document production macros for yourself or creating a set of macros to help users format a template, you’re likely to have some of the same commands repeat in multiple macros. When those duplicated commands run to more than a few lines of code, it can be helpful to put the duplicated code into its own macro and run it as part of each of the macros that need it. That way, you don’t have to write that code out in every macro where you need it.
Running one macro from another is also commonly done when several macros use the same variable definitions. For example, say that you declare the following public variables in the General Declarations section of the module.
Public myName as String, myComp as String, myIn as Integer
If several macros need to use the same values for that information, create a procedure just to store the values of those variables. That entire macro might look something like this:
Public Sub VarDefs()
myName = Application.UserName
myComp = ActiveDocument.BuiltinDocumentProperties("Company").Value
myIn = 1
End Sub
To then use these variable definitions in any macro in the project, just call the macro that includes the definitions. The statement to call a macro is just the word Call plus the macro name. If the macro exists in a different module from the macro where you’re calling it, also specify the module name.
For example, to call the preceding macro from a macro in the same module, I would type the following statement.
Call VarDefs
If the macro from which I want to call VarDefs is in a different module, the statement would look like the following (assuming that VarDefs is in a module named myMod).
Call myMod.VarDefs
Note that, as long as the variables are declared as public, you don’t actually have to specify Public in the Sub statement of the preceding macro to make the contents of that procedure available to other macros in the project. However, if you want to allow the contents of that procedure to be shared only by other macros in the same module (such as in cases where macros in a different module might need to share a different set of values for the same variables), use Private Sub <procedurename>() to start the macro. Keep in mind also that private procedures don’t appear in the Macros dialog box available from the Developer tab, so identifying a procedure as private is also a good way to keep it hidden from the user.
Caution!
When you call one macro from another for the purpose of using variable definitions, make sure the call to the source macro appears prior to where you use those variables in the destination macro.
Note
Your macros might share many types of variables in a given project. I’ve presented the preceding variable example to point out one place where the 2007 release may offer you a simpler solution than VBA, depending on your particular needs. For adding document property information to your documents and templates, you can use the built-in Document Property Quick Parts that have information already bound to Content Controls. For other types of information not available in the Document Property set of Quick Parts, see the next chapter of this book to learn how to bind Content Controls to your own custom XML data.
You can add a statement to end the macro under specified conditions or to exit just a part of the macro.
To end code execution entirely, just type End on its own line. For example, say that you want to stop a macro from running if no document is open. That code would look like this:
If Documents.Count = 0 Then
End
End If
To exit a loop when a condition is met, use an Exit statement specifically for the loop type, such as Exit For or Exit Do. Following is an example of an Exit For statement.
Dim ast as Style
For each ast in ActiveDocument.Styles
   If ast.NameLocal = "Sample" Then
      ast.Delete
      Exit For
   End If
Next
When you run one macro from another, you might also want to exit just the individual macro under certain conditions and not stop executing code altogether. For example, if you call one macro from another but only want to run the called macro under certain conditions, you can tell the code to exit that called macro with an Exit Sub statement, as you see in the following example.
If ActiveDocument.Tables.Count = 0 Then
Exit Sub
End if
You can run a macro directly from the Visual Basic Editor, or you can add it to the user interface to run it from the Quick Access Toolbar (or, in Word, from a keyboard shortcut).
To run a macro directly from the Visual Basic Editor (as I do frequently with on-the-fly document production macros), just click in the macro (anywhere between the Sub and End Sub lines will do) and then click the green Run SubUser Form arrow icon on the Standard toolbar. This option is also available from the Run menu, or by pressing the F5 key.
To add a macro to the Quick Access Toolbar, click the arrow at the end of your Quick Access Toolbar and then click More Commands to open the Customization tab of the <Program> Options dialog box. Then, do the following.
In the Choose Commands From list, select Macros.
If you want to add the macro to the toolbar just for a specific document or template, select that document or template from the Customize Quick Access Toolbar list.
To be available in this list, the document or template must use an Open XML Format and must be open at the time.
Select the macro to add from the list at the left and then click Add.
To customize the appearance of the macro on the Quick Access Toolbar, select it in the list on the right, and then click Modify. In the Modify Button dialog box, you can select a different icon and edit the way the name appears in the ScreenTip for that macro.
To add a macro to a keyboard shortcut in Word, open the Word Options dialog box to the Customize tab and then click the Customize button to open the Customize Keyboard dialog box. As you see in the following image, select Macros in the list on the left and then select the macro you want to assign to a shortcut on the right.

Press the keystroke combination you want to use—such as Ctrl+; shown in this example. A notice appears to let you know if the combination is already assigned. You can select it even if it’s already assigned to another action, as long as you don’t need the shortcut for that other action. Notice that you need to select the document or template in which to save the shortcut. Keyboard shortcuts can be saved in both Open XML Format and legacy format Word documents and templates.
Note
For many actions, you might want to run just one line of code at a time—such as to get information about your document or to execute a single action. In this case, you can run the code from the Immediate window in the Visual Basic Editor. This is an extremely handy option that you’re likely to use regularly once you become accustomed to using VBA as a document production tool. Learn how to use the Immediate window later in this chapter.
As you’re writing lengthy macros, or when you’re ready to use your macros, compiling the project is an important step. Compilers are actually used to translate source code to executable code, which isn’t strictly necessary for typical VBA macros. But, using the compiler in the Visual Basic Editor is an essential way to help ensure that your code works properly.
To compile a project, just select a module or click into a procedure in the project and then, on the Debug menu, click Compile <Project>. Depending on the size of the VBA project, compiling might be instantaneous or it might take a few moments. If VBA recognizes errors in your code, it will select the code containing the error and display a message box telling you the type of error. Learn about recognizing, fixing, and managing errors under the heading that follows.
Errors can occur when you compile a project or when you attempt to run a macro. Following are a few of the most common error types, along with their corresponding error numbers.
"Type Mismatch" (error number 13) indicates that you’re trying to act on an item in an unavailable way, such as if you define an integer variable for the response to an input box that requires a text string response. Note that the absence of this error doesn’t guarantee that you’ve assigned the correct data type to your variable because VBA can automatically allow for incorrect data types under some circumstances.
"Method or Data Member Not Found" (error number 461) usually indicates that you either misspelled a term or you referenced an item that doesn’t exist.
"Requested Member of the Collection Does Not Exist" (error number 5941) appears when you run a macro on a range that doesn’t include the object you specified to act on. For example, this would occur if your macro includes the statement
ActiveDocument.Tables(3).Deleteand two or fewer tables are in the active document."Object Required" (error 424) indicates that you need to specify an object upon which to act. This error might occur, for example, in a
For Each...Nextloop when you don’t correctly define the collection of objects upon which you want to act. A similar error may appear as "Object Doesn’t Support This Property or Method."
Note
Error numbers are provided in the preceding list because it is possible to correct for individual errors—that is, to write code that enables your macro to respond differently to different errors. When you do this, you need to identify the error by number, as discussed later in this section, in "Creating Error Handlers".
When an error occurs while you’re compiling a project, the error statement is selected and a message box appears telling you the type of error and offering help. If you click the help option, an article explaining the error type is opened in most cases.
If an error occurs when you run a macro, a similar message box appears to indicate the error type, but it provides the options End, Debug, and Help. Just as with compile errors, the help option usually provides an article with more information on the error type. (Note also that clicking the help option doesn’t close the error message for either compile or runtime errors.) Click End to dismiss a runtime error message if you’re familiar with the error and know where to find it. Or, click Debug for guidance in correcting a runtime error.
When you click Debug, the statement that caused the error is highlighted. (Note that, by default, the statement is highlighted in yellow with a yellow arrow at the margin indicator bar, but you can customize this formatting in the Options dialog box.) This also puts the program into Break mode, which stops code from executing. When this occurs, "[break]" appears in the title bar after the project name. To exit Break mode, which removes the highlight from the error statement, click the Reset button on either the Standard toolbar or the Run menu. (Note that Break mode also restricts many actions in the application window. So, resolve the error and turn off Break mode before you return to working in the applicable program.)
If a compile error occurs at runtime (meaning that you didn’t compile the code, but ran a macro that contains a compile error), the project goes into Break mode when you click OK to dismiss the error message. The title line of the macro that caused the error is highlighted and the error statement is selected.
When you’re not sure of the cause of an error, there are several ways to go about finding it efficiently. Some of these options can also be used when you want to see the results of just a portion of your code at a time, even if errors don’t occur. A few of the easiest options for testing or debugging code are described in the following list.
You can step into a macro to execute one line at a time and see the results as you go. To do this, click in the macro and then press F8 to start executing the macro one line at a time. Press F8 again each time you want to run the next statement.
You can also click in a specific line in the macro and then press Ctrl+F8 to execute the macro up to the line where your insertion point appears.
Use a breakpoint to run a macro using a traditional method (such as by pressing F5 from the Visual Basic Editor or running the macro from the Quick Access Toolbar) but execute statements only up to a specified line of code. To add a breakpoint, click the margin indicator bar to the left of the line of code. A circle appears on the window edge where you clicked, and the statement is shaded (in burgundy, by default), as you see in the following image.
If you’re not sure where to click, you can right-click in the statement instead, point to Toggle, and then click Breakpoint. To remove a breakpoint, just click the circle that appears to the left of the statement. (As with error notifications, you can customize the formatting of breakpoints in the Options dialog box.)
You can comment out a block of code, so that it gets skipped when a macro runs. This is a great tool to use when you want to try running just part of your macro, especially if you have lines of code that aren’t finished (which would otherwise throw an error when you run the macro). To do this, right-click the toolbar area and then click Edit to open the Edit toolbar. On that toolbar, you’ll find Comment Block and Uncomment Block buttons as shown here, which add or remove an apostrophe from in front of each selected line of code.

When you write macros, particularly for others to use, it’s a good idea to try to account for any errors you can control. You can account for many possible errors with conditional structures to protect the macro from conditions you know would cause an error. For example, if the macro acts on the active document, you can set the macro to end without taking any action if no documents are open, as shown in "Setting Macros to Conditionally Stop Executing Commands".
However, you might also want to set up error handlers to manage what the user sees if an unexpected error occurs. In some cases, you might even know that certain conditions could cause an error, but find it more efficient to add an error handler than to write code to account for every possibility.
The two most common types of error handlers are the statements On Error Resume Next and. On Error GoTo ErrorHandler. Let’s look at those one at a time.
Use On Error Resume Next when a given instance of a loop, for example, might throw an error under certain conditions, but you’d still want the loop to continue running after it encounters an error. To do this, type On Error Resume Next on its own line early in the macro, before any code that could possibly throw the error for which you want the handler to correct. Then, if the possible error occurs, the user won’t be notified—the code will just skip the instance it couldn’t act on and continue on its merry way.
Use On Error GoTo... when you want to control what happens when an error occurs. For example, you might write an error handler that contains a message box telling the user that an error has occurred and what to do to correct it. Take a look at the following example.
Sub Sample()
On Error GoTo MyHandler
<code statements>
End
MyHandler:
MsgBox "Please place your insertion point in the table you want to copy before running this macro.", vbExclamation, "Please Try Again"
End Sub
Notice that this handler consists of an On Error GoTo... statement as well as another statement with the name of the handler followed by a colon (both in bold in the preceding sample). You can name the handler anything you like, within VBA naming conventions. Notice also the End statement that precedes the error handler, so that a macro that doesn’t throw an error ends before the error handler is executed. If you call one macro from another, use Exit Sub in place of the End statement shown in the preceding example. The End statement ends all code execution. Exit Sub exits the active macro and returns to the macro from which it was called.
What this error handler indicates is that, if an error occurs, the code stops executing and moves to the line following MyHandler: to continue executing code from that point. In this case, the handler just displays a message box giving the user information on why they couldn’t run the macro.
Note
A term followed by a colon is known as a Line Label. It’s simply a way of naming a position in your code. If you weren’t using an error handler, you could just type GoTo SampleName where you want the code to pick up at another position in the macro and then precede the new position with a line that reads SampleName:.
Caution!
If you add an error handler of any kind to your macro, be sure to comment that line out (add an apostrophe in front of the statement) when you test the macro. Otherwise, any errors might be ignored, causing you not to see the reason for an unexpected result. Also remember that an error handler can’t account for code that comes before it. So, be sure to place an error handler before any code that might cause the error you want to address.
When deciding on how to handle errors for a particular macro, consider whether accounting for possible conditions or adding an error handler is the more effective way to go. For example, in the preceding code sample, if you just need the user to click in a table before running the macro, you might have added the following code at the beginning of the macro instead of an error handler.
If Selection.Information(wdWithinTable) = False Then
MsgBox "Please place your insertion point in the table you want to copy before running this macro.", vbExclamation, "Please Try Again"
End If
As mentioned earlier in this chapter, you can identify different actions to take in an error handler based on the type of error. One way to do this is to use another type of conditional structure referred to as Select Case.
Similar to an If...Else...End If structure, the Select Case...End Select structure enables you to specify different actions based on conditions you identify. Select Case is not at all strictly for error handlers, but it’s mentioned here because trapping individual errors offers a good example of using this type of structure.
While If...End If structures evaluate each If, Else If, or Else expression independently, you can use a Select Case structure when you want to compare several possible results to a single expression. Take a look at the following code, for example, that uses one of the input box macro examples from earlier in this chapter.
Dim myInp As Integer
ResumeInputBox:
On Error GoTo ErrorHandler
myInp = InputBox("How many columns would you like?", "My Input Box")
With Selection
   .Tables.Add Range:=.Range, NumRows:=5, NumColumns:=myInp
End With
End
ErrorHandler:
Select Case Err.Number
   Case 13
         MsgBox "Please enter a numeric value to continue.", vbInformation
         Resume ResumeInputBox
   Case Else
         Msgbox Err.Description
End Select
Similar to an If...End If structure, you can identify several cases with the Select Case structure and provide for all cases not specified with a Case Else statement. As with all paired structures, remember to add End Select at the end of the structure, or your code will return an error.
Of course, you can search for help using the Type A Question For Help box on the Visual Basic Editor menu bar. But, there are often faster ways to get to exactly what you need.
In the case of error messages, remember that the Help button in those message boxes takes you directly to a help article on that specific error message. If, however, you need information on an error message any time other than right when it occurs, search for the topic Trappable Errors—available from the Visual Basic Editor in Word, Excel, and PowerPoint. You can then use Ctrl+F for the find feature, to quickly locate the name or number of the particular error you need. The Trappable Errors article lists each error with a hyperlink to its article.
In the case of any object model member, right-click the name of the item where it appears in the code and then click Definition. This opens the Object Browser to the selected item—which might be enough information if you just need, for example, to see the available members of a selected object.
However, in the Object Browser, you can right-click any item and then click Help to open the help topic on that article. Note that some items, such as individual constants, might not have help articles—but articles are available for most members of the active object model.
You can export a module of code (as well as some other project elements, discussed later in this chapter), which is the equivalent of saving a copy of the file. To do this, right-click the module in the Project Explorer pane and then click Export. Choose a location and name the file, following file naming conventions. The file name doesn’t need to match the module name. Notice also that VBA modules have the file extension .bas.
To import a module of code, such as the samples available on this book’s CD (discussed in the next section), right-click the project in Project Explorer and then click Import. Browse to and select the .bas file you need, just as if you were opening a document.
Caution!
If you export or import modules, remember that some modules refer to code outside of the module itself, such as when the project contains a UserForm (discussed in "Creating UserForms (Dialog Boxes)") or when one macro calls another from a different module in the project. Be sure that you’re aware of the project components that need to work together, so that you export or make note of everything you’ll need when you or someone else imports that content later.
Because you can share an entire VBA project by sharing the Word, Excel, or PowerPoint file in which the project is stored, exporting is more often used as backup. This is often a good idea, because if you lose a document or template, you of course lose any code it contained.
In particular, if you store a module of document production macros, for example, in Normal.dotm, exporting that module periodically for backup is an important safety measure, considering that you might solve some Word performance issues by deleting Normal.dotm and allowing Word to regenerate a new default template, in which case your macros would be lost.
To share an entire project, just compile the project, save the file, and share it as you would any file. Keep in mind, of course, that some networks block Microsoft Office files that contain macros—so you might want to either compress the file into a zip container (though, keep in mind that many networks search compressed files for prohibited file types) or arrange another method of safely sharing the project with others.
Some macro projects need to be saved as particular file types, such as for Excel and PowerPoint add-ins. Additionally, signing projects can help to avoid systems or programs blocking your macros.
You can also protect your code when sharing projects—such as when you want others to be able to use the macros, but not to be able to see or copy your source code. To do this, select the project in Project Explorer. Then, on the Tools menu, click <Project> Properties.
In this dialog box, you can rename the project (following VBA naming conventions), which does not affect the file name of the document, template, or add-in where the project resides. You can also click the Protection tab to require a password to view the code. You must enable the Lock Project For Viewing option and provide a password for this to work. When you do, double-clicking the project in Project Explorer will display a box where you can type the password. Without the correct password, the macros can still be run from the user interface, but their code can’t be viewed.