This part of the chapter describes how to protect workbooks, how to use more than one workbook at a time, and how and why to split your view of a workbook into multiple windows. Generally when you start Microsoft Office Excel 2007, a blank workbook appears with the provisional title Book1. The only exceptions occur when you start Office Excel 2007 by opening an existing workbook or when you have one or more Excel files stored in the XLStart folder so that they open automatically.
If you start Excel with Book1 visible and then open an existing Excel file, Book1 disappears unless you have edited it. You can open as many workbooks as you like until your computer runs out of memory.
Note
For more about working with multiple windows, see "Opening Multiple Windows for the Same Workbook".
If you have more than one workbook open, you can activate a particular workbook in any of the following three ways:
Click its window, if you can see it.
If you have all your workbook windows maximized, you can shuffle through the open workbooks by pressing Ctrl+Tab to activate each workbook in the order you opened them. Press Shift+Ctrl+Tab to activate them in reverse order.
On the View tab on the Ribbon, click a window name on the Switch Windows menu, which lists as many as nine open workbooks or, if you have more than nine, displays a More Workbooks command that presents a dialog box that lists all the open workbooks.
To make all open workbooks visible at the same time, click the View tab, and click Arrange All. Excel displays the Arrange Windows dialog box, shown in Figure 12-30, which also shows the workbooks arranged in the Tiled configuration with the screen divided into a patchwork of open documents. Figure 12-31 shows the same workbooks in the Horizontal configuration.

Figure 12-30. Clicking View, Arrange All opens the Arrange Windows dialog box, which gives you a choice of configurations.

You’ll find the 2008 Projections.xlsx, Humongous08.xlsm, and Pacific Sales.xlsm files in the Sample Files section of the companion CD.
If you select the Windows Of Active Workbook check box in the Arrange Windows dialog box, only the active workbook is affected by the configuration setting, and then only if more than one window is open for the active workbook. Excel arranges those windows according to the option you select under Arrange in the Arrange Windows dialog box. This is handy if you have several workbooks open but you have multiple windows open for one of them and you want only to arrange these windows without closing the other workbooks.
Note
For more information about working with multiple worksheets from one workbook, see "Opening Multiple Windows for the Same Workbook".
You can maximize the workbook window if you need to see more of the active worksheet, but if that still isn’t enough, you can click the Full Screen button on the View tab. When you do so, Excel removes the formula bar, status bar, Quick Access Toolbar, and Ribbon from your screen—everything except the maximized workbook—as shown in Figure 12-32.
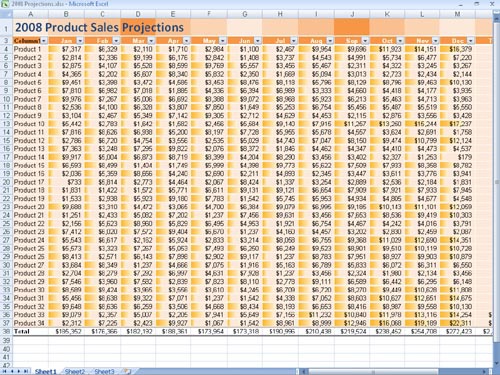
Figure 12-32. Clicking View, Full Screen hides the formula bar, status bar, Quick Access Toolbar, and Ribbon to maximize the screen space available for viewing your data.
To return the screen to its former configuration, press Esc.
The Full Screen button provides a convenient way to display the most information on the screen without changing the magnification of the data using the Zoom controls. For more information, see "Zooming Worksheets".
Note
When you save a workbook, Excel also saves its characteristics, such as the window’s size, position on the screen, and display settings. The next time you open the workbook, the window looks the same as it did the last time you saved it. When you open it, Excel even selects the same cells you selected when you saved the file.
The Arrange All button on the View tab is extremely helpful if you need to compare the contents of two similar workbooks, but another feature makes this task even easier. The View Side By Side button essentially packages the Horizontal window arrangement option with a couple of useful features to make comparison chores a lot easier. The View Side By Side button lives in the Window group on the View tab; it is the top button located to the left of the Save Workspace command, as shown in Figure 12-33.

Note
The Ribbon on your screen may look different from what you see in this book. The Ribbon display adjusts to the size of your screen, its resolution, and the size of the Excel window. For example, the six buttons in the middle of the Window group on the View tab may not display adjacent text labels if you have a smaller display or if Excel is not maximized.
You can click the View Side By Side button to arrange any two open windows, even if they are windows for the same workbook (as described in the next section). But unlike the Arrange button, View Side By Side performs its trick on no more or less than two windows. After you click the button, you will see a Compare Side By Side dialog box like the one shown in Figure 12-34 if you have more than two windows open. If so, select the window you want to compare, and click OK; this opens and arranges it along with the window that was active when you clicked View Side By Side. (The button name is a little bit misleading, because the windows are actually arranged horizontally—not really "side by side" but one above the other.)

After you activate "side-by-side mode," the two buttons below the View Side By Side button become active, as shown in Figure 12-34. The Synchronous Scrolling button locks the two windows together wherever they happen to be so when you scroll in any direction, the inactive window scrolls in an identical fashion. The Reset Window Position button puts the active window on top, which is handy. The window that is active when you click the View Side By Side button is the one that appears on top. If you want the other window on top, click the other window, and then click the Reset Window Position button to place it in the top position.
The View Side By Side button is a toggle—to turn off side-by-side mode and return to Normal view, click the View Side By Side button again.