
InDesign Lesson 1: InDesign CC Essential Skills

This lesson gets you started with InDesign CC, covering essential skills necessary for working efficiently with InDesign documents. It provides a high-level overview of key concepts associated with creating layouts using InDesign. You’ll work with an existing document to understand how to navigate, place graphics, and add formatting to text, creating a finished newsletter that can be printed or distributed as a digital document.
What you’ll learn in this lesson:
- • Understanding the InDesign CC Workspace
- • Working with panels and tools
- • Navigating through InDesign documents
- • Importing text and images
- • Using styles to quickly format text and objects
Starting up
Before you begin, make sure that your tools and panels are consistent by resetting your preferences. (For more information, see “Resetting the InDesign workspace and preferences” in the Starting up section of this book.)
In this lesson, you will work with several files from the id01lessons folder. Make sure that you have copied the CClessons folder onto your hard drive from www.digitalclassroombooks.com/CC/DesignTools. For more information, see “Loading lesson files” in the Starting up section of this book. If you are completely new to InDesign and don’t have much computer experience, it might be easier to follow the lesson if the id01lessons folder is placed on the desktop of your computer. This lesson provides an overview of InDesign concepts. After completing this lesson, you’ll examine individual capabilities and features in more details in each of the remaining lessons. It might be helpful to view this lesson as a broad survey, providing you with a general understanding of the InDesign landscape, while the remaining lessons provide much more detail about specific InDesign capabilities.
InDesign tools
You’ll use InDesign’s tools for creating or modifying everything that appears in your documents, including text, images, and multimedia elements for digital documents. You’ll also use InDesign’s tools for navigating around the document. All tools are found in the Tools panel, located along the left side of your screen.
Many tools displayed in the tools panel have related tools that provide additional functionality, and you can select these related tools by clicking and holding the tool that is displayed in the tools panel. You can identify the tools with additional functionality by the small arrow in the lower-right corner. You can also right-click (Windows) or Ctrl+click (Mac OS) any tool to access related tools.
If you place your cursor over any tool in the Tools panel without clicking, a tooltip appears displaying the tool’s name and a keyboard shortcut in parentheses. You can use the keyboard shortcut to access a tool from your keyboard, instead of clicking it with your mouse.

Use the InDesign CC Tools panel to create objects, make selections, and modify objects and pages.
The InDesign workspace
InDesign documents are displayed in the center of the work area, while panels that let you control objects or perform specific tasks are displayed along the right side of the workspace in the panel docking area. InDesign uses many panels, and many are critical for editing and design work you perform. InDesign includes various workspaces that provide easy access to the panels and tools you’ll use for specific tasks. Let’s take a closer look at the InDesign workspace, including the document window and panels.
The document window
InDesign pages are displayed within a black border. Anything positioned within this area appears in the final product. The area outside of the black border is referred to as the pasteboard. Anything that is placed completely outside this black border on the pasteboard is generally not visible when the final document is distributed.
You can use the pasteboard to temporarily hold elements while designing your project. You can move design elements such as images from the pasteboard to the page, trying different layout variations. The pasteboard can also be useful for placing notes to colleagues (or to yourself) regarding the project. To get a better understanding of the InDesign workspace, you’ll open up the completed project, reset the workspace, and look at the work area.
1 Choose File > Open. In the Open a File dialog box, navigate to the id01lessons folder and select the id01_done.indd file. Click Open.
2 Choose Window > Workspace > Typography. Panels containing controls that help you work with type are now displayed.
 You can also use the dedicated Workspace switcher to switch to a specific workspace. The Workspace switcher is located in the Application bar above the Control panel. The Workspace switcher displays the name of the current workspace and can also be used to change between workspaces or to reset the current workspace. The selected workspace determines the panels to display and the menu items that are available. The number of available panels and menu choices is based upon the selected workspace.

The workspace switcher makes it easy to display specific panels and menus depending upon your needs.
3 Choose Window > Workspace > Reset Typography to reset the InDesign panels to their default positions for the Typography workspace. This ensures that your panels are in position, making them easier to locate during this lesson.

A. The document window. B. The page border (black lines). C. Bleed guides. D. Margin guides. E. Column guides. F. The pasteboard.
Using guides
Non-printing guides help you align content on your page and create an organized layout. There are several types of guides, but the essential guides for starting to work with InDesign are margin guides and ruler guides. Margin guides define the space around the edge of your document: a space you generally want to keep free from objects. White space around the edge of your document creates good design, and also eliminates the risk of content being cut off if your document is printed and trimmed to a specific size at a printing plant. Margin guides are displayed in magenta by default, immediately inside the page border. By default, they display one-half inch inside of the page edge, but you can adjust them, as you will learn in InDesign Lesson 2, “Working Smarter with Master Pages.”
Ruler guides are the other type of guide you should add to your document layout. Ruler guides are created manually by dragging them from the rulers onto the page. Both ruler guides and margin guides are useful, but they can also be distracting when you want to see the elements of your page design. In such a case, you can hide the guides.
1 Choose View > Grids & Guides > Hide Guides, or use the keyboard shortcut Ctrl+; (Windows) or Command+; (Mac OS), to hide all the guides in the open document.
2 Choose View > Grids & Guides > Show Guides, or use the keyboard shortcut Ctrl+; (Windows) or Command+; (Mac OS), to show all the guides in the open document.
3 You can show or hide guides by toggling back and forth using these commands.
Another type of guide is the liquid guide, which is used to help adjust the layout of an InDesign page when it is displayed as a digital document. Liquid Guides is a more advanced topic and is covered in Lesson 11 of of the Adobe InDesign CC Digital Classroom book.
Viewing modes
You can use viewing modes to hide guides and other items that will not display when the final document is printed or distributed. This provides a fast-and-easy way to preview your document. You can even turn your document into a presentation.
The viewing modes option lets you choose whether all content and guides display on your monitor, or whether InDesign displays only content that is positioned on the page and will print. Here you will explore the various viewing modes.
1 At the bottom of the Tools panel, click and hold the Mode button (![]() ) and choose Preview from the available modes. Notice that the entire pasteboard appears gray and all elements located on the pasteboard are hidden. The borders do not display around any items on the page if they are not selected.
) and choose Preview from the available modes. Notice that the entire pasteboard appears gray and all elements located on the pasteboard are hidden. The borders do not display around any items on the page if they are not selected.

Click the display mode button at the bottom of the Tools panel to change how a page is displayed using InDesign.
2 Click and hold the Mode button again and choose Bleed from the menu. This shows the allowable bleed area that was specified when the document was created. Bleed is an area outside of the page that is intentionally used by designers so that any inaccuracies in the cutting, trimming, and binding process do not create a visible white space along the edge of an object that is intended to print all the way to the edge of a document. This mode is useful when you need to make sure that all the elements on your page extend to a specific bleed value. In this document, the bleed is set to 1/8 inch, which is a standard bleed value in the printing industry.
3 Click and hold the Mode button again and choose Presentation from the menu. This mode presents your document on a black background with no distracting interface elements. This is great for viewing your document or showing it to a client. When in this mode, you can navigate through the pages of your document by using the up and down or left and right-arrow keys on your keyboard as well as the spacebar. To exit Presentation mode, press the Escape key on your keyboard.
4 Click and hold the Mode button again and choose Normal.
 You can also use the shortcut key W on your keyboard to switch between Preview and Normal modes, and Shift+W to activate Presentation mode, or you can use the Screen Mode button in the Application bar. Keep in mind that keyboard shortcuts do not work if you are using the Type tool and working with text inside a text frame.
Working with panels
Another important part of the InDesign workspace are the panels used to modify and create objects. You can access panels by clicking their name in the panel docking area, or choose the panel you want to access from the Window menu.
The Tools panel
The Tools panel is located on the left side of your screen and contains all the tools necessary to draw, add, or edit type, and edit items in your document. The Tools panel appears as a single column attached to the left side of your screen. You can modify the appearance and location of the Tools panel to accommodate your needs.
1 Click the double-arrow icon (![]() ) at the top of the Tools panel. The Tools panel changes from a single column to a double column. If the Tools panel is not docked, you have a third option when you click the double-arrow; it changes to a horizontal layout, then to a single column, and then a double column each time you click. Go to step 2 to learn how to dock and undock panels in InDesign.
) at the top of the Tools panel. The Tools panel changes from a single column to a double column. If the Tools panel is not docked, you have a third option when you click the double-arrow; it changes to a horizontal layout, then to a single column, and then a double column each time you click. Go to step 2 to learn how to dock and undock panels in InDesign.

Clicking the double-arrow icon at the top of the Tools panel changes its appearance between a one-column, two-column, or horizontal layout.
2 Click the dark gray bar at the top of the Tools panel, and while pressing and holding the mouse button, drag the panel to the right, into the document area. Release the mouse button when over the document area. The Tools panel is repositioned as a free-floating panel at the location where you released the mouse button. You can position the panel anywhere on your display, or return it to the docking area on the side of the workspace.
3 Click the dark gray bar at the top of the Tools panel and drag the panel to the right so that it is positioned just to the left of the panels. A blue, vertical bar appears. Release the mouse button; the Tools panel is docked to the right of your screen. If you have trouble moving the panel by clicking the dark gray bar, click the dotted area just below the dark gray bar at the top of the Tools panel to reposition and dock the panel.

The tools panel can be docked along either the left or the right side of the InDesign workspace by dragging it into position using the dotted line near the top of the panel. Here the tools panel has been docked along the right side of the workspace.
Managing panels
InDesign’s panels are essential for your design work. They help you create new objects, edit existing objects, and work more efficiently as you design your documents. The various workspaces include different panels that are docked at the right side of the document window. The available panels change based upon the selected workspace. You can add panels to the workspace as you need them, or remove panels. When the panels display only their name or icon, they are in collapsed mode. Collapsed mode saves screen space by providing you with easy access to many panels, and only displaying the full panel when you need to access all the controls. Here you will work with the various display modes available for panels.
1 Click the double-arrow icon (![]() ) at the top-right corner of the docked panels that are in collapsed mode along the right side of the document window. Notice how all the docked panels expand to reveal their options.
) at the top-right corner of the docked panels that are in collapsed mode along the right side of the document window. Notice how all the docked panels expand to reveal their options.
2 Click the double-arrow icon again to collapse the dock and return the panels to their previous state.
3 Click the Pages button in the dock. This reveals the entire contents of the Pages panel. When you click a panel button, only the individual panel expands.
4 Click the Pages button again; the panel closes and is displayed only as a button.
5 Place your cursor along the left edge of the panel docking area, between the docked panels and the toolbar panel. When the cursor changes to a double-arrow (![]() ), drag the panels to the right until the panels display only as icons. Click and drag back to the left so the panels display as icons along with their name.
), drag the panels to the right until the panels display only as icons. Click and drag back to the left so the panels display as icons along with their name.

Click and drag the panel docking area to the right so the panels take up less space and display only their icons.
6 Click and drag the Pages button, moving it to the far-left side of the document window. When a vertical bar appears, release the mouse button. The Pages panel is docked to the left side of the document window.
You can place panels anywhere on your workspace, including over the document or on either side of the work area, and customize panels in any way that makes it easier for you to work. Keep the panel in this location, since you will work with customizing workspaces in the next exercise.
Saving your workspace
Once you have selected the panels that you need, and positioned them in the locations that let you work most efficiently, you can save the location of the panels as a workspace.
Once you have saved a workspace, you can quickly access the exact panels displayed and their location by returning to the default setup of that workspace.
1 From the Workspace drop-down menu, located in the Application bar to the left of the Help search text field, choose New Workspace.

Choose New Workspace from the Workspace switcher in the Application bar to save the panels you are using and their location in the workspace.
2 In the New Workspace window, type My Workspace in the Name text field and then click OK, leaving all the settings at their defaults.

Saving your workspace allows you to easily restore the panel positions.
You’ve now saved the locations of your panels.
3 From the Workspace switcher drop-down menu, choose Typography. Then click the Workspace switcher drop-down menu again and choose Reset Typography. Note how the panels revert to their default locations.
4 From the Workspace switcher drop-down menu, choose My Workspace. Alternatively, choose Window > Workspace > My Workspace. All the panels are restored to their location that was part of the workspace you saved earlier in this project.
You can create and save multiple workspaces. Workspaces are not document-specific; you can use them in any document. Before proceeding to the next section, reset your workspace to the default Typography workspace using the Workspace switcher drop-down menu. This allows the panels to match the descriptions used in the remainder of this lesson. If necessary, you can also choose Reset Typography from the Workspace switcher drop-down menu to reset the workspace to its default appearance.
Working with the Control panel
The Control panel appears across the top of the workspace. The panel is contextual, so the content of the panel changes depending on the tool you are using and the object you have selected.
1 Choose the Selection tool (![]() ) in the Tools panel. The Control panel changes based upon the tool being used and the items selected in the layout.
) in the Tools panel. The Control panel changes based upon the tool being used and the items selected in the layout.
2 Using the Selection tool, click the headline, Fending off the winter blues, positioned at the top of the page. The Control panel now displays information about this text frame.
3 Double-click the same headline. When you double-click the text frame, the Selection tool switches to the Type tool. The Control panel now displays information relating to the text.

The Control panel displays information about objects in your layout. The information displayed changes based upon the tool used for selection and the object selected. The icons displayed in the Control panel on your computer might differ slightly based on the resolution of your computer’s display.
Navigating through an InDesign document
In this exercise, you’ll continue working with the id01_done.indd file, which is the completed newsletter that you opened at the beginning of the lesson. You’ll explore the tools used to navigate to different pages in an InDesign document, and how to change the document’s magnification to see more or fewer details in the document layout.
Using the Pages panel
The Pages panel provides a quick overview of the contents of each page in an InDesign document. You can use it to navigate between document pages, rearrange pages, and add or remove pages. You can also use it to create transitions between pages that are distributed as electronic documents, and create page variations such as portrait and landscape variations for use on a tablet.
1 Click the Pages button (![]() ) in the dock at the right of the workspace to display the Pages panel. The bottom-left corner of the Pages panel indicates that there are four pages displayed in three spreads within this document.
) in the dock at the right of the workspace to display the Pages panel. The bottom-left corner of the Pages panel indicates that there are four pages displayed in three spreads within this document.

You can use the Pages panel to add and delete pages as well as navigate between pages within your InDesign documents.
2 Double-click page 2 in the Pages panel to display page 2 of the document. The left page of the inside spread, which is page 2, appears in the document window.
3 Double-click page 4 in the Pages panel to display page 4 of your document.
 If you are unable to see all the pages displayed in the Pages panel, you can make the panel larger by clicking and dragging the bottom-right corner of the panel. You can also scroll through the pages in the Pages panel by using the scroll bar along the right side of the panel or the scroll wheel on your mouse.

Use the Pages panel to navigate to the different pages in your document.
Changing the magnification of your document
You might want to get a closer look at parts of your document to align objects, check the spacing of type, or the position of items in your layout. InDesign makes it easy to change the magnification so you can zoom in on parts of your document, or zoom out to get a birds-eye view of your layout.
1 In the Pages panel, double-click the page 1 icon to display the first page of the document.
2 Select the Zoom tool (![]() ). Using the Zoom tool, click and hold the upper-left corner of the Spinnews logo at the top of the page, and then drag down to the lower-right corner of the logo. Release the mouse once you have reached the lower-right corner of the logo. The area you have selected with the Zoom tool is magnified.
). Using the Zoom tool, click and hold the upper-left corner of the Spinnews logo at the top of the page, and then drag down to the lower-right corner of the logo. Release the mouse once you have reached the lower-right corner of the logo. The area you have selected with the Zoom tool is magnified.
You might have enlarged the document too much or not enough. To fine-tune the magnification, click with the Zoom tool to increase the magnification incrementally. If you zoomed in too close, decrease the magnification by pressing and holding the Alt (Windows) or Option (Mac OS) key while clicking with the Zoom tool.

Click and drag to increase the magnification of a specific area.
 You can also increase or decrease the magnification of the document by using the keyboard shortcut Ctrl+plus sign (Windows) or Command+plus sign (Mac OS) to zoom in on a document, or Ctrl+minus sign (Windows) or Command+minus sign (Mac OS) to zoom out. If you have an object selected or your cursor is inserted within a text frame when using these key commands, the page will center on the selected object or cursor when changing the magnification.
3 Select the Hand tool (![]() ) from the Tools panel, and then click and hold the page in the document window. The page magnification changes and a red frame appears, indicating the portion of the document that will be visible when you finish scrolling.
) from the Tools panel, and then click and hold the page in the document window. The page magnification changes and a red frame appears, indicating the portion of the document that will be visible when you finish scrolling.
4 Use the Hand tool to arrange the page so that the logo is in the center of your document window. The Hand tool is used to move pages within the document window, allowing you to focus on specific areas of the layout.
5 Click and hold the page in the document window. Position the red frame so the entire border of the image is visible, and then release the mouse. The zoom returns to its original level, focused on the part of the page you identified using the Hand tool.
 You can access the Hand tool temporarily by pressing and holding the spacebar on your keyboard when using any tool except the Type tool. When the spacebar is pressed, the cursor changes to the Hand tool. If you have the Type tool selected, press and hold the Alt (Windows) or Option (Mac OS) key to temporarily access the Hand tool.
6 To view the entire document, choose View > Fit Page in Window or press Ctrl+0 (Windows) or Command+0 (Mac OS). The currently selected page is displayed inside the document window.
7 Choose File > Close to close the document. If asked to save, choose No (Windows) or Don’t Save (Mac OS). You’ve completed your tour of the InDesign workspace, and will move into a tour of working with type.
Working with type
You have significant control over the appearance, formatting, and placement of type, and you can save formatting attributes to easily reapply them to other text so you can work efficiently while maintaining a consistent appearance across your documents. In this section, you’ll add the finishing touches to a document by applying formatting to text, thereby completing the layout.
Entering and formatting type
When you add text to an InDesign layout, you will almost always place it inside a frame. Frames are containers that hold text, but they can also hold graphics or even just a color, such as a shape in a design or a background color. In this exercise, you’ll be working with text frames.
1 Choose File > Open. In the Open a File dialog box, navigate to the id01lessons folder and select the id01.indd file. Click Open. You will use this project file for the remainder of the lesson.
2 It’s a good idea to save a working copy of your document. To do this, choose File > Save As. In the Save As dialog box, navigate to the id01lessons folder. In the Name text field, type id01_work.indd, and then click Save. This allows you to work without altering the original file.
3 If necessary, click the Pages button (![]() ) in the docking area along the right side of the workspace. The Pages panel opens. In the Pages panel, double-click page 1 to center this page in the workspace.
) in the docking area along the right side of the workspace. The Pages panel opens. In the Pages panel, double-click page 1 to center this page in the workspace.
4 In the Tools panel, click to select the Type tool (![]() ). You will use the Type tool to create a new text frame. Position your cursor along the left side of the page, where the left margin guide and the first horizontal guide meet. Click and hold, then drag down and to the right, to the location where the right margin guide and the second horizontal guide meet. Release the mouse button. A new text frame is created, and a cursor blinks in the top-left corner of the new frame you have created.
). You will use the Type tool to create a new text frame. Position your cursor along the left side of the page, where the left margin guide and the first horizontal guide meet. Click and hold, then drag down and to the right, to the location where the right margin guide and the second horizontal guide meet. Release the mouse button. A new text frame is created, and a cursor blinks in the top-left corner of the new frame you have created.

Use the Type tool to create a new text frame. All text in an InDesign layout is placed within frames.
5 Type Fending off the winter blues with cross-training in the text frame you created in the previous step. The text appears in the default font and size. Keep the cursor within this text frame, and keep the Type tool selected.
6 In the panel docking area along the right side of the workspace, click the Paragraph Styles button (![]() ) to open the Paragraph Styles panel. Click to select the Heading style from the list of available styles in the Paragraph Styles panel. The Heading style is applied to the paragraph, which includes all the text within this frame. This saved style includes a variety of formatting attributes including font, style, and size. You’ll learn to create your own paragraph styles in InDesign Lesson 4, “Using Styles to Save Time.”
) to open the Paragraph Styles panel. Click to select the Heading style from the list of available styles in the Paragraph Styles panel. The Heading style is applied to the paragraph, which includes all the text within this frame. This saved style includes a variety of formatting attributes including font, style, and size. You’ll learn to create your own paragraph styles in InDesign Lesson 4, “Using Styles to Save Time.”

Paragraph styles make it easy to save and reapply multiple formatting attributes to text.
7 The top line of the sentence is much longer than the bottom line. To balance the lines, click the panel menu button (![]() ) in the top-right corner of the Control panel and choose Balance Ragged Lines from the submenu. InDesign automatically balances the lines within the frame.
) in the top-right corner of the Control panel and choose Balance Ragged Lines from the submenu. InDesign automatically balances the lines within the frame.

The headline after using the Balance Ragged Lines command.
Placing and formatting type
You can add text to an InDesign document by typing text onto the InDesign page, or by importing the text from an external file, such as a Microsoft Word document or an Excel spreadsheet. You can import most major text file formats into an InDesign layout.
1 If you’ve closed the Page panel, click the Pages button (![]() ) in the panel dock to open the Pages panel. Double-click page 2 in the Pages panel. If the Pages panel is covering your work area, click the double-arrows in the upper-right corner of the panel to reduce it to a button, or reposition it so you can see the document page.
) in the panel dock to open the Pages panel. Double-click page 2 in the Pages panel. If the Pages panel is covering your work area, click the double-arrows in the upper-right corner of the panel to reduce it to a button, or reposition it so you can see the document page.
2 Continuing to use the Type tool (![]() ), click inside the empty text frame that covers the center and right columns, under the headline Caring for Those Wheels. The cursor is inserted into the frame. Next you will import text into your layout that was created using word processing software such as Microsoft Word, and saved as a plain .txt file.
), click inside the empty text frame that covers the center and right columns, under the headline Caring for Those Wheels. The cursor is inserted into the frame. Next you will import text into your layout that was created using word processing software such as Microsoft Word, and saved as a plain .txt file.
 You can import a variety of file types into your InDesign layouts. While this example uses a text file, the format could be a native Microsoft Word or even Microsoft Excel file, along with many other file formats.
3 Choose File > Place. The Place dialog box opens. In the Place dialog box, make certain that Show Import Options is not selected and that Replace Selected Item is selected. These options are explained in more detail in InDesign Lesson 3, “Working with and Formatting Text.”
Navigate to the id01lessons folder provided with this book, and then locate and open the Links folder within the id01lessons folder. Choose the file Wheels.txt; then click Open. The text from this file is placed inside your text frame where you had placed the cursor. The text is formatted using InDesign’s Basic Paragraph style. Next you will apply a paragraph style to format the text you imported.
4 Place the cursor at the start of the story. Click the Paragraph Styles button to display the Paragraph Styles panel. Click the paragraph style Body, and the first paragraph is formatted using the Body style. Paragraph styles apply formatting to the paragraph where the cursor is located. You will now apply formatting to multiple paragraphs by selecting them and repeating this process.
5 Use the keyboard shortcut Ctrl+A (Windows) or Command+A (Mac OS) to select all the type within the current frame. From the Paragraph Styles panel, choose Body. All the selected paragraphs are now formatted using the Body style.
6 Choose Edit > Deselect All to deselect the type.
Flowing type
Stories often continue from one page or column to another. You will set up links between text frames so the story flows into multiple columns.
1 In the lower-left corner of the document window, click the page number drop-down menu, then select page 3 to navigate to this page. You can also use this menu to navigate to different pages in your document.
Use the page drop-down menu to navigate between pages.
2 Using the Type tool (![]() ), click inside the first frame on the left side of the page, underneath the headline Race Calendar.
), click inside the first frame on the left side of the page, underneath the headline Race Calendar.
3 Choose File > Place. In the Place dialog box, navigate to the Links folder within the id01lessons folder. Confirm that Show Import Options is not selected, and then click to select the file Calendar.txt; click Open to place this text file into the frame in your InDesign layout.
4 Click to choose the Selection tool (![]() ) in the Tools panel. Click to select the text frame where you imported the text if it isn’t still selected from the previous step. You can tell the frame is selected by small, square handles that appear on the corners of the frame and at the center of each side of the frame.
) in the Tools panel. Click to select the text frame where you imported the text if it isn’t still selected from the previous step. You can tell the frame is selected by small, square handles that appear on the corners of the frame and at the center of each side of the frame.
Notice the red plus sign located in the lower-right corner of the text frame. This indicates that there is more text in the story than fits within this text frame. You will link this text to another frame so it continues in another location.
The newly placed text on the page doesn’t fit into the text frame. InDesign labels this as overset text, displaying a red plus symbol to identify it.
5 Using the Selection tool, click once on the red plus sign in the lower-right corner of the text frame. After you click the red plus sign, the cursor changes, indicating that you are about to link the text so it continues in a new location. Some of the text to be linked is displayed in the cursor. You will use the cursor to indicate where the story continues.
6 Move the cursor to the center of the middle column. Notice that the cursor changes to also show a linked chain. Click to link the first and second frames together. The overset text from the first frame continues into the second frame. Because this story contains more text than fits into these two frames, a red plus symbol now appears at the bottom of the second column. Next you will link the second frame to the third frame, continuing the story.

Linking text from one frame to another.
7 Click the red plus sign on the lower-right corner of the second frame, then click inside the frame located along the right side of the page. The frames in the second and third columns are now linked together. As text runs out of space in the second column, it will continue into the frame in the third column.
8 Choose File > Save to save your work.
You have worked with some essential skills for linking text, and will work with these skills further in InDesign Lesson 3, “Working with and Formatting Text.”
Using styles
Earlier in this lesson, you formatted text by applying a paragraph style. You can use styles to easily and consistently format paragraphs, individual words or letters, as well as entire text frames and tables. Here you will apply styles to both paragraphs and individual characters. You’ll get a more detailed look at creating and using styles in InDesign Lesson 4, “Using Styles to Save Time.”
Applying paragraph styles
Paragraph styles are applied to all the text between two paragraph returns. Whether several sentences or an individual word, InDesign applies styles to the text between two paragraph returns that were entered by using the Enter (Windows) or Return (Mac OS) key on the keyboard when the text was entered, even if the paragraph consists of only a single word.
1 Select the Type tool (![]() ) from the Tools panel, then on the left side of page 3, click anywhere inside the word January located in the first line of the frame on the left side of the page.
) from the Tools panel, then on the left side of page 3, click anywhere inside the word January located in the first line of the frame on the left side of the page.
2 In the Paragraph Styles panel, choose Calendar Month to apply the correct formatting to the word January. Repeat the process to format the words February, and then March to format these words using the same paragraph style. Because these words have a keyboard return before and after them, they are considered to be a paragraph for the purpose of applying styles.
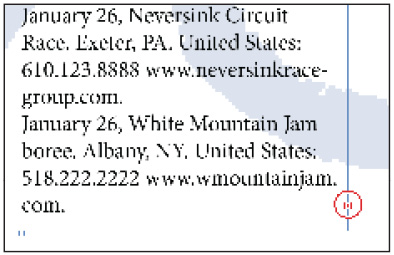
3 Using the Type tool, click and drag to select the text located between the January and February headings, then click the Calendar Event style in the Paragraph Styles panel. Repeat this process to select all the text between February and March, and also all the March events, applying the Calendar Event style to this text.

Format the text using the Calendar Event style from the Paragraph Styles panel.
Notice that the Calendar Event style applies several attributes to the events in a single click, styling the date bold, the name red, and the web address in italic. The Calendar Event style includes several styles that are grouped together into what InDesign refers to as a nested style. A nested style applies several formatting attributes to text within a paragraph in a sequence you can define. You will learn more about nested styles in InDesign Lesson 4, “Using Styles to Save Time.”
Applying character styles
You can also apply styles to individual words or characters within a group of type, formatting only the type you want to change. For example, you can apply common formatting attributes such as bold and italic. Character styles are the foundation for the nested styles that you applied to the event listings in the previous step. Here you will apply a character style to individual words.
1 Double-click page 2 in the Pages panel to display page 2 within the workspace.
2 Using the Zoom tool (![]() ), increase the magnification so you can easily see the first paragraph, which starts with the text Your wheels.
), increase the magnification so you can easily see the first paragraph, which starts with the text Your wheels.
3 Select the Type tool (![]() ) from the Tools panel and select the word wheels at the top of the first paragraph. You can select the word by clicking and dragging using your mouse or by double-clicking the word.
) from the Tools panel and select the word wheels at the top of the first paragraph. You can select the word by clicking and dragging using your mouse or by double-clicking the word.
 When using the Type tool, double-clicking a word selects the word, triple-clicking selects the line, and quadruple-clicking (four clicks) selects the paragraph.
4 Click the Character Styles button (![]() ) in the dock on the right side of the workspace to open the Character Styles panel. Choose Italic from the Character Styles panel to apply the Italic style to the selected word.
) in the dock on the right side of the workspace to open the Character Styles panel. Choose Italic from the Character Styles panel to apply the Italic style to the selected word.

A Character style applies only to selected text.
Apply styles across a story using Find/Change
You’ve seen how you can use Character Styles to easily apply formatting changes to selected text. In the text you are working in, you will change every instance of the word wheels to be italicized, combining character styles with InDesign’s ability to find and then change text formatting.
1 Using the Type tool (![]() ), click once within the wheels story, then right-click (Windows) or Control+click (Mac OS) anywhere within the text frame on page 2 of the document. Choose Find/Change from the contextual menu that appears; it’s near the top of the many choices available in the contextual menu. The Find/Change window opens.
), click once within the wheels story, then right-click (Windows) or Control+click (Mac OS) anywhere within the text frame on page 2 of the document. Choose Find/Change from the contextual menu that appears; it’s near the top of the many choices available in the contextual menu. The Find/Change window opens.
 Contextual menus offer a quick way to access commands that apply to the part of the document in which you are working. The commands change based upon the location of the cursor, the tool you are using, and the object selected. In the previous step, the contextual menu options relate to text because the text tool is selected and the cursor is within a text frame.
2 In the Find/Change window, click in the Text tab and type wheels in the Find what text field, then choose Story from the Search drop-down menu. This tells InDesign to search all the text within the current story to locate the word wheels. A story is defined as all the columns and text frames that are linked together.
3 In the Change Format section at the bottom of the window, click the Specify Attributes to Change button (![]() ). The Change Format Settings window opens.
). The Change Format Settings window opens.
 Be careful not to select the Specify Attributes to Find button, which is an identical button located above the Specify Attributes to Change button.

Click the Specify attributes to change button to modify text attributes in specific words or phrases.
4 In the Change Format Settings dialog box, choose Italic from the Character Style menu and click OK. This changes the format of all text that is found, applying the Italic style to any text InDesign finds within the story.

Choose Italic from the Character Style drop-down menu.
5 Click the Change All button. A window appears indicating that five instances of wheels have been found and formatted using the style attributes you specified. Click OK, then click Done to close the Find/Change dialog box.
InDesign notifies you of replacements it makes using the Find/Change option.
Applying object styles
You can use Object styles to apply formatting to entire objects rather than individual pieces of text or paragraphs. For example, you can use object styles to format entire text frames and picture frames. You can use object styles to quickly and consistently apply borders to objects, or effects such as a drop shadow. Object styles can combine character and paragraph styles so you can apply multiple formatting attributes to a frame and the contents of the frame in a single step. While doing this, you’ll also practice importing text and repositioning objects in a page layout.
Here you’ll place some text into a text frame and then apply an object style to the frame so that the entire frame is formatted in a single click.
1 In the Pages panel, double-click page 1. Once the page is displayed, you might need to decrease the magnification to see the full page depending upon the size of your monitor and screen resolution. If you can’t see the full page, change the display magnification by choosing a smaller percentage from the Zoom level drop-down menu located in the Application bar.
2 If you can’t see the text frame located to the right side of the page in the pasteboard area, choose the Hand tool (![]() ) from the Tools panel, then click and drag from the right to the left until the text frame is visible.
) from the Tools panel, then click and drag from the right to the left until the text frame is visible.
3 Select the Type tool (![]() ) from the Tools panel, and then click to insert the cursor inside the text frame on the pasteboard. Next you will import text that was created using a word processor.
) from the Tools panel, and then click to insert the cursor inside the text frame on the pasteboard. Next you will import text that was created using a word processor.
4 Choose File > Place to import text into this frame. In the Place dialog box, navigate to the Links folder within the id01lessons folder and select the file Sidebar.txt. Confirm that Show Import Options is not selected, and then click Open.
5 Choose the Selection tool (![]() ) from the Tools panel and confirm that the text frame on which you have been working remains selected. If necessary, click the frame to select it.
) from the Tools panel and confirm that the text frame on which you have been working remains selected. If necessary, click the frame to select it.
 You can switch from the Type tool to the Selection tool and select the current text frame in a single step by pressing the Escape key on your keyboard when editing text within a frame.
6 Choose Window > Styles > Object Styles to open the Object Styles panel. In the Object Styles panel, choose Sidebar from the list to apply these attributes to the selected frame. The entire frame, including the text, is formatted.
You can use Object styles to apply background colors, effects, and multiple text styles to a frame in a single click. This makes applying formatting, and keeping your document design consistent, as easy as a single click.

Object styles format entire objects, including text within objects.
7 Using the Selection tool (![]() ), click the middle of the frame and drag it to the column on the right side of the first page, aligning the right edge and bottom edge of the frame with the right and bottom margin guides.
), click the middle of the frame and drag it to the column on the right side of the first page, aligning the right edge and bottom edge of the frame with the right and bottom margin guides.
Working with graphics
Graphics are an integral part of page design, and InDesign puts you in control of cropping, sizing, borders, and effects, thus controlling the appearance of images in your layout. You can place a wide variety of graphic types into your layouts, including PDF, TIFF, JPEG, and EPS. You can also place native Creative Cloud files such as Photoshop (.psd), Illustrator (.ai), and even other InDesign (.indd) documents into your InDesign layout as graphics.
Placing graphics
Like text, graphics are also placed inside a frame when you import them into your layout. You can create the frame first, and then import the image or you can create the frame at the same time you import the image, depending upon how you prefer to design your documents.
1 Double-click page 4 in the Pages panel to display page 4 of the document, then choose Edit > Deselect All so that no objects are selected. If Deselect All is not available in the Edit menu, it means that no objects are selected.
2 Click the Layers button in the panel docking area along the right side of the workspace to display the Layers panel, and then click the Graphics layer to make it active. Selecting this layer before placing a new image into the layout causes the image to be placed on this layer. You can put content on any layer, and create layers to help organize content in your InDesign documents.

Use layers to organize content in your InDesign documents.
3 Choose File > Place. In the Place dialog box, navigate to the Links folder within the id01lessons folder and select the file cyclist.psd; then click Open. Because no frame has been selected, InDesign changes the cursor to represent that an image is ready to be placed in the document.
4 Move the cursor to the upper-left corner of the workspace where the red bleed guides intersect, outside of the page area. Click once to place the image at its full size.
5 If the upper-left corner of the image is not correctly positioned at the intersection of the bleed guides, use the Selection tool (![]() ) to click and drag the image to the correct position. Next you will resize the image to cover the top half of the layout and extend (bleed) off the edges of the layout.
) to click and drag the image to the correct position. Next you will resize the image to cover the top half of the layout and extend (bleed) off the edges of the layout.
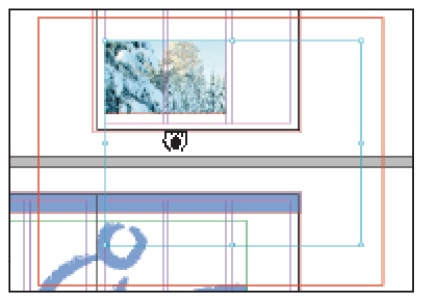
6 To scale the image and also the frame in which it is contained, press and hold Shift+Ctrl (Windows) or Shift+Command (Mac OS). While continuing to press and hold these keys on your keyboard, use your mouse to click and hold the handle located in the lower-right corner of the picture frame, dragging it down and to the right until the image extends off the page. Align the right edge with the bleed guide lines located just outside the page area. Note that using the keyboard commands while scaling the image caused both the frame and image to scale proportionately.

Scaling the image and the frame proportionately.
 Depending upon the resolution of the original image, it is possible to scale the image too much and cause the image to become pixelated or bitmapped. If this occurs, the image will appear unclear when printed or converted to PDF. Most images can be scaled up to 20% without affecting their quality, but it is best to test the image in its final intended format by printing or creating a digital document such as PDF, depending upon your final destination. For more information about image quality and resolution, see the Adobe Photoshop CC Digital Classroom book, which is available in print or digital format.
7 Next you will crop the image by reducing the height of the frame, keeping the image the same size, but reducing the parts of it that will be visible. Locate the center handle along the bottom edge of the picture frame. Click and drag up on this handle until the bottom edge of the frame snaps to the guide located horizontally along the middle of the page. The image remains the same size, but the bottom is cropped and will not print or display when converted to a digital document.
 Moving the handles of a frame using the Selection tool changes the size of the frame and adjusts how much of the image is displayed. If you move the handles while pressing and holding the Shift+Ctrl (Windows) or Shift+Command (Mac OS) modifier keys on the keyboard, you can scale the image and content together.
Positioning graphics within a frame
You might need to crop or scale images that are placed in your layout. Here you will explore tools that help you position and scale the graphics in your documents.
1 Navigate to page 1 by using the page drop-down menu located in the lower-left corner of the document window, or by double-clicking Page 1 in the Pages panel.
2 To focus on the graphics, you’ll hide the Text layer. In the panel docking area along the right side of the workspace, click the Layers button to open the Layers panel, and then click the Visibility icon (![]() ) to hide the contents of the text layer.
) to hide the contents of the text layer.
3 In the Tools panel, choose the Selection tool (![]() ), then click to select the graphic frame located in the bottom-left corner of page 1. The frame spans the left and center columns. Because the graphic frame is empty, an X is displayed inside the frame.
), then click to select the graphic frame located in the bottom-left corner of page 1. The frame spans the left and center columns. Because the graphic frame is empty, an X is displayed inside the frame.
4 Choose File > Place. In the Place dialog box, navigate to the Links folder within the id01lessons folder and select the snowshoe.psd image. Confirm that Show Import Options is not selected, then click Open. The image is placed inside the selected frame at its original size (100 percent), and is larger than the frame. Next you will resize the image so it fits within the frame.
5 Position your cursor over the center of the snowshoe image but do not click. A semi-transparent circle appears in the center of the photo. This is the Content Grabber. Click the Content Grabber to select the photo within the frame. The edges of the image are displayed with a light-blue border, showing the size of the graphic. The color of the border varies when you use multiple layers in your documents. You’ll now reposition the document so you can see the entire size of the image.

The Content Grabber makes it easy to adjust a graphic within a frame without having to choose a different tool to do so.
6 If you can see the complete border of the image, you can skip to step 7. Otherwise, press and hold the spacebar on your keyboard to temporarily access the Hand tool (![]() ). Click and hold the document. The page magnification changes and a red frame appears when using the Hand tool. Reposition the red frame so the entire border of the image is visible, and then release the mouse. The zoom returns to its original level, focused on the portion of the page you identified. Release the spacebar. If necessary, use the magnification levels located in the Application bar to reduce the magnification in order to see the entire bounds of the graphic.
). Click and hold the document. The page magnification changes and a red frame appears when using the Hand tool. Reposition the red frame so the entire border of the image is visible, and then release the mouse. The zoom returns to its original level, focused on the portion of the page you identified. Release the spacebar. If necessary, use the magnification levels located in the Application bar to reduce the magnification in order to see the entire bounds of the graphic.
Press and hold the spacebar on your keyboard to access the Hand tool for repositioning documents.
7 With the content of the frame, the snowshoe image, still selected, press and hold the Shift key on your keyboard. Click the handle in the bottom-right corner of the image and drag the handle up and to the left, reducing the size of the image until its width is slightly larger than the width of the frame, then release the mouse button. Here you scaled the content of the image without modifying the frame. Pressing the Shift key maintained the proportions of the image while it was scaled.
8 Move the cursor to the middle of the picture frame; notice that the cursor changes to a hand. While the cursor is a Hand icon (![]() ), click and drag to reposition the graphic within the frame so that the person in the light blue jacket is located along the right side of the picture frame.
), click and drag to reposition the graphic within the frame so that the person in the light blue jacket is located along the right side of the picture frame.
 Clicking the Content Grabber selects the graphic inside the frame. The Hand icon indicates you can reposition the graphic. While the icon is identical to the Hand tool, it is used only to reposition graphics within a frame, while the Hand tool is accessed from the Tools panel and is used for adjusting the display within the document window.

The cropped image should appear similar to this figure.
9 To edit the frame instead of the content of the frame, double-click anywhere on the graphic. The frame becomes selected again.
10 Using your keyboard, press Ctrl+0 (Windows) or Command+0 (Mac OS) to fit page 1 within the document window.
11 If the Layers panel isn’t already open, click the Layers button, then click the Visibility icon (![]() ) in the Text layer so that objects on this layer are once again displayed.
) in the Text layer so that objects on this layer are once again displayed.
12 Choose File > Save to save your work. Keep the document open for the next part of this lesson.
Applying text wrap
You can control the position of text relative to graphics and other objects. In some cases, you might want text to be placed on top of an image; in other cases, you might want text to wrap around the shape of an image or object. You’ll continue to work on the first page of the brochure, applying text wrap to an image.
1 Using the Selection tool (![]() ), click to select the snowshoe image at the bottom of the page. Click between the two columns of text, but be careful not to click the Content Grabber at the center of the image, since you will manipulate the frame attributes in this exercise, and not work with the content. Next you’ll enable text wrap on the image to force the text away from the image.
), click to select the snowshoe image at the bottom of the page. Click between the two columns of text, but be careful not to click the Content Grabber at the center of the image, since you will manipulate the frame attributes in this exercise, and not work with the content. Next you’ll enable text wrap on the image to force the text away from the image.
 If you have trouble selecting the image, press the Ctrl (Windows) or Command (Mac OS) key and then click again on the image to select it. This enables you to select an object beneath another object in a layout. In this case, the image is positioned below the text frames, so the key command makes it easier to select.
2 Choose Window > Text Wrap to open the Text Wrap panel.
3 Click the Wrap Around Bounding Box button (![]() ) at the top of the Text Wrap panel to apply the text wrap to the selected image. The text wrap forces the text to flow into the second column, making all the text visible.
) at the top of the Text Wrap panel to apply the text wrap to the selected image. The text wrap forces the text to flow into the second column, making all the text visible.

The Wrap Around Bounding Box button in the Text Wrap panel wraps the text around the shape of an object.
4 To get a better understanding of how the text wrap is applied to the text surrounding the graphic frame, use the Selection tool to move the snowshoe image up or down on page 1. As you move the image, notice how the text moves around the frame. When you’re finished, move the image back to its original location.
5 Click the two arrows pointing to the right in the upper-right corner of the Text Wrap panel to close it. You will work more with Text Wrap in InDesign Lesson 5, “Designing with Graphics.”
Understanding layers
Layers help you organize your layout. By positioning related objects together on the same layer, you can turn items off and on for viewing, working on your layout, and even for printing. Layers can even be used to create different versions of projects.
Here you will place text and graphics on separate layers, thus making it easier to proofread text.
1 Using the Pages panel, double-click Page 2 to navigate to this page, then choose View > Fit Spread in Window to display both pages 2 and 3 together. Two adjoining pages in a layout are referred to as a Spread.
2 Click the Layers button (![]() ) in the panel docking area to open the Layers panel.
) in the panel docking area to open the Layers panel.

Use the Layers panel to organize objects in your layout.
 If you have closed a panel instead of placing it in the docking area, you can access it from the Window menu. For example, you can choose Window > Pages to open the Pages panel. The list of available panels is also determined by the current workspace. To access all panels, choose the Advanced workspace from the Workspace switcher located at the top-right corner of the Application bar.
3 In the Layers panel there are three layers: Text, Graphics, and Background Content. Click the Visibility icon (![]() ) next to the Text layer. Any content on the Text layer is hidden. Click the Visibility icon again to show the contents of the Text layer.
) next to the Text layer. Any content on the Text layer is hidden. Click the Visibility icon again to show the contents of the Text layer.
4 Click to turn the visibility of the Graphics and Background Content layers on and off to see the items that are located on each of these layers.
 InDesign layers are document-wide. When you create a layer, it is available on every page in the document, including the master pages. When you hide or show a layer, all pages in the document are affected by this change.
5 If necessary, open the Pages panel by clicking the Pages Panel icon (![]() ) or choose Window > Pages. In the Pages panel, double-click page 1 to navigate to this page.
) or choose Window > Pages. In the Pages panel, double-click page 1 to navigate to this page.
6 Using the Selection tool (![]() ), click to select the frame containing the snowshoe image at the bottom of the page. If you have trouble selecting it, click the Visibility icon (
), click to select the frame containing the snowshoe image at the bottom of the page. If you have trouble selecting it, click the Visibility icon (![]() ) for the Text layer to temporarily hide the text frames. After selecting the image frame, click the Visibility icon for the Text layer to display the text. In the Layers panel, notice the red square (
) for the Text layer to temporarily hide the text frames. After selecting the image frame, click the Visibility icon for the Text layer to display the text. In the Layers panel, notice the red square (![]() ) located to the right of the Graphics layer. This indicates that the currently selected object is located on the Graphics layer.
) located to the right of the Graphics layer. This indicates that the currently selected object is located on the Graphics layer.
7 If the Layers panel is not visible, click the Layers panel icon (![]() ) or choose Window > Layers. In the Layers panel, click and drag the red square to the Background Content layer. The object is moved to this layer, and the edge of the frame containing the snowshoe graphic is now green, the color of the Background Content layer.
) or choose Window > Layers. In the Layers panel, click and drag the red square to the Background Content layer. The object is moved to this layer, and the edge of the frame containing the snowshoe graphic is now green, the color of the Background Content layer.

Moving an object between layers.
8 Click the Visibility icon of the Background Content layer to hide the contents of the layer, confirming that the snowshoe image is on this layer. Click the Visibility icon again to make the layer visible.
9 Click the square immediately to the left of the Background Content layer to lock this layer. Locking the layer prevents you or others from modifying any contents on a layer.

Locking a layer prevents any changes to objects on the layer.
10 Choose the Selection tool and click the snowshoe picture on page 1. You cannot currently select it because the layer is locked.
11 Unlock the layer by clicking the Padlock icon (![]() ) immediately to the left of the Background Content layer. Locking a layer prevents all items on that layer from being selected. You can use this to organize your layout as you construct your documents. For example, you can create a layer that contains all the guides for your document and lock it so the guides are not accidentally selected, and you can easily show and hide guides that are all placed on a single layer.
) immediately to the left of the Background Content layer. Locking a layer prevents all items on that layer from being selected. You can use this to organize your layout as you construct your documents. For example, you can create a layer that contains all the guides for your document and lock it so the guides are not accidentally selected, and you can easily show and hide guides that are all placed on a single layer.
 If you accidentally select the wrong object, choose Edit > Deselect All, or if you accidentally move an object, choose Edit > Undo to return it to the original location.
Applying effects
You can use InDesign to apply special effects to images or objects in your layout, including adding drop shadows to frames, soft feathered edges to pictures, or adjusting the transparency or opacity of objects and images—all without modifying the original object. Here you will discover how to apply effects to objects.
1 In the Pages panel, double-click page 2 or use the page drop-down menu in the lower-left corner of the workspace to navigate to page 2 of the newsletter.
2 Using the Selection tool (![]() ), select the blue border in the upper-left corner of the page. The border spans pages 2 and 3.
), select the blue border in the upper-left corner of the page. The border spans pages 2 and 3.
3 Click the Effects button (![]() ) in the panel docking area or choose Windows > Effects to open the Effects panel.
) in the panel docking area or choose Windows > Effects to open the Effects panel.
4 In the Effects panel, confirm that Object is highlighted. Click the Add an Object Effect to the Selected Target button (![]() ) at the bottom of the panel and choose Bevel and Emboss from the menu. The Bevel and Emboss dialog box opens. Click the Preview check box in the lower-left corner of the dialog box to preview the effect before you apply it.
) at the bottom of the panel and choose Bevel and Emboss from the menu. The Bevel and Emboss dialog box opens. Click the Preview check box in the lower-left corner of the dialog box to preview the effect before you apply it.

The Effects button at the bottom of the Effects panel allows you to choose effects to apply to selected objects.
5 In the Effects dialog box, leave the settings at their defaults and click OK.
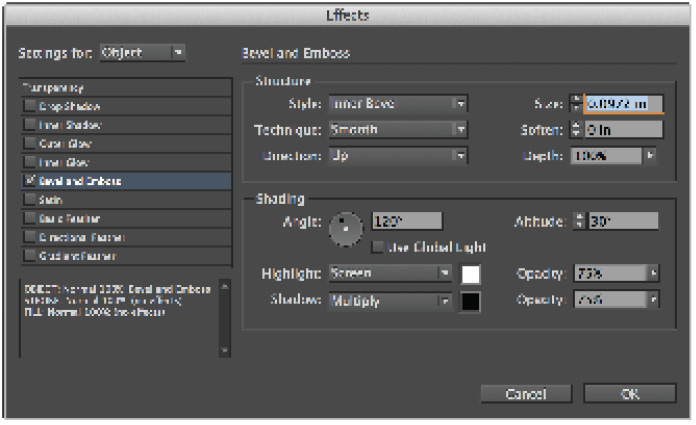
Use the default Bevel and Emboss settings in the Effects dialog box to add an effect to the blue border.
6 Click the Screen Mode button (![]() ) in the Application bar at the top of the workspace and switch to the Preview viewing mode. Use the Preview viewing mode to see the final project without any non-printing elements such as guides and frame edges. You can also press the keyboard shortcut W to switch between viewing modes, or use the Screen Mode controls located at the bottom of the tools panel.
) in the Application bar at the top of the workspace and switch to the Preview viewing mode. Use the Preview viewing mode to see the final project without any non-printing elements such as guides and frame edges. You can also press the keyboard shortcut W to switch between viewing modes, or use the Screen Mode controls located at the bottom of the tools panel.
7 Choose File > Save, and then choose File > Close to close the file.
You have now completed a tour of InDesign CC, discovering essential skills and concepts for creating layouts.
Resources for additional help
With the help of this book, you are on your way to becoming a skilled InDesign user, but you might still need assistance with certain capabilities and features. We’ve created a comprehensive index at the back of this book to help you find information about specific topics. If you are using an eBook version, use the search capabilities to locate specific topics. There are also a number of other ways to get help when using InDesign, as you will discover in this section.
DigitalClassroomBooks.com
The Digital Classroom authors provide updates and respond to inquiries regarding the book content at the DigitalClassroomBooks.com website. By registering your book at www.digitalclassroombooks.com/CC/DesignTools you will receive updated information regarding any changes in the software and any reported issues that affect your work with this book.
In-product help
InDesign includes help documentation directly within the application. Choose Help > InDesign Help to launch the Adobe Help Viewer, which you can use to search by topic. You can also access help quickly by typing a search query in the help search field, indicated by a magnifying glass (![]() ) in the Application bar at the top of the workspace.
) in the Application bar at the top of the workspace.
Online help
You can also find documentation for InDesign online. The online help tends to be more current, since it is updated regularly. The documentation that shipped with the software and is part of the help menu might be out-of-date, since it is often written months before the software is in its final format. The online help also gives you the opportunity to add comments to topics that you view, and even receive an e-mail when someone else adds a comment to the topic. You can also download many of the help files in PDF format for printing or easy searching. Find the online help at adobe.com.
Forums
Adobe on-line forums are an excellent resource for finding solutions to questions you have about InDesign or how InDesign integrates with other applications. Adobe forums are contributed to by a community of beginning, intermediate, and advanced users who might be looking for the same answer as you, or who have already discovered solutions and answers to questions and are willing to share their solutions with other users. You can access the InDesign Forums page at http://forums.adobe.com/community/indesign.
Conferences, seminars, and training
The authors of this book regularly speak at conferences and seminars, and are available to deliver instructor-led professional development training sessions. You can learn more about the authors’ professional development training offerings at www.agitraining.com.
Self study
Place some of your own graphics into the newsletter that you just created, and then practice cropping and repositioning the graphics within their frames. Move objects to other layers and create your own layer to further refine the organization of the file.
Review
Questions
1 What does a red plus sign in the lower-right corner of a text frame indicate?
2 How do you reposition an image inside of a frame?
3 How can you ensure that if you reposition the panels in InDesign to your liking, you can always bring them back to that state?
4 If you cannot see panels that you need to use, how can you locate and display them in your workspace?
Answers
1 The red plus sign in the lower-right corner of a text frame indicates that there is more text in the frame than can be displayed within the current frame. This is called overset text. You can fix this by linking the text to another frame, editing the text so that it fits within the existing frame, or enlarging the size of the frame.
2 You can reposition an image inside of a frame by clicking the semi-transparent circle known as the Content Grabber located in the center of an image. You can also use the Direct Selection tool to manipulate an image inside a frame.
3 To ensure that you can bring back the position of panels after repositioning them, save the custom workspace by choosing Window > Workspace > New Workspace.
4 When the workspace is changed, the list of available panels also changes. Use the Advanced workspace to view all the panels. All panels can also be found under the Window menu: choose the panel you want to use from the list, and it appears.