
Project 9: Serial to Servo
Sending information to the Arduino board to control how it functions is as useful and almost as easy as sending information from the Arduino board. For this project, we will look at the Servo project from the last chapter so that we can use the Serial functions to send data to the Arduino board to control the servo's position. For our sketch to work properly, we need to change the communication mode from No line ending to Newline in the drop-down menu at the bottom of the Serial Monitor.
Hooking It Up
Because the circuit should be familiar, we won't dwell on it too much. Figures 10-1 and 10-2 show the standard servo schematic and illustration that we used before with nothing else needed. The following source code, however, will give us something new and fun to talk about.
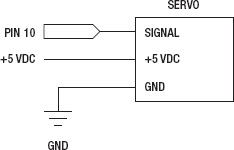
Figure 10-1. Serial Servo schematic
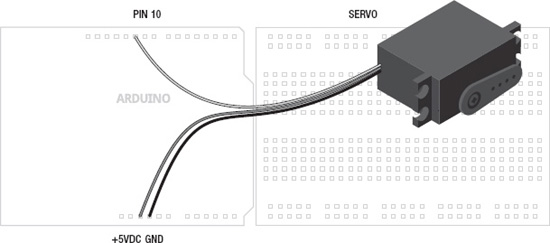
Figure 10-2. Serial Servo illustration
Uploading the Source Code
Where before we have used the Serial functions to send data from the Arduino board to our Serial Monitor, for the purpose of monitoring analog values, the sketch in Listing 10-1 will instead allow us to send data to the Arduino board that has been entered in the Serial Monitor. On the surface, all we need to do is type in an angle for our servo from 0 to 180, corresponding to the angle that we want to position a servo, and hit enter. When the Arduino receives this information, it will process it and move the servo to the proper angle.
We see that because serial communications happens in one-byte chunks and because of the habit of serial to send information in characters rather than numerical values (more on that shortly), we need to do a little work to get the characters that are received converted to proper numbers that can be used to position a servo. So let's upload the following code and have a look at how all this works.
Listing 10-1. Serial Servo Source Code
#include <Servo.h>


Servo servo;


void setup() {

  Serial.begin(9600);

  servo.attach( 10);

}


void loop() {

  int angle = 0;

  if (Serial.available()) {

    byte incomingByte = Serial.read();


    while (incomingByte != '
') {

      if (incomingByte >= '0' && incomingByte <= '9')

        angle = angle *10 + (incomingByte - '0'),

      incomingByte = Serial.read();

    }


    if (angle >= 0 && angle <= 180) {

      servo.write(angle);

      Serial.println(angle);


    } else Serial.println("Choose an angle between 0 and 180.");

  }

}
Source Code Summary
Just like our example from the last chapter, at the beginning of our sketch we include and create a new instance for the Servo library. While it acts like any other library, we do not need to create an instance of Serial because it is already included as a part of our sketch as standard. In our setup() function, we have the necessary statements to establish the speed of our serial communications and attach our servo to a pin number. Our loop() function begins by starting our servo angle off at 0° and then checks to see if data is available in our serial buffer. If so, it reads the first byte and, so long as the newline escape code has not been sent, will check to see if that value of the byte represents a digit from 0 to 9. This sketch uses the Newline option in the Serial Monitor, so that each time we hit the Enter key, the Serial Monitor sends the escape code '/n' for a new line. We can test for this in our if statement like any other value to know when all of the digits for our angle have been entered.
At this point, the code will put together our angle integer digit-by-digit or byte-by-byte using a little math to convert the ASCII character into its numerical value, and then increases the angle value by a power of ten for each byte received. Once it receives the newline character or '/n' from the Serial Monitor, it will move on to check the angle value that was received to make sure it falls within the capabilities of the servo. If so, it moves the servo to that angle and sends that angle value to the Serial Monitor. If not, it will send a message letting us know to try again. Now let's look at how this is done.