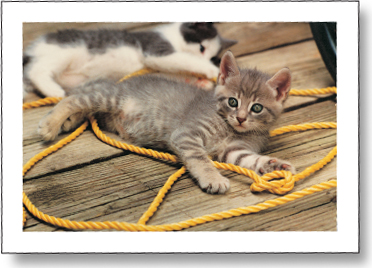
Animals make wonderful subjects to draw because there are so many different kinds to choose from, and they all have their own distinctive features and textures—whether they are smooth and scaled, fluffy and feathered, or soft and furry. In this depiction of “Spike,” Debra Yaun uses blending and layering techniques to convey the distinctive patterns in the soft, silky fur of this playful kitten.
Comparing for Accuracy As I work, I often check my drawing for accuracy by turning it and my reference photo upside down and comparing the two. Looking at them both upside down makes it easier to spot any problems because you’re forced to really see the actual object, rather than relying on any preconceptions you may have about what the subject should look like.

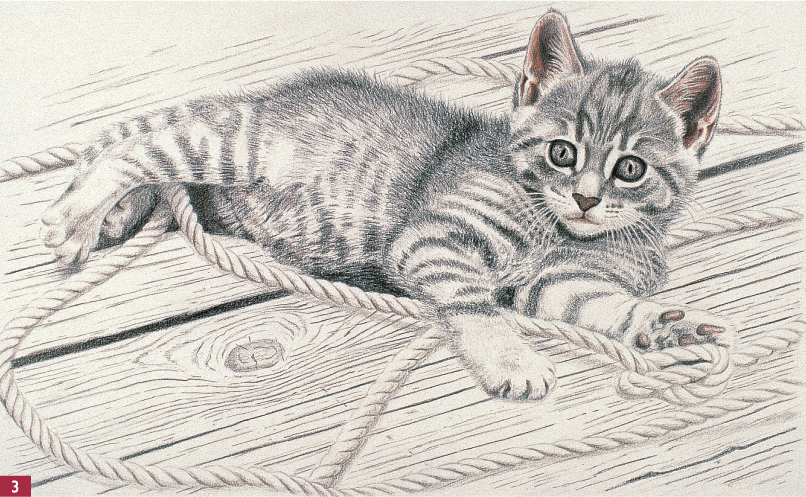
Step One Before I start drawing, I decide to make some slight adjustments from my photo (see “Utilizing Artistic License” on page 60). Then I begin by sketching out the kitten on practice paper, where I make sure I capture Spike’s features and proportions accurately. I transfer the drawing to my art paper and erase any excess pencil lines with a kneaded eraser. Next I apply black to the darkest areas around the kitten and lightly layer over the gray areas of the fur. At this point I’m not worried about creating texture; I just apply the various gray values with a fairly sharp pencil, using a circular motion. Then I use gray to fill in around the areas of lighter fur and the area around the whiskers, leaving the whiskers white.

Step Two I apply a light layer of peach to the insides of the ears, to the nose, to the belly, and around the mouth, using circular strokes. I give the upturned paw pads a layer of peach, but I leave the highlights white. I add a light layer of dark umber to the rope and then add a heavier layer on the shadowed side. I also work a light layer of dark umber into the fur and over the paw pads. I detail the wood with black, making sure all the strokes follow the direction of the wood grain.
Step Three I lightly apply magenta over the insides of the ears. Then I add light layers of magenta and dark umber to the paw pads, using circular strokes for a soft blend. I soften the black rims around the eyes with dark umber and also add dark umber to the stripes in the fur. I add some more black to the dark grays in the fur and darken some areas of the chest and front legs, using short, tapered strokes that follow the direction the fur grows. Then I add dark umber to the stripes and the darker areas of the hind legs, using a blending stump to soften the colors. I add a ring of dark umber to the eyes around the pupils, and then I use dark umber to draw over the black detail lines in the wood.

Step Four Next I layer cobalt blue over the irises in the eyes, saving the white highlights. To deepen the shadows, I apply some blue over the chin area, under the neck, along the shadow side of the front legs, and in all of the shadowed areas of the rope. I also add blue to the back leg and the tail to “push” them back a bit. I add a touch of canary yellow to the eyes between the iris and the pupil. Next I apply yellow to the rope, putting a slightly heavier layer on the strand in the foreground. Then I layer a little black over the rope’s blue cast shadow to darken it.
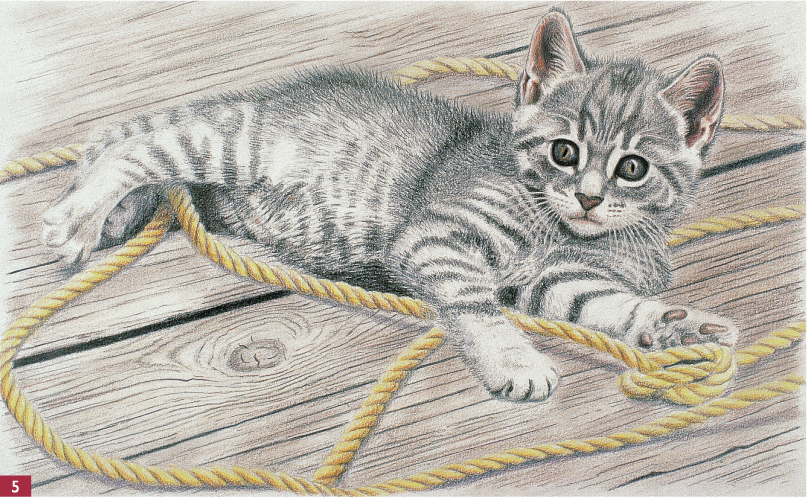
Step Five I apply cobalt blue to the dark cracks of the deck and add a few light strokes of magenta in front of the kitten. Then I add magenta to the shadow under the rope, creating a purple hue. I add a shadow under the knot in the rope and then apply another light layer of dark umber to darken the wood. I lightly add a few spots of canary yellow and use a blending stump to soften the colors. Then I draw the kitten’s fur over the wood with black, making short strokes that start at the body and go out in slightly different directions. I refer to my photo here, matching it carefully to render this kitten’s particular fur pattern.

Step Six I soften the fur even more by blending short strokes of white over some of the black. Then I draw white over the whiskers and create a few hard strokes of white through some of the darker areas (such as the belly) to show the texture of the fur. I add a little more cobalt blue, dark umber, and canary yellow to the eyes, then finish with a layer of white to soften and blend the colors. I also add white to the tiny tufts of fur in the ears. The stripes on the legs look a little thin, so I widen them with short black strokes. I darken the shadows under the ropes in a few places with a little more blue and black, but I keep the shadow lighter than it appears in the photo to keep the focus on the kitten. I use white to soften the colors in the rope, and then I turn the drawing upside down again to check the values. I decide to darken the wood a little more, so I add some black and dark umber, mostly in the foreground. Finally I apply a light layer of yellow to warm the color of the wood.
Many colored pencil artists begin with a black-and-white value drawing; this method is called “grisaille.” Grisaille allows the artist to establish the darks and lights in a subject before applying color. Then, as the transparent colored pencil values are layered over the initial drawing, the dark values lend additional depth to the darkest areas. The example below demonstrates how the grisaille technique helps build volume in a simple scene.

Graphite underdrawing
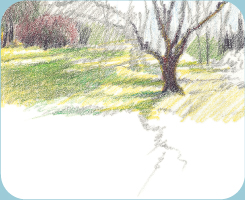
First layer of color
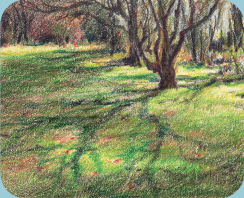
Art by Pat Averill
Final drawing