Composing a still life takes a little thought and planning. Like a landscape, your still life should have a visual path that leads the viewer’s eye in and around the drawing, as well as a distinct center of interest. However, with a still life, you are in control of choosing the placement of the objects and the lighting in the scene. When setting up a still life, try including objects of different shapes, sizes, and textures to help add interest and variation. And to avoid a static still life, choose an odd number of elements. Overlap the objects—don’t align them on the same plane—and avoid horizontal lines because they lead the eye out of the picture altogether. In this beautiful still life, Sylvester Hickmon overlaps the pears and other elements and then frames them nicely with the checkered tray to direct the eye toward the focus of the scene.

Step One As I’m composing this still life, I try several different setups, moving the objects around to find the most visually interesting arrangement. I also play with the lighting, photographing the scene at various times of day to find the most pleasing combination of highlights and shadows. Then, once I’ve settled on my composition and drawn the contours, I begin blocking in the darkest values of color. For the darkest areas of the pears, I heavily apply dark umber with a thick lead pencil, followed by dark brown for the lightest areas. Then I use a hard-lead dark brown to model the forms and soften the value transitions. I create the cup with thick-lead 90% gray and varying pressure. I add 70% cool gray and light gray for the reflections on the vase and then create the bowl with hard-lead 70% cool gray and light gray. I add dark brown for the reflection on the bowl and fill in the shadow patterns on the table with 20% gray. For the darkest areas inside the tray, I use 30% cool gray. I use a hard-lead light gray for the flowers but decide not to work on the leaves at this point.

Step Two I layer indigo blue on the cup, burnt ochre on the pear, and terra cotta on the tray. Then I create the patterns and shadows on the inside of the tray with yellow-orange, terra cotta, grass green, and peacock green. For the inside of the bowl, I add light layers of cerulean blue and azure blue. I also use cerulean blue on the flower vase to suggest the reflections of the taller vase. Then I turn my attention to the leaves. (See “Rendering Leaves” below.)
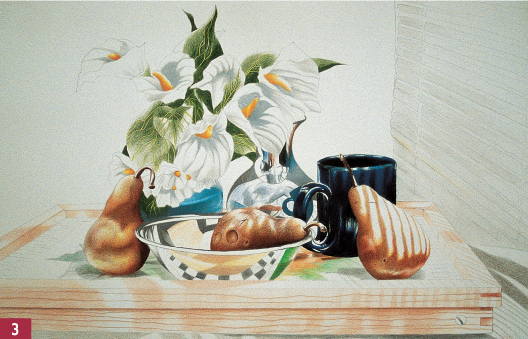
Step Three Next I use pumpkin orange and yellow orange to burnish the pears. For the pear on the left, I add additional layers of lime peel and yellow chartreuse. I use ultramarine blue on the cup and deco blue on the water in the vase. Then I add 90% gray, blue slate, peach, and 20% cool gray to the taller vase. For the insides of the flowers, I apply pumpkin orange and sienna brown and then burnish over those colors with canary yellow. I use 20% cool gray for the lightest areas of the petals, cream for the reflections on the tray, and apple green for the reflections on the bowl. Next I create the blinds with long horizontal strokes of 20% warm gray and add 50% French gray to the bottom section of the table.

Step One To make the leaves appear more realistic, I focus on the details. First I apply chartreuse on the veins, filling them in completely.
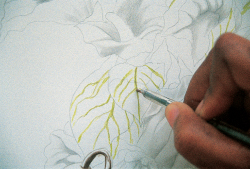
Step Two Next I go over the color with a stylus to impress the lines into the paper; then I reapply chartreuse to the impressed lines.

Step Three Finally I fill in the shapes with marine green and grass green, using the broad side of the pencil and softly blending the midtones.

Step Four I use my stylus to impress pits on the pear on the left, and then I add layers of dark brown and mineral orange. Next I apply dark brown, canary yellow, and Spanish orange on the other pears and then burnish over these colors with a colorless blender. I darken the pattern on the bowl with 90% gray and enhance the shadow at the bottom of the bowl with 70% gray. I burnish white over the tall vase with heavy pressure and reapply the same blues and grays used in the previous steps. I use the colorless blending pencil on the cup and then add more ultramarine blue and white for highlights. I apply canary yellow to the flower petals and strengthen the darker areas of the leaves with 90% gray. Then I add more marine green and yellow chartreuse at the edges of the leaves. I apply terra cotta to the table and adjust the shadows with dark brown.

Step Five Next I fill in the left side of the background with 90% gray, then add indigo blue and blue slate. I use thick-lead blue slate to blend the colors and to create a solid backdrop. To add warmth and enhance the pattern of light on the pear on the right, I use hard-lead yellow orange and hard-lead canary yellow. Then I apply a layer of white to the inside of the tray and use 90% gray to fill in the dark shadow patterns around the edges. (I avoid doing this in the earlier stages to prevent pulling dark colors into the light areas.) Next I burnish the inside of the bowl with 10% gray. For the remaining areas, I use a colorless blending pencil and hard-lead white to clean up any rough edges and to adjust the values as needed.
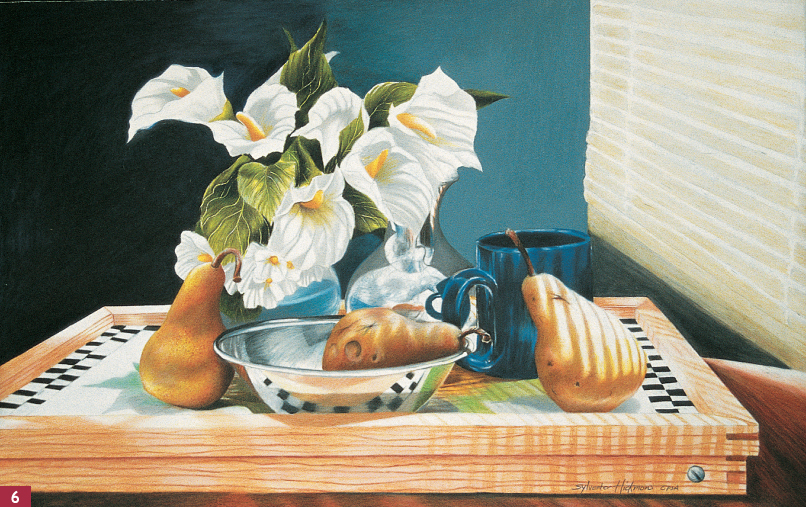
Step Six Now it’s time to make some final color adjustments. I decide to add more indigo blue to the middle ground and adjust the bottom portion of the window blinds with 90% gray; then I add a layer of 20% warm gray to the top sections of the blinds for warmth. I darken the shadows on the tray with additional layers of mineral orange and terra cotta. I also use terra cotta to strengthen the darker lines in the wood on the tray, using strokes that follow the grain of the wood. Finally I use a soft paper towel to buff the image and give the drawing 4–5 coats of workable fixative. (See “Preserving Your Artwork” on page 63.)

Bowl Detail I am careful to make sure the reflection of the checkered pattern on the bowl is not flat. The curved distortion of the image on the shiny bowl helps “ground” it on the tray and makes it seem more three-dimensional.
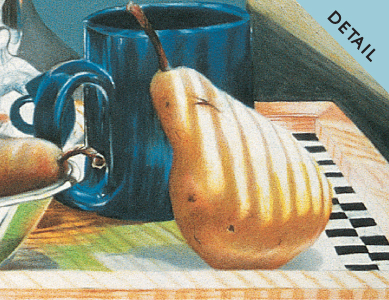
Pear and Cup Detail I use a stylus to impress the pits on the pears, creating a more rough and realistic texture. In contrast, I use a colorless blending pencil to smooth out the sleek ceramic surface of the cup behind the pear.