Colored pencil is amazingly satisfying to work with, partly because it’s so easily manipulated and controlled. The way you sharpen your pencil, the way you hold it, and the amount of pressure you apply all affect the strokes you create. With colored pencils, you can create everything from soft blends to brilliant highlights to realistic textures. Once you get the basics down, you’ll be able to decide which techniques will capture your subject’s unique qualities. There are as many techniques in the art of colored pencil as there are effects—and the more you practice and experiment, the more potential you will see in the images that inspire you.
Each line you make in a colored pencil drawing is important—and the direction, width, and texture of the line you draw will all contribute to the effects you create. Practice making different strokes, as shown in these examples. Apply light, medium, and heavy pressure; use the side and then the point of your pencil; and experiment with long, sweeping strokes as well as short, precise ones.

Pressure Varying the amount of pressure you use on your pencil is an easy way to transition between values. Since colored pencils are translucent, the color of the paper underneath will show through. With light pressure, the color is almost transparent. Medium pressure creates a good foundation for layering, and heavy pressure flattens the paper texture, and the color appears almost solid.

Strokes and Movement While a group of straight lines can suggest direction, a group of slightly curved lines conveys a sense of motion more clearly. Try combining a variety of strokes to create a more turbulent, busy design. Exercises like these can give you an idea of how the lines and strokes you draw can be expressive as well as descriptive.

Varied Line Try varying the width and weight of the lines you create to make them more textured and interesting. These calligraphic lines can help create a feeling of dimension in your drawing.
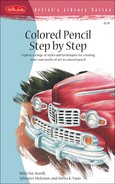
Strokes and Texture You can imitate a number of different textures by creating patterns of dots and dashes on the paper. To create dense, even dots, try twisting the point of your pencil on the paper.
The term hatching refers to creating a series of roughly parallel lines. The density of color you create with hatch strokes depends on the weight of the lines you draw and how much space you leave between them. Cross-hatching is laying one set of hatched lines over another but in the opposite direction, producing a meshlike pattern. Hatch and cross-hatch strokes can both be used to fill in an almost solid area of color, or they can be used to create texture, as shown at right.

Cross-Hatched Spacing Filling in space with cross-hatch strokes in random directions creates the dense, haphazard texture shown above. For a smoother, more even texture, make cross-hatch strokes in two directions only (left leaning and right leaning).
Although there is no single “correct” method for holding the pencil, the way you do so will have a direct impact on the strokes you create. Some grips will allow you to press more firmly on the pencil, resulting in dark, dense strokes. Others hinder the amount of pressure you can apply, effectively rendering your strokes lighter. Still others give you greater control over the pencil, allowing you to create fine details. Try each of the grips below, and choose those that are the most comfortable and create the effects you desire.

Overhand Grip Guide the pencil by laying your index finger along the shaft. This is the best grip for strong applications of color made with heavy pressure.

Conventional Grip For the most control, grasp the pencil about 1-1/2" from the tip. Hold it the same way you write, with the pencil resting firmly against your middle finger. This grip is perfect for smooth applications of color, as well as for making hatch strokes and small, circular strokes. Try to relax and let the pencil glide across the page.


Illustrations © Quarto Publishing plc
Underhand Grip When you cradle the pencil in your hand (as in either example shown above), you control it by applying pressure only with the thumb and index finger. This grip can produce a lighter line, but keep in mind that when you hold the pencil this way, your whole hand should move (not just your wrist and fingers).
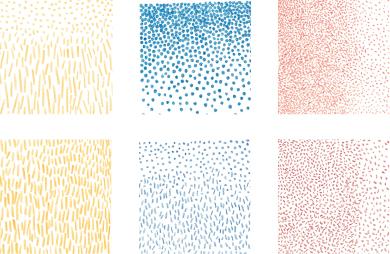
Because colored pencils are translucent, artists use a transparent layering process to either build up color or create new hues. This layering process is wonderful because it creates a much richer hue than you could ever achieve if you were using just one pure color. To deepen a color, layer more of the same over it; to dull it, use its complement. If you want to blend your strokes together, you can use a colorless blender, as shown at the bottom of the page.

Layering with Hatch Strokes In the examples at right, yellow, orange, red, and blue were layered on top of one another with cross-hatch strokes to demonstrate one way of creating a new color. To avoid getting a hue that’s too dark, begin with the lightest color and work up to the darkest. This way you can tell if the mix is getting too muddy or deep before it’s too late.
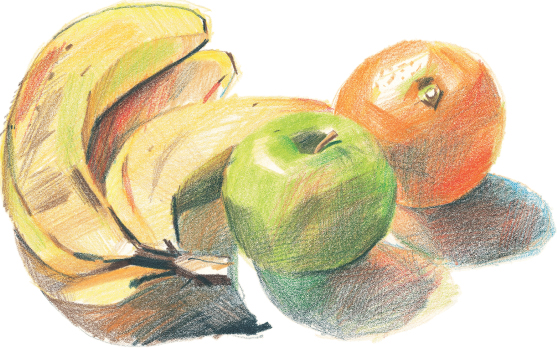
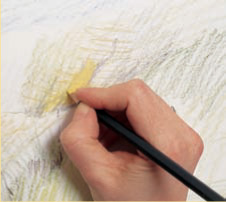
Building Up Color Here is a simple still life rendered with layers of hatch strokes. The forms of the fruit were built up by layering different values of the same color and then dulled a bit with a touch of their complements. Notice that the shadows under the fruit are blends of many different colors; they are never just gray or black.

Colorless Blender This special marker dissolves the pigment, creating a smooth, solid color. Apply it over the pigment, as shown here, or on the blank paper before you add color.

Using a Colorless Blender The example at left shows a quick study created with colored pencils. In the second example at right, a colorless blender was used to blend the pigments. Notice how much smoother the strokes appear after blending. The surface of the paper also becomes a little slick after using the blender, so any colors you add over the blended layer will glide easily on the page.
Burnishing (or opaque layering) is a blending technique that requires heavy pressure to meld two or more colors, which also flattens the tooth of the paper. Usually a heavy layer of white (or another light color) is applied over darker colors to create a smooth, shiny blend, as shown in the example below. Try not to press too hard on the underlayers of the area you intend to burnish; if you flatten the paper too soon, the resulting blend won’t be as effective.
Step One Begin with a line drawing in local color (the actual color of the object) so the outline won’t be visible when you’re done. Press lightly so the outlines aren’t impressed into the paper surface, creating dents. Here the solid lines indicate where hard edges will be, and the dashes or broken lines denote soft edges and shadows.
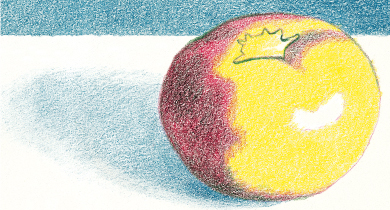
Step Two As you fill in the outlines with layers of color, keep the pencils sharp. Apply light to medium pressure as you slowly build color from light to dark. Use short, controlled strokes for a smooth tone, gradually lessening the pressure at the edges to make them soft. Here the darkest areas are created with green, the complement of red.

Step Three Next layer the different values of red and green, using heavier pressure. Be sure to fill in any highlights with white; this will act as a sort of barrier against saturation from the other colors.
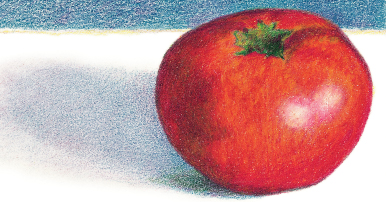
Step Four Finish by using a semi-sharp white pencil with circular strokes to burnish first the highlights and then the rest of the object. You may need to burnish over the same areas more than once to get an even blend.

Effects of Burnishing Here various colors and techniques were used to burnish over the same red hue. At far left is the original, untouched color. To the right of that is shown the effect of burnishing with white, with blue, and with yellow, in that order. At far right, a blending stump was used to burnish the color. There are also colorless (without pigment) blending pencils available that many artists prefer—they are nontoxic and easy to use.
Special Effects and Techniques
As you’re working in colored pencil, you may sometimes need to go beyond the basics and use some specialized techniques and materials, like the ones shown here. For example, you may choose to use black paper to provide a dramatic backdrop, lift off color with tape to reveal highlights, or make impressed lines to create texture. There are literally hundreds of possible techniques, so feel free to invent your own!
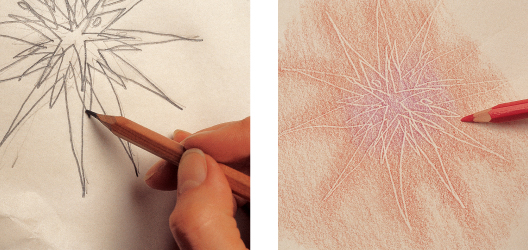
Impressed Line To resist color with an impressed line, draw a design on tracing paper, place it over your drawing paper, and trace over it firmly to leave an impression on the paper underneath. (You can also press lines directly into the paper with your fingernail or a stylus.) Then shade over the impressed lines, using the side of the pencil and light pressure to avoid filling in the lines completely.

Using Stencils For a stylized pattern, cut out a stencil and draw the shape repeatedly on your paper. For the pattern shown above, randomly fill in the shapes with a variety of colors.

Using Transparent Tape to Erase For soft highlights, such as the light line shown on the pencil at right, place transparent tape over the area. Then use a stylus to draw over the tape where you want to remove color. Carefully lift off the tape; then repair the spots where too much color was lifted. Try testing this on your paper before drawing, since some papers could be damaged by this technique. And if the tape removes too much color, stick the tape to your clothing first (to remove some of the tack) and then try again.

Masking with Tape You can use artists’ tape or masking tape to create clean lines and simple borders, as shown above. Just place the tape where you want it, apply color over it, and then remove it to reveal clean lines underneath.

Using Ink Using a finetipped, permanent marker is an interesting way to create dark values, as in this leaf. When you layer translucent pencil over the ink, the ink will show through, creating a darker value than you’d get with pencil alone. Just be sure to use a smudge-proof marker so it won’t smear on your drawing paper.

Frottage Rubbing over a textured surface, like the leaf at right, with the side of a pencil is a technique called “frottage.” This creates an impression of the object (and its texture) on your paper.
Watersoluble, or watercolor, pencils offer the same amount of control and detail as regular colored pencils, but they have the added versatility of being similar to painting tools as well. When you blend them with a brush and water, the artwork you create will have a softer and more painterly effect.
You can also use colored grounds, multimedia panels, illustration boards, and specialty papers (such as velour, sandpaper, or mylar) for your drawings. Each will give you a different result—some offer more texture or provide an undercolor, and others are better suited for mixed-media projects. When choosing paper, make sure you select one of high quality, and test out the pencils and techniques you plan to use ahead of time.


Watersoluble Pencil You can blend watersoluble pencils with a wet brush (see top example) to create soft blends like the ones shown (in the bottom example) in the sky, in the hills, and on the road. Here the rest of the scene was created with regular wax-based colored pencils.

Colored Grounds If you choose a colored support that shares a dominant hue in your drawing, you can create harmony among the colors in your drawing and save a significant amount of time—the paper provides a medium value to build color on (see example at right). Make a test sheet first on the back of your paper (or on a scrap piece of paper, as shown above) to see how the colors in your palette will be affected by the colored ground you choose.

Black Paper The contrast of light colors on black paper creates a sense of drama. Bright, colorful subjects appear even bolder over a dark ground. For the most brilliant hues, apply a layer of white before applying color over it.

Sanded Paper “Sanded paper” has a gritty quality to it that lends an interesting texture to colored pencil art. The rough surface will sand off the point of your pencil, so make sure to keep a dust brush handy to sweep away the residue.