Step One I sketch the basic shape of the head with an HB pencil. The head is turned at a three-quarter angle, so I shift the vertical centerline to the right and curve it to follow the form of the face. Note that the guidelines for the eyes, nose, and mouth are also curved. I indicate the ears and nose with triangle shapes, and I depict the cheeks with two half-circles. Next I draw the body, adding a small hump for the shoulders.

Step Two I refine the features, making the eye on the right smaller to show that it is farther away. I also adjust the leopard’s left ear so less of the inside shows, indicating the turned angle of the head. Next I draw the whiskers and some curved lines on the body to help me line up the spots in the next step. I also add some long blades of grass.

Step Three Now I draw the leopard’s spots, using the curved lines as guides and erasing them as I go. A pattern like this can be confusing, so it’s helpful to find areas where the spots line up. (You may want to try covering up some of the leopard so you can concentrate on small areas at a time.) Then I detail some of the blades of grass and draw a few more.

Step Four Switching to cool gray 20%, I add more long, curved whiskers. Then I use a very sharp black pencil to outline the eyes and fill in the pupils, nostrils, mouth, and areas on the cheeks and in the ears, as shown. Next I color the blades of grass with dark brown. Using cool gray 90%, I lightly shade around the leopard’s right eye and along the bridge of the nose. I use the same color to lightly shade along the creases on the legs.

Step Five Now I fill in the irises with yellow ochre, leaving a white highlight in the leopard’s right eye. (Going over the highlight with a white colored pencil helps protect it from being covered by other colors.) Using medium pressure, I apply burnt ochre to the ears and some areas of the head; I use the same color to lightly fill in the centers of most of the spots and other areas of the body. With firm strokes, I add burnt sienna to the existing grass and draw a few more blades. Then I use firm pressure to apply henna to the nose and tongue. Switching to black, I finish the spots using very short strokes that follow the direction of fur growth. Then I add even more grass with raw sienna.

Step Six I apply a light layer of sepia over most of the body and lower face. Then I add cool gray 90% to the ears and middle of the body to emphasize the crease behind the front leg. Next I add cool gray 20% to the chin, leaving the center white. Using firm, short strokes, I add some dark areas to the grass with sepia and burnt ochre. Now I apply dark umber to most of the body, adding a few strokes of burnt ochre to the spots and some cool gray 90% to the leopard’s rump. To finish, I use a very sharp cool gray 90% to darken a few areas on the body and go over the outlines of the edges of the body and head, varying the pressure so the lines aren’t solid and look more realistic.
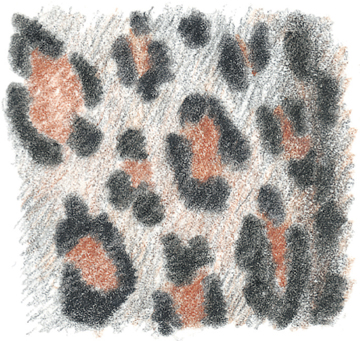
Here you can see the kinds of strokes that make up this leopard’s fur. It is important to make sure your strokes follow the form of the body. Also make sure to leave the edges somewhat ragged and rough; smooth edges will make the spots look “stuck on” and unnatural.