
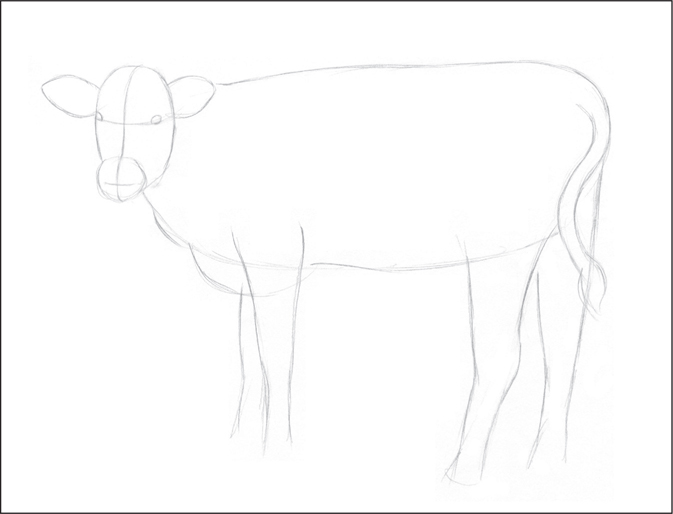
Step One Using an HB pencil, I sketch an oval shape for the head and a smaller circle for the nose. Then I add the facial guidelines: a slightly curved vertical centerline and horizontal lines for the eyes and nostrils. Next I draw the ears, making the ear on the left slightly larger because the ear on the right is turned forward. Now I add the body, making it about 6 heads long; I also draw the legs and curved tail.

Step Two I refine and detail the shapes, adding the nostrils, mouth, and hooves. Then I indicate folds in the skin and add some short strokes to the edges of the body to suggest its coat. Now I draw a background of trees and a fence, adding clumps of grass and wildflowers on the ground and around the cow’s hooves.

Step Three Switching to cool gray 90%, I use medium pressure to shade the darkest areas on the cow’s body, including the hooves, neck wrinkles, top of the nose, and chest; I also shade the fence posts. Then I use firm pressure to fill in the eyes and nostrils.

Step Four After applying henna to the insides of the ears, I use light to medium pressure to shade the face and some areas of the body with slate gray, going over some of the dark areas from step three. I also lightly apply burnt sienna to areas of the ground. Then, using indigo blue and firm pressure, I shade most of the area directly behind the cow, avoiding the ground and the fence. I use medium to light pressure to shade the foliage above the cow, leaving small areas of white showing through.

Step Five Now I start the grass with Prussian green, using more pressure for the grass in the foreground to help suggest depth. (The lighter grass in the background looks farther away.) I add a few strokes of pumpkin orange to the grass; then I use canary yellow and circular strokes for the flowers, adding burnt ochre for the flower centers. Returning to the cow, I cover most of the body with peach beige, leaving the top edges of the cow’s back white to show the sunlight coming from above. I also leave a great deal of white on the bridge and sides of the nose. Then I use medium pressure to apply blue slate to the sky, still leaving some white showing through.
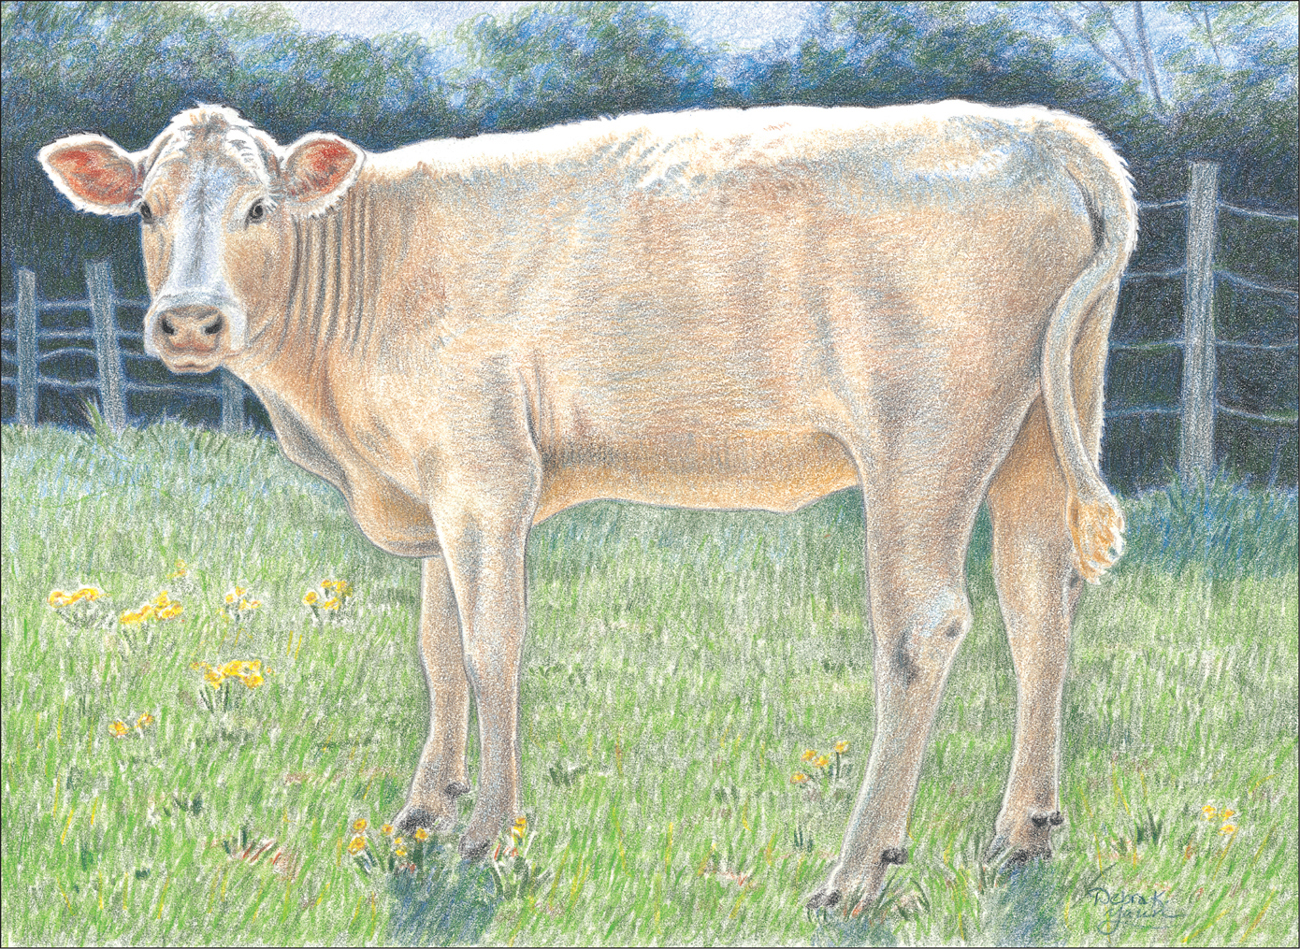
Step Six I go over the fence with slate gray and then add long, vertical lines of cool gray 90% to the posts. I also use cool gray 90% on the cow’s hooves. Now I add interest to the drawing by applying several subtle colors to the cow. I apply yellow ochre to the cow’s underside and the hair on the tail, putty beige around the eyes, beige sienna inside the ears, more peach beige on the face, and cloud blue on the white areas on the nose and forehead. I also add poppy red to areas of the ears and a light layer of beige sienna over some of the peach beige on the face. Then I apply light cerulean blue to the shadows on the closest legs, the upper part of the tail, the top of the back and nose, and the upper part of the foliage. To finish the cow, I add a light layer of dark brown to the body and use French gray 50% and short, firm strokes to blend the colors on the coat. Now I refine the background. To darken the lower part of the background, I add a layer of black; then I apply a layer of Prussian green over the black and up over most of the foliage. Next I use short, vertical strokes to complete the grass, using sap green for the background and apple green for the middle- and foreground. To help the grass in the background recede, I apply some strokes of light cerulean blue. I create the cast shadows on the grass from the legs with firm pressure using indigo blue; I also apply this color over the grass near the fence posts to suggest the shadows of the trees. To finish, I add more indigo to the trees and brighten the grass with a few more firm strokes of apple green.