

Step One With an HB pencil, I use basic shapes to sketch the head, neck, ears, and eye. Then I draw the bridle, curving it to follow the shape of the horse’s head. Next I indicate the nostril and mouth.
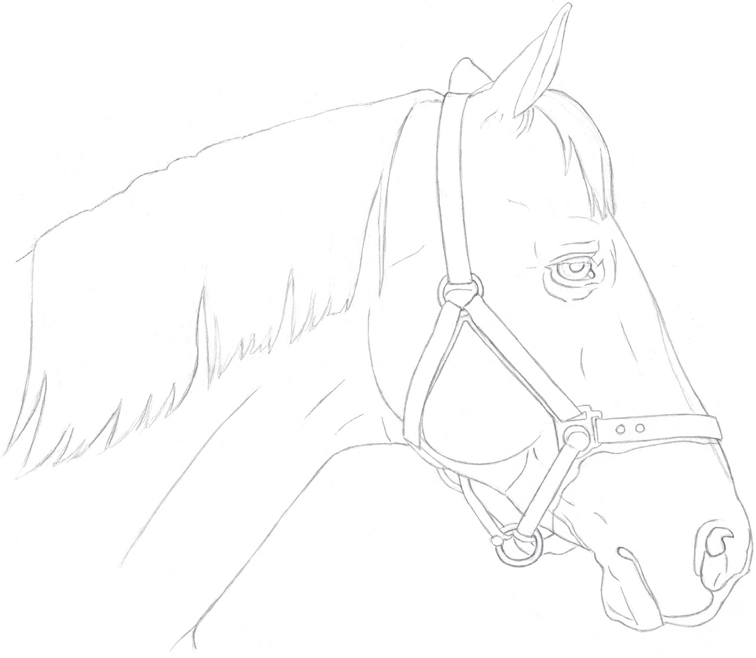
Step Two Using the basic sketch as a guide, I develop the facial features, ears, and bridle. Then I draw the mane and indicate some of the folds of the skin and shadowed areas.

Step Three I fill in some of the shadowed areas using cool gray 90%; then I layer indigo blue over some of the shadow edges. Next I color the iris with sienna brown. Using medium pressure, I apply yellow ochre to the metal areas of the bridle, leaving small areas white for highlights.
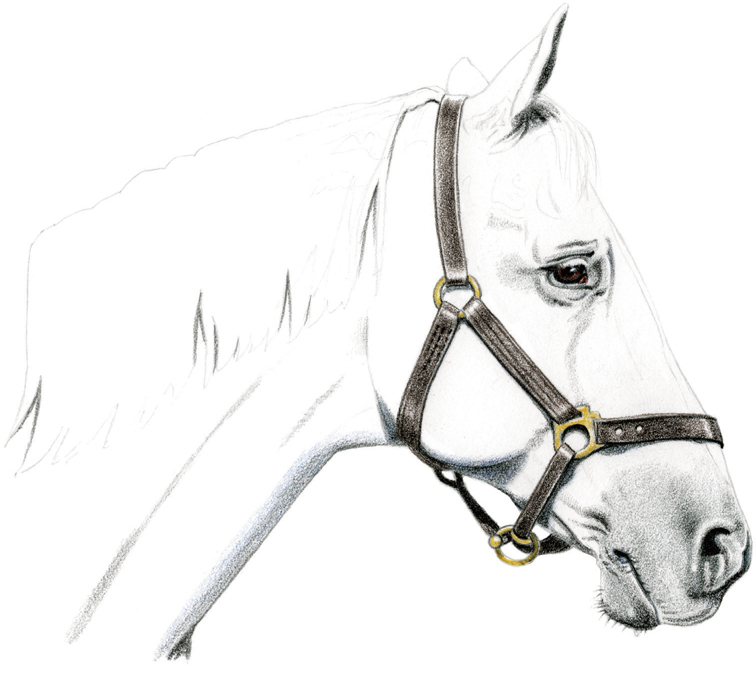
Step Four I lightly apply dark umber to the bridle, leaving small areas white to suggest the shine of the leather. I leave larger white areas near the metal rings to show that the leather is worn there. I also use short strokes and medium pressure to indicate some stitching on the bridle where it stretches over the cheek. Then, using cool gray 90%, I outline and shade the nostril and the line of the mouth. For the lighter areas around the muzzle, I use cool gray 50%. Next I create a few whiskers on the chin with cool gray 90%; I use the same color to create more shadows under the ear. Moving down the face, I apply henna to the corner of the eye. Then I add some color to the shadows under the cheek and on the neck with indigo blue.

Step Five Now I add more color to the leather of the bridle by lightly applying burnt sienna over the dark umber, using more pressure to create darker areas. I give the metal rings a bit more form by adding some burnt sienna on the edges of the metal. Using cool gray 90%, I outline the eyelashes and shade around the eyes. Next I add dark umber to the shadows on the head and neck. I develop the hair of the mane and forelock using cool gray 90%, leaving areas of the paper white for shine and pressing harder for the darker areas at the bottom of the mane. Then I lightly fill in the neck with an even layer of burnt ochre. I also use burnt ochre to outline the edges of the ears and the blaze that extends from the forehead to the top of the nose.

Step Six I fill in the entire face, layering over the shadowed areas and leaving the blaze white. Then I very lightly apply burnt ochre to the gray on the nose and muzzle. I create the darker folds and areas on the face and neck by adding more burnt ochre. Next I lightly apply ultramarine for the dark areas of the mane, leaving areas white for shine. Then I apply a little cool gray 70% around the eye, nose, and mouth.

Step Seven To deepen the color of the coat, I add a layer of sienna brown over most of the horse’s head and neck, leaving some lighter areas to indicate shine. I go over the edges of these lighter areas with white to soften the transition. To add a glow of color to the shadow under the neck, I apply Venetian red. Using cool gray 90%, I add some darker strokes to the mane and pull some of the strokes into the neck to lengthen the mane. I also add darker strokes to the forelock. To deepen areas of the head and neck even further, I apply circular strokes of sienna brown. Finally, I darken the nose and muzzle with another layer of cool gray 90%.