
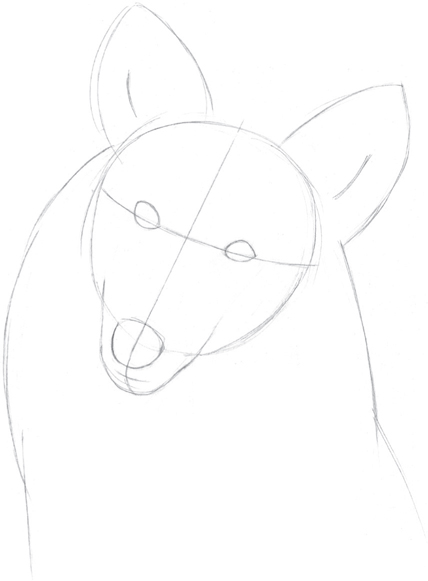
Step One With an HB pencil, I sketch a circle for the dog’s head and a rounded triangle for the muzzle. Then I draw the vertical centerline so it reflects the angled position of the dog’s head. Next I add the slightly curved horizontal centerline. I use these guidelines to position the eyes and nose; then I draw the large ears and the basic shape of the body.

Step Two I refine the eyes, nose, and mouth, adding details and erasing unneeded lines as I go. I draw some jagged lines for the fur, making sure they reflect the curves of the dog’s body. Then I establish the light and dark areas of the fur on the face, which will help me when applying color.
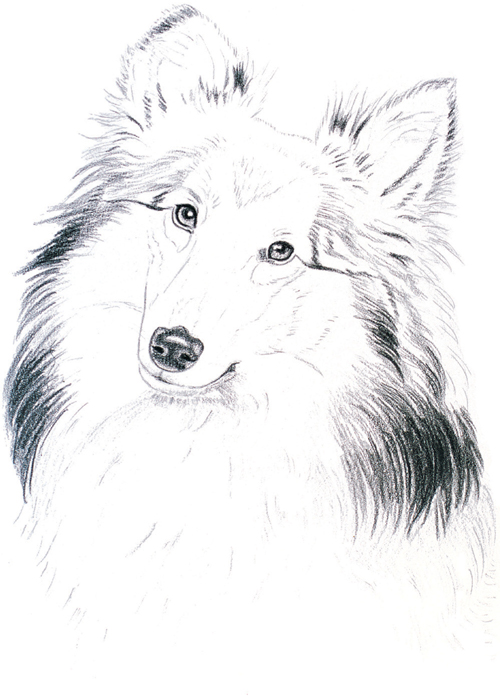
Step Three Still using the HB pencil, I add longer, softer lines to indicate the fur. Then I begin applying color by establishing the darkest areas with cool gray 90%, using strokes that follow the direction of the fur growth. I use the same pencil to fill in the eyes and nose, leaving the highlights white. Next I use medium pressure to add a few long strokes of cool gray 30% to the chest and under the chin.

Step Four I lightly fill in the inner ears with henna and use long strokes of dark umber for the fur on the edges of the ears. For the fur on the face, I use the same pencil and short strokes, following my sketch and leaving some areas white. Then I apply Venetian red to the irises. I use cool gray 90% to refine the nose and pupils, as well as to darken the long fur on the sides of the head and neck. Then, using medium pressure and sienna brown, I create long strokes on the ears and neck and short strokes on the face, pressing harder for darker areas. I also apply a light layer of sienna brown over the henna in the ears.

Step Five Now I use firm pressure to apply dark umber to the darkest areas on the tips of the ears and along the sides of the head. I use the same color to sharpen the edges of some of the facial fur and outline the eyes. Then I switch to burnt ochre and lightly apply it over the rest of the face, leaving some white along the bridge of the nose and around the mouth. When shading the face, I pull the strokes over the already shaded areas to blend and smooth the edges, but I leave some white showing through to indicate lighter areas and highlights.
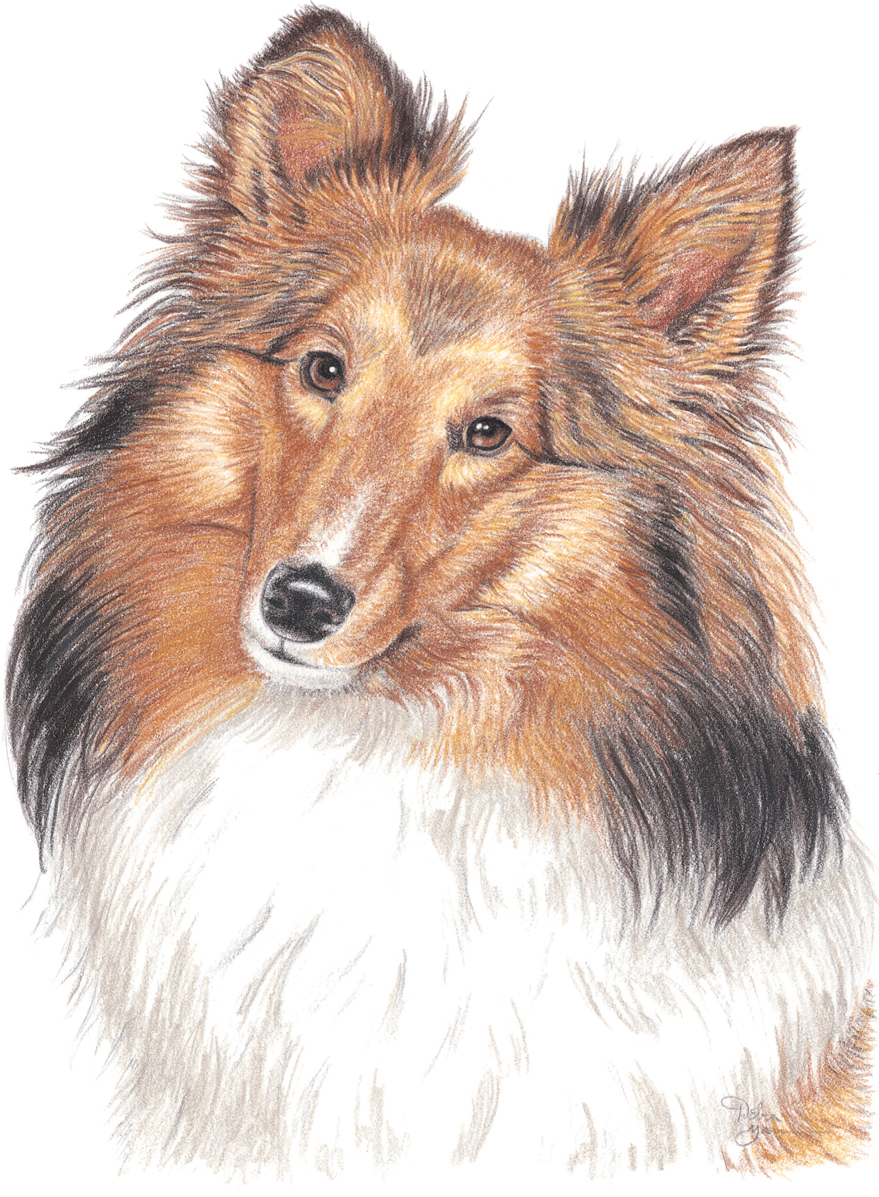
Step Six I apply French gray 30% to areas of the chest and under the neck, using firm pressure in the darkest areas. Then I use dark umber to sharpen the eyes and the areas around them. Stepping back from my drawing, I squint my eyes to see which areas need to be darker; then I refine the black edges of the fur with a few firm strokes. Using medium pressure, I apply yellow ochre over areas of the face and neck, adding enough color so that all but the whitest fur is covered. Then I use medium pressure to apply jasmine to the lighter areas on the face, leaving the small area around the mouth and the bridge of the nose white. Next I slightly darken the nose with cool gray 90%. To finish, I add strokes of sienna brown and yellow ochre to the fur on the dog’s lower left side.