
10. Using the Design Checker

In this chapter, you learn techniques for working with Publisher’s Design Checker. Topics include the following:
![]() Starting the Design Checker
Starting the Design Checker
![]() Running a General Design Check
Running a General Design Check
![]() Running a Commercial Printing Check
Running a Commercial Printing Check
![]() Setting Design Checker Options
Setting Design Checker Options
The Design Checker is a wonderful built-in mistake preventer. For those of us who fumble around a bit, it’s great to know that we can run the Design Checker before we let anyone else see our publication. It checks the publication for design and layout problems and then offers solutions to fix them.
There are four different types of checks: general design, commercial printing, web site, and e-mail. Each type is designed to work with a specific type of publication. It is strongly recommended that you run Design Checker before you print, package it for a commercial printer, publish to the web, or after you convert a publication.
Checking the Publication for Problems
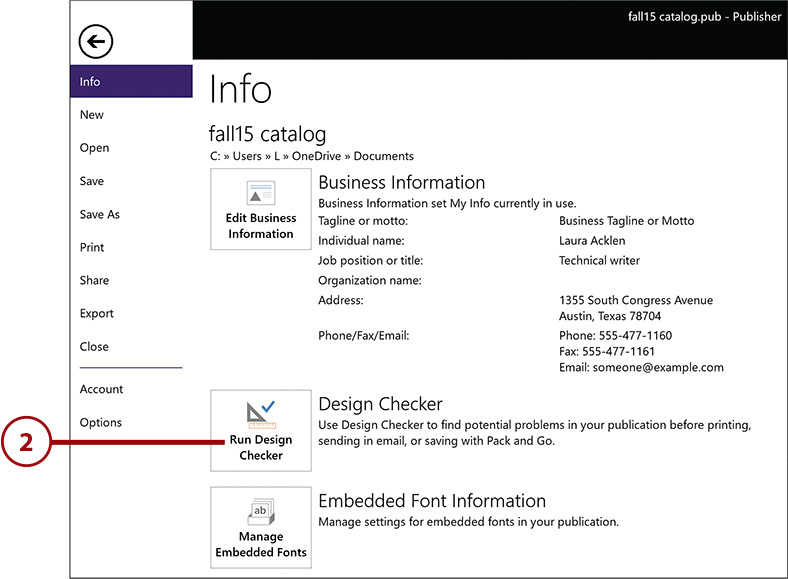
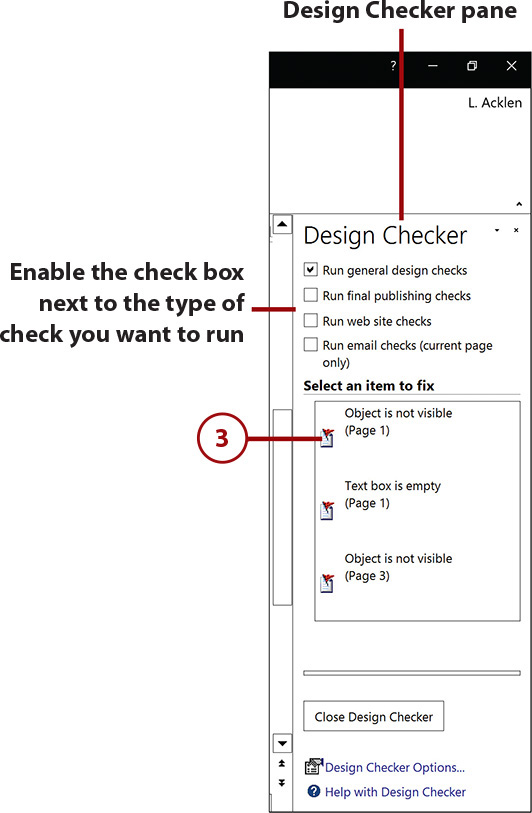
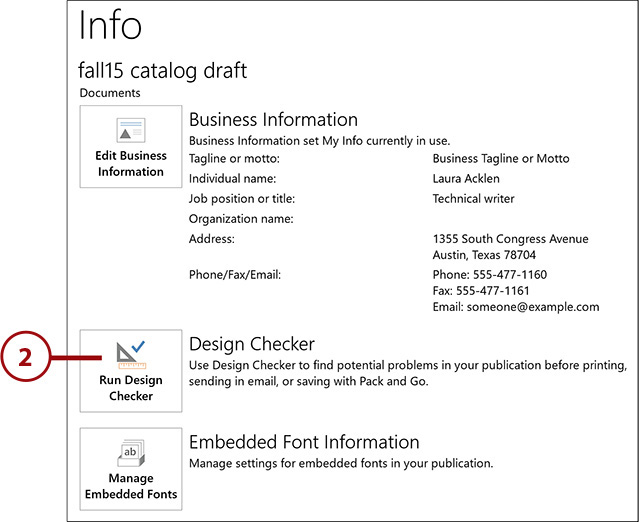
The Design Checker command button is located in the Backstage area. When you start the Design Checker, a new pane appears on the right. You use the options on the Design Checker pane to control the check and to fix problems.
When the Design Checker pane is open, it dynamically updates the list of potential problems as they occur, and as you fix them. Sometimes, fixing one problem leads to another. Take a deep breath and tackle each problem, one at a time. That list will dwindle down into nothing in just minutes.
Running Your First Design Check
As previously mentioned, you can run four different types of checks on your publication, depending on the intended purpose. Before going into detail on each type of check, let’s run through a basic general design check to give you an idea of how the process works.
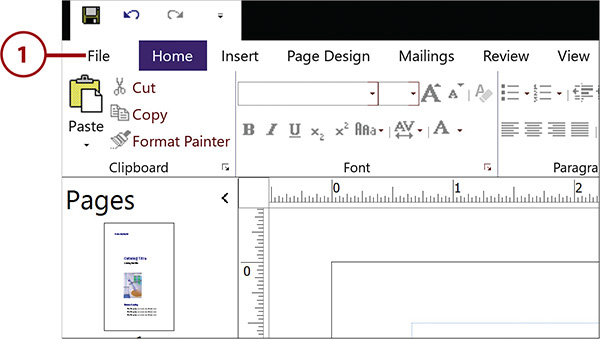
1. Click the File tab to switch to the Backstage area.

2. Click the Run Design Checker button to display the Design Checker pane in the publication window.
3. Select the first potential problem. Publisher moves to that page and displays the object.
4. Point to the right side of the problem box until you see an arrow bar.

5. Click the arrow bar to display other options.

6. Click Explain to display the Publisher 2016 Help window.

7. Type a search word or phrase into the Search box.
8. Click the magnifying glass to start the search.

9. Click the Using the Design Checker in Publisher help topic for more information.
10. Close the Help window when you finish reading.

11. Display the arrow bar again.
12. Click Fix: Bring Object to Front.
13. Select the object and move it aside. Chances are there is another object underneath.

14. Select the extra object and delete it. After a few seconds, that problem no longer appears in the list.

15. Select the next potential problem.

16. Delete the empty text box.
17. Repeat these steps until you have taken care of the potential problems.
18. Click Close Design Checker when you finish.

Running a General Check
A General Design check is just what it sounds like—it scans the document for common design problems, such as the empty text box and overlapping objects that you saw earlier. These may not cause formatting problems. That’s why I call them “potential” problems. If you have trouble figuring out what a problem is, and your publication looks fine when you print it, you may opt to skip the problem.
1. Click the File tab to switch to the Backstage area.

2. Click the Run Design Checker button to display the Design Checker pane in the publication window.

3. Verify that the Run general design checks check box is enabled.
4. Select the first potential problem in the Design Checker pane.
5. Continue working through the list of problems.
6. Click the Close Design Checker button when you finish.

Running a Commercial Printing Check
The final publishing checks are specifically designed to catch mistakes that can cause problems when you have a publication professionally printed. Common issues include setting a publication to print in RGB colors, low-resolution pictures, missing pictures, and so on. This type of mistake can be expensive if caught after a large print run.
1. Click the File tab to switch to the Backstage area.

2. Click the Run Design Checker button to display the Design Checker pane in the publication window.

3. Enable the Run final publishing checks check box.
4. Select the first potential problem in the Design Checker pane.
5. Continue working through the list of problems.
6. Click the Close Design Checker button when you finish.

Run Other Checks
You can enable more than one type of check in the Design Checker pane. For example, you may want to run all the general design checks as well as e-mail checks. Note also that e-mail checks are run only on the current page.
Running a Web Site Check
Potential problems with web pages are the focus of the Run Web Site Checks option. The check looks for pictures without alternative text, pages that can’t be reached from the first page, and pages that don’t have a link to leave the page.
1. Click the File tab to switch to the Backstage area.

2. Click the Run Design Checker button to display the Design Checker pane in the publication window.
3. Enable the Run web site checks check box.
4. Select the first potential problem in the Design Checker pane.
5. Continue working through the list of problems.
6. Click the Close Design Checker button when you finish.

Running an Email Check
The Email checks option looks for potential problems with creating publications that are destined for email messages. This check finds issues with objects that overlap text boxes, objects containing text that may have been accidentally rotated, text boxes with vertical text, and a handful more.
1. Click the File tab to switch to the Backstage area.
2. Click the Run Design Checker button to display the Design Checker pane in the publication window.

3. Enable the Run email checks (current page only) check box.
4. Select the first potential problem in the Design Checker pane.
5. Continue working through the list of problems.
6. Click the Close Design Checker button when you finish.

Setting Design Checker Options
The Design Checker Options dialog box is the command center: the place where you control exactly what Publisher looks for in each of the four checks previously described. You can also customize how the task pane displays the problems that it finds, and set which pages you want the Design Checker to set.
Selecting Options on the General Tab
The General tab has just a couple sections: Display Options and Page Range. The Sort by list enables you to choose how you want the potential problems arranged: by page number, by description, or by status.
The default is to remove the items that are fixed so that eventually you are left with an empty list. If you collaborate with others on the publication, you may want to leave those on the list. Simply disable the Remove fixed items check box.
The Page Range section enables you to limit the check to the current page, versus all the pages. You can also enable or disable the option to check master page(s).
1. Click the File tab to switch to the Backstage area.

2. Click the Run Design Checker button to display the Design Checker pane in the publication window.

3. Click Design Checker Options to display the Design Checker Options dialog box.

4. On the General tab, click the Sort by arrow to open the list of options.

5. If you like, choose another option to rearrange the list.
6. Disable the Remove fixed items check box if you would prefer to leave fixed problems in the list.
7. If you prefer not to check master pages, disable the Check master page(s) check box.
8. Enable the Current page(s) option if you want to check only the current page, or the currently selected pages.
9. Click OK if you want to save your changes, or click Cancel to clear the dialog box.

Enabling/Disabling Checks on the Checks Tab
For extremely complex publications, you can customize the way Design Checker works by enabling and disabling the checks for each category on the Checks tab. Is it necessary for a routine publication? Not at all. However, if you move past the same potential problem over and over, maybe you should disable that check.
1. Click the File tab to switch to the Backstage area.

2. Click the Run Design Checker button to display the Design Checker pane in the publication window.

3. Click Design Checker Options to display the Design Checker Options dialog box.

4. Click the Checks tab.

5. Click the Show arrow to open the list of checks you can control.

6. Select one of the other checks to narrow down the list to just those options.

7. Disable items in the list by removing the check marks.
8. Click OK when you finish.

Check All
Selecting All Checks in the Show list displays the checks performed for all of the categories.
Exploring the General Checks Options
Narrowing down the list of checks that are done makes it much easier to work with only those options that you are using. For example, it doesn’t make sense to scroll past options for website checks if you aren’t preparing your publication for the web.
Specifically, the checks performed during a General Checks run are as follows.


It’s Transparent
If you want to use transparent colors or effects, it’s best to save the publication in PDF or XPS. You can also opt to print to XPS Enhanced Printer.
Exploring the Final Publishing Checks Options
Selecting the Final Publishing Checks in the Show list narrows the list of checks to just those for commercial printing.
The checks performed during a Final Publishing Checks run are as follows.

It’s Transparent
If you want to use transparent colors or effects, it’s best to save the publication in PDF or XPS. You can also opt to print to XPS Enhanced Printer.
Exploring the Web Site Checks Options
The three web site checks are self-explanatory.

Exploring the Email Checks Options
Now consider the Email Checks options. Publisher runs through the publication looking for issues related to e-mailing the publication. The options for Email checks are as follows.
