
5. Saving and Printing Publications

In this chapter, you learn techniques for saving and printing publications. Topics include the following:
![]() Saving Publications
Saving Publications
![]() Opening Publications
Opening Publications
![]() Sending Publications as Attachments
Sending Publications as Attachments
![]() Generating PDF/XPS Files
Generating PDF/XPS Files
![]() Setting Up for Professional Printing
Setting Up for Professional Printing
In Chapter 1, “Getting Started with Publisher 2016,” you quickly learned how to save a publication. Of all the techniques, that one is a top priority. Until you save your work, it isn’t actually secure. This chapter comes back around to saving your publication and delves into the details of saving to formats other than Publisher’s native format. From there, you learn how to open existing publications.
The rest of this chapter discusses sharing publications via email and printing. The final section goes over the specifics to set up a publication for photo printing and commercial printing.
Saving a Publication
When you save a publication, Publisher 2016 saves it in its own proprietary format (.PUB). You can save the publication in other formats, however, so that you can share the publication with people who may not have Publisher. For example, you may want to save your publication as a PDF file so that you can email it to your colleagues.
Publisher 2016 saves files in the following formats:
• Publisher 98, Publisher 2000
• JPEG, GIF, TIFF, PNG, BMP
• PDF, Windows Metafile, Enhanced Metafile, Plain Text
• Word Document 97–2003 (DOC)
• Unicode, Postscript, XPS, Rich Text, HTML
There are some important limitations to be aware of when saving your publications in other formats. Saving in previous versions of Publisher is crucial if your collaborators don’t have the most recent version. Therefore, saving a file in Publisher 98 or Publisher 2000 ensures backward compatibility, but the older formats do not support newer features.
Your publications may be formatted differently on older versions of Publisher, and the results can be unexpected. You need to take care not to use features that won’t be available to your collaborators.
Saving a Publication as a PUB File
Before you learn how to save a publication in a non-native format, go over the steps to save a publication in Publisher’s native format of PUB.
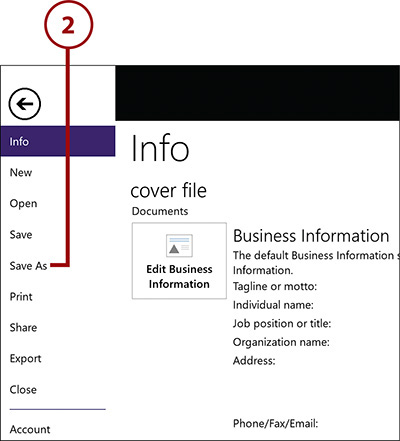
1. With the publication that you want to save open in the workspace, click the File tab to switch to the Backstage area.

2. Click Save As where you can choose a location for your new file.
3. First, decide if you want to save it on OneDrive or on This PC. For this example, save the file on This PC.
4. Click the Documents folder to store the publication there. Now, the Save As dialog box appears.

5. If you haven’t already named your publication, type a name in the File Name box.
6. Click the Save As Type arrow to open the list of file types that are supported in Publisher 2016. You see three Publisher file formats in the list: Publisher Files, Publisher 98 Files, and Publisher 2000 Files.
7. Select the Publisher format in which you want to save your publication.

8. Click the arrow next to the Save button to open the Save option list.
9. Click Save to save the publication.
10. Or, click Save with Backup if you want to create a backup file in addition to the original file.

Saving a Publication in PDF
Saving a file as a PDF produces a file that few people will be able to edit (if at all). Which isn’t necessarily a bad thing. If you don’t want anyone to easily alter the content, saving the file as a PDF is the perfect solution. It creates a small file that is easily shared.
1. With the publication that you want to save as a PDF open in the workspace, click the File tab to switch to the Backstage area.

2. Click Save As to open the Save As place where you can choose a location for your new file.

3. Click to save the file on This PC.
4. Click the Documents folder to store the publication there. Finally, the Save As dialog box appears.

5. If you haven’t already named your publication, type a name in the File Name box.
6. Click the Save As Type arrow to open the list of file types that are supported in Publisher 2016.
7. Select PDF to display the options for this format.

8. Click to set options for saving the publication to PDF. The Publish Options dialog box displays.

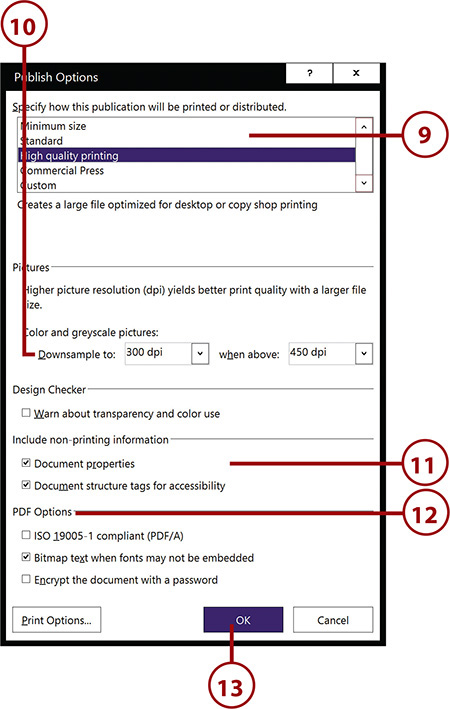
9. Choose the type of PDF you want generated, based on how you will share it.
10. Set options for handling pictures.
11. Enable these check boxes to include or exclude nonprinting information.
12. Enable or disable the PDF Options here.
13. Click OK when you finish. You return to the Save As dialog box.
14. Disable this check box if you do not want to open the PDF after publishing.
15. Click Save to create the PDF. You then return to the Publisher workspace.

Opening a PDF
If you opt to open the PDF after publishing in the Save As dialog box, you may be prompted to select the app you want to use to open the PDF file.
Saving to a Different Format
If you plan to save your publication in another format (non-native), plan on saving it in the native format (PUB) as well. This way, you can quickly edit the publication when necessary. Then you can resave it in the non-native format if you want.
Saving a Publication as a Web Page
Although Publisher 2016 is not a web site builder, you can use it to save your publication in HTML format. It’s so quick and easy; you might think that nothing has happened. Rest assured Publisher has produced an HTML file in the selected folder.
1. With the publication that you want to save as a PDF open in the workspace, click the File tab to switch to the Backstage area.

2. Click Save As to open the Save As place where you can choose a location for your new file.

3. Click to save the file on This PC.
4. Click the Documents folder to store the publication there.

5. If you haven’t already named your publication, type a name in the File Name box.
6. Click the Save As Type arrow to open the list of file formats.
7. Select Single File Web Page.

8. Click Save to create the HTML file.

Opening a Publication
Opening a publication is just as simple as saving it. After you navigate to the folder where the publication is stored, you simply select it. In fact, you can elect to open multiple publications as long as they are in the same folder. Remember, you must click the first file, and then hold down Ctrl to click the rest.
1. Click the File tab to switch to the Backstage area.

Opening a File
Regardless of where your files are located, the steps for opening a file once a location is selected are the same.
2. Click Open to switch to the Open place where you can browse to the location of the file you want to open.
3. Browse to the publication file you want to open.

4. Select one or more files in the list.
5. Click Open to open the file(s).

Recent Files
When the Open place appears, the Recent option is selected. A list of recently opened publications displays in the right pane, so you can quickly get to the files you’ve been working on.
Open as Read-Only
You can also opt to open a file as read-only, so you can’t accidentally make any changes. Click the arrow on the Open button, and then click Open Read-Only.
Sharing a Publication
Sending files as email attachments has revolutionized the way we work with one another. Collaborating with people all over the world is as simple as attaching a file and asking for input/feedback. It no longer matters if the decision makers are physically in the office, because you can email a file for their approval to virtually anywhere in the world.
Publisher gives you four options for emailing publications:
• Rendering the current page to an HTML to attach to an email message
• Sending the entire publication as a PUB
• Sending the publication as a PDF attachment
• Sending the publication as an XPS attachment
Sending a Page as HTML
When you post your publication on the Web, it can be helpful to share an HTML copy with your collaborators so that everyone has a chance to see what it will look like “live.” The Send Current Page option publishes the page where the insertion point resides into an HTML version and displays it in the message body of an email message, ready to be addressed and sent.
Repeat Sending Page
Of course, the process of sending the current page can be repeated as often as necessary to share relevant sections of the publication. Simply click one at a time on the other pages you want to share and generate the HTML.
1. Click the File tab to switch to Backstage.

2. Click Share to open the Share place, where you select to send the current page as an HTML attachment.

3. Before you share your masterpiece, it’s a good idea to preview it first. Click Email Preview to generate an HTML file of the publication, and open it in your browser.

4. Scroll down through the publication to make sure everything looks okay. You may want to do some minor editing at this point, or if you are satisfied, you can send it. In either case, you need to switch from your browser window back to the Publisher window.
5. Back in the Backstage of Publisher, click Send Current Page.

6. In this email message window, fill in the To:, Cc:, and Subject boxes just as you normally would.
7. Click Send to distribute your masterpiece to the world!

Setting Message Properties
Click Options (above the To: box) in the email message window to set the properties for this message. You can set the importance and sensitivity, adjust security settings, enable read receipts, and set the delivery options.
Sending the Publication as an Attachment
The second option is a quick way to share the entire publication. An email message is created with the PUB file attached. You just fill in the To, Cc, and Subject and send it.
Remember that the publication is traveling as a PUB file, so the recipients must have Publisher to open it. If you have any doubts at all, consider sending it as a PDF instead. They won’t be able to edit it, but they can see exactly how it looks in Publisher. That’s covered in the next section.
1. Click the File tab to switch to Backstage.

2. From the Backstage, click Share to open the Share place.
3. Click Send as Attachment.

4. If for any reason you do not want to save your changes, click No. Otherwise, click Yes to continue.

5. Click in the To: and Cc: boxes and address the message.
6. Type a subject here.
7. Type the message text.

8. Click the arrow next to the Attached box to display the options for attachments. Click the arrow again to close this menu.
9. Click Send to distribute the publication.

Removing an Attachment
If you change your mind and want to delete the attachment, click the arrow next to the Attached box, and then choose Remove Attachment.
Sending the Publication as a PDF/XPS File
These last two options are ideal if you don’t want any changes made to your publication, intentional or otherwise. Both PDF and XPS files preserve the layout, images, fonts, and formatting and although they can be changed, it isn’t easy to do so.
Which one do you choose? If you haven’t specifically been told to send the publication out in XPS format, use PDF. It’s a universally accepted file format and close to 90% of all computers have a PDF reader installed. So it’s safe.
1. From the Backstage, click Share to open the Share place.
2. Click Send as PDF to generate a PDF file.
Or
3. Click Send as XPS to generate a XPS file.

4. Click in the To: and Cc: boxes and address the message.
5. Type a subject here.
6. Type the message text.
7. Click Send to distribute your PDF or XPS file.

XPS Files
If you create an XPS file, you see an XPS file as the attachment.
Printing Publications
This may actually be the easiest thing you do with a publication. Printing is printing! You may not do it as often now that we all try to conserve paper, but it’s something you should know how to do. Publisher works just like any other Windows application: You pick the printer, set options if necessary, and then print!
1. From the Backstage, click Print to open the Print place.

2. Click this arrow to open a drop-down list of available printers.
3. Type the page numbers here to print only specific pages.
4. Display the options that print on both sides by either flipping the page on the long edge or the short edge. Click the button again to close the drop-down list.
5. Select Composite Grayscale here to print in black and white.
6. Enable this check box to save the settings.
7. When you are satisfied with the settings, click Print.

Setting Up for Professional Printing
Generally speaking, it’s cheaper to have your publication reproduced by a professional printer than it is for you to print it on your own printer. Understandably, deadlines take precedence, so if you must, print them on a color printer. Most current color printers have a high resolution, so they will look professionally done. Just be prepared for the high cost of replacing all that ink.
Save for Photo Printing
Should you have the luxury of getting your publication professionally printed, you have a couple options: You can produce a file of images for photo printing, or you can produce a file prepared for a commercial printer.
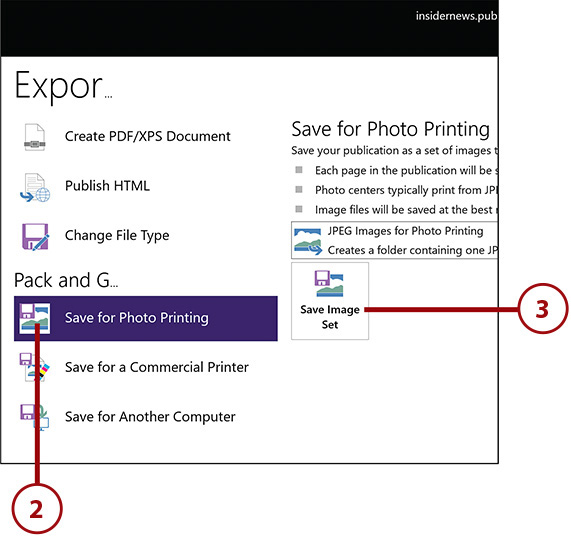
1. From the Backstage, click Export to open the Export place.

2. Click here to save the publication as a series of JPEG images.
3. Click Save Image Set. The Choose Location dialog box appears.
4. Browse to the location where you want to save this file.
5. When you locate the folder, select it and then click Select Folder.

If you purchased your color printer in the last five years, chances are it prints pictures on photo paper with a decent resolution. They will definitely work in a pinch. Furthermore, you don’t have to print on photo paper to get a sharp image. Simply printing on a bright white page produces impressive results.

Save for a Commercial Printer
There are important considerations when you prepare a file for a professional printer. They can only work with what you bring them, so it’s crucial that you know what type of file they need and how they prefer to receive it. The company may post those guidelines on its web site, or a quick phone call can usually answer those questions.
Publisher’s Pack and Go Wizard makes quick work out of the process. It walks you through the process of saving the files to your desired location and allows you to print a composite proof.
1. From the Backstage, click Export to open the Export place.

2. Click Save for a Commercial Printer.

3. Choose to generate both PDF and PUB files or one or the other.
4. Commercial Press is already selected. Open the list to choose a different file type.

5. If you like, select High Quality Printing instead of Commercial Press.
6. Click Custom to display the Publish Options dialog.

7. Set the resolution for photos here.
8. Enable or disable the PDF Options.
9. Set additional Print Options like printing crop marks.
10. Click OK when you finish.

11. Select where you want to save the files.
12. If necessary, browse to the location.
13. Click Next to continue.

14. Disable this check box if you do not want to print a proof.
15. Click OK to complete the process.
