In Chapter 2, I strongly suggested that you write most of your presentation in the PowerPoint or Word Outline view. I’m not backing off from that advice; focusing on your presentation’s text, rather than the text on your slides, will lead you to write better presentations.
But sooner or later, you will need to work with the text on your slides, and that’s what this chapter is all about. For this chapter, at least, I’ll assume that you’ll be entering text directly onto slides.
PowerPoint showcases Office 2007’s improved text handling, layout, and display abilities, and you’ve got better control over the appearance and style of text within PowerPoint 2007, compared to previous versions. In this chapter, you’ll learn how to enter text on slides; style that text as you wish; change the alignment and spacing of text; work with indents and tabs on slides; save time when you’re setting text styles; and avoid embarrassing spelling errors.
The first slide in your presentation is almost always the title slide, which usually contains two pieces of information: the title of the presentation, and a subtitle, which is where you can put your name and company affiliation (Figure 4.1).

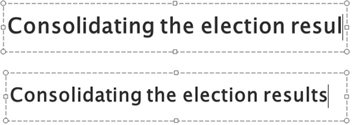
In PowerPoint, all text must be in text boxes. A text box defines the boundaries of the text. If you have more text than the text box can normally contain (which depends on the size of the text box and the size and style of the text within the box), PowerPoint automatically shrinks the text to fit the box (Figure 4.2). When there are multiple lines of text, the text automatically wraps inside text boxes.
Most of the time, you’ll use the text boxes provided on the slide layout that you have chosen for your slide, but you can also add your own text boxes to a particular slide, as discussed later in this chapter.
Procedure 4.1. To add title and body text:
Open a new presentation file, and apply a design from the Design > Themes group. (See Chapter 2 if you need more information about doing that.)
PowerPoint creates a new slide based on the first slide layout in the theme file, which is usually the Title Slide layout. The new slide will contain placeholder text for its text boxes, which say, “Click to add title” and “Click to add subtitle” as shown in Figure 4.3.
Click in the title box, which usually contains larger-sized text than the subtitle.
An insertion point begins blinking in the title box.
Type your title.
When you’re done entering the title, click outside the title box to deselect it, or click in the subtitle box to begin entering your subtitle.
You’ll know you’re ready to enter text in the subtitle box when you see the insertion point blinking in that box.
Type your subtitle.
Click outside the subtitle box to deselect it.
✓ Tips
It’s natural to want to press the Return or Enter when you’re done entering text in a PowerPoint text box. But if you do that, PowerPoint inserts another line in the text box.
If you like, you can place a graphic on your title slide; there’s no law saying that it has to include just text. See Chapter 5 for more information about placing graphics on slides.

On many slides, you’ll use bulleted text, which you’ve seen in most presentations to denote the individual talking points on a slide (Figure 4.4). Bulleted text is just that, text preceded by a marker called a bullet. Bullets in PowerPoint can be either text characters, or pictures.

The bulleted text on a slide can have multiple levels, which denote sub-points or sub-topics. For example, you could have text on a slide such as this:
Contemporary Folk Music
   Artists
      Kaplansky, Lucy
      Peacock, Alice
      Shindell, Richard
Each level of text is subordinate to the level above. On a slide, just as in the text above, that subordination will be shown as indented text. There will be a bullet at each level, preceding the text. In some themes, you’ll see different bullets for each indented level (Figure 4.5).

When you enter text in a bulleted text box, PowerPoint automatically inserts the bullets whenever you press Enter to begin a new line. Pressing Tab at the beginning of a new line indents that line one level.
On slide layouts with content boxes, PowerPoint allows one bulleted text box per content box. You can manually insert other text boxes, but they can’t contain bulleted text (except for text you manually add bullets to with the Home > Paragraph > Bullets button; those bullets don’t take on the theme’s bullet styles, as shown in Figure 4.6).

Procedure 4.2. To enter bulleted text:
Create a slide with a slide layout containing a content box.
Typical slide layouts with content boxes include Title and Content, Two Content, Comparison, and Content with Caption.
In the text box with the “Click to add text” placeholder, click to place the insertion point (Figure 4.7).
Enter your text.
If your entry is too long, it will wrap within the text box, with the default left text alignment.
Press Return to begin a new line.
PowerPoint automatically inserts a new bullet at the beginning of the line.
(Optional) To indent text one level, press Tab before you begin typing on a new line.
✓ Tips
Press
 with the insertion point placed at the start of a line of text to remove one level of indenting.
You can move text around with the mouse by pointing at a bullet, which turns the mouse cursor into a four-headed arrow (Figure 4.8). Click and drag the bullet point, which moves the bullet and its associated text together, to rearrange the text on the slide.


It’s common to need to add special characters to your slides, such as the copyright, trademark or currency symbols. These characters aren’t on your keyboard, so PowerPoint gives you another way to add them.
Procedure 4.3. To enter special characters:
Click in a text box to set the insertion point.
Choose Insert > Text > Symbol (Figure 4.9).
The Symbol dialog appears (Figure 4.10).
Recently used symbols are listed at the bottom of the dialog; click the one you want to select it.
or
Scroll through the list of symbols at the top of the dialog to find the one you want, then click to select it.
Click Insert.
Nothing appears to happen, but PowerPoint has inserted the character at the insertion point.
Click the window’s Close box.
The character you inserted appears on the slide (Figure 4.11).


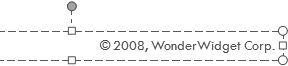
Besides the bulleted text boxes found on many slide layouts, you can also add your own text boxes to slides. These “free” text boxes can be used wherever you need extra text on a slide. For example, you can use a text box as a picture caption (Figure 4.12).
You format the text in a text box in much the same way that you format any text (for more about this, see “Formatting Text,” later in this chapter), but there is a special dialog box that you can use, too.
Procedure 4.4. To add a text box:
On the slide where you want to add the text box, choose Insert > Text > Text Box.
The cursor changes into a crosshair.
Click and drag the cursor, drawing the text box to the size you want and putting it where you want to position it on the slide.
Release the mouse button to create the text box, which displays an insertion point, then enter your text (Figure 4.13).
✓ Tips
Free text boxes automatically grow or shrink vertically to handle the length of your text. You can resize them using their selection handles, just like most other objects in PowerPoint.
If you want to rotate the text box, click and drag the green Rotate handle above the box. The cursor turns into a curved arrow, and you can rotate the box freely.

Procedure 4.5. To format text in a text box:
Right-click the text box, then choose Format Shape from the resulting shortcut menu.
The Format Shape dialog appears.
Click the Text Box category (Figure 4.14).
Make adjustments to your text.
You can change the vertical alignment, the text direction (horizontal or rotated in 90 degree increments), the way the text is automatically fit in the box, the margins of the text within the box, or the number of columns in the text box.
When you are done formatting, click Close.

Once text has been created in text boxes on a slide, the text box can be treated, in many ways, as if it were a graphic object. You can move text boxes around and rotate them, apply drop shadows and graphic fills, and change the opacity of the text. For more about those topics, see Chapter 5, and remember that the same tools can be applied equally to graphics and text boxes.
There’s another useful text manipulation you can do, and that is to layer text boxes with the other elements on the slide. Imagine that each element—text, graphics, movies, shapes, etc.—on the slide is in its own layer on the slide, with the slide layout making up the layer that’s in the back. You can move each element forward or back in the stack. It’s possible to get some interesting results by layering, as shown in Figure 4.15.

Procedure 4.6. To layer text boxes:
Create the text boxes on the slide that you want to layer.
These boxes can include the Title and Content boxes.
Select a text box.
The Drawing Tools contextual tab appears in the Ribbon.
To move the text box backward in the layer order, choose Drawing Tools > Format > Arrange > Send to Back (or click the arrow next to the button and choose Send Backwards from the pop-up menu).
or
To move the text box forward in the layer order, choose Drawing Tools > Format > Arrange > Bring to Front (or click the arrow next to the button and choose Bring Forward from the pop-up menu).
The selected item moves as you command.
PowerPoint does a good job of showing off the improved font rendering capabilities in Office 2007 and Windows Vista. You can scale text with no loss of quality, so your presentations will remain readable (unless you make the text too small for people in the back row!).
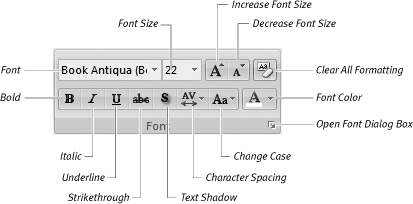
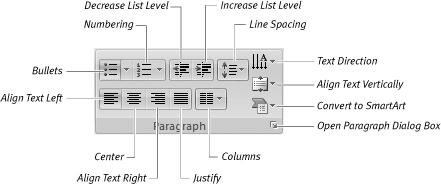
The main tools you’ll use to work with fonts are in the Font and Paragraph groups on the Home tab of the Ribbon (Figures 4.16 and 4.17). These tools are similar to the ones in the other Office 2007 applications. Because great-looking text is so vital to a good presentation, I’ll be discussing the text tools in depth.
Procedure 4.7. To change fonts in a text box:
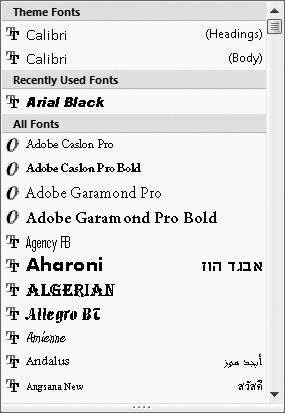
Choose Home > Font > Font, then choose the font you want from the pop-up menu (Figure 4.18).
As you hover over a font, the text shows you a live preview of the change. Click a font to select it, and the selected text changes.
Notice how PowerPoint lists the fonts used in the theme design at the top, other fonts that have been recently used next, then all the fonts in your system last. All the fonts are shown as previews, rather than just a plain menu font.
✓ Tip
In the Font menu, you can also see what format a font is by looking at the icon next to the font name. The double-T icon stands for TrueType, and the stylized O stands for OpenType. A discussion of these two font formats is beyond the scope of this book; I recommend that you read the Wikipedia entries for both formats.
Like changing fonts, changing font sizes is just a matter of selecting text boxes or text and making your choice from the Font window.
Procedure 4.8. To change the size of type:
Select the text you want to change.
Choose Home > Font > Font Size, then choose the size you want from the pop-up menu.
As you hover over a font size, the text shows you a live preview of the size change. Click a size to select it, and the selected text changes.
or
Choose Home > Font > Increase Font Size, or press
 .
.or
Choose Home > Font > Decrease Font Size, or press
 .
.These two buttons change the font size up or down in the same increments that they are listed in the Font Size menu. So for instance, clicking Increase Font Size on 24-point text jumps the text size to 28 points, and clicking Decrease Font Size on that same 24-point text shrinks the text to 20 points.
There are several font styles that you can set using the Font group, including bold, italic, underline, strikethrough, and shadow. There are also additional styles accessible from the Font dialog.
Procedure 4.9. To set basic font styles:
In a text box, select the text that you want to style.
Click on the style button you want from the choices in Home > Font.
or
To make text bold face, press
 .
.or
To make text italic, press
 .
.or
To underline the text, press
 .
.The text changes as you command.
Procedure 4.10. To set additional font styles:
Select the text that you want to style.
At the lower-right corner of the Font group, click the Open Font Dialog Box button.
The Font dialog appears (Figure 4.19). The additional font styles available in this dialog include your choice of underline style and color; double strikethrough; superscript; subscript; small caps; all caps; and the ability to equalize the character height.
Make your choices in the Font dialog, then click OK to apply your changes.

Using Equations in PowerPoint
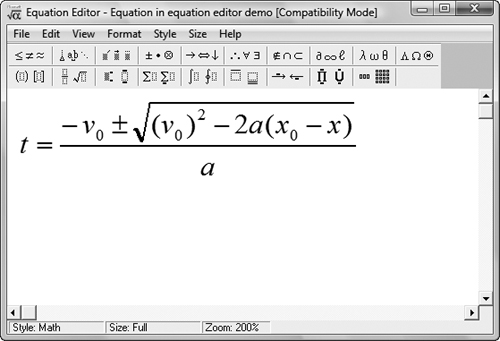
PowerPoint is fine for creating basic superscripts and subscripts, but its shortcomings in creating complex equations will make mathematicians, scientists, and engineers throw up their hands in horror. PowerPoint’s built-in text tools just aren’t made for specialized formatting of that complexity.
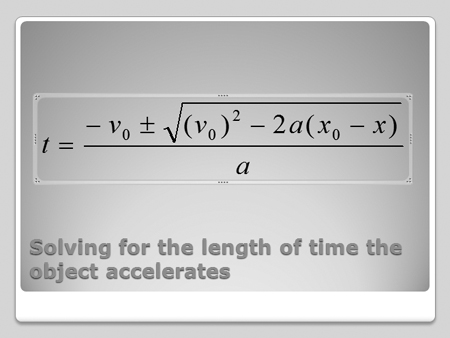
The solution is to use other applications to create an equation, save it as an object, then place the equation into your presentation. Microsoft provides a good basic program for equation creation, Microsoft Equation Editor, which is part of the default installation of Office. The Equation Editor does a decent job for light-duty equation wranglers. To use it, choose Insert > Object, then choose Microsoft Equation from the resulting dialog. The Equation Editor will open, and you can type your equation into it, using the editor’s tools to give it that equation-y goodness (Figure 4.20). Then choose File > Exit and return to [presentation name]. You’ll need to resize the graphic, but the result looks good (Figure 4.21).
If you have hard-core equation needs, consider upgrading to MathType ($97; www.dessci.com), which is made by Design Science, the same company that provides Equation Editor for Microsoft. MathType contains many more symbols, templates, and specialized math fonts than Equation Editor. You may also want to consider turning to the LaTeX equation typesetting system. There are free, open source software implementations of LaTeX for Windows; perhaps the best known is MiKTeX, which you can find at www.miktex.org.
Sometimes you accidentally press your Caps Lock key, and type an entry in all uppercase. Or perhaps you purposely made a title uppercase for effect, then later decide you don’t like that effect. Rather than retyping the offending entry, use PowerPoint’s Change Case feature to apply the capitalization you want.
Procedure 4.11. To change text case:
Select the text that needs its case changed.
Choose Home > Font > Change Case, then choose the capitalization you want from the pop-up menu (Figure 4.22).
Your choices are:
Sentence case.
lowercase
UPPERCASE
Capitalize Each Word
tOGGLE cASE
The text changes.

There are different color pickers you can use to apply colors to text.
Procedure 4.12. To change the color of text:
Select the text whose color you wish to change.
Click the Font Color button in the Font group.
The Colors pop-up menu appears (Figure 4.23).
Pick one of the Theme Colors or the Standard Colors to select the color you want.
The text changes color.
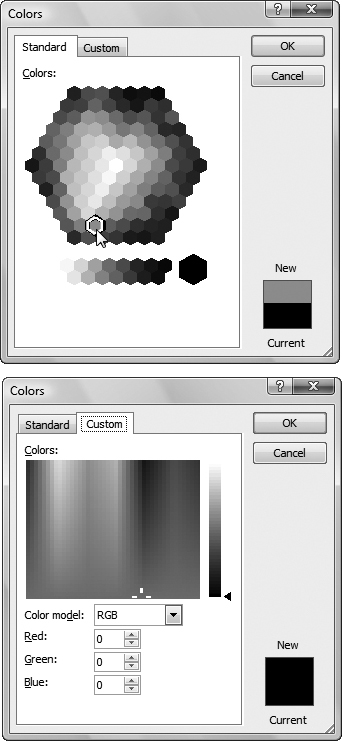
(Optional) If you want to use a color picker to choose a color not in the pop-up menu, choose More Colors.
The Colors dialog appears, set to the Standard tab (Figure 4.24). You also have the choice of a different color picker on the Custom tab.
(Optional) Choose a color from one of the color pickers, then click OK.
The text changes color.

If you make a bunch of font style changes, then decide that you really prefer the default font styling of the theme, you don’t have to go back and re-style the text. Instead, you can simply remove the font formatting.
Procedure 4.13. To remove font formatting:
Select the text that you want to return to the default font style for your presentation’s theme.
Choose Home > Font > Clear All Formatting.
The text returns to the theme’s default style (Figure 4.25).
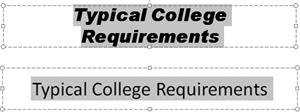
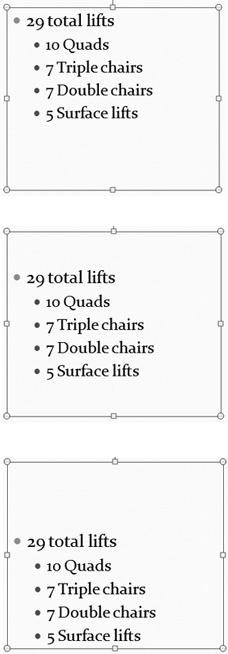
PowerPoint has two ways to control text alignment. You can set horizontal alignment in the four standard ways: Left, Center, Right, and Justified (Figure 4.26). You can also set vertical alignment, which controls where the text is placed (Top, Middle, Bottom) within its text box (Figure 4.27). You’ll use the Paragraph group in the Home tab to do the job.

Procedure 4.14. To set horizontal text alignment:
On your slide, select the text whose alignment you wish to change.
Click the appropriate horizontal alignment button in the Home > Paragraph group (Figure 4.28).
The text alignment changes.

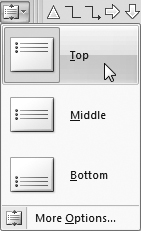
Procedure 4.15. To set vertical text alignment:
On your slide, select the text whose alignment you wish to change.
Choose the alignment you want from the pop-up menu at Home > Paragraph > Align Text Vertically (Figure 4.29).
The text alignment changes.
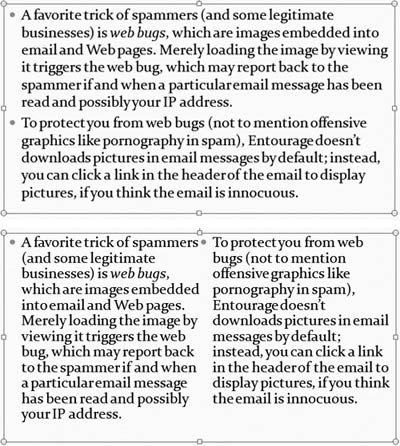
Within a text box, PowerPoint allows you to create columns of text. You can create two, three, or even more columns in a text box, though for slides, more than two columns will rarely look good.
Procedure 4.16. To arrange your text in columns:
Click on a text box to select it.
Choose Home > Paragraph > Columns, then choose the number of columns you want from the pop-up menu (Figure 4.30).
The text changes (Figure 4.31).
(Optional) to add more than three columns, choose More Columns from the pop-up menu. The Columns dialog appears (Figure 4.32). Set the number of columns and the spacing between them, then click OK.


When you select text in PowerPoint, a small semitransparent toolbar appears near your cursor. This is the Mini toolbar, and if you move your cursor over the Mini toolbar, it will come completely into view (Figure 4.33). The Mini toolbar makes it easy to style text without having to resort to the Ribbon. You can use it to set fonts, font size, text color, bold, italic, text alignment, create bulleted lists, and increase or decrease bullet indent.

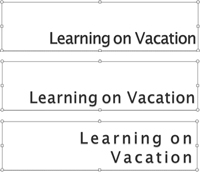
You have control over two attributes of the spacing of your text. Character spacing affects the amount of space that PowerPoint puts between the characters within a line. Line spacing is the amount of space between two or more lines of text.
Two other adjustments, before and after paragraph spacing, control the spacing between paragraphs on the slide.
Procedure 4.18. To change character spacing:
Select the text that you wish to change.
Choose Home > Font > Character Spacing, then pick from the pop-up menu (Figure 4.34). Your choices range from Very Tight to Very Loose.
The text changes (Figure 4.35).

Procedure 4.19. To change line spacing:
Choose Home > Paragraph > Line Spacing, then pick from the pop-up menu (Figure 4.36).
The text changes.

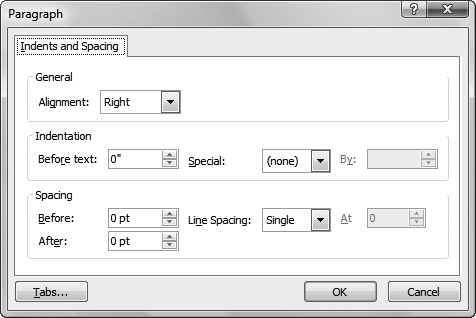
Procedure 4.20. To change paragraph spacing:
Select the text that you wish to change.
At the lower-right corner of the Home > Paragraph group, click the Open Paragraph Dialog Box button.
The Paragraph dialog appears (Figure 4.37).
In the Spacing section of the dialog, change the values in the Before or After fields.
The text changes.
✓ Tips
Be aware of the differences when using line spacing and paragraph spacing. You’ll use line spacing most often when you want to change line spacing within a free text box. Paragraph spacing is more often used when you want to compress the amount of vertical space one or more paragraphs takes up on the slide.
Remember that PowerPoint treats each bullet point on a slide as its own paragraph.
Another handy timesaving feature is PowerPoint’s ability to copy and paste font styles, which includes most formatting that you have applied to text, including the font, font size, color, and character spacing (though not line spacing). The Format Painter allows you to “pick up” formatting from some text and “paint” it onto the destination text.
Procedure 4.21. To copy and paste font styles:
Click Home > Clipboard > Format Painter (Figure 4.38).
The mouse cursor turns into an I-beam with a paintbrush (Figure 4.39).
Select the destination text.
The text takes on the format of the text that you selected in Step 1.

The bullets that appear at the beginning of lines of bulleted text can be customized. You can mix different bullet styles within a group of bullets, and bullets can be either text characters or pictures.
Most of the time, you’ll probably use the bullet styles that are part of the theme for the presentation, because those styles have been designed to match the look of the theme. But it’s sometimes useful to customize bullets for particular slides. For example, on a slide that discusses financial matters, you could change the usual image bullets into dollar signs to emphasize your point.
Procedure 4.22. To set bullet and number styles:
To apply a bullet or number style to an entire bulleted text box, click once in the box to select it.
or
To apply a bullet or number style to multiple lines inside a bulleted text box, select the lines.
or
To apply a bullet or number style to a single line, click twice to set the insertion point in the line.
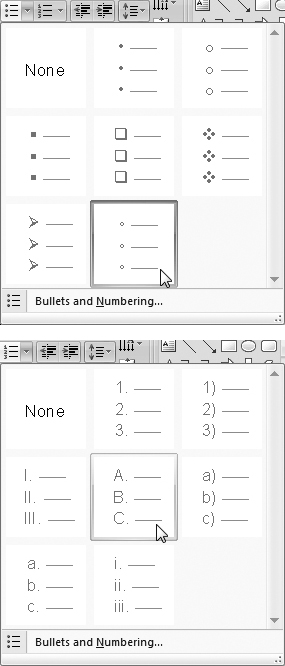
From Home > Paragraph > Bullets or Home > Paragraph > Numbering, choose the type of bullet or number style you want from the pop-up menu (Figure 4.40).
The selection changes.
(Optional) For additional customization, choose Bullets and Numbering from either of the Bullet or Numbering pop-up menus.
The Bullets and Numbering dialog appears (Figure 4.41).
(Optional) To use a picture bullet, click the Picture button in the Bullets and Numbering dialog, then pick a bullet from the resulting Picture Bullet dialog. To use a different character bullet, click the Customize button in the Bullets and Numbering dialog, which brings up the Symbol dialog (Figure 4.10).

PowerPoint allows you to set tabs within bulleted text boxes and free text boxes in much the same way that you could set tabs in a word processor. As with word processors, you’ll set tabs using rulers and tab markers.
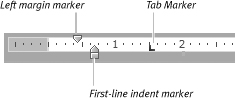
When you display PowerPoint’s rulers and set the insertion point into a text box, you’ll see a variety of markers on the ruler showing you the tabs and indents for the text box (Figure 4.42). The markers are as follows:
First-line indent marker is useful mainly in free text boxes. It allows you to set a first-line indent. If you drag this marker to the left of the text indent marker, you’ll create an outdent, where the first line hangs by itself to the left of the rest of the text.
Left margin marker sets the left margin for the text within the text box. This marker is usually in the same position as the first-line indent marker.
Tab markers allow you to set left, center, right, and decimal tabs.
Procedure 4.23. To set and change text indents and tabs:
If it is not already visible, show PowerPoint’s ruler by choosing View > Ruler.
The ruler appears above the slide.
Click to set the insertion point in a text box where you want to set or change tabs or indents.
The indent and tab markers for that line appear on the ruler.
To add a new tab, click the ruler.
or
To remove a tab from the ruler, drag it off the ruler.
or
To move tabs or indents, drag them left or right on the ruler.
By default, PowerPoint puts a left tab on the ruler when you click.
(Optional) To change a tab on the ruler from one sort of tab to another, click the Open Paragraph Dialog Box button, then click the Tabs button in the resulting dialog. The Tabs dialog will appear, and you can set left, right, center, or decimal tabs.
PowerPoint allows you to find and replace text on your slides, which is handy when Marketing tells you that they’ve decided to rename the SuperWidget to UltraWidget half an hour before your presentation.
Procedure 4.24. To find text:
Choose Home > Editing > Find, or press
 .
.The Find dialog appears (Figure 4.43).
In the Find what field, enter the text you wish to find.
Click Find Next, or press Enter.
PowerPoint finds the text.

Procedure 4.25. To find and replace text:
Choose Home> Editing > Replace, or press
 .
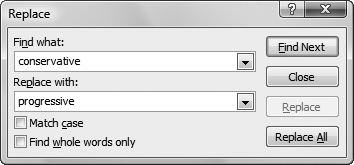
.The Replace dialog appears (Figure 4.44).
In the Find what field, enter the text you wish to find.
In the Replace with field, enter the text you want to replace the found text.
(Optional) Choose either (or both) Match case and Find whole words only.
Click Replace to replace the first instance of the found text, or Replace All to replace the text throughout your presentation.
PowerPoint allows you check your spelling in two ways. By default, the program checks spelling as you type, and misspellings show up on your slides with red dotted underlines (Figure 4.45). Right-click on the underlined word to get a shortcut menu that includes possible replacements. Or you can check spelling manually.
Procedure 4.26. To check spelling manually:
Choose Review > Proofing > Spelling (Figure 4.46), or press F7.
The Spelling window appears (Figure 4.47).
Use the controls in the Spelling window to check your text.