
20. Consolidate projects and resources
Practice files
For this chapter, use the practice files from the Project2016SBSCh20 folder. For practice file download instructions, see the introduction.
In the previous chapters in this book, you usually worked with one plan at a time. Although a single plan might be your main focus in Project much of the time, it’s likely that at some point you or your organization will need to coordinate people, work, and deliverables across multiple projects. This chapter introduces you to the powerful features in Project that can help you optimize your resources, consolidate multiple plans into a single consolidated plan, and create dependencies between plans.
This chapter guides you through procedures related to sharing a resource pool across multiple plans, consolidating plans, and creating dependencies between plans.
Share a resource pool across multiple plans
When managing multiple projects, you might find that work resources (people and equipment) need to be assigned to more than one project at a time. It might become difficult to coordinate the work resources’ time among the multiple projects, especially if those projects are managed by different people. For example, a resource might have task assignments in three projects that are proceeding simultaneously. In each plan, the resource might be fully allocated or even underallocated. However, if you add all of that resource’s tasks from these plans together, you might discover that the resource has been overallocated; that is, the resource has been assigned more work than that person can handle at one time.
A resource pool can help you see how resources are utilized across multiple plans. The resource pool is a plan from which other plans draw their resource information. It contains information about all resources’ task assignments from all plans that are linked to the resource pool.
A resource pool is useful for more than work resources. When working with cost resources in multiple plans, you might want to see not only the cost per plan associated with a cost resource, but also the cumulative costs across plans. Likewise, when working with material resources in multiple plans, you can see cumulative consumed material resources in whatever unit of consumption you are using.
The plans that are linked to the resource pool are called sharer plans.

You can link a sharer plan to a resource pool at any time: when initially entering the plan’s tasks, after you assign resources to tasks, or even after work begins. After you set up a resource pool, you might find it helpful to make all new plans sharer plans. A time-saving advantage of creating new plans as sharer plans of a resource pool is that your resource information is instantly available. You do not have to reenter any resource data.
If you manage only one project with resources that are not used in other plans, a resource pool provides you no benefit. However, if your organization manages multiple projects, setting up a resource pool enables you to do the following:
![]() Find resources who are overallocated across multiple plans, even if those resources are underallocated in individual plans.
Find resources who are overallocated across multiple plans, even if those resources are underallocated in individual plans.
![]() View resources’ assignment and cost details from multiple plans in a single location.
View resources’ assignment and cost details from multiple plans in a single location.
![]() Change working times for a base calendar in the resource pool and see the changes updated to all sharer plans that use that calendar. For example, if you specify that certain days (such as holidays) are to be nonworking days in the resource pool, that change is made to all sharer plans.
Change working times for a base calendar in the resource pool and see the changes updated to all sharer plans that use that calendar. For example, if you specify that certain days (such as holidays) are to be nonworking days in the resource pool, that change is made to all sharer plans.
Here’s a closer examination of how a resource pool can help deliver such benefits. Consider two plans that include some of the same resources assigned to tasks.

Several of the same resources appear in both plans
Let’s say that none of these resources are overallocated in either plan. After the two plans are linked to a common resource pool, however, you can start to more accurately measure the resources’ true scope of allocations.

In the resource pool, Project merges resource information from the sharer plans based on the names of the resources
The resource pool contains the resource information from all sharer plans. Now you can more easily identify how resources are assigned across multiple plans.
![]() Important
Important
Project cannot match variations of a resource’s name—for example, John Evans from one sharer plan and J. Evans from another. For this reason, you should develop a convention for naming resources in your organization and then apply it consistently.
A resource pool is especially beneficial when you are working with other Project users across a network. In those cases, the resource pool would be stored in a central location, such as a network server, and the individual owners of the sharer plans (which might be stored locally or on a network server) would share the common resource pool.
After you’ve created a resource pool file, you use the Share Resources dialog box to link plans to it, making them sharer plans.

Link plans to a resource pool in the Share Resources dialog box
After the link to share resources between the pool and the plan is made, Project merges resource names between the plan and the pool. You can change resource information—such as maximum units, cost rates, and nonworking time—in the resource pool, and all sharer plans will use the updated information.
Because a resource pool and sharer plans are linked, Project gives you options when you open either type of file. When you open a resource pool file, Project prompts you to select how you want to open it. The default option is to open the resource pool as read-only.

When you open the resource pool file, Project prompts you to select how you want to open it
If you store the resource pool locally, you should open it as read/write.
You might want to choose the read-only option if you and other Project users share a resource pool across a network. That way, you won’t prevent other Project users from updating the resource pool. You can quickly push resource and assignment updates from the sharer plan to the read-only resource pool as needed. After that is done, anyone else who opens the resource pool will see the latest assignment information.
When working with sharer plans and a resource pool, when you open a sharer plan, you must also open the resource pool if you want the sharer plan to be updated with the most recent changes to the resource pool. For example, assume that you change the project calendar’s working time in the resource pool, save it, and close it. If you later open a sharer plan but do not also open the resource pool, that sharer plan will not reflect the updated project calendar’s working time.
As we said earlier, one of the most important benefits of using a resource pool is that it allows you to see how resources are allocated across plans. In the resource pool, a great way to examine the details of resources’ assignments and allocations is to show the Resource Form in combination with the Resource Usage view.

The Resource Form shows assignments across multiple plans when you are using a resource pool
In this combination view, you can see all resources in the resource pool and their assignments (in the upper pane), and the selected resource’s details (in the lower pane) from all sharer plans.
The Resource Form is just one way to see the details of specific assignments from sharer plans. You can also add the Project or Task Summary Name column to the table portion of the Resource Usage view. Doing so shows you which project each task assignment is from and that assignment’s summary task name.
When you are working in a sharer plan, as long as the resource pool is open, Project keeps the resource pool synchronized as you work. Any changes you make to resource assignments or other resource information in any sharer plans immediately show up in all other open sharer plans and in the resource pool.
To link a plan to a resource pool
1. Open an existing resource pool, or create a new plan that will become a resource pool. If you open an existing resource pool, when prompted, open it as read/write.
![]() Important
Important
When you open a resource pool file that is linked to sharer plans, Project prompts you to select how you want to open it. The default option is to open the resource pool as read-only.
2. Open or switch to the plan you want to make a sharer plan.
3. On the Resource tab, in the Assignments group, click Resource Pool, and then click Share Resources to open the Share Resources dialog box.
4. Under Resources for ‘file name’, select Use resources.
5. The From box contains the open plans that can be used as resource pools. In the From box, click the name of the resource pool file.
6. If the same resource name is listed in both the sharer plan and the resource pool, specify how Project should resolve conflicting information. If you want Project to use resource information in the resource pool rather than in the sharer plan, under On conflict with calendar or resource information, make sure that Pool takes precedence is selected.
7. Click OK to close the Share Resources dialog box.
8. Save the sharer plan and the resource pool.
To unlink a sharer plan from a resource pool
1. Open the resource pool as read/write.
2. In the sharer plan, on the Resources tab, click Resource Pool, and then click Share Resources.
3. Under Resources For ‘Current Project Name’, select Use Own Resources.
4. Click OK.
5. Save the unlinked plan and the resource pool.
To update a read-only resource pool from a sharer plan
1. In the sharer plan, make whatever resource or assignment updates are needed.
2. On the Resource tab, in the Assignments group, click Resource Pool, and then click Update Resource Pool. Project updates the assignment information in the resource pool with the new details from the sharer plan and then saves the resource pool. Anyone else who opens or refreshes the resource pool now will see the updated assignment information.
To view resource usage details in the resource pool
1. Open or switch to the resource pool file.
2. On the View tab, in the Resource Views group, click Resource Usage to display the Resource Usage view.
3. If you want, you can also display the Resource Form in a split view. On the View tab, in the Split View group, click Details.
To manage sharer plans linked to a resource pool
1. Open the resource pool and sharer plans as read/write.
2. In the resource pool, on the Resource tab, in the Assignments group, click Resource Pool, and then click Share Resources to open the Share Resources dialog box.
3. Under Sharing Links, select a sharer plan. You can then open that sharer plan, break its link to the resource pool, or adjust its conflict resolution setting.
4. When you are done in the Share Resources dialog box, click OK.
A sharer plan’s assignment information is recorded in its resource pool. If a sharer plan is deleted, its assignment information remains in the resource pool. To clear this assignment information from the resource pool, you must break the link to the sharer plan. To do this, open the resource pool as read/write. On the Resource tab, in the Assignments group, click Resource Pool, and then click Share Resources. In the Share Resources dialog box, click the name of the now-deleted sharer plan, and click Break Link. Note that the contents of the Share Resources dialog box for a resource pool differ from those for sharer plans.
To update all sharer plans’ working times in a resource pool
1. Open or switch to the resource pool.
2. On the Project tab, in the Properties group, click Change Working Time to open the Change Working Time dialog box.
3. In the For calendar box, select Standard (Project Calendar) from the list.
![]() Tip
Tip
Base calendars—such as 24 Hours, Night Shift, and Standard—appear at the top of the list in the For Calendar box. Resource calendar names appear below the base calendars.
Changes in working time to the Standard base calendar in the resource pool affect all plans that are sharer plans of the resource pool.
4. On the Exceptions tab of the Change Working Time dialog box, make your working time adjustments.
5. Click OK to close the Change Working Time dialog box. All plans that are sharer plans of the same resource pool will see this change in this base calendar.
![]() Important
Important
By default, all sharer plans share the same base calendars, and any changes you make to a base calendar in one sharer plan are reflected in all other sharer plans through the resource pool. If you have a specific sharer plan for which you want to use different base calendar working times, change the base calendar that sharer plan uses.
Consolidate plans
You might find yourself managing multiple plans that involve some of the same resources and that might be related to the same overall goal or deliverable of an organization. You might even need to coordinate with several people working on tasks at different times, sometimes in different locations, and frequently for different supervisors. In either case, you might need to produce a single “all-up” view of distinct but related plans.
A good way to pull together far-flung project information is to use a consolidated plan. This is a plan that contains other plans, called inserted plans. The inserted plans do not reside within the consolidated plan; rather, they are linked to it in such a way that they can be viewed and edited either on their own or from within the consolidated plan. If an inserted plan is edited outside of the consolidated plan, the updated information appears in the consolidated plan the next time it is opened.
![]() Tip
Tip
Consolidated plans are also known as consolidated projects or master projects, and inserted plans are also known as subprojects; however, this chapter uses the terms consolidated and inserted plans.
Using consolidated plans is a powerful capability. Some of the beneficial uses of consolidated plans include the following:
![]() See all tasks from your organization’s plans in a single view.
See all tasks from your organization’s plans in a single view.
![]() Roll up information to higher levels of management. For example, you might insert a team’s plan into the larger department’s consolidated plan and then insert that plan into the larger organization’s consolidated plan.
Roll up information to higher levels of management. For example, you might insert a team’s plan into the larger department’s consolidated plan and then insert that plan into the larger organization’s consolidated plan.
![]() Divide your project data into different plans to match the nature of your project, such as by phase, component, or location. Then you can pull the information back together into a consolidated plan for a comprehensive look at the whole plan.
Divide your project data into different plans to match the nature of your project, such as by phase, component, or location. Then you can pull the information back together into a consolidated plan for a comprehensive look at the whole plan.
![]() See all your plans’ information in one location so that you can filter, sort, and group the data.
See all your plans’ information in one location so that you can filter, sort, and group the data.
So how does it work? Consolidated plans use the Insert Subproject command and Project’s outlining features. An inserted plan initially appears as a collapsed summary task in the consolidated plan, and its summary Gantt bar is gray. Project displays an inserted project icon in the Indicators column.

In this view of a consolidated plan, the Gantt bars of the inserted plans are collapsed
The summary tasks representing inserted plans are sequentially numbered as 1, 2, and so on. When you expand the collapsed summary task of each inserted plan, the task IDs within each inserted plan start at 1. This numbering scheme preserves the task IDs within each inserted plan, whether you work with it as a stand-alone plan you open directly in Project, or as an inserted plan you open from within a consolidated plan.
When you are working with a consolidated plan, it is especially useful to display the project summary task. Recall from Chapter 4, “Build a task list,” that the project summary task sums up the values from quantified fields such as work and cost. In a consolidated plan, the project summary task’s roll-up values represent the total values from all of the inserted plans. Similarly, the start and finish dates of the project summary task span the earliest start and latest finish dates from the inserted plans.

The values of this summary task, such as duration and work, represent the rolled-up values of the inserted plans
![]() Tip
Tip
If you want to share resources across the inserted plans in a consolidated plan, connect the inserted plans to a common resource pool as described in the previous topic.
To create a consolidated plan
1. Click the File tab to display the Backstage view, and then click New.
2. On the New page, click Blank project. Project creates a new plan. This plan will become the consolidated plan into which you insert other plans.
3. On the Project tab, in the Insert group, click Subproject to open the Insert Project dialog box.
![]() Tip
Tip
You can insert two or more plans into the consolidated plan if the plans to be inserted are located in the same folder. In the Insert Project dialog box, select each plan while pressing the Ctrl key, and then click Insert.
4. Locate and select each plan you want to insert into the consolidated plan, and then click Insert. Project inserts the plan (or plans) into the consolidated plan. Each inserted plan appears as a collapsed summary task with an inserted project indicator in the Indicators column.
![]() Tip
Tip
You can quickly create a consolidated plan that includes some or all of the currently open plans. On the View tab, in the Windows group, click New Window. Under Projects, press the Ctrl key while selecting the plans to be inserted into the new consolidated plan, and then click OK.
To display the details of an inserted plan
1. Display the consolidated plan in a task-oriented view that includes a table, such as the Gantt Chart view with Entry table.
2. Click the Select All button in the upper-left corner of the table.
3. On the View tab, in the Data group, click Outline, and then click All Subtasks. Project expands the inserted plan or plans.
Or
1. Display the consolidated plan, in a task-oriented view that includes a table.
2. Click the expand/collapse arrow next to the name of each inserted plan.
To display the project summary task of a consolidated plan
1. In the consolidated plan, on the Format tab, in the Show/Hide group, click Project Summary Task.
Create dependencies between plans
Most projects do not exist in a vacuum. Tasks or phases in one project might depend on tasks in other projects. You can show such dependencies by linking tasks between plans.
Reasons that you might need to create dependencies between plans include the following:
![]() The completion of one task in a plan might enable the start of a task in another plan. For example, another project manager might need to complete an environmental impact statement before you can start to construct a building. Even if these two tasks are managed in separate plans (perhaps because separate departments of a construction company are completing them), one plan has a logical dependency on the other.
The completion of one task in a plan might enable the start of a task in another plan. For example, another project manager might need to complete an environmental impact statement before you can start to construct a building. Even if these two tasks are managed in separate plans (perhaps because separate departments of a construction company are completing them), one plan has a logical dependency on the other.
![]() A person or a piece of equipment might be assigned to a task in one plan, and you need to delay the start of a task in another plan until that resource completes the first task. The two tasks might have nothing in common other than needing that resource.
A person or a piece of equipment might be assigned to a task in one plan, and you need to delay the start of a task in another plan until that resource completes the first task. The two tasks might have nothing in common other than needing that resource.
You create a link between plans by entering information about the predecessor task in the plan that contains the successor task. Specifically, you enter the external predecessor link in the format File NameTask ID. You do so in a task’s predecessor field such as in the Predecessors column in the Entry table, or in the ID field in the Task Information dialog box, on the Predecessors tab.
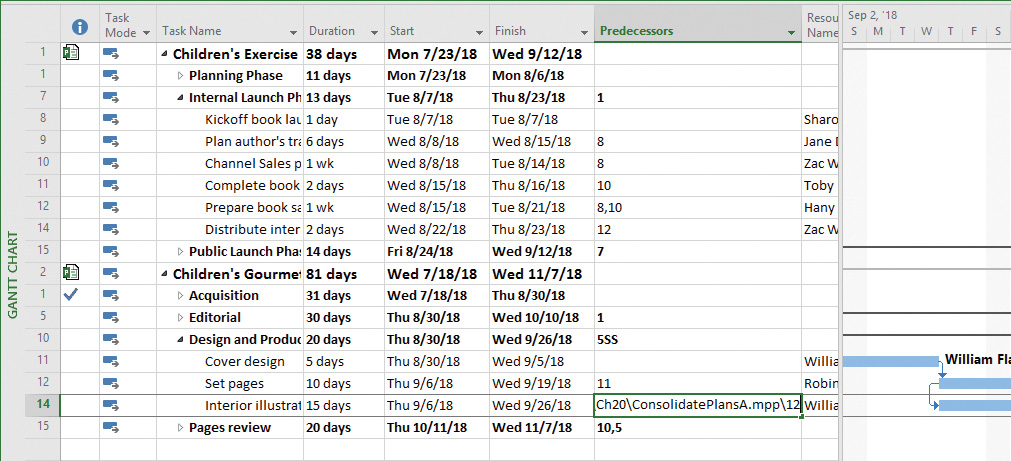
Create cross-plan links by entering the file name and task number of the predecessor task in the successor task’s Predecessors field
After you create a task relationship between plans, the relationship looks similar to links between tasks within a plan. The visual indication of a task relationship between plans is that external predecessor and successor tasks have gray task names and Gantt bars (sometimes referred to as ghost tasks).

The external predecessor appears as a gray “ghost task” in the file to which it is linked
The same visual treatment of external links appears in both plans—the source plan that contains the predecessor task, and the destination plan that contains the successor.

The external successor task also appears as a gray “ghost task” in the file to which it is linked
The link between the two plans will remain until you break it. Deleting a task in the source plan or the external task in the destination plan deletes the corresponding task or external task in the other plan.
When you are working with consolidated plans (see the previous topic), links between two inserted plans function like normal task links within a single plan. In fact, creating cross-plan links is easy in a consolidated plan. If you have complex cross-plan link needs, you might find it easiest to first insert the plans into a consolidated plan and then create the links you need.
The following are a few additional tips and suggestions for working with cross-plan links:
![]() If you point to the external task’s Gantt bar, Project displays a ScreenTip that contains details about the external task, including the full path to the external plan where the external predecessor task resides.
If you point to the external task’s Gantt bar, Project displays a ScreenTip that contains details about the external task, including the full path to the external plan where the external predecessor task resides.
![]() You can turn off the display of external tasks if you want. To do this, click the File tab, and click Options. In the Project Options dialog box, on the Advanced tab, under Cross Project Linking Options For <File Name>, clear the Show External Successors and Show External Predecessors check boxes.
You can turn off the display of external tasks if you want. To do this, click the File tab, and click Options. In the Project Options dialog box, on the Advanced tab, under Cross Project Linking Options For <File Name>, clear the Show External Successors and Show External Predecessors check boxes.
![]() Each time you open a plan with cross-plan links, Project prompts you to update the cross-plan links. You can suppress this prompt if you would rather not be reminded, or you can tell Project to accept updated data from the linked plan automatically. To do this, click the File tab, and click Options. In the Project Options dialog box, on the Advanced tab, under Cross Project Linking Options For <File Name>, select the options you want.
Each time you open a plan with cross-plan links, Project prompts you to update the cross-plan links. You can suppress this prompt if you would rather not be reminded, or you can tell Project to accept updated data from the linked plan automatically. To do this, click the File tab, and click Options. In the Project Options dialog box, on the Advanced tab, under Cross Project Linking Options For <File Name>, select the options you want.
To create cross-plan links between two plans
1. Open the two plans you want to link.
2. In the plan that contains the task you want to be the successor task, display the Entry table if it’s not already visible.
3. Click the Predecessors field of the task you want to be the successor task.
4. In the Predecessors field, enter the file name and task ID of the predecessor task in the format File NameTask ID, and then press Enter. For example, you would enter Children’s Cookbook5 to make task 5 of the file Children’s Cookbook.mpp a cross-plan predecessor.
To create cross-plan links between inserted plans in a consolidated plan
1. Select the task you want to be the predecessor task, and then select the task you want to be the successor task.
2. On the Task tab, in the Schedule group, click Link The Selected Tasks. The two tasks are linked with a finish-to-start relationship.
To change the relationship type of a cross-project link in a consolidated plan
1. Select the successor task.
2. On the Task tab, in the Properties group, click Information to open the Task Information dialog box.
3. Click the Predecessors tab.
4. In the Type field, click the link type you want.
To delete a cross-plan link
1. Click the successor task first.
2. On the Task tab, in the Properties group, click Information to open the Task Information dialog box.
3. Click the Predecessors tab.
4. In the Predecessors box, select the external task link’s ID, and press Delete.
To identify and manage all links (external predecessors and external successors) in a plan
1. On the Project tab, in the Properties group, click Links Between Projects to open the Links Between Projects dialog box.
2. Choose the options you want on the External Predecessors and External Successors tabs, and then click Close.
Skills review
In this chapter, you learned how to:
![]() Share a resource pool across multiple plans
Share a resource pool across multiple plans
![]() Create dependencies between plans
Create dependencies between plans

![]() Important
Important
If you are running Project Professional with Project Web App/Project Server, take care not to save any of the practice files you work with in this book to Project Web App (PWA). For more information, see Appendix C, “Collaborate: Project, SharePoint, and PWA.”
Share a resource pool across multiple plans
The scenario: At Lucerne Publishing, you frequently assign work resources (people) to different tasks in different plans. Although you manage those plans in Project, you have occasionally inadvertently overallocated some resources when all their work across the plans is accounted for. To help avoid this problem in the future, you decide to create a resource pool and connect it to your current plans. Open the ShareResourcesA and ShareResourcesB plans in Project, and then perform the following tasks:
1. Create a new plan and save it in the practice file folder. Name the file Lucerne Resource Pool.
2. Make the ShareResourcesA and ShareResourcesB plans sharer plans of the resource pool.
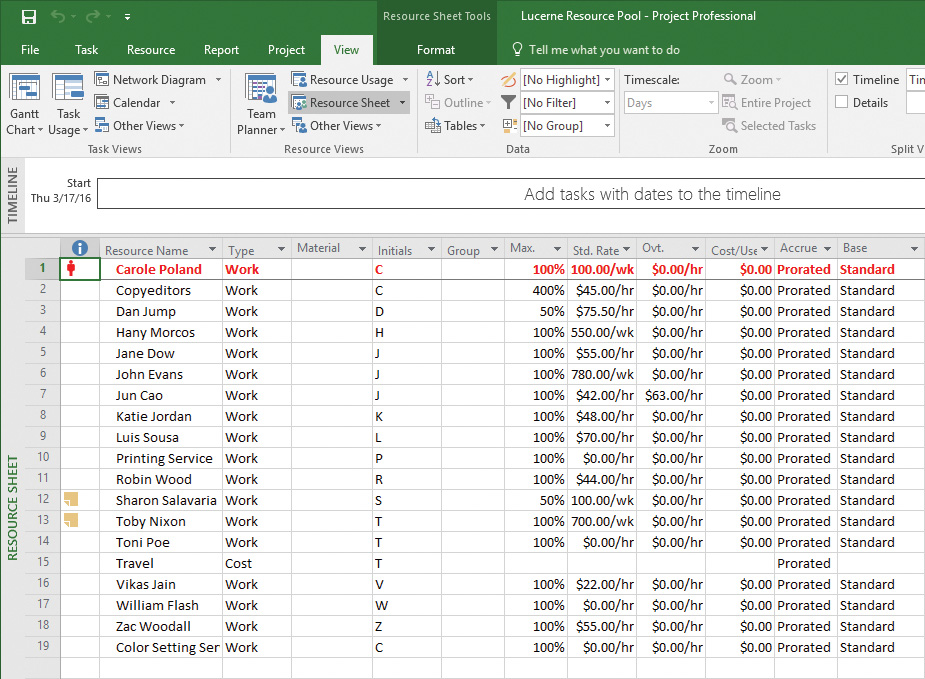
3. Display the Resource Sheet view in the resource pool.
4. Save and close all plans.
Consolidate plans
The scenario: You occasionally need to look at information spread between closely related but distinct projects. To get an “all-up” view across plans, you decide to add them to a consolidated plan. In Project, perform the following tasks:
1. Create a new plan and save it in the practice file folder. Name the file Lucerne Consolidated Plan.
2. Insert the ConsolidatePlansA and ConsolidatePlansB plans into Lucerne Consolidated Plan.
3. In Lucerne Consolidated Plan, expand both inserted plans to see their details.
4. Display the project summary task.

Your consolidated plan should look like this
Create dependencies between plans
The scenario: You have identified that the deliverable of a task from one plan is required before a task in another plan can begin. You decide to create a cross-project link between these two plans. Continuing in the Lucerne Consolidated Plan you previously created, perform the following tasks:
1. In Lucerne Consolidated Plan, make task 12 in ConsolidatePlansA (Children’s Exercise Book Launch schedule) the predecessor of task 13 in the ConsolidatePlansB (Children’s Gourmet Cookbook) plan.

Your cross-project link should look like this in the consolidated plan