
ROS provides basic support for Computer Vision. First, drivers are available for different cameras and protocols, especially for FireWire (IEEE1394a or IEEE1394b) cameras. An image pipeline helps with the camera calibration process, distortion rectification, color decoding, and other low-level operations. For more complex tasks, you can use OpenCV, and the cv_bridge and image_transport libraries to interface with it and subscribe and publish images on topics. Finally, there are several packages that implement algorithms for object recognition, augmented reality, visual odometry, and so on.
Although FireWire cameras are best integrated in ROS, it is not difficult to support other protocols, such as USB and GigaEthernet. Since USB cameras are usually less expensive and easier to find, in this chapter we discuss several options, and we will also provide a driver that integrates seamlessly in the image pipeline, using the OpenCV video capture API.
The camera calibration and the result integration in the image pipeline is explained in detail. ROS provides GUIs to help with the camera calibration process, using a calibration pattern. Furthermore, we cover stereo cameras and explain how we can manage rigs of two or more cameras, with more complex setups than a binocular camera. Stereo vision will also let us obtain depth information from the world, up to an extent and depending on certain conditions. Hence, we will see how to inspect that information as point clouds and how to improve its quality to the best possible extent for our camera's quality and its setup.
Here, we explain the ROS image pipeline, which simplifies the process of converting the RAW images acquired by the camera into monochrome (grayscale) and color images; this sometimes means to "debayer" the RAW images if they are codified as a Bayer pattern. If the camera has been calibrated, the calibration information is used to rectify the images, that is, to correct the distortion. For stereo images, since we have the baseline between the left and right cameras, we can compute the disparity image that allows obtaining depth information and a 3D point cloud, once it has been fine-tuned; here, we will give tuning advice, which may be quite difficult for low-quality cameras and sometimes require good calibration results beforehand.
Finally, using OpenCV inside ROS, even though it's only version 2.x (version 3.x is not yet supported), we have the ability to implement a wide range of Computer Vision and Machine Learning algorithms or even to run some algorithms or examples already present in this library. Here, we will not see the OpenCV API, which is outside the scope of this book. On the contrary, we advise the reader to check the online documentation (http://docs.opencv.org) or any book about OpenCV and Computer Vision. Here, we simply show you how you can use OpenCV in your nodes, with an example of feature detection, descriptor extraction, and matching to compute the homography between two images. Additionally, this chapter will finish with a tutorial to set up and run a visual odometry implementation integrated into ROS: the viso2_ros wrapper of the libviso2 visual odometry library, using a stereo pair built with two cheap webcams attached to a supporting bar. Other visual odometry libraries will be mentioned, for example, fovis, along with some advice to start working with them and how to improve the results with RGBD sensors, such as Kinect, or even sensor fusion or additional information in the case of monocular vision.
The first few steps that we must perform are connecting the camera to the computer, running the driver, and seeing the images it acquires in ROS. Before we get into ROS, it is always a good idea to use external tools to check that the camera is actually recognized by our system, which, in our case, is an Ubuntu distribution. We will start with FireWire cameras since they are better supported in ROS, and later, we will see USB cameras.
Connect your camera to the computer, which should have a FireWire IEEE1394a or IEEE1394b slot. Then, in Ubuntu, you only need coriander to check that the camera is recognized and working. If it is not already installed, just install coriander. Then, run it (in old Ubuntu distributions, you may have to run it as sudo):
$ coriander
Tip
Downloading the example code
You can download the example code files from your account at http://www.packtpub.com for all the Packt Publishing books you have purchased. If you purchased this book elsewhere, you can visit http://www.packtpub.com/support and register to have the files e-mailed directly to you. You can also download these code files from https://github.com/AaronMR/ROS_Book_Hydro.
It will automatically detect all your FireWire cameras, as shown in the next screenshot:
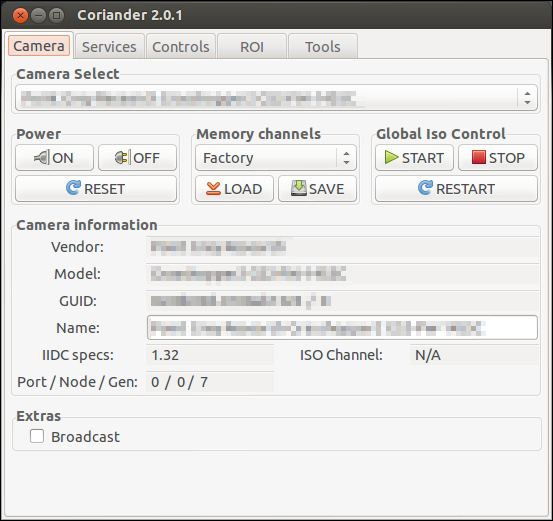
The great thing about coriander is that it also allows us to view the image and configure the camera. Indeed, our advice is to use the coriander package's camera configuration interface and then take those values into ROS, as we will see later. The advantage of this approach is that coriander gives us the dimensional values of some parameters, and in ROS, there are certain parameters that sometimes fail to be set, that is, gamma, and they may need to be set beforehand in coriander as a workaround.
Now that we know that the camera is working, we can close coriander and run the ROS FireWire camera driver (with roscore running):
$ rosrun camera1394 camera1394_node
Simply run roscore and the preceding command. It will start the first camera on the bus, but note that you can select the camera by its GUID, which you can see in the coriander package's GUI.
The FireWire camera's parameters supported are listed and assigned sensible values in the camera1394/config/firewire_camera/format7_mode0.yaml file, as shown in the following code:
guid: 00b09d0100ab1324       # (defaults to first camera on bus)
iso_speed: 800  # IEEE1394b
video_mode: format7_mode0  # 1384x1036 @ 30fps bayer pattern
# Note that frame_rate is overwritten by frame_rate_feature; some useful values:
# 21fps (480)
frame_rate: 21 # max fps (Hz)
auto_frame_rate_feature: 3 # Manual (3)
frame_rate_feature: 480
format7_color_coding: raw8  # for bayer
bayer_pattern: rggb
bayer_method: HQ
auto_brightness: 3 # Manual (3)
brightness: 0
auto_exposure: 3 # Manual (3)
exposure: 350
auto_gain: 3 # Manual (3)
gain: 700
# We cannot set gamma manually in ROS, so we switch it off
auto_gamma: 0 # Off (0)
#gamma: 1024    # gamma 1
auto_saturation: 3 # Manual (3)
saturation: 1000
auto_sharpness: 3 # Manual (3)
sharpness: 1000
auto_shutter: 3 # Manual (3)
#shutter: 1000 # = 10ms
shutter: 1512 # = 20ms (1/50Hz), max. in 30fps
auto_white_balance: 3 # Manual (3)
white_balance_BU: 820
white_balance_RV: 520
frame_id: firewire_camera
camera_info_url: package://chapter5_tutorials/calibration/firewire_camera/calibration_firewire_camera.yaml
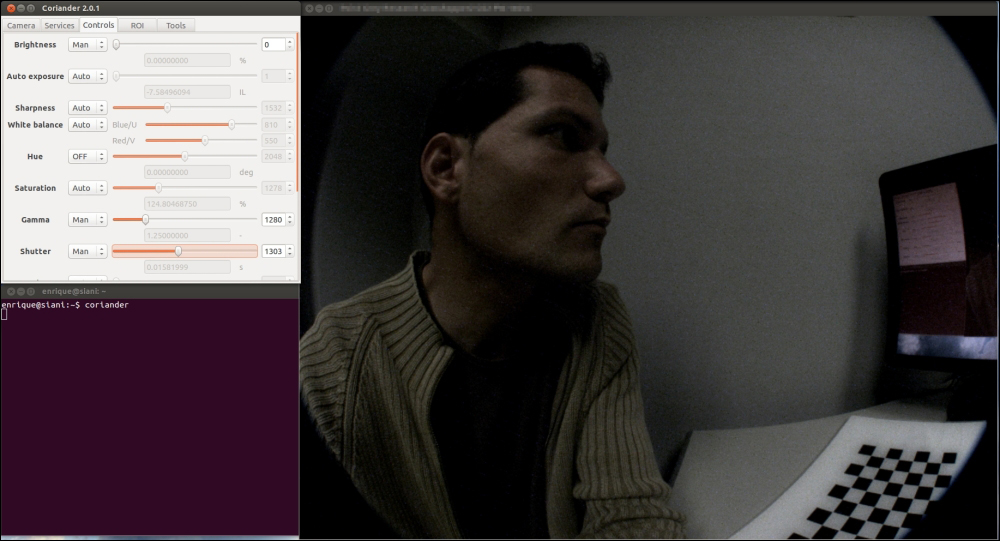
The values must be tuned by watching the images acquired, for example, in coriander, and setting the values that give better images. The GUID parameter is used to select the camera, which is a unique value. You should usually set the shutter speed to a frequency equal to, or a multiple of, the electric light you have in the room to avoid flickering. If outside, with sun light, you only have to worry about setting a value that gives you an appropriate lightness. You can also put a high gain, but it will introduce noise. However, in general, it is better to have a salt-and-pepper noise such as that of a low shutter speed (to receive most light), because with a low shutter speed, we will have motion blur, and most algorithms perform badly with it. As you see, the configuration depends on the lighting conditions of the environment, and you may have to adapt the configuration to them. That is quite easy using coriander or the rqt_reconfigure interface (see the screenshots following the upcoming code, for instance):
$ rosrun rqt_reconfigure rqt_reconfigure /camera
$ coriander
In order to better understand how to properly set the parameters of the camera to obtain high-quality images, which are also algorithm-friendly, you are encouraged to find out more about the basic concepts of photography, such as the exposure triangle, which is a combination of shutter speed, ISO, and aperture.

Here, the camera's namespace is /camera. Then, we can change all the parameters that are specified in the camera1394 dynamic reconfigure cfg file, as shown in Chapter 3, Visualization and Debug Tools. Here, for your convenience, you can create a launch file, which is also in launch/firewire_camera.launch:
<launch>
  <!-- Arguments -->
  <!-- Show video output (both RAW and rectified) -->
  <arg name="view" default="false"/>
  <!-- Camera params (config) -->
  <arg name="params" default="$(find chapter5_tutorials)/config/firewire_camera/format7_mode0.yaml"/>

  <!-- Camera driver -->
  <node pkg="camera1394" type="camera1394_node" name="camera1394_node">
    <rosparam file="$(arg params)"/>
  </node>

  <!-- Camera image processing (color + rectification) -->
  <node ns="camera" pkg="image_proc" type="image_proc" name="image_proc"/>

  <!-- Show video output -->
  <group if="$(arg view)">
    <!-- Image viewer (non-rectified image) -->
    <node pkg="image_view" type="image_view" name="non_rectified_image">
      <remap from="image" to="camera/image_color"/>
    </node>

    <!-- Image viewer (rectified image) -->
    <node pkg="image_view" type="image_view" name="rectified_image">
      <remap from="image" to="camera/image_rect_color"/>
    </node>
  </group>
</launch>
The camera1394 driver is started with the parameters shown so far. Then, it also runs the image pipeline that we will see in the sequel in order to obtain the color-rectified images using the Debayer algorithm and the calibration parameters (once the camera has been calibrated). Finally, we have a conditional group to visualize the color and color-rectified images using image_view (or rqt_image_view).
In sum, in order to run a FireWire camera in ROS and view the images, once you have set its GUID in the parameters file, simply run the following command:
$ roslaunch chapter5_tutorials firewire_camera.launch view:=true
Then, you can also configure it dynamically with rqt_reconfigure.
Now, we are going to do the same thing with USB cameras. The only problem is that, surprisingly, they are not inherently supported by ROS. First of all, once you connect the camera to the computer, test it with a chat or video meeting program, for example, Skype or Cheese. The camera resource should appear in /dev/video?, where ? should be a number starting with 0 (that may be your internal webcam if you are using a laptop).
There are two main options that deserve to be mentioned as possible USB camera drivers for ROS. First, we have usb_cam. To install it, use the following command:
$ sudo apt-get install ros-hydro-usb-cam
Then, run the following command:
$ roslaunch chapter5_tutorials usb_cam.launch view:=true
It simply does rosrun usb_cam usb_cam_node and also shows the camera images with image_view (or rqt_image_view), so you should see something similar to the following screenshot. It has the RAW image of the USB camera, which is already in color:

Similarly, another good option is gscam, which is installed as follows:
$ sudo apt-get install ros-hydro-gscam
Then, run the following command:
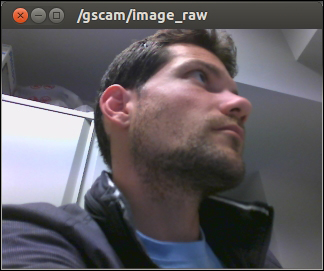
$ roslaunch chapter5_tuturials gscam.launch view:=true
As for usb_cam, this launch file performs a rosrun gscam gscam and also sets the camera's parameters. It also visualizes the camera's images with image_view (or rqt_image_view), as shown in the following screenshot:
The parameters required by gscam are as follows (see config/gscam/logitech.yaml):
gscam_config: v4l2src device=/dev/video0 ! video/x-raw-rgb,framerate=30/1 ! ffmpegcolorspace
frame_id: gscam
camera_info_url: package://chapter5_tutorials/calibration/gscam/calibration_gscam.yaml
The gscam_config parameter invokes the v4l2src command with appropriate arguments to run the camera. The rest of the parameters will be useful once the camera is calibrated and used in the ROS image pipeline.