
Appendix A. Installing the Android SDK
This chapter covers
- Meeting development environment requirements
- Obtaining and installing Eclipse
- Obtaining the Android SDK
- Using the SDK and AVD Manager
- Configuring the Android Development Tools for Eclipse
This appendix walks through the installation of Eclipse, the Android SDK, and the ADT plug-in for Eclipse. This appendix is meant to be a reference resource to assist in setting up the environment for Android application development. The topic of using the development tools is covered in chapter 2.
A.1. Development environment requirements
To develop Android applications, your computing environment must satisfy the minimum requirements. Android development is a quick-paced topic, with changes coming about very rapidly, so it’s a good idea to stay in tune with the latest developments from the Android development team at Google. You’ll find the latest information regarding supported platforms and requirements for Android Development Tools (ADT) at http://developer.android.com/sdk/requirements.html.
Compatible development environments for the sample applications in this book include:
- Windows XP/Vista/Windows 7, Mac OS X 10.4.8 or later (Intel x86 only), Linux
- Eclipse 3.4 (or later), including the JDT and Web Tools Platform, which are included in the Eclipse installation package
- JDK and Java Runtime Environment (JRE) version 5 or 6
- ADT plug-in for Eclipse
Once you’ve identified a compatible computing environment, it’s time to obtain and install the development tools. We’ll start with the Eclipse IDE.
A.2. Obtaining and installing Eclipse
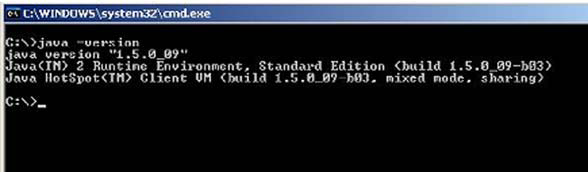
A requirement for running the Eclipse IDE is the JRE version 5 or later. For assistance in determining the best JRE for your development computer, go to http://www.eclipse.org/downloads/moreinfo/jre.php. It’s likely that you already have an acceptable JRE installed on your computer. An easy way to determine what version (if any) you have is to run the following command from a command window or terminal session on your development computer:
java -version
This command checks to see if the JRE is installed and present in your computer’s search path. If the command comes back with an error stating an invalid or unrecognized command, that probably means the JRE isn’t installed and/or it’s not properly configured. Figure A.1 demonstrates using this command to check the version of the installed JRE on a computer running the Windows OS.
Figure A.1. The java –version command displays the version of Java installed on your computer
Once your JRE is installed, the next step is to install the Eclipse IDE. Download the latest stable release from http://www.eclipse.org/downloads. You’ll want to download the version for Java developers. This distribution is described at the Eclipse website: http://www.eclipse.org/downloads/moreinfo/java.php. The Eclipse download is a compressed file. Once you’ve downloaded it, extract the contents of the file to a convenient place on your computer. Because this download is simply a compressed file and not an installer, it doesn’t create any icons or shortcuts on your computer.
To start Eclipse, execute the file named eclipse (run eclipse.exe for Windows users) found in the directory to which you downloaded Eclipse. You may want to make your own menu or desktop shortcut to eclipse(.exe) for convenience. Executing this file loads the Eclipse IDE. Eclipse prompts for a workspace and suggests a default location, such as C:documents and settingsusernameworkspace. You can change the workspace location to something Android specific to separate your Android work from other projects, as shown in figure A.2.
Figure A.2. Eclipse projects are stored in a workspace, which is a directory on your computer’s hard drive.

Accept the suggested workspace location or specify an alternative workspace location, as desired. Once Eclipse is loaded, click the Workbench: Go to the Workbench icon on the main screen, as shown in figure A.3.
Figure A.3. Eclipse defaults to the home screen. Go to the workbench.
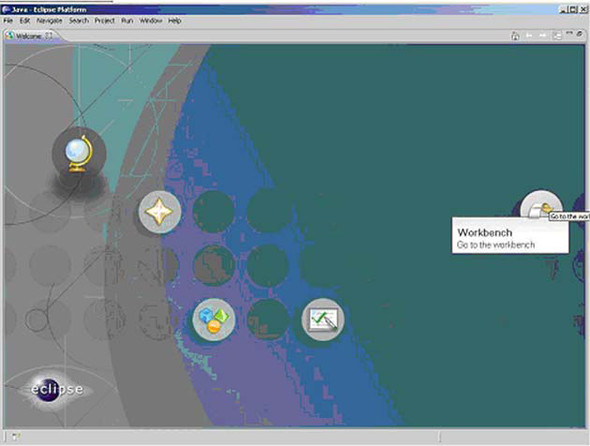
Eclipse consists of many “perspectives,” and the default is the Java Perspective, from which Android application development takes place. The Java Perspective is shown in figure A.4. Chapter 2 discusses in greater detail the use of the Eclipse IDE for Android application development.
Figure A.4. Android development takes place in the Java Perspective.

For more information on becoming familiar with the Eclipse environment, visit http://www.eclipse.org, where you can find online tutorials for building Java applications with Eclipse.
Now that Eclipse is installed, it’s time to focus on the Android SDK.
A.3. Obtaining and installing the Android SDK
The Android SDK is available as a free download from a link on the Android home page, at http://developer.android.com/sdk/index.html. SDK installation versions are available for multiple platforms, including Windows, Mac OS X (Intel x86 only), and Linux (i386). Select the latest version of the SDK for the desired platform.
The Android SDK is a compressed folder download. Download and extract the contents of the compressed folder file to a convenient place on your computer. For example, you might install the SDK to C:softwaregoogleandroid-sdk-windows on a Windows machine, or /somefolder/android-sdk-mac_86, as shown in Figure A.5.
Figure A.5. Unzip the Android SDK archive to your hard drive.

As you can see in figure A.5, the installation footprint is rather simple. Earlier versions of the Android SDK were a complete archive of tools, documentation, and classes. Starting with version 1.6 of the SDK, the archive only contains the tools—essentially a set of SDK Management tools. As specific packages are installed over time they are added under the platforms folder. For Windows users, run the file named SDK Setup.exe. For other development environments, run the shell script named android. This will load the Android SDK and AVD Manager, which permits you to manage the SDKs on your development machine as well as define instances of the Android emulator.
A.4. Using the SDK and AVD Manager
To begin developing Android applications, you must first download at least one of the available Android “platforms.” The benefit of this approach is that it allows you to manage and use multiple SDK versions in parallel on your development machine. Given the pace at which the Android team is releasing code, this is a welcome improvement over earlier versions of the SDK.
In figure A.6 you can see the SDK and AVD Manager displaying the available Android packages for download. Only the packages which are not presently on your computer are listed here. As new packages become available are released they appear in this list.
Figure A.6. The packages available for download

Although the Android platform is generally described as versions, such as 1.1, 1.5, 1.6, and 2.0 and so on, the underlying technologies have been described as levels. For example, Android API Level 5 was introduced at the 2.0 release and Android 2.3 is API level 9. When looking at certain API documentation or working with Android platforms, you’ll see these level indicators.
Unless you have a specific older Android device in mind for an application, you’ll want to focus on the most recent SDK release level. Much of this book uses SDK version 2.2, but you can install multiple versions of the SDK. Figure A.7 shows an installation with support for numerous Android releases.
Figure A.7. The currently installed packages

Testing is often done via the Android emulator; each instance of the emulator is known as an Android virtual device (AVD). Here’s where the AVD Manager comes into play. Under the virtual devices section of the SDK and AVD Manager, you can define instances of the emulator, each with specific characteristics, such as SDK version/API Level, SDCard storage size, and screen size. Figure A.8 shows the definition of a single Android virtual device/emulator named 201 that uses the SDK version 2.0.1. You can name your virtual device anything you like.
Figure A.8. Defining an Android virtual device, also known as an emulator

You can view API documentation based on your local SDK installation if installed, or online at http://developer.android.com/reference/classes.html. To view documentation locally, select the index.html file under the docs folder in the folder where the Android SDK was unzipped. The SDK’s documentation is largely a collection of Javadocs enumerating the packages and classes of the SDK. The file android.jar is the Android runtime Java archive. The samples folder contains a number of sample applications, each of which is mentioned in the documentation. The tools folder contains Android-specific resource compilers and the very helpful adb tool. These tools are explained and demonstrated in chapter 2 of this book. Each version of the Android platform contains its own set of samples, tools, and runtime libraries.
Tip
The SDK changes from time to time as the Android team releases new versions. If you need to upgrade from one version to another, there will be an upgrade document on the Android website—be sure to examine the relevant upgrade documentation file to learn of important changes to the API. Check for items that may impact your previously written applications.
Both Eclipse and the Android SDK are now installed. It’s time to install the ADT plug-in for Eclipse to take advantage of the ADT’s powerful features, which help you bring your Android applications to life.
A.5. Obtaining and installing the Eclipse plug-in
The following steps show you how to install the Android plug-in for Eclipse, known as the ADT. The most up-to-date installation directions are available from the Android website at http://developer.android.com/sdk/eclipse-adt.html. The first steps are generic for any Eclipse plug-in installation, not just the ADT.
Here are the basic steps to install the ADT:
1. Run the Find and Install feature in Eclipse, found under the Help > Software Updates menu, as shown in figure A.9.
Figure A.9. The Eclipse environment supports an extensible plug-in architecture.

2. Select the “Search for new features to install” option, as shown in figure A.10. Click Next.
Figure A.10. Choose the new features option.

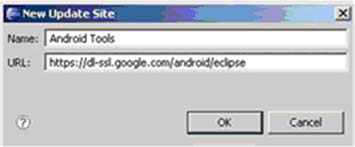
3. Select New Update Site. Give this site a name, such as Android Tools, as shown in figure A.11. Use the following URL in the dialog: https://dl-ssl.google.com/android/eclipse. Please note the https in the URL. Click OK.
Figure A.11. Create a new update site to search for Android-related tools.
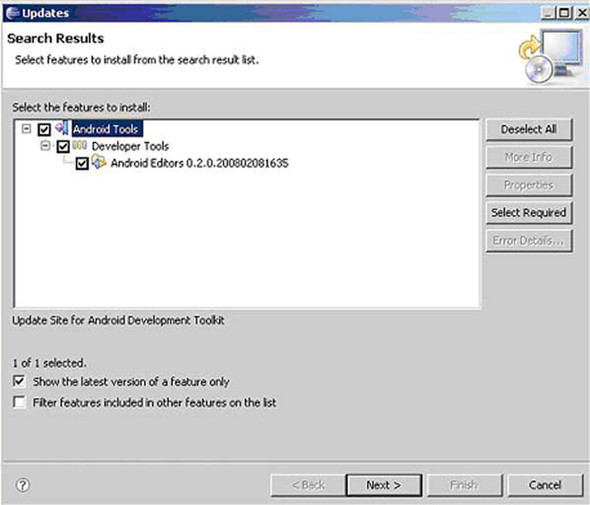
4. A new entry is added to the list and is checked by default. Click Finish. The search results display the ADTs.
5. Select Android Tools and click Next, as shown in figure A.12.
Figure A.12. You must select Android Tools for Eclipse to download and install.
6. After reviewing and accepting the license agreement, click Next.
7. Review and accept the installation location. Click Finish.
8. The plug-in is now downloaded and installed. Restart Eclipse to complete the installation.
Congratulations! The ADT Eclipse plug-in is installed.
Note that from time to time you may need to upgrade your ADT plug-in to support a new Android API level/SDK. As of the writing of this book, the latest version of the ADT plug-in is version 8.01v201012062107-82219. To check for available ADT upgrades, select Software Updates under the Help menu in Eclipse. Highlight the Android Developer Tools in the Installed Software list and click the Upgrade button on the right side of the dialog. This will upgrade your ADT plug-in if an upgrade is available. As with the original installation of the ADT, we recommend that you restart the Eclipse IDE for the software to properly install and be available to you.
Next step: configuration.
A.6. Configuring the Eclipse plug-in
Once Eclipse is restarted, you connect the plug-in to the Android SDK installation. Select Preferences from the Window menu in Eclipse for Windows or from the Eclipse menu for Mac OS X. Click the Android item in the tree view to the left to expand the Android settings. In the right pane, specify the SDK installation location. For example, the value used for this appendix is /Users/fableson/Software/android/android-sdkmac_86, as shown in figure A.13.
Figure A.13. ADT plug-in for Eclipse preferences

Once the SDK location is specified, there are five other sections you may configure:
- Build— This section has options for automatically rebuilding resources. Leave this checked. The Build option can change the level of verbosity. Normal is the default setting.
- DDMS— This service is used for peering into a running virtual machine. These settings specify TCP/IP port numbers used for connecting to a running VM with the debugger and various logging levels and options. The default settings should be just fine. Chapter 2 describes how to use the DDMS.
- Launch— This section permits optional emulator switches to be sent to the emulator upon startup. An example of this might be the wipe-data option, which cleans the persistent file system upon launch of the emulator.
- LogCat?— The LogCat feature is used to view logging messages on the device. This feature permits you to view both application-level log messages as well as kernel-level messages. Only the font is selectable in this dialog, so adjust this as desired. Don’t be fooled by this simple configuration setting—the LogCat is your friend and is demonstrated throughout the book.
- Usage Stats?— This optional feature sends your usage stats to Google to help the Android tools team better understand which features of the plug-in are used in an effort to enhance the toolset.
Your Android development environment is complete!