Introduction to the Solaris Management Console
The Solaris Management Console (SMC) uses GUI tools to make your servers easier to administer. The Solaris Management Console 2.1 software simplifies the task of administering both local and remote Solaris servers by providing the following:
An easy-to-navigate, GUI-based console and a context-sensitive help panel that integrates online documentation
Administration of multiple Solaris systems by a single console and a single login
Role-based access control that enables administrators to delegate specific administrative rights to users within a secure system
An open and extensible environment that integrates Java applications, X.11 legacy applications, wizards, and HTML through the Solaris Management Console 2.1 Software Development Kit (SDK)
The benefits of using the Solaris Management Console are as follows:
SMC supports all experience levels. Inexperienced users can complete tasks using the graphical interface, which includes dialog boxes, wizards, and context help. Experienced administrators will find that the console provides a convenient, secure alternative to using vi to manage configuration parameters on a large network of systems.
The network features of the SMC reduce the number of remote logins required to do administration, including rebooting systems and performing backups.
The SMC simplifies user administration by bringing all the administration tools together so that all SMC servers can be managed from a single location.
New applications can be added to the SMC server, and any authorized user can run that application from that server. In SMC, it’s possible to create special user accounts called roles that can be assigned to users, typically administrators who are permitted to make specific system changes. See Chapter 17, “Role-Based Access Control,” for more details.
SMC provides the user with a graphical representation of the administration components available as well as the level of authorization that is required to run them.
If preferred, more experienced administrators can operate the Solaris management tools through a command-line interface (CLI). SMC also can run in a terminal (nongraphical mode) for use over remote connections or noninteractively from a script.
SMC enables administrators to run applications remotely and to view the activity locally on all their servers. Central and remote management of all servers can be handled from any server on the network. S MC has three components:
The SMC console is a window that contains three panes, four bars, and two tabs. On the left side of the window is a Navigation pane, the right side window is called the View pane, and the bottom window is the Information pane.
The SMC console relies on SMC servers running on one or more computers to perform modifications and report data. Each of these servers is a repository for code, which the console can retrieve after the server has authenticated the user of the console.
The SMC uses the concept of a toolbox to provide a view of various system administration tools or applications. The toolbox is a hierarchical collection of folders, tools, legacy applications, and links to other toolboxes. The SMC comes complete with a default toolbox, the “root” toolbox called “Management Tools,” which contains GUI tools to handle the tasks outlined in Table 18.1.
Note
I demonstrate most of the SMC tools described in Table 18.1 in their respective chapters throughout this book.
The console can retrieve toolboxes from the server. These toolboxes are descriptions of organized collections of tools available on a server. After one of these toolboxes is loaded, the console displays it and the tools referenced in it.
The Solaris Management Console also can run in a terminal (nongraphical mode) for use over remote connections or noninteractively from a script.
Some Solaris commands are written specifically to mimic the Solaris Management Console tool functions (the commands for managing users, for example). These new commands are listed in Table 18.2 with a brief description of each command. There also is a man page for each command.
Note
I demonstrate the commands described in Table 18.2 in their respective chapters throughout this book.
Using SMC
The Solaris Management Console is installed when you install the Solaris 9 operating environment, and it is started at bootup by the /etc/init.d/ init.wbem script. At any time, you can check the status of the SMC server by typing the following:
/etc/init.d/init.wbem status
If SMC is running, you get the following message:
Solaris Management Console server version 2.1.0 running on port 898.
Exercise 18.1 Using SMC
1. |
Start
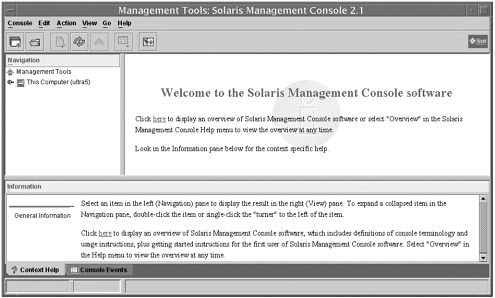
the Solaris Management Console by typing the following: /usr/sbin/smc & On a bitmapped display, you see the SMC initializing, as shown in Figure 18.1. After it is initialized, the Solaris Management Console window appears, as shown in Figure 18.2. You can start SMC as a nonroot user, but some tools and applications might not load unless you log in as root or assume a role. (This is described later in this section.) |
2. |
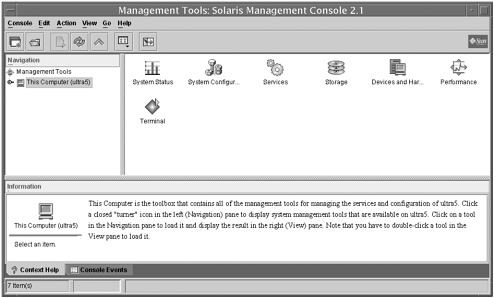
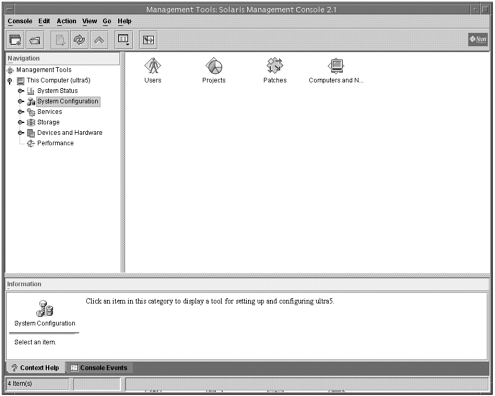
When you expand an item in the Navigation pane, details of that item are displayed in the right pane. For example, when I click This Computer (ultra5), the window panes change as shown in Figure 18.3. Items displayed in the navigation pane are applications that the SMC can manage. These applications have been registered as SMC applications for the current host. |
3. |
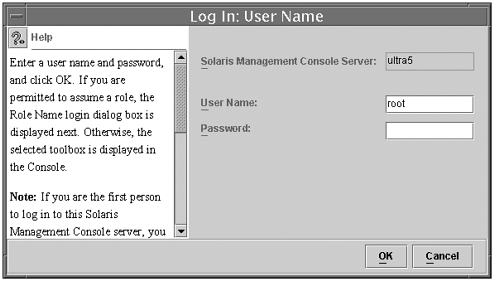
The first time you log in as root and start up the SMC, you have the responsibility to set up at least one account with the right of Primary Administrator and to provide rights for other users. For instance, you can give another nonroot user privileges to manage user accounts on the system. To set up a Primary Administrator account, you must assign roles to user accounts. This is referred to as role-based access control and is described in Chapter 17. Roles are special accounts used to grant rights to administrators. To set up the Primary Administrator account, go to the navigation pane, click the System Configuration icon, and then click the Users icon. The Login window will appear, as shown in Figure 18.4. |
4. |
Enter the root password in the Password field and click OK to continue. The Users tool will begin loading. The Users tool displays in the View pane of the SMC window, as shown in Figure 18.5. |
5. |
Click the Administrative Role icon in the View pane. Then click the Action menu and select Add Administrative Role, as shown in Figure 18.6. Figure 18.6. The Add Administrative Role option.
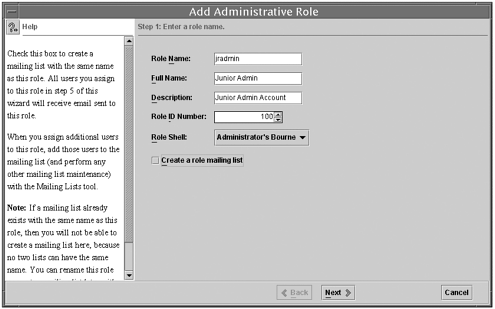
The Add Administrative Role wizard opens, as shown in Figure 18.7. |
6. |
Create the Primary Administrator role by using the Administrative Role wizard and following these steps. In the following windows that appear, you’ll be asked to provide information regarding the role you are setting up. Each field and option is described in Table 18.3. |
7. | |
8. |
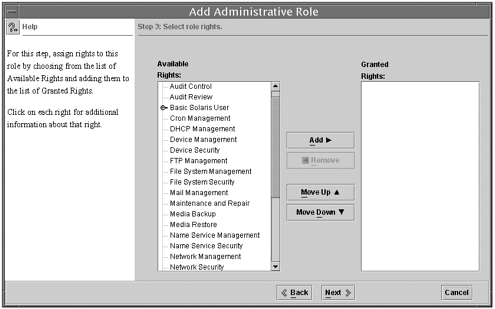
A window will appear, asking you to set and confirm the role password. Click the Next button to continue. You’ll then need to assign rights to the role as shown in Figure 18.9. Figure 18.9. Assigning role rights.
|
9. |
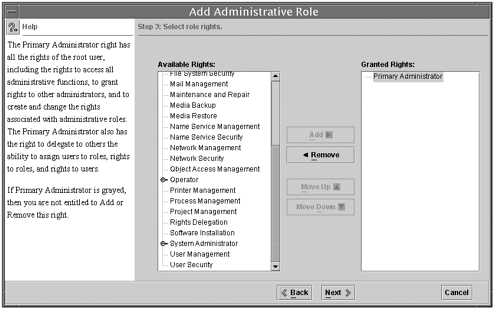
Select the Primary Administrator right from the Available Rights column and add it to Granted Rights column, as shown in Figure 18.10. Click the Next button to continue. |
10. |
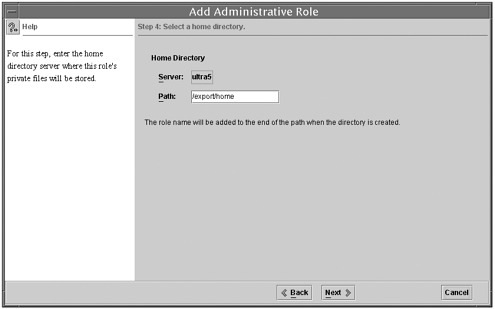
Select the home directory for the role, as shown in Figure 18.11, and click the Next button to continue. |
11. |
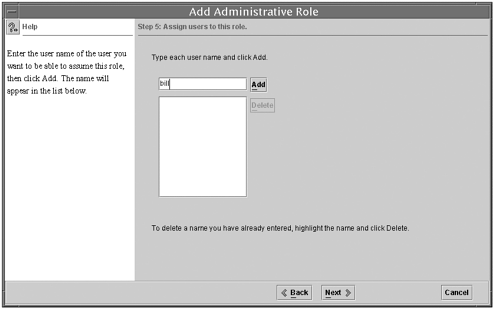
Assign yourself to the list of users who can assume the role, as shown in Figure 18.12, and click the Next button to continue. |
12. |
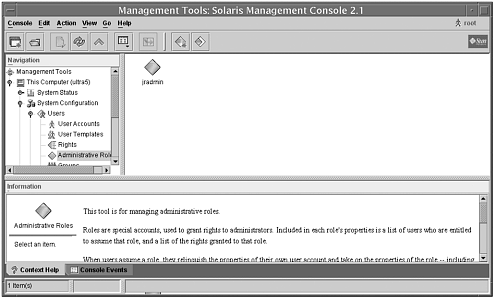
A confirmation window will appear, displaying all of your selections. Click the Finish button to return to the Solaris Management Console window. The new role displays, as shown in Figure 18.13. Figure 18.13. The new role displayed in the Solaris Management Console.
|
13. |
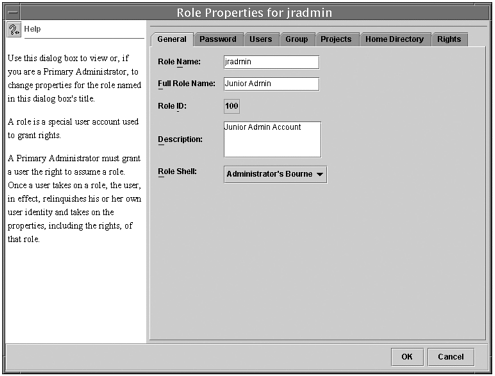
At any time,
you can click a role (such as “jradmin”), and the role properties for that particular role will display, as shown in Figure 18.14. |
14. |
In this window, you can view the properties for the selected role. If you are the Primary Administrator, you can change the properties for a particular role. |
15. |
Now that a role has been defined and users have been associated with that role, those users can start up SMC, assume their role, and use the functions that have been assigned to that role. For example, when user bill starts up SMC, the SMC window displays, as shown in Figure
18.15. |
16. |
When the user clicks the This Computer icon in the navigation pane, the Users icon appears under System Configuration, as shown in Figure 18.16. |
17. |
When bill clicks the Users icon, the Log In window shown in Figure 18.17 opens, prompting for a password. |
18. |
bill enters his password and clicks the OK button. |
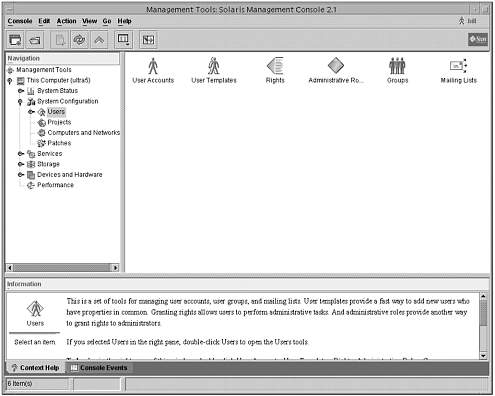
19. |
The Solaris Management Console window now displays icons for the functions to which you have been granted rights, as shown in Figure 18.18. For a more in-depth description of role-based access control (RBAC), refer to Chapter 17. |


