
The Front Panel
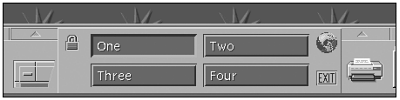
The Front Panel contains a set of icons and pop-up menus (more like roll-up menus) that appear at the bottom of the screen. The two main elements of the Front Panel are the Main Panel and the subpanels. The Main Panel includes the workspace switch, shown in Figure 25.3, which contains the buttons you use to change from one workspace to the next.
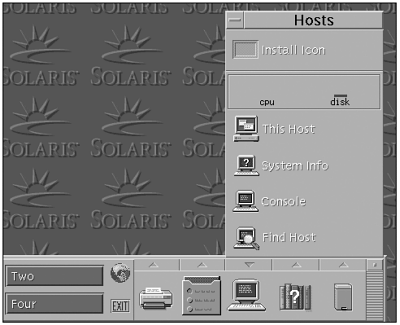
If a control in the Main Panel has an arrow on top of it, that control has a subpanel, as shown in Figure 25.4.
Figure 25.4. A subpanel for a control in the Main Panel.
Users can drag and drop icons from the File Manager or Application Manager to add them to the subpanels. Up to 12 additional workspaces can be configured, each with different backgrounds and colors. Each workspace can have any number of applications running in it, and an application can be set to appear in one, more than one, or all workspaces simultaneously. In some instances, the system administrator might find it necessary to lock the Front Panel so that users can’t change it.
Using the desktop’s interface, the Front Panel can easily be modified in the following ways:
Customizing a workspace
Adding and deleting a workspace
Renaming a workspace
Adding and deleting controls to subpanels
The system administrator can also do more advanced customization outside the CDE by editing CDE configuration files directly from the UNIX command line. However, advanced customization is not covered in this book. For more information on advanced Front Panel customization, see the “Solaris Common Desktop Environment Advanced User’s and System Administrator’s Guide” by Sun Microsytems, which is available at http://docs.sun.com.
Customizing Workspaces
Users can use the Front Panel workspace switch to rename or change the number of workspaces. Click the workspace buttons to change workspaces. When the cursor is positioned on a workspace button, right-clicking the mouse button displays its pop-up menu, as shown in Figure 25.5.
Figure 25.5. The workspace button pop-up menu.

The workspace button pop-up menu includes the items described in Table 25.4.
Exercise 25.2 Renaming a Workspace
Use the pop-up menu to modify workspace button parameters. For example, to rename a workspace, follow these steps:
1. |
Point to the button of the workspace you want to rename. |
2. |
Choose Rename from the button’s pop-up menu (displayed when you right-click the mouse button). The workspace button turns into a text field. |
3. |
Edit the text field. |
4. |
Exercise 25.3 Adding a Workspace
To add a workspace, follow these steps:
1. |
Point to any area in the workspace switch and right-click to display the pop-up menu. |
2. |
Choose Add Workspace from the pop-up menu. The new workspace, named New, is placed at the end of the set of workspaces. (If more than one new workspace is created, the workspaces are named New_1, New_2, and so on.) |
3. |
Exercise 25.4 Removing a Workspace
To remove a workspace, follow these steps:
1. |
Point to the workspace button of the workspace you want to remove. |
2. |
Customizing Workspace Controls
Customizing the controls in the workspace switch is an advanced task that requires the system administrator to create a Front Panel configuration file. This section describes some easy customizations that can be performed from the desktop. Advanced customization is covered in the “Solaris Common Desktop Environment Advanced User’s and System Administrator’s Guide” by Sun Microsytems and is available at http://docs.sun.com.
Customizing the Front Panel Switch Area
The switch area shown in Figure 25.6 is the portion of the workspace switch that is not occupied by other controls or workspace buttons. Just right-click in the empty area of the Front Panel, just below the lock, as shown in Figure 25.6.
Figure 25.6. The portion of the workspace switch that is unoccupied.

The switch area has a pop-up menu containing these items:
| Add Workspace | Adds a workspace and creates a workspace button in the workspace switch |
| Help | Displays help for the workspace switch |
Adding an Application or Other Icon to a Subpanel
The user can add any type of File Manager or Application Manager icon to the Front Panel. The most convenient use of this feature is to add application icons.
Exercise 25.5 Adding an Application Icon to a Subpanel
To add an application icon to a subpanel, follow these steps:
1. |
Display the object’s icon in File Manager or Application Manager. |
2. |
Display the subpanel to which the object is to be added. |
3. |
The behavior of controls added to the Front Panel by using the Install Icon control depends on the type of icon dropped. Table 25.5 describes the control behavior for each type of icon.
Resetting All User Customizations
When you want to remove all customizations from the Front Panel, you can reset the Front Panel by following these steps:
Exercise 25.6 Resetting the Front Panel
To reset the Front Panel and remove all user customizations, follow these steps:
1. |
Open the Application Manager and double-click the Desktop_Tools application group icon. |
2. |
The screen goes blank for several seconds while the Workspace Manager is restarted. The Restore Front Panel action removes all customizations made by using the Install Icon control or the Front Panel’s pop-up menus.
Note
This procedure does not affect advanced customizations made by manually editing Front Panel configuration files.