
13
Test-Driving GraphQL
GraphQL offers an alternative to HTTP requests for fetching data. It offers a whole bunch of additional features that can be added to data requests.
As with Redux, GraphQL systems can seem complicated, but TDD helps to provide an approach to understanding and learning.
In this chapter, we’ll use the Relay library to connect to our backend. We’re going to build a new CustomerHistory component that displays details of a single customer and their appointment history.
This is a bare-bones GraphQL implementation that shows the fundamentals of test-driving the technology. If you’re using other GraphQL libraries instead of Relay, the techniques we’ll explore in this chapter will also apply.
Here’s what the new CustomerHistory component looks like:
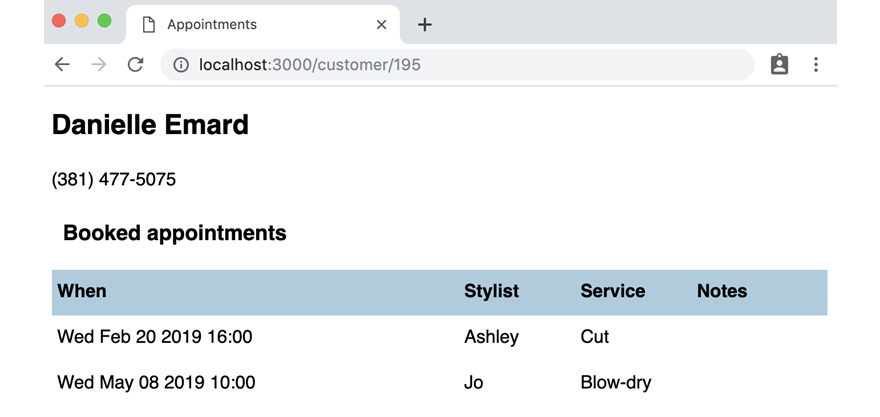
Figure 13.1 – The new CustomerHistory component
This chapter covers the following topics:
- Compiling the schema before you begin
- Test-driving the Relay environment
- Fetching GraphQL data from within a component
By the end of the chapter, you’ll have explored the test-driven approach to GraphQL.
Technical requirements
The code files for this chapter can be found here:
Compiling the schema before you begin
The code samples for this chapter already contain some additions:
- The react-relay, relay-compiler, and babel-plugin-relay packages.
- Babel configuration to ensure your build understands the new GraphQL syntax.
- Relay configuration in the relay.config.json file. The primary piece of configuration is the location of the schema.
- A GraphQL schema in the file src/schema.graphql.
- A server endpoint at POST/graphql, which services incoming GraphQL requests.
It’s beyond the scope of this book to go into each of these, but you will need to compile the schema before you begin, which can be done by typing the following command:
The npm run build command has also been modified to run this command for you, just in case you forget. Once everything is compiled, you’re ready to write some tests.
Testing the Relay environment
There are a few different ways to approach the integration of Relay into a React application. The method we’ll use in this book is the fetchQuery function, which is analogous to the global.fetch function we’ve already used for standard HTTP requests.
However, Relay’s fetchQuery function has a much more complicated setup than global.fetch.
One of the parameters of the fetchQuery function is the environment, and in this section, we’ll see what that is and how to construct it.
Why Do We Need to Construct an Environment?
The Relay environment is an extension point where all manner of functionality can be added. Data caching is one example. If you’re interested in how to do that, check out the Further reading section at the end of this chapter.
We will build a function named buildEnvironment, and then another named getEnvironment that provides a singleton instance of this environment so that the initialization only needs to be done once. Both functions return an object of type Environment.
One of the arguments that the Environment constructor requires is a function named performFetch. This function, unsurprisingly, is the bit that actually fetches data – in our case, from the POST /graphql server endpoint.
In a separate test, we'll check whether performFetch is passed to the new Environment object. We need to treat performFetch as its own unit because we’re not going to be testing the behavior of the resulting environment, only its construction.
Building a performFetch function
Let’s begin by creating our own performFetch function:
- Create a new file, test/relayEnvironment.test.js, and add the following setup. This sets up our global.fetch spy in the same way as usual. There are two new constants here, text and variables, which we’ll use soon:
import {
fetchResponseOk,
fetchResponseError
} from "./builders/fetch";
import {
performFetch
} from "../src/relayEnvironment";
describe("performFetch", () => {
let response = { data: { id: 123 } };
const text = "test";
const variables = { a: 123 };
beforeEach(() => {
jest
.spyOn(global, "fetch")
.mockResolvedValue(fetchResponseOk(response));
});
});
- Then, add the first test, checking that we make the appropriate HTTP request. The call to performFetch takes two parameters that contain text (wrapped in an object) and variables. This mimics how the Relay environment will call the performFetch function for each request:
it("sends HTTP request to POST /graphql", () => {
performFetch({ text }, variables);
expect(global.fetch).toBeCalledWith(
"/graphql",
expect.objectContaining({
method: "POST",
})
);
});
- Create a new file, src/relayEnvironment.js, and make the test pass with the following code:
export const performFetch = (operation, variables) =>
global
.fetch("/graphql", {
method: "POST",
});
- Add the second of our tests for the HTTP request dance, which ensures we pass the correct request configuration:
it("calls fetch with the correct configuration", () => {
performFetch({ text }, variables);
expect(global.fetch).toBeCalledWith(
"/graphql",
expect.objectContaining({
credentials: "same-origin",
headers: { "Content-Type": "application/json" },
})
);
});
- Make that pass by adding the two lines highlighted here:
export const performFetch = (operation, variables) =>
global
.fetch("/graphql", {
method: "POST",
credentials: "same-origin",
headers: { "Content-Type": "application/json" },
});
- Then, add the third and final test of our HTTP request dance. This one checks that we pass the right request data – the required text query and the variables argument included within it:
it("calls fetch with query and variables as request body", async () => {
performFetch({ text }, variables);
expect(global.fetch).toBeCalledWith(
"/graphql",
expect.objectContaining({
body: JSON.stringify({
query: text,
variables,
}),
})
);
});
- Make that pass by defining the body property for the fetch request, as shown here:
export const performFetch = (operation, variables) =>
global
.fetch("/graphql", {
method: "POST",
headers: { "Content-Type": "application/json" },
body: JSON.stringify({
query: operation.text,
variables
})
});
Understanding Operation, Text, and Variables
The text property of the operation argument is a static piece of data that defines the query, and the variables argument will be the piece that is relevant to this specific request.
The tests we’re writing in this chapter do not go as far as checking the behavior of this Relay plumbing code. When writing this type of unit test, which doesn’t exercise behavior, it’s important to note that some kind of end-to-end test will be necessary. That will ensure your unit tests have the right specification.
- The next test checks that we return the right data from the function. Relay expects our performFetch function to return a promise that will either resolve or reject. In this case, we’re resolving it to the fetch response:
it("returns the request data", async () => {
const result = await performFetch(
{ text }, variables
);
expect(result).toEqual(response);
});
- Make that pass:
export const performFetch = (operation, variables) =>
global
.fetch("/graphql", ...)
.then(result => result.json());
- Now, we need to handle the error cases. We need the promise to reject if an HTTP error occurred. We use a new form of the expect function that we haven’t seen before; it takes a promise and expects it to reject:
it("rejects when the request fails", () => {
global.fetch.mockResolvedValue(
fetchResponseError(500)
);
return expect(
performFetch({ text }, variables)
).rejects.toEqual(new Error(500));
});
- In our production code, we’ll test whether the fetch response’s ok property is false, and reject the promise if it is. Add the following function:
const verifyStatusOk = result => {
if (!result.ok) {
return Promise.reject(new Error(500));
} else {
return result;
}
};
- Call that function within your promise chain. After this, our performFetch function is complete:
export const performFetch = (operation, variables) =>
global
.fetch("/graphql", ...)
.then(verifyStatusOk)
.then(result => result.json());
You’ve now learned how to specify and test the performFetch function required for the Environment constructor. Now, we’re ready to do that construction.
Test-driving the Environment object construction
We’re going to build a function named buildEnvironment, that takes all the various pieces we need to build an Environment object. The reason there are so many pieces is that they are all extension points that enable the configuration of the Relay connection.
These pieces are our performFetch function and a bunch of other Relay types that come directly from the relay-runtime package. We’ll use jest.mock to mock all these out in one fell swoop.
Let’s get started:
- In the same test file, test/relayEnvironment.test.js, update your import to include the new function:
import {
performFetch,
buildEnvironment
} from "../src/relayEnvironment";
- Now, it’s time to import all the relevant pieces we need from the relay-runtime package and mock them out. Add the following to the top of the file:
import {
Environment,
Network,
Store,
RecordSource
} from "relay-runtime";
jest.mock("relay-runtime");
- For our first test, we need to test that the Environment constructor was called:
describe("buildEnvironment", () => {
const environment = { a: 123 };
beforeEach(() => {
Environment.mockImplementation(() => environment);
});
it("returns environment", () => {
expect(buildEnvironment()).toEqual(environment);
});
});
- Start by adding all the imports in the production code in src/relayEnvironment.js:
import {
Environment,
Network,
RecordSource,
Store
} from "relay-runtime";
- Make the test pass by adding this code at the bottom of the file:
export const buildEnvironment = () =>
new Environment();
- The second test makes sure we pass the right arguments to Environment. Its first argument is the result of calling Network.create, and the second argument is the result of constructing a Store object. The tests need to mock those out and then check the return values:
describe("buildEnvironment", () => {
const environment = { a: 123 };
const network = { b: 234 };
const store = { c: 345 };
beforeEach(() => {
Environment.mockImplementation(() => environment);
Network.create.mockReturnValue(network);
Store.mockImplementation(() => store);
});
it("returns environment", () => {
expect(buildEnvironment()).toEqual(environment);
});
it("calls Environment with network and store", () => {
expect(Environment).toBeCalledWith({
network,
store
});
});
});
Mocking Constructors
Note the difference in how we mock out constructors and function calls. To mock out a new Store and a new Environment, we need to use mockImplementation(fn). To mock out Network.create, we need to use mockReturnValue(returnValue).
- Make the test pass by updating the function to pass those arguments to the Environment constructor:
export const buildEnvironment = () =>
new Environment({
network: Network.create(),
store: new Store()
});
- Next up, we need to ensure that Network.create gets a reference to our performFetch function:
it("calls Network.create with performFetch", () => {
expect(Network.create).toBeCalledWith(performFetch);
});
- Make that pass by passing performFetch to the Network.create function:
export const buildEnvironment = () =>
new Environment({
network: Network.create(performFetch),
store: new Store()
});
- The Store constructor needs a RecordSource object. Add a new mock implementation for RecordSource in your test setup:
describe("buildEnvironment", () => {
...
const recordSource = { d: 456 };
beforeEach(() => {
...
RecordSource.mockImplementation(
() => recordSource
);
});
...
});
- Add the following test to specify the behavior we want:
it("calls Store with RecordSource", () => {
expect(Store).toBeCalledWith(recordSource);
});
- Make that pass by constructing a new RecordSource object:
export const buildEnvironment = () =>
new Environment({
network: Network.create(performFetch),
store: new Store(new RecordSource())
});
And that, would you believe, is it for buildEnvironment! At this stage, you will have a valid Environment object.
Test-driving a singleton instance of Environment
Because creating Environment takes a substantial amount of plumbing, it’s common to construct it once and then use that value for the rest of the application.
An Alternative Approach Using RelayEnvironmentProvider
There is an alternative approach to using the singleton instance shown here, which is to use React Context. The RelayEnvironmentProvider component provided by Relay can help you with that. For more information, see the Further reading section at the end of the chapter.
Let’s build the getEnvironment function:
- Import the new function at the top of test/relayEnvironment.test.js:
import {
performFetch,
buildEnvironment,
getEnvironment
} from "../src/relayEnvironment";
- At the bottom of the file, add a third describe block with the one and only one test for this function:
describe("getEnvironment", () => {
it("constructs the object only once", () => {
getEnvironment();
getEnvironment();
expect(Environment.mock.calls.length).toEqual(1);
});
});
- In src/relayEnvironment.js, make that pass by introducing a top-level variable that stores the result of getEnvironment if it hasn’t yet been called:
let environment = null;
export const getEnvironment = () =>
environment || (environment = buildEnvironment());
That’s all for the environment boilerplate. We now have a shiny getEnvironment function that we can use within our React components.
In the next section, we’ll start on the CustomerHistory component.
Fetching GraphQL data from within a component
Now that we have a Relay environment, we can begin to build out our feature. Recall from the introduction that we’re building a new CustomerHistory component that displays customer details and a list of the customer’s appointments. A GraphQL query to return this information already exists in our server, so we just need to call it in the right way. The query looks like this:
customer(id: $id) {
  id
  firstName
  lastName
  phoneNumber
  appointments {
    startsAt
    stylist
    service
    notes
  }
}
This says we get a customer record for a given customer ID (specified by the $id parameter), together with a list of their appointments.
Our component will perform this query when it’s mounted. We’ll jump right in with that functionality, by testing the call to fetchQuery:
- Create a new file, test/CustomerHistory.test.js, and add the following setup. We’re going to break this setup into parts, as it’s long! First up is our import, and the call to mock relay-runtime again, so that we can stub fetchQuery:
import React from "react";
import { act } from "react-dom/test-utils";
import {
initializeReactContainer,
render,
renderAndWait,
container,
element,
elements,
textOf,
} from "./reactTestExtensions";
import { fetchQuery } from "relay-runtime";
import {
CustomerHistory,
query
} from "../src/CustomerHistory";
import {
getEnvironment
} from "../src/relayEnvironment";
jest.mock("relay-runtime");
jest.mock("../src/relayEnvironment");
- Now, let’s define some sample data:
const date = new Date("February 16, 2019");
const appointments = [
{
startsAt: date.setHours(9, 0, 0, 0),
stylist: "Jo",
service: "Cut",
notes: "Note one"
},
{
startsAt: date.setHours(10, 0, 0, 0),
stylist: "Stevie",
service: "Cut & color",
notes: "Note two"
}
];
const customer = {
firstName: "Ashley",
lastName: "Jones",
phoneNumber: "123",
appointments
};
- Next, let’s get beforeEach in place. This stubs out fetchQuery with a special sendCustomer fake, mimicking the return value of a fetchQuery request:
describe("CustomerHistory", () => {
let unsubscribeSpy = jest.fn();
const sendCustomer = ({ next }) => {
act(() => next({ customer }));
return { unsubscribe: unsubscribeSpy };
};
beforeEach(() => {
initializeReactContainer();
fetchQuery.mockReturnValue(
{ subscribe: sendCustomer }
);
});
});
The Return Value of fetchQuery
This function has a relatively complex usage pattern. A call to fetchQuery returns an object with subscribe and unsubscribe function properties We call subscribe with an object with a next callback property. That callback is called by Relay’s fetchQuery each time the query returns a result set. We can use that callback to set our component state. Finally, the unsubscribe function is returned from the useEffect block so that it’s called when the component is unmounted or the relevant props change.
- Finally, add the test, which checks that we call fetchQuery in the expected way:
it("calls fetchQuery", async () => {
await renderAndWait(<CustomerHistory id={123} />);
expect(fetchQuery).toBeCalledWith(
getEnvironment(), query, { id: 123 }
);
});
- Let’s make that pass. Create a new file, src/CustomerHistory.js, and start it off with the imports and the exported query definition:
import React, { useEffect } from "react";
import { fetchQuery, graphql } from "relay-runtime";
import { getEnvironment } from "./relayEnvironment";
export const query = graphql`
query CustomerHistoryQuery($id: ID!) {
customer(id: $id) {
id
firstName
lastName
phoneNumber
appointments {
startsAt
stylist
service
notes
}
}
}
`;
- Add the component, together with a useEffect Hook:
export const CustomerHistory = ({ id }) => {
useEffect(() => {
fetchQuery(getEnvironment(), query, { id });
}, [id]);
return null;
};
- If you run tests now, you might see an error, as shown here:
Cannot find module './__generated__/CustomerHistoryQuery.graphql' from 'src/CustomerHistory.js'
To fix this, run the following command to compile your GraphQL query:
npx relay-compiler
- Next, we can add a test to show what happens when we pull out some data:
it("unsubscribes when id changes", async () => {
await renderAndWait(<CustomerHistory id={123} />);
await renderAndWait(<CustomerHistory id={234} />);
expect(unsubscribeSpy).toBeCalled();
});
- To make that pass, update the useEffect block to return the unsubscribe function property:
useEffect(() => {
const subscription = fetchQuery(
getEnvironment(), query, { id }
);
return subscription.unsubscribe;
}, [id]);
- Then, update your component to render that data, pulling in the customer data:
it("renders the first name and last name together in a h2", async () => {
await renderAndWait(<CustomerHistory id={123} />);
await new Promise(setTimeout);
expect(element("h2")).toContainText("Ashley Jones");
});
- Then, update your component to include a new state variable, customer. This is set by calling setCustomer in our definition of the next callback:
export const CustomerHistory = ({ id }) => {
const [customer, setCustomer] = useState(null);
useEffect(() => {
const subscription = fetchQuery(
getEnvironment(), query, { id }
).subscribe({
next: ({ customer }) => setCustomer(customer),
});
return subscription.unsubscribe;
}, [id]);
- Make the test pass by extending your JSX to render the customer data:
const { firstName, lastName } = customer;
return (
<>
<h2>
{firstName} {lastName}
</h2>
</>
);
- Now, add a test to also render the customer’s phone number:
it("renders the phone number", async () => {
await renderAndWait(<CustomerHistory id={123} />);
expect(document.body).toContainText("123");
});
- Make that pass with the change shown here:
const { firstName, lastName, phoneNumber } = customer;
return (
<>
<h2>
{firstName} {lastName}
</h2>
<p>{phoneNumber}</p>
</>
);
- Now, let’s get started on rendering the appointments:
it("renders a Booked appointments heading", async () => {
await renderAndWait(<CustomerHistory id={123} />);
expect(element("h3")).not.toBeNull();
expect(element("h3")).toContainText(
"Booked appointments"
);
});
- That’s a quick one to fix; add in the h3 element, as shown here:
const { firstName, lastName, phoneNumber } = customer;
return (
<>
<h2>
{firstName} {lastName}
</h2>
<p>{phoneNumber}</p>
<h3>Booked appointments</h3>
</>
);
- Next, we’ll render a table for each of the appointments available:
it("renders a table with four column headings", async () => {
await renderAndWait(<CustomerHistory id={123} />);
const headings = elements(
"table > thead > tr > th"
);
expect(textOf(headings)).toEqual([
"When",
"Stylist",
"Service",
"Notes",
]);
});
- Add that table:
const { firstName, lastName, phoneNumber } = customer;
return (
<>
<h2>
{firstName} {lastName}
</h2>
<p>{phoneNumber}</p>
<h3>Booked appointments</h3>
<table>
<thead>
<tr>
<th>When</th>
<th>Stylist</th>
<th>Service</th>
<th>Notes</th>
</tr>
</thead>
</table>
</>
);
- For the next set of tests, we’ll use a columnValues helper, which will find a rendered table element and pull out an array of all the values in a column. We can use this to test that our code displays data for a list of appointments, rather than just one:
const columnValues = (columnNumber) =>
elements("tbody > tr").map(
(tr) => tr.childNodes[columnNumber]
);
it("renders the start time of each appointment in the correct format", async () => {
await renderAndWait(<CustomerHistory id={123} />);
expect(textOf(columnValues(0))).toEqual([
"Sat Feb 16 2019 09:00",
"Sat Feb 16 2019 10:00",
]);
});
- Add a new tbody element here, just below thead. This makes a reference to a new AppointmentRow component, which we haven’t built yet, but we will do so in the next step:
<table>
<thead>
...
</thead>
<tbody>
{customer.appointments.map((appointment, i) => (
<AppointmentRow
appointment={appointment}
key={i}
/>
))}
</tbody>
</table>
- Now, let’s define AppointmentRow. Add this above the CustomerHistory definition. After this, your test should pass:
const toTimeString = (startsAt) =>
new Date(Number(startsAt))
.toString()
.substring(0, 21);
const AppointmentRow = ({ appointment }) => (
<tr>
<td>{toTimeString(appointment.startsAt)}</td>
</tr>
);
- Let’s add in the other columns, starting with the stylist:
it("renders the stylist", async () => {
await renderAndWait(<CustomerHistory id={123} />);
expect(textOf(columnValues(1))).toEqual([
"Jo", "Stevie"
]);
});
- Add that as the next column in AppointmentRow:
const AppointmentRow = ({ appointment }) => (
<tr>
<td>{toTimeString(appointment.startsAt)}</td>
<td>{appointment.stylist}</td>
</tr>
);
- Next is the service field:
it("renders the service", async () => {
await renderAndWait(<CustomerHistory id={123} />);
expect(textOf(columnValues(2))).toEqual([
"Cut",
"Cut & color",
]);
});
- Again, that involves simply adding a further td element to AppointmentRow:
const AppointmentRow = ({ appointment }) => (
<tr>
<td>{toTimeString(appointment.startsAt)}</td>
<td>{appointment.stylist}</td>
<td>{appointment.service}</td>
</tr>
);
- Finally, for rendering information, we’ll show the notes field too.
it("renders notes", async () => {
await renderAndWait(<CustomerHistory id={123} />);
expect(textOf(columnValues(3))).toEqual([
"Note one",
"Note two",
]);
});
- Complete the AppointmentRow component, as shown here:
const AppointmentRow = ({ appointment }) => (
<tr>
<td>{toTimeString(appointment.startsAt)}</td>
<td>{appointment.stylist}</td>
<td>{appointment.service}</td>
<td>{appointment.notes}</td>
</tr>
);
- We’re almost done. Let’s display a Loading message when data is being submitted to the server. This test should be a new nested describe block, just below the test that we’ve just completed. It uses a noSend fake that does nothing; there’s no call to next. This can be used to mimic the scenario when data is still loading:
describe("submitting", () => {
const noSend = () => unsubscribeSpy;
beforeEach(() => {
fetchQuery.mockReturnValue({ subscribe: noSend });
});
it("displays a loading message", async () => {
await renderAndWait(<CustomerHistory id={123} />);
expect(element("[role=alert]")).toContainText(
"Loading"
);
});
});
- To make that pass, introduce a conditional just before the JSX:
export const CustomerHistory = ({ id }) => {
const [customer, setCustomer] = useState(null);
useEffect(() => {
...
}, [id]);
if (!customer) {
return <p role="alert">Loading</p>;
}
...
};
- Finally, let’s handle the case when there’s an error fetching data. This uses another fake, errorSend, that invokes the error callback. It’s like the next callback and can be used to set state, which we’ll see in the next step:
describe("when there is an error fetching data", () => {
const errorSend = ({ error }) => {
act(() => error());
return { unsubscribe: unsubscribeSpy };
};
beforeEach(() => {
fetchQuery.mockReturnValue(
{ subscribe: errorSend }
);
});
it("displays an error message", async () => {
await renderAndWait(<CustomerHistory />);
expect(element("[role=alert]")).toContainText(
"Sorry, an error occurred while pulling data from the server."
);
});
});
- To make that pass, you’ll need to introduce a new status state variable. Initially, this has the loading value. When successful, it changes to loaded, and when an error occurs, it changes to failed. For the failed state, we render the specified error message:
const [customer, setCustomer] = useState(null);
const [status, setStatus] = useState("loading");
useEffect(() => {
const subscription = fetchQuery(
getEnvironment(), query, { id }
).subscribe({
next: ({ customer }) => {
setCustomer(customer);
setStatus("loaded");
},
error: (_) => setStatus("failed"),
})
return subscription.unsubscribe;
}, [id]);
if (status === "loading") {
return <p role="alert">Loading</p>;
}
if (status === "failed") {
return (
<p role="alert">
Sorry, an error occurred while pulling data from
the server.
</p>
);
}
const { firstName, lastName, phoneNumber } = customer;
...
That completes the new CustomerHistory component. You have now learned how to test-drive the use of Relay’s fetchQuery function in your application, and this component is now ready to integrate with App. This is left as an exercise.
Summary
This chapter has explored how to test-drive the integration of a GraphQL endpoint using Relay. You have seen how to test-drive the building of the Relay environment, and how to build a component that uses the fetchQuery API.
In Part 3, Interactivity, we’ll begin work in a new code base that will allow us to explore more complex use cases involving undo/redo, animation, and WebSocket manipulation.
In Chapter 14, Building a Logo Interpreter, we’ll begin by writing new Redux middleware to handle undo/redo behavior.
Exercises
Integrate the CustomerHistory component into the rest of your application by taking the following steps:
- Add a new route at /viewHistory?customer=<customer id> that displays the CustomerHistory component, using a new intermediate CustomerHistoryRoute component.
- Add a new Link to the search actions on the CustomerSearch screen, titled View history, that, when pressed, navigates to the new route.
Further reading
The RelayEnvironmentProvider component:
https://relay.dev/docs/api-reference/relay-environment-provider/