
16
Working with WebSockets
In this chapter, we’ll look at how to test-drive the WebSocket API within our React app. We’ll use it to build a teaching mechanism whereby one person can share their screen and others can watch as they type out commands.
The WebSocket API isn’t straightforward. It uses a number of different callbacks and requires functions to be called in a certain order. To make things harder, we’ll do this all within a Redux saga: that means we’ll need to do some work to convert the callback API to one that can work with generator functions.
Because this is the last chapter covering unit testing techniques, it does things a little differently. It doesn’t follow a strict TDD process. The starting point for this chapter has a skeleton of our functions already completed. You’ll flesh out these functions, concentrating on learning test-driven techniques for WebSocket connections.
This chapter covers the following topics:
- Designing a WebSocket interaction
- Test-driving a WebSocket connection
- Streaming events with redux-saga
- Updating the app
By the end of the chapter, you’ll have learned how the WebSocket API works along with its unit testing mechanisms.
Technical requirements
The code files for this chapter can be found here:
Designing a WebSocket interaction
In this section, we’ll start by describing the sharing workflow, then we’ll look at the new UI elements that support this workflow, and finally we’ll walk through the code changes you’ll make in this chapter.
The sharing workflow
A sharing session is made up of one presenter and zero or more watchers. That means there are two modes that the app can be in: either presenting or watching.
When the app is in presenting mode, then everyone watching will get a copy of your Spec Logo instructions. All your instructions are sent to the server via a WebSocket.
When your app is in watching mode, a WebSocket receives instructions from the server and immediately outputs them onto your screen.
The messages sent to and from the server are simple JSON-formatted data structures.
Figure 16.1 shows how the interface looks when it’s in presenter mode.
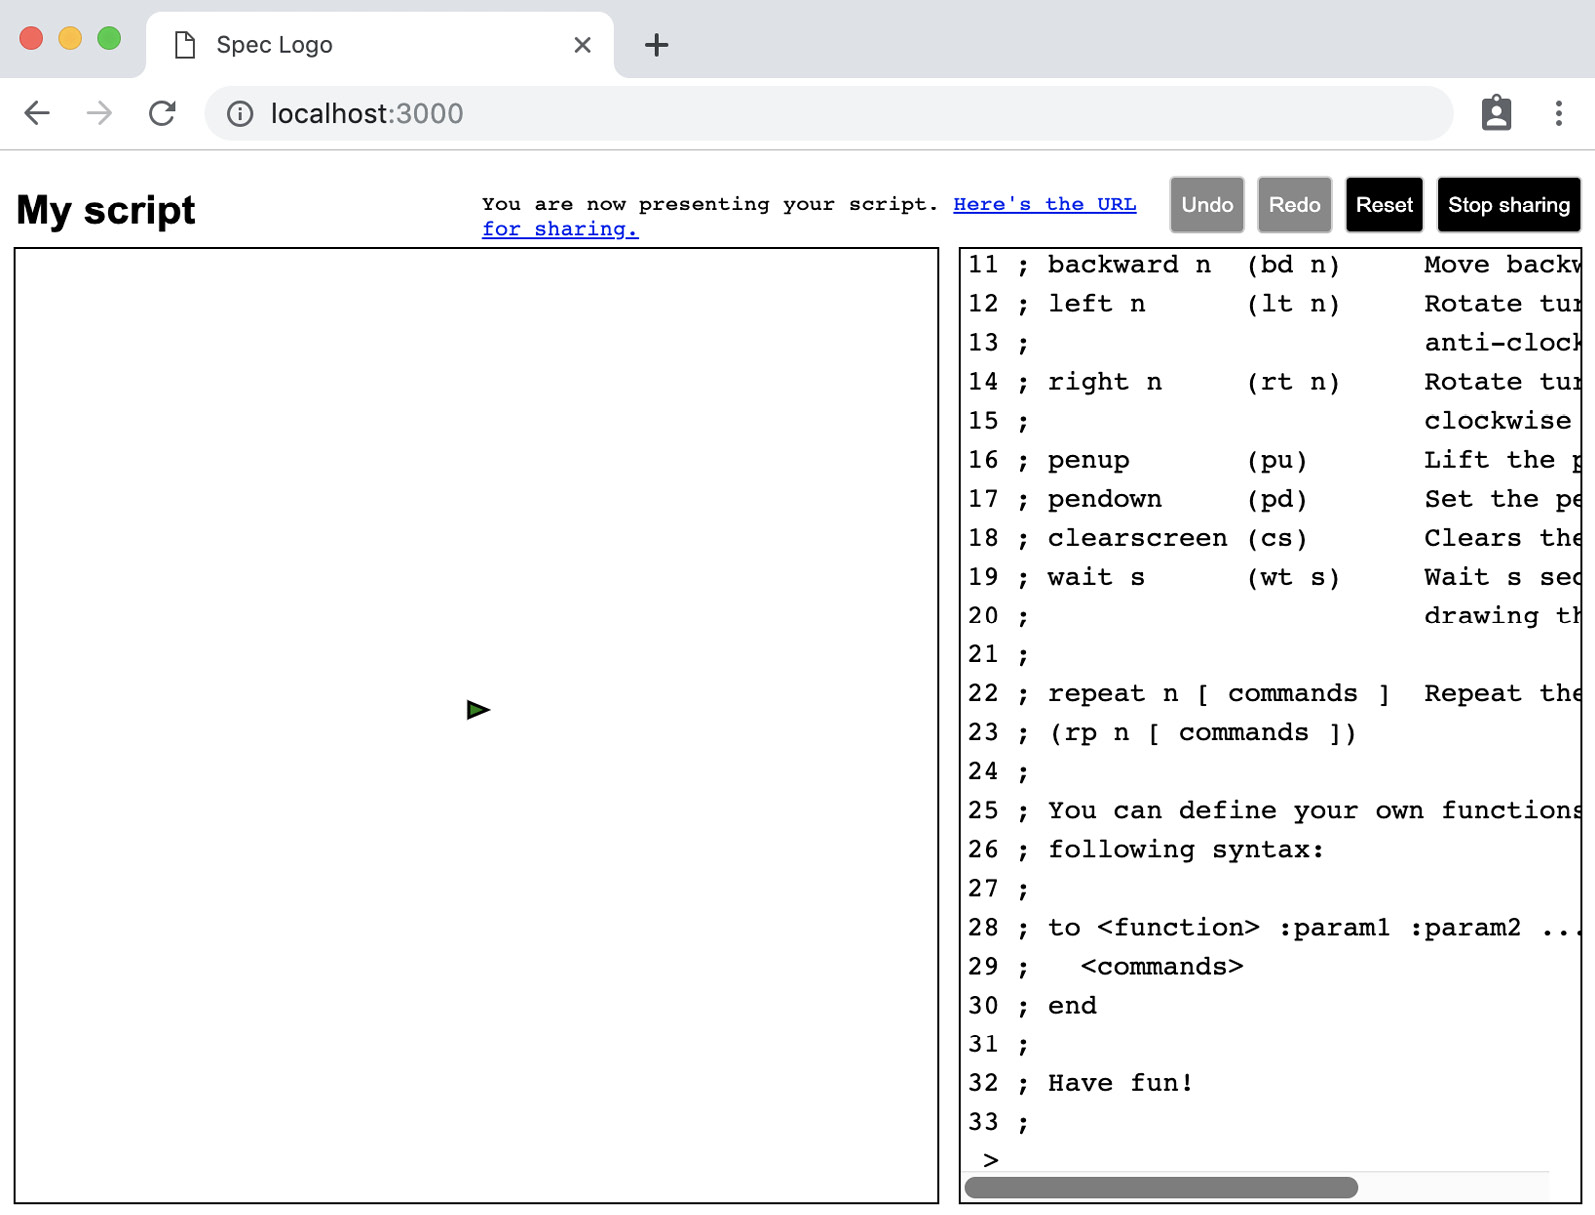
Figure 16.1 – Spec Logo in presenter mode
- The presenter clicks the Start sharing button. The server is sent the following message:
{ type: "START_SHARING" }
- The server then responds with the ID of the session:
{ status: "STARTED", id: 123 }
- This ID is used to construct a URL that opens the application in watching mode, for example:
http://localhost:3000/index.html?watching=123
- The URL can be shared and opened anywhere. When the application is opened in this mode, the application immediately opens a WebSocket to the server and sends this message:
{ type: "START_WATCHING", id: 123 }
- There can be any number of watchers that connect. On an initial connection, any commands that the presenter has already sent to the server will be replayed. Those commands are sent from the presenter for any Redux action of type SUBMIT_EDIT_LINE, and they are sent via the WebSocket to the server like this:
{
type: "NEW_ACTION",
innerAction: {
type: "SUBMIT_EDIT_LINE",
text: "forward 10 "
}
}
- When the server receives actions on the presenter’s WebSocket, it immediately forwards the actions to every subscriber:
{ type: "SUBMIT_EDIT_LINE", text: "forward 10 " } }
- The server also stores received actions in history, so the actions can be replayed by new joiners.
- When the watcher is done, they simply need to close the browser window and their WebSocket will close.
- When the presenter is done, they can either close the browser window or hit the Stop sharing button. This closes the connection and the server clears out its internal state.
The new UI elements
Here’s what you’ll find in the UI; all of this has already been built for you:
- A new menu button to toggle sharing on and off. It is named Start sharing, but once sharing has started, the name switches to Stop sharing.
- There is a new message that appears as part of the menu buttons bar when Spec Logo is in sharing mode. It contains a message telling the user whether they are presenting or watching. If they are presenting, it also contains a URL that they can copy and share with others.
- You can now launch the app in watching mode by adding the search parameter ?watching=<id> to the end of the Spec Logo URL.
Next, let’s have a look at the skeleton of the Redux saga that you’ll be fleshing out.
Splitting apart the saga
A new piece of Redux middleware exists in the file src/middleware/sharingSagas.js. This file has two parts to it. First, there’s a middleware function named duplicateForSharing. This is a filter that provides us with all the actions that we wish to broadcast:
export const duplicateForSharing =
  store => next => action => {
    if (action.type === "SUBMIT_EDIT_LINE") {
      store.dispatch({
        type: "SHARE_NEW_ACTION",
        innerAction: action,
      });
    }
    return next(action);
  };
Second, there’s the root saga itself. It’s split into four smaller functions, and these are the functions we’ll fill out in this chapter, using a test-driven approach:
export function* sharingSaga() {
  yield takeLatest("TRY_START_WATCHING", startWatching);
  yield takeLatest("START_SHARING", startSharing);
  yield takeLatest("STOP_SHARING", stopSharing);
  yield takeLatest("SHARE_NEW_ACTION", shareNewAction);
}
With enough of the design done, let’s get cracking with the implementation.
Test-driving a WebSocket connection
We start by filling out that first function, startSharing. This function is invoked when the START_SHARING action is received. That action is triggered when the user clicks the Start sharing button:
- Open test/middleware/sharingSagas.test.js and add the following imports at the top:
import { storeSpy, expectRedux } from "expect-redux";
import { act } from "react-dom/test-utils";
import { configureStore } from "../../src/store";
- At the bottom of the file, add a new describe block and its setup. We’ll break this into a couple of steps: first, set up the Redux store and the WebSocket spy. Because window.WebSocket is a constructor function, we use mockImplementation to stub it out:
describe("sharingSaga", () => {
let store;
let socketSpyFactory;
beforeEach(() => {
store = configureStore([storeSpy]);
socketSpyFactory = spyOn(window, "WebSocket");
socketSpyFactory.mockImplementation(() => {
return {};
});
});
});
Understanding the WebSocket API
The WebSocket constructor returns an object with send and close methods, plus onopen, onmessage, onclose, and onerror event handlers. We’ll implement most of these on our test double as we build out our test suite. If you’d like to learn more about the WebSocket API, check out the Further reading section at the end of this chapter.
- Next, because we’re also concerned with the window location, we also need to stub out the window.location object. Because this is a read-only object in the JSDOM environment, we need to use the Object.defineProperty function to override it. This is a little clunky, so you may prefer to extract that into its own function with a good name. Add the following into the same beforeEach block:
beforeEach(() => {
...
Object.defineProperty(window, "location", {
writable: true,
value: {
protocol: "http:",
host: "test:1234",
pathname: "/index.html",
},
});
});
- Add the first test in a nested describe block. This checks that we make the WebSocket connection with the right URL:
describe("START_SHARING", () => {
it("opens a websocket when starting to share", () => {
store.dispatch({ type: "START_SHARING" });
expect(socketSpyFactory).toBeCalledWith(
"ws://test:1234/share"
);
});
});
- Make that pass by filling in the startSharing generator function in the file src/middleware/sharingSagas.js (remembering that the skeleton has already been created for you). This code constructs a new URL with the right host:
function* startSharing() {
const { host } = window.location;
new WebSocket(`ws://${host}/share`);
}
- Back in the test suite, modify the WebSocket stub implementation to add an inner spy, sendSpy, which will be called when the user calls the send function on the WebSocket. We also need to store a reference to the socketSpy function that’s created, so we can call the callbacks that the user attaches to its event handlers (such as onopen and onmessage). This will make sense when we write the next test:
let sendSpy;
let socketSpy;
beforeEach(() => {
sendSpy = jest.fn();
socketSpyFactory = spyOn(window, "WebSocket");
socketSpyFactory.mockImplementation(() => {
socketSpy = {
send: sendSpy,
};
return socketSpy;
});
...
}
- When test-driving an API with callbacks, such as the WebSocket API, it’s important that we mimic the exact behavior of each callback. We will start with the onopen callback. The next test will trigger this as if it was a server sending a message. Because we expect a bunch of asynchronous actions to occur when onopen is received, we can use async act to wait for the actions to be completed. So, before the next test, define the following function, which triggers the onopen callback:
const notifySocketOpened = async () => {
await act(async () => {
socketSpy.onopen();
});
};
Using act with non-React code
The async act function helps us even when we’re not dealing with React components because it waits for promises to run before returning.
- We can then use the notifySocketOpened function in our next test, which checks that when the client receives a START_SHARING action, it immediately forwards it onto the server:
it("dispatches a START_SHARING action to the socket", async () => {
store.dispatch({ type: "START_SHARING" });
await notifySocketOpened();
expect(sendSpy).toBeCalledWith(
JSON.stringify({ type: "START_SHARING" })
);
});
- To make that pass, start by extracting the existing code in the startSharing function into a new function named openWebsocket. Then, add in code that invokes a Promise object that resolves when the onopen message is received on the socket. This code is fairly difficult—we’re building a Promise object specifically to adapt the callback-based API into something that we can use with the generator yield keyword:
const openWebSocket = () => {
const { host } = window.location;
const socket = new WebSocket(`ws://${host}/share`);
return new Promise(resolve => {
socket.onopen = () => {
resolve(socket)
};
});
};
- You can now make use of that openWebSocket function in startSharing. After this, your test should pass:
function* startSharing() {
const presenterSocket = yield openWebSocket();
presenterSocket.send(
JSON.stringify({ type: "START_SHARING" })
);
}
- The next test will send a message over the socket from the server to the app. For this, we need a helper function to mimic sending a message and wait to empty the current task queue of tasks. Add this helper to test/middleware/sharingSagas.test.js, just below notifySocketOpened:
const sendSocketMessage = async message => {
await act(async () => {
socketSpy.onmessage({
data: JSON.stringify(message)
});
});
};
- Add the next test, using the function you’ve just defined:
it("dispatches an action of STARTED_SHARING with a URL containing the id that is returned from the server", async () => {
store.dispatch({ type: "START_SHARING" });
await notifySocketOpened();
await sendSocketMessage({
type: "UNKNOWN",
id: 123,
});
return expectRedux(store)
.toDispatchAnAction()
.matching({
type: "STARTED_SHARING",
url: "http://test:1234/index.html?watching=123",
});
});
- To make this pass, we’ll read the message from the socket. Once that’s done, we can pass the retrieved information back to the Redux store. Start by adding the following new functions at the top of src/middleware/sharingSagas.js:
const receiveMessage = (socket) =>
new Promise(resolve => {
socket.onmessage = evt => {
resolve(evt.data)
};
});
const buildUrl = (id) => {
const {
protocol, host, pathname
} = window.location;
return (
`${protocol}//${host}${pathname}?watching=${id}`
);
};
- Now you can use those functions to finish the implementation of startSharing:
function* startSharing() {
const presenterSocket = yield openWebSocket();
presenterSocket.send(
JSON.stringify({ type: "START_SHARING" })
);
const message = yield receiveMessage(
presenterSocket
);
const presenterSessionId = JSON.parse(message).id;
yield put({
type: "STARTED_SHARING",
url: buildUrl(presenterSessionId),
});
}
That’s it for the process of starting to share. Now let’s deal with what happens when the user clicks the Stop sharing button:
- Create a helper function inside the describe block named sharingSaga, as shown. This function will change the system to a state of STARTED_SHARING:
const startSharing = async () => {
store.dispatch({ type: "START_SHARING" });
await notifySocketOpened();
await sendSocketMessage({
type: "UNKNOWN",
id: 123,
});
};
- Update the spy to include a closeSpy variable, which we set up in the same way as sendSpy:
let closeSpy;
beforeEach(() => {
sendSpy = jest.fn();
closeSpy = jest.fn();
socketSpyFactory = spyOn(window, "WebSocket");
socketSpyFactory.mockImplementation(() => {
socketSpy = {
send: sendSpy,
close: closeSpy,
};
return socketSpy;
});
...
});
- Add the first test in a new nested context. It begins by starting sharing and then dispatches the STOP_SHARING action:
describe("STOP_SHARING", () => {
it("calls close on the open socket", async () => {
await startSharing();
store.dispatch({ type: "STOP_SHARING" });
expect(closeSpy).toBeCalled();
});
});
- To make this pass, we’ll fill out the stopSharing generator function. First, however, we need to get access to the socket that we created within the startSharing function. Extract that variable into the top-level namespace:
let presenterSocket;
function* startSharing() {
presenterSocket = yield openWebSocket();
...
}
- Then, add the following definition to the stopSharing function. You can then run your tests, and everything should pass; however, if you’re running your entire test suite (with npm test), you’ll see a couple of console errors appear. These are coming from one test in the MenuButtons test suite—we will fix this in the Updating the app section later:
function* stopSharing() {
presenterSocket.close();
}
Running tests in just a single suite
To avoid seeing the console errors, remember you can opt to run tests for this test suite only using the command npm test test/middleware/sharingSagas.test.js.
- Moving on to the next test, we want to update the Redux store with the new stopped status. This will allow us to remove the message that appeared to the user when they began sharing:
it("dispatches an action of STOPPED_SHARING", async () => {
await startSharing();
store.dispatch({ type: "STOP_SHARING" });
return expectRedux(store)
.toDispatchAnAction()
.matching({ type: "STOPPED_SHARING" });
});
- That’s a simple one-liner to make pass:
function* stopSharing() {
presenterSocket.close();
yield put({ type: "STOPPED_SHARING" });
}
Next up is broadcasting actions from the presenter to the server:
- Create a new nested describe block with the following test:
describe("SHARE_NEW_ACTION", () => {
it("forwards the same action on to the socket", async () => {
const innerAction = { a: 123 };
await startSharing(123);
store.dispatch({
type: "SHARE_NEW_ACTION",
innerAction,
});
expect(sendSpy).toHaveBeenLastCalledWith(
JSON.stringify({
type: "NEW_ACTION",
innerAction,
})
);
});
});
- Make it pass by filling in the following content for the shareNewAction function:
const shareNewAction = ({ innerAction }) => {
presenterSocket.send(
JSON.stringify({
type: "NEW_ACTION",
innerAction,
})
);
}
- Add the next test, which checks that we do not send any actions if the user isn’t presenting:
it("does not forward if the socket is not set yet", () => {
store.dispatch({ type: "SHARE_NEW_ACTION" });
expect(sendSpy).not.toBeCalled();
});
Using not.toBeCalled in an asynchronous environment
This test has a subtle issue. Although it will help you add to the design of your software, it’s slightly less useful as a regression test because it could potentially result in false positives. This test guarantees that something doesn’t happen between the start and the end of the test, but it makes no guarantees about what happens after. Such is the nature of the async environment.
- Making this test pass is simply a matter of adding a conditional around the code we have:
function* shareNewAction({ innerAction } ) {
if (presenterSocket) {
presenterSocket.send(
JSON.stringify({
type: "NEW_ACTION",
innerAction,
})
);
}
}
- We also don’t want to share the action if the user has stopped sharing—so let’s add that in:
it("does not forward if the socket has been closed", async () => {
await startSharing();
socketSpy.readyState = WebSocket.CLOSED;
store.dispatch({ type: "SHARE_NEW_ACTION" });
expect(sendSpy.mock.calls).toHaveLength(1);
});
The WebSocket specification
The constant in the preceding test, WebSocket.CLOSED, and the constant in the following code, WebSocket.OPEN, are defined in the WebSocket specification.
- Move to the top of the test file and define the following two constants, underneath your imports. These are needed because when we spy on the WebSocket constructor, we overwrite these values. So, we need to add them back in. Start by saving the real values:
const WEB_SOCKET_OPEN = WebSocket.OPEN;
const WEB_SOCKET_CLOSED = WebSocket.CLOSED;
- Update your spy to set these constants once WebSocket has been stubbed. While we’re here, let’s also set the default readyState for a socket to be WebSocket.OPEN, which means our other tests won’t break:
socketSpyFactory = jest.spyOn(window, "WebSocket");
Object.defineProperty(socketSpyFactory, "OPEN", {
value: WEB_SOCKET_OPEN
});
Object.defineProperty(socketSpyFactory, "CLOSED", {
value: WEB_SOCKET_CLOSED
});
socketSpyFactory.mockImplementation(() => {
socketSpy = {
send: sendSpy,
close: closeSpy,
readyState: WebSocket.OPEN,
};
return socketSpy;
});
- Finally, back in the production code, make the test pass by checking if readyState is WebSocket.OPEN, which is not exactly what the test specified, but it’s good enough to make it pass:
const shareNewAction = ({ innerAction }) => {
if (
presenterSocket &&
presenterSocket.readyState === WebSocket.OPEN
) {
presenterSocket.send(
JSON.stringify({
type: "NEW_ACTION",
innerAction,
})
);
}
}
That’s it for the presenter behavior: we have test-driven the onopen, onclose, and onmessage callbacks. In a real-world application, you would want to follow the same process for the onerror callback.
Now let’s look at the watcher’s behavior.
Streaming events with redux-saga
We’ll repeat a lot of the same techniques in this section. There are two new concepts: first, pulling out the search param for the watcher ID, and second, using eventChannel to subscribe to the onmessage callback. This is used to continually stream messages from the WebSocket into the Redux store.
Let’s being by specifying the new URL behavior:
- Write a new describe block at the bottom of test/middleware/sharingSagas.test.js, but still nested inside the main describe block:
describe("watching", () => {
beforeEach(() => {
Object.defineProperty(window, "location", {
writable: true,
value: {
host: "test:1234",
pathname: "/index.html",
search: "?watching=234"
}
});
});
it("opens a socket when the page loads", () => {
store.dispatch({ type: "TRY_START_WATCHING" });
expect(socketSpyFactory).toBeCalledWith(
"ws://test:1234/share"
);
});
});
- Make it pass by filling out the startWatching function in your production code. You can make use of the existing openWebSocket function:
function* startWatching() {
yield openWebSocket();
}
- In the next test, we’ll begin to make use of the search param:
it("does not open socket if the watching field is not set", () => {
window.location.search = "?";
store.dispatch({ type: "TRY_START_WATCHING" });
expect(socketSpyFactory).not.toBeCalled();
});
- Make it pass by extracting the search param using the URLSearchParams object:
function* startWatching() {
const sessionId = new URLSearchParams(
window.location.search.substring(1)
).get("watching");
if (sessionId) {
yield openWebSocket();
}
}
- Before we write the next test, add the following helper function, which mimics the action that will occur on the real WebSocket, ensuring that onopen is called:
const startWatching = async () => {
await act(async () => {
store.dispatch({ type: "TRY_START_WATCHING" });
socketSpy.onopen();
});
};
- When a new watch session has started, we need to reset the user’s output so that it is blank:
it("dispatches a RESET action", async () => {
await startWatching();
return expectRedux(store)
.toDispatchAnAction()
.matching({ type: "RESET" });
});
- Make it pass by adding in a put function call:
function* startWatching() {
const sessionId = new URLSearchParams(
location.search.substring(1)
).get("watching");
if (sessionId) {
yield openWebSocket();
yield put({ type: "RESET" });
}
}
- Next, we need to send a message to the server, including the ID of the session we wish to watch:
it("sends the session id to the socket with an action type of START_WATCHING", async () => {
await startWatching();
expect(sendSpy).toBeCalledWith(
JSON.stringify({
type: "START_WATCHING",
id: "234",
})
);
});
- We already have our spy set up from the previous section, so this is a quick one to fix:
function* startWatching() {
const sessionId = new URLSearchParams(
window.location.search.substring(1)
).get("watching");
if (sessionId) {
const watcherSocket = yield openWebSocket();
yield put({ type: "RESET" });
watcherSocket.send(
JSON.stringify({
type: "START_WATCHING",
id: sessionId,
})
);
}
}
- The next test tells the Redux store that we have started watching. This will then allow the React UI to display a message to the user telling them that they are connected:
it("dispatches a STARTED_WATCHING action", async () => {
await startWatching();
return expectRedux(store)
.toDispatchAnAction()
.matching({ type: "STARTED_WATCHING" });
});
- Make that pass by adding a new call to put, as shown:
function* startWatching() {
...
if (sessionId) {
...
yield put({ type: "STARTED_WATCHING" });
}
}
- Now the big one. We need to add in the behavior that allows us to receive multiple messages from the server and read them in:
it("relays multiple actions from the websocket", async () => {
const message1 = { type: "ABC" };
const message2 = { type: "BCD" };
const message3 = { type: "CDE" };
await startWatching();
await sendSocketMessage(message1);
await sendSocketMessage(message2);
await sendSocketMessage(message3);
await expectRedux(store)
.toDispatchAnAction()
.matching(message1);
await expectRedux(store)
.toDispatchAnAction()
.matching(message2);
await expectRedux(store)
.toDispatchAnAction()
.matching(message3);
socketSpy.onclose();
});
Long tests
You may think it would help to have a smaller test that handles just one message. However, that won’t help us for multiple messages, as we need to use an entirely different implementation for multiple messages, as you’ll see in the next step.
- We’ll use the eventChannel function to do this. Its usage is similar to the earlier Promise object usage when we converted a callback to an operation that could be awaited with yield. With the Promise object, we called resolve when the callback was received. With eventChannel, when the callback is received, we invoke emitter(END). The significance of this will become apparent in the next step:
import { eventChannel, END } from "redux-saga";
const webSocketListener = socket =>
eventChannel(emitter => {
socket.onmessage = emitter;
socket.onclose = () => emitter(END);
return () => {
socket.onmessage = undefined;
socket.onclose = undefined;
};
});
Understanding the eventChannel function
The eventChannel function from redux-saga is a mechanism for consuming event streams that occur outside of Redux. In the preceding example, the WebSocket provides the stream of events. When invoked, eventChannel calls the provided function to initialize the channel, then the provided emmitter function must be called each time an event is received. In our case, we pass the message directly to the emmitter function without modification. When the WebSocket is closed, we pass the special END event to signal to redux-saga that no more events will be received, allowing it to close the channel.
- Now you can use the websocketListener function to create a channel that we can repeatedly take events from using a loop. This loop needs to be wrapped in a try construct. The finally block will be called when the emitter(END) instruction is reached. Create a new generator function that does that, as shown:
function* watchUntilStopRequest(chan) {
try {
while (true) {
let evt = yield take(chan);
yield put(JSON.parse(evt.data));
}
} finally {
}
};
- Link the webSocketListener function and the watchUntilStopRequest generator function by calling them both from within startWatching. After this step, your test should pass:
function* startWatching() {
...
if (sessionId) {
...
yield put({ type: "STARTED_WATCHING" });
const channel = yield call(
webSocketListener, watcherSocket
);
yield call(watchUntilStopRequest(channel);
}
}
- The final test is to alert the Redux store that we’ve stopped watching so that it can then remove the message that appears in the React UI:
it("dispatches a STOPPED_WATCHING action when the connection is closed", async () => {
await startWatching();
socketSpy.onclose();
return expectRedux(store)
.toDispatchAnAction()
.matching({ type: "STOPPED_WATCHING" });
});
- Make that pass by adding this one-liner to the finally block in watchUntilStopRequest:
try {
...
} finally {
yield put({ type: "STOPPED_WATCHING" });
}
You’ve now completed the saga: your application is now receiving events, and you’ve seen how to use the eventChannel function to listen to a stream of messages.
All that’s left is to integrate this into our React component.
Updating the app
We’ve completed the work on building the sagas, but we have just a couple of adjustments to make in the rest of the app.
The MenuButtons component is already functionally complete, but we need to update the tests to properly exercise the middleware, in two ways: first, we must stub out the WebSocket constructor, and second, we need to fire off a TRY_START_WATCHING action as soon as the app starts:
- Open test/MenuButtons.test.js and start by importing the act function. We’ll need this to await our socket saga actions:
import { act } from "react-dom/test-utils";
- Next, find the describe block named sharing button and insert the following beforeEach block, which is similar to the same stubbed constructor you used in the saga tests:
describe("sharing button", () => {
let socketSpyFactory;
let socketSpy;
beforeEach(() => {
socketSpyFactory = jest.spyOn(
window,
"WebSocket"
);
socketSpyFactory.mockImplementation(() => {
socketSpy = {
close: () => {},
send: () => {},
};
return socketSpy;
});
});
});
- Next, in the same describe block, add the following notifySocketOpened implementation. This is different from the notifySocketOpened implementation in the saga tests, because it calls both onopen and then onmessage, with a sample message. All of this is necessary for the startSharing saga to run correctly: it mimics the WebSocket opening, then the server sending the first message, which should result in the STARTED_SHARING message being sent:
const notifySocketOpened = async () => {
const data = JSON.stringify({ id: 1 });
await act(async () => {
socketSpy.onopen();
socketSpy.onmessage({ data });
});
};
- We can now use this to update the test that is causing console errors. The test is the one with the description dispatches an action of STOP_SHARING when stop sharing is clicked. To avoid the errors, we must adjust a couple of lines. First, we dispatch a START_SHARING message, rather than a STARTED_SHARING message. Then, we use notifySocketOpened to mimic the server response to opening the socket. This will trigger the saga to send a STARTED_SHARING event, which causes the Sharing button in MenuButtons to change to be named Stop sharing. The test clicks it and waits for the STOP_SHARING event to be sent:
it("dispatches an action of STOP_SHARING when stop sharing is clicked", async () => {
renderWithStore(<MenuButtons />);
dispatchToStore({ type: "START_SHARING" });
await notifySocketOpened();
click(buttonWithLabel("Stop sharing"));
return expectRedux(store)
.toDispatchAnAction()
.matching({ type: "STOP_SHARING" });
});
- With the test passing, update src/index.js to call the TRY_START_WATCHING action when the app first loads:
const store = configureStoreWithLocalStorage();
store.dispatch({ type: "TRY_START_WATCHING" });
ReactDOM
.createRoot(document.getElementById("root"))
.render(
<Provider store={store}>
<App />
</Provider);
You can now run the app and try it out. Here’s a manual test you can try:
- Open a session in a browser window and click Start sharing.
- Right-click on the link that appears and choose to open it in a new window.
- Move your two windows so that they are side by side.
- In the original window, type some commands, such as forward 100 and right 90. You should see the commands update.
- Now, hit Stop sharing in the original window. You should see the sharing messages disappear from both screens.
That covers test-driving WebSockets.
Summary
In this chapter, we’ve covered how to test against the WebSocket API.
You’ve seen how to mock the WebSocket constructor function, and how to test-drive its onopen, onclose, and onmessage callbacks.
You’ve also seen how to use a Promise object to convert a callback into something that can be yielded in a generator function, and how you can use eventChannel to take a stream of events and send them into the Redux store.
In the next chapter, we’ll look at using Cucumber tests to drive some improvements to the sharing feature.
Exercises
What tests could you add to ensure that socket errors are handled gracefully?
Further reading
The WebSocket specification: