
Chapter 15. Using SharePoint Foundation with InfoPath 2010
Chapter at a Glance

✓ | Create a form library. |
✓ | Modify a form library. |
✓ | Create a new form. |
✓ | Edit an existing form. |
✓ | Create and modify a custom Office document information panel in InfoPath. |
✓ | Edit custom document properties and view them in SharePoint document library. |
Microsoft SharePoint Foundation 2010 provides many features that allow you to use Microsoft InfoPath Designer 2010 and Microsoft InfoPath Filler 2010 in a SharePoint context. In particular, SharePoint form libraries provide the primary integration point between SharePoint Foundation and InfoPath 2010. Form libraries allow you to use and share InfoPath 2010 forms. An InfoPath form collects information from a user in a structured way. InfoPath Designer 2010 allows you to design form templates, while InfoPath Filler 2010 allows you to fill out the forms. Form libraries provide a central location where users can fill out and store forms based on the same template. For example, you can use InfoPath Filler 2010 to fill out purchase orders and subsequently store them in a SharePoint form library.
In this chapter, you will learn how to use InfoPath 2010 to work with SharePoint form libraries and the forms stored within these libraries. You will create a SharePoint form library and modify an existing form library from InfoPath Designer 2010. You will then use InfoPath Filler 2010 to fill out new forms based on a form library’s template, as well as edit existing forms stored in the form library. In addition, you will learn what a document information panel is and how to create and customize the document information panel based on an InfoPath Designer 2010 template. Finally, you will use the document information panel to view and edit properties of a Microsoft Word 2010 document.
See Also
SharePoint Server 2010 includes InfoPath Form Services that provide more features and functionality for InfoPath integration than SharePoint Foundation 2010, such as browser-enabled form templates that enable forms to be displayed and filled out using the browser. For more information, refer to http://technet.microsoft.com/en-us/library/cc303431.aspx.
Practice Files
Before you can complete the exercises in this chapter, you need to (1) download the Chapter 15 practice files from the book’s catalog page to the following folder on your computer: DocumentsMicrosoft PressSBS_SPFChapter15 and (2) install the Chapter 15 practice site using the Chapter15_Starter.wsp file. See Using the Practice Files at the beginning of this book for more information.
Important
Remember to use your SharePoint site location in place of http://wideworldimporters in the following exercises.
Creating a Form Library
A SharePoint form library stores forms that are based on the same form template. An InfoPath form template is a file that defines the appearance, structure, and behavior of an InfoPath 2010 form. Form templates allow form designers to create the look, feel, and functionality of the form. After the form template is created, users create new forms by filling out the fields provided by the template.
Tip
Forms that are stored in SharePoint form libraries can be taken offline using SharePoint Workspace.
In Microsoft Office 2010, there are two separate InfoPath 2010 products: InfoPath Designer 2010 and InfoPath Filler 2010. InfoPath Designer 2010 allows designers to create form templates. For example, a template for purchase orders can be created in InfoPath Designer 2010. InfoPath Filler 2010 provides users with a familiar Office environment where they create new forms by filling out the fields provided to them by the form template. For example, a new purchase order can be created in InfoPath Filler 2010 based on the purchase order template.
In the previous two versions of Office, there was only one product—InfoPath. It had two different modes: Design mode and Fill Out A Form mode. Design mode was similar to InfoPath Designer 2010, and Fill Out A Form mode was similar to InfoPath Filler 2010. However, InfoPath 2010 provides more features and functionality than its predecessor, InfoPath 2007.
See Also
To learn more about the differences between InfoPath 2010 and InfoPath 2007, refer to http://blogs.msdn.com/b/infopath/archive/2009/07/15/what-s-new-in-infopath-2010.aspx.
When you create a new SharePoint form library from InfoPath Designer 2010, you publish a form template into a newly created library. The library is then associated with this template, and every form in this library has the same appearance and structure.
See Also
You can also create a form library from a SharePoint site. For detailed instructions, refer to Chapter 5.
In the following exercise, you will use InfoPath Designer 2010 to create a new SharePoint form library named Purchase Orders.
Practice Files
You will use the practice file Purchase Order Template.xsn, located in the DocumentsMicrosoft PressSBS_SPFChapter15 folder.
Set Up
Open InfoPath Designer 2010 before beginning this exercise. Close the Getting Started window if it appears.
Note
BE SURE TO verify that you have sufficient rights to create a library in your site. If in doubt, see the Appendix A at the back of this book.
In InfoPath Designer, on the File tab, click Open.
Navigate to the DocumentsMicrosoft PressSBS_SPFChapter15 folder, select Purchase Order Template.xsn, and click Open.
The Purchase Order template opens in Design mode. Note the Fields pane that appears on the right of the InfoPath window.
On the page listing the options for publishing location, select SharePoint Server: Publish form to a SharePoint Library. The InfoPath Publishing Wizard opens.
On the first page of the Publishing Wizard, in the Enter the location of your SharePoint or InfoPath Forms Services site, type the Uniform Resource Locator (URL) of the SharePoint site in which you want to create the form library, such as http://wideworldimporters. Click Next.
If prompted, type your user name and password for the SharePoint site, and click OK.
On the next page, select Form library, and click Next.
On the next page, select Create a new form library, and click Next.
On the next page, in the Name box, type the name for the form library, such as Purchase Orders. In the Description box, type a description of the information in the form library that you are creating, such as Contains purchase orders. Click Next.
The next page in the Publishing Wizard allows you to define the layout of the Form Library page. The form library displays the form data in a table. Data in the table columns comes from the form fields. This page of the Publishing Wizard allows you to create the table layout by defining the form fields that you want to become the columns in the table.
Tip
After the library is created, this table is displayed on the Form Library page in the library’s default view.
The table columns for this form library are listed in the Column Name list. Five form fields will become columns after the library is created: Date Ordered, Reference Number, Vendor, Submitted By, and Currency. Because the majority of orders for Wide World Importers use the same currency, the owner has decided not to display the currency used in the purchase orders on the site.
To prevent the Currency column from appearing in the form library, select Currency, and then click Remove.
The Currency column is removed from the Column Name list.
Click Next.
On the next page, verify the form information that you provided and then click Publish. The form library is created.
On the confirmation page, select Open this form library, and then click Close.
The Purchase Orders library page appears in the browser. The library is empty. Note that the name of the library appears on the Quick Launch, under Libraries.


Tip
When the form template is published to the SharePoint library, it is stored in the Forms folder in this library with the default name Template.xsn. If you want to verify that your template has been published, start the browser and go to the site to which you published a template, such as http://wideworldimporters. Click All Site Content in the left navigation panel. Under Document Libraries, click the Purchase Orders library. On the Form Library page, from the Library Tools group on the Ribbon, select the Library tab, and in the Connect & Export group, click Open with Explorer. The Forms folder is displayed in Windows Explorer, and your form template is stored inside this folder. Double-click the Forms folder to verify that Template.xsn is inside this folder. After locating the form template, close Windows Explorer and then close the browser.
Modifying a Form Library
To modify an existing form library, you can change the form template on which the library is based. Care must be used when changing a form template because your changes might result in the loss of data within the existing forms in the library that are based on this template. For example, if you remove a field from a form template, this field no longer appears in the existing forms that are based on that form template; consequently, the data in this field is lost. However, if you are making additions to the form or changing its appearance, you shouldn’t lose any data.
Tip
If in doubt, do not modify the existing library. Instead, publish the changed form template to a new form library.
In this exercise, you will modify the existing form library from InfoPath Designer 2010. In the Purchase Orders form library template, you will change the form title to “Wide World Importers Purchase Orders,” and then add the Charge To column to the table layout of the Form Library page.
Set Up
Open the SharePoint site in which your existing form library is located. If prompted, type your user name and password, and click OK.
Note
BE SURE TO verify that you have sufficient rights to modify this library. If in doubt, see the Appendix A at the back of this book.
On the Quick Launch, click the Purchase Orders library.
On the Purchase Orders form library page, from the Library Tools group on the Ribbon, click the Library tab.
In the Settings group, click Library Settings.
On the Form Library Settings page, in the General Settings section, click Advanced settings.
On the Form Library Settings: Advanced Settings page, in the Document Template section, under Template URL, click (Edit Template).
If prompted, type your user name and password for the SharePoint site, and then click OK.
If a dialog box appears that asks whether you want to continue, click Yes.
The Purchase Orders form template opens in InfoPath Designer 2010.
Position your cursor to the left of the Purchase Order heading. Type Wide World Importers so that the heading reads “Wide World Importers Purchase Order.”
On the File tab, click Publish.
On the page listing the options for publishing location, select SharePoint Server: Publish form to a SharePoint Library. The InfoPath Publishing Wizard opens.
On the first page, in the Enter the location of your SharePoint or InfoPath Forms Services site, keep the URL of the SharePoint library that you want to edit the template for, such as http://wideworldimporters/Purchase Orders. Click Next.
On the next page, make sure that Form Library is selected, and then click Next.
On the next page, click Update the form template in an existing form library, and then select the Purchase Orders library from the list of existing libraries. Click Next.
You will now modify the table layout for the Form Library page by adding a Charge To column.
On the page that lists column names, click Add. The Select A Field Or Group dialog box appears.
Select the chargeTo field. In the Column name box, edit the field so that it reads Charge To. Click OK.
Charge To is added to the list of column names.
On the next page, verify that the form information is correct, and then click Publish. The modified template has been published to the SharePoint site.
On the confirmation page, select the Open this form library check box and click Close. The browser opens the modified form library. Verify that the new Charge To column heading has been added and is displayed at the far right of the page.


Creating a New Form
After a form library is created, users can fill out new forms and edit existing forms in the library.
In the following exercise, you will create a new form and save it to the SharePoint form library.
Set Up
Open the SharePoint site in which the form library is located. If prompted, type your user name and password, and click OK.
Note
BE SURE TO verify that you have sufficient rights to create forms in this library. If in doubt, see the Appendix A at the back of this book.
In the left navigation panel, click All Site Content.
Under Libraries, click the Purchase Orders library.
On the Purchase Orders form library page, click Add document. Alternatively, in the Library Tools group on the Ribbon, click the Documents tab and, in the New group, click the New Document button.
InfoPath Filler 2010 opens and displays a new form based on the Purchase Order template. You will now fill out the form.
In the Reference Number field, type 12345. Under Vendor Information, in the Company name field, type Contoso. Fill out other form fields with fictitious data.
From the File menu, click Save As. The Save As dialog box appears.
In the File Name box, type ContosoPO.
Click Save. The form is saved to the Purchase Orders form library.
From the Windows taskbar, restore the browser that points to the Purchase Orders form library.
Refresh the browser and verify that the ContosoPO form is listed in the library.


Editing a Form
You might often find yourself in a situation in which you need to edit an existing form that is stored in the SharePoint form library, such as correcting mistyped data. The existing form is edited in InfoPath Filler 2010 and then saved to the form library.
In this exercise, you will edit the existing form and save it back to the form library.
Set Up
Open the SharePoint site in which the form library is located. If prompted, type your user name and password, and click OK.
Note
BE SURE TO verify that you have sufficient rights to edit forms in this library. If in doubt, see the Appendix A at the back of this book.
Navigate to the Purchase Orders library.
On the Purchase Orders page, hover the mouse over the ContosoPO name so that the arrow appears to the right. Click the arrow, and then select Edit in Microsoft InfoPath.
The ContosoPO form opens in InfoPath Filler 2010. Change the Reference Number to 12346.
In InfoPath, from the File menu, select Save. The form is saved to the Purchase Orders form library.
From the Windows taskbar, restore the browser that points to the Purchase Orders form library.
Refresh the browser and verify that the edited form with reference number 12346 is listed in the library.
You will now edit the ContosoPO form and save it under a different name.
On the Purchase Orders form library page, hover the mouse over the ContosoPO name so that the arrow appears to the right. Click the arrow and then select Edit in Microsoft InfoPath.
The ContosoPO form opens in InfoPath Filler 2010. Change the Reference Number to 12347.
Under Vendor Information, change the Company name to Northwind Traders. Feel free to make other changes to the form data if you want.
In InfoPath, from the File menu, choose Save As. The Save As dialog box appears.
In the File Name box, type NorthwindPO, and then click Save. The form is saved to the Purchase Orders form library.
From the Windows taskbar, restore the browser that points to the Purchase Orders form library.
Refresh the browser and verify that the NorthwindPO form is listed in the library.


Creating a Custom Office Document Information Panel
Document properties, also known as document metadata, are specific details about a particular document, such as document title, author name, subject, date when it was last modified, whether the file is read-only, and other file characteristics. You can specify document properties from the File tab in Office 2010 applications, including Microsoft Word 2010, Microsoft Excel 2010, Microsoft PowerPoint 2010, and Microsoft Access 2010.
When an Office document is saved, you can view and modify properties for that document by right-clicking the file in Windows Explorer and selecting Properties. The collection of properties, or metadata, is displayed in the document information panel.
In SharePoint 2010, document properties are displayed as columns in a Document Library page. You can create a custom document information panel and modify an existing document information panel from within InfoPath Designer 2010. The custom document information panel is then used instead of the automatically generated document information panel in the SharePoint library. When you create a custom document information panel using InfoPath Designer 2010, you start with the automatically generated document information panel on which a SharePoint library is based, and then you modify it. The document information panel is an InfoPath 2010 form that provides a template for the metadata for the documents stored in this SharePoint library.
See Also
For more information about creating document information panels, refer to http://msdn.microsoft.com/en-us/library/ms563688.aspx.
In the following exercise, you will use InfoPath Designer 2010 to create a custom document information panel for a document library based on a default Document content type.
Important
The exercises in the rest of this chapter use the default Document content type that the document libraries are based on. It is not recommended that you change this content type on the live site that already has documents stored in the libraries. Instead, you can create a practice site based on the site template provided in the Chapter 15 practice file folder and use the CustomDocument content type in place of the Document content type in the following exercise and the subsequent sections in this chapter.
Set Up
Open InfoPath Designer 2010 before beginning this exercise. Close the Getting Started window if it appears.
Note
BE SURE TO verify that you have sufficient rights to modify the library. If in doubt, see the Appendix A at the back of this book.
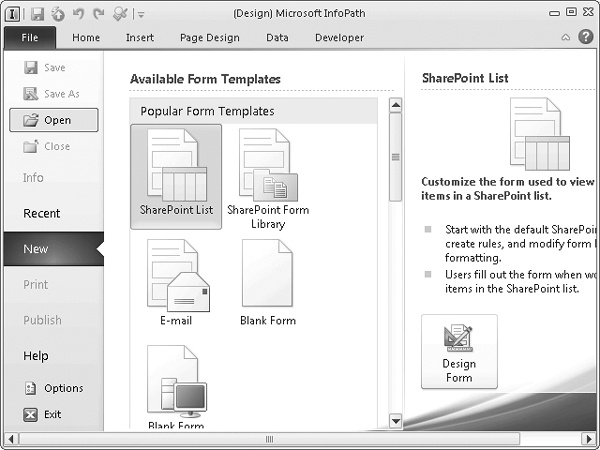
In InfoPath Designer 2010, from the File menu, choose New, select Document Information Panel, and click Design Form. The Data Source Wizard opens.
On the first page of the Data Source Wizard, in the Enter the address location of the document library you want to modify, type the URL of the SharePoint document library in which you want to create a custom document information panel, such as http://wideworldimporters/Shared Documents. Click Next. InfoPath connects to the library and obtains information about content types in this library and the columns that are configured to be displayed on the library page.
On the page listing the content types that are associated with the document library, select Document. Click Next.
On the last page of the Data Source Wizard, click Finish.
InfoPath Designer 2010 opens the automatically generated document information panel.
You will now modify the panel. In the panel, above the Title box, type My Custom Document Information Panel.
You will now publish the custom panel back to the library. On the File menu, click Publish, and then select Document Information Panel.
You are prompted to save the panel before you can publish it. To do this, click OK, and then browse to the location where you would like to save the panel and click Save. The Publishing Wizard opens.
In the Publishing Wizard, click Publish. The document information panel is published to the SharePoint library.
On the confirmation page, click Close.


Viewing and Editing Custom Document Properties
You can view and edit properties of Office documents that are stored in a SharePoint library based on a custom document information panel using the Office applications that created these documents, such as Word 2010, Excel 2010, and PowerPoint 2010.
See Also
SharePoint 2010 allows you to display any document property in a table column in a document library through a mechanism called property promotion/demotion. For more information about promotion and demotion of document properties, see http://msdn.microsoft.com/en-us/library/aa543341.aspx.
In the following exercise, you will create a new document from the SharePoint library, edit a property of this document in Word 2010, save the document back to the library, and then view the document in a Document Library page.
Set Up
Open a SharePoint site where you’d like to view and edit the properties of a document. If prompted, type your user name and password, and then click OK.
Note
BE SURE TO verify that you have sufficient rights to edit documents in this library. If in doubt, see the Appendix A at the back of this book.
Navigate to the Shared Documents document library.
In the Library Tools group on the Ribbon, click the Documents tab. In the New group, click the New Document button. Word 2010 opens.
In Word, open the Document Information Panel by going to the File tab, selecting Info, clicking Properties, and then selecting Show Document Panel.
In the Document Information Panel, notice the text that you added using InfoPath Designer 2010 in the previous exercise.
You will now fill out the document information panel with the property for this document. In the Document Information Panel, in the Title box, type My Title.
On the File tab, click Save.
From the Windows taskbar, restore the browser that points to the Shared Documents library.
Refresh the browser and verify that there is a document called “My Title” listed in the library in the Title column.


Editing a Custom Document Information Panel
If you need to change a custom document information panel that you created earlier, you can edit it in InfoPath Designer 2010. Doing this in SharePoint Foundation requires several steps: locating the existing document information panel file in the SharePoint library, manually opening it in InfoPath from the file system, editing it in InfoPath, and finally publishing it back into the SharePoint library.
Tip
Editing the document information panel is much easier in SharePoint Server. All you need to do is click a link called Document Information Panel Settings on the content type settings page. This allows you to either create a new document information panel or edit an existing one.
See Also
For more information about changing a document information panel, refer to http://msdn.microsoft.com/en-us/library/ms494347.aspx.
In this exercise, you will locate and edit the document information panel that you created in the previous exercise.
Set Up
Open the SharePoint site in which the document library based on the existing document information panel is located. If prompted, type your user name and password, and click OK.
Note
BE SURE TO verify that you have sufficient rights to modify this library. If in doubt, see the Appendix A at the back of this book.
Navigate to the library where you want to edit the document information panel, such as Shared Documents. Click the Library tab on the Ribbon, and in the Connect & Export group, click Open with Explorer. The Shared Documents library opens in Windows Explorer.
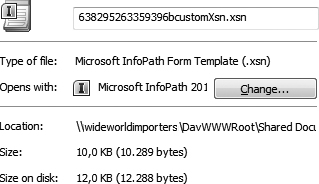
Navigate to the Forms\Document folder and locate a file called [GUID]customXsn.xsn, where GUID (Global Unique Identifier) is a hexadecimal prefix that appears before customXsn in the file name of the document information panel for this library. In this example, GUID is 638295263359396b.
Right-click [GUID]customXsn.xsn, and select Properties. From the Properties window, make a note of the name of the file ([GUID]CustomXsn.xsn) and its location. You will need this information later in the exercise. For example, you can copy and paste the file name and location from the Properties window into Notepad.
Open InfoPath Designer 2010.
On the File tab, click Open. The Open in Design Mode window appears.
Browse to the [GUID]customXsn.xsn, using the file name and location that you saved in step 3, such as \wideworldimportersDavWWWRootShared DocumentsFormsDocument638295263359396bcustomXsn.xsn. Click Open.
The document information panel opens in InfoPath Designer 2010.
You can now edit the document information panel in InfoPath Designer 2010. Make one or more changes to it.
On the File menu, click Publish, and then select Document Information Panel.
You will be prompted to save the document information panel before you can publish it. Click OK, and then click Save. The Publishing Wizard opens.
In the Publishing Wizard, click Publish. The modified panel has been published back to the Shared Documents library.
On the confirmation page of the Publishing Wizard, click Close.
Optional: using the previous exercise as a guide, create a new document from the Shared Documents library, fill out the modified document information panel in Word 2010, save the document back to the library, and view the changes on the library page in the browser.

Key Points
SharePoint form libraries provide the primary integration point between SharePoint Foundation 2010 and InfoPath 2010.
Form libraries can be created from within InfoPath Designer 2010, as well as from the SharePoint site.
When you create a new SharePoint form library from InfoPath Designer 2010, you publish a form template into a newly created library.
You can define a table layout on the Form Library page when you publish the form template into this library.
After the form library has been created, you can modify its template by using InfoPath Designer 2010.
You can fill out a new form in the form library using InfoPath Filler 2010.
To edit an existing form, click the form on the library’s page. The form opens in InfoPath Filler 2010. Edit the form data, and then save the form to the library.
A document information panel contains properties of an Office document. InfoPath Designer 2010 allows you to customize a document information panel for a content type in a SharePoint library. The custom properties are displayed as columns on a library page.