13
THE ROAD TO VIDEO: TIME FOR TECH
If you bought this book, then you must intend for your graphics to end up on video. If you’re on a deadline (okay, you’re always on a deadline), you may have jumped to this chapter right away. Please go back and start at the beginning of the book. In one chapter, it would be impossible to discuss the several issues that make designing video graphics a challenge.
Copyright Breany/iStockphoto.
If you’ve made it through most of the book, then you are likely anxious to see your work on screen, on air, or on tape. I realize that Photoshop can be painful at times. Unlike your NLE, Photoshop is not designed to exclusively be a video application. There are very few safety nets to keep you from choosing an adjustment or filter that will send your graphic reeling into the land of nonbroadcast-safe.
Purpose of this Chapter
What you will find in this chapter are several methods to check your work to ensure it is ready for video. We’ll also explore techniques for getting your client to buy in and sign off, as well as some general tips on resizing and deciding upon the right file format. Finally, we’ll discuss the importance of file extensions and reinforce methods to prepare for future changes (because “approved” only means “for now”).
Copyright Hemera PhotoObjects

The tips in this chapter come from years of experience. What you’ll find here are strategies for success. Techniques for tiny budgets, as well as those for deeper pockets, are offered. Please go with the best solution you can afford.
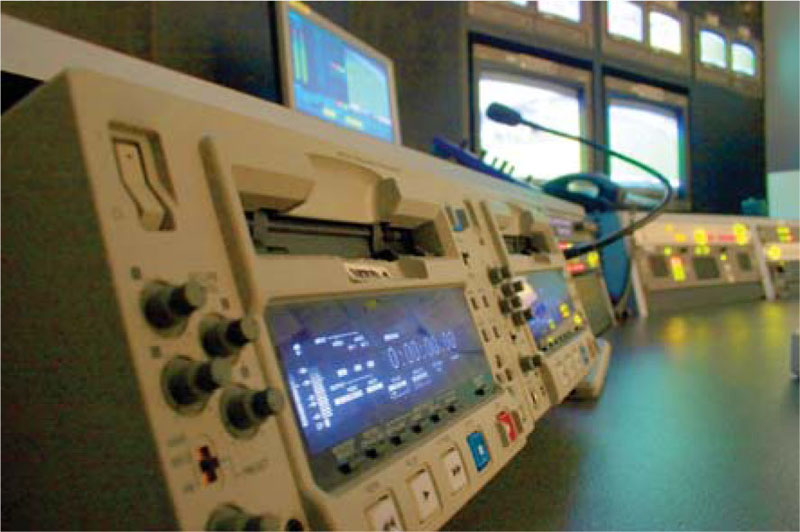
Final Testing on an NTSC/PAL Monitor
There’s no way around it: you have to test your graphics. If you’re building them in the edit suite, this should be easy. But what happens if you’re building them for someone else, or you’re on the road, or you don’t own a vec-torscope? There are lots of challenges in creating video graphics; it is essential that you test the graphics on your final intended output device.
Copyright SoundSnaps/iStockphoto
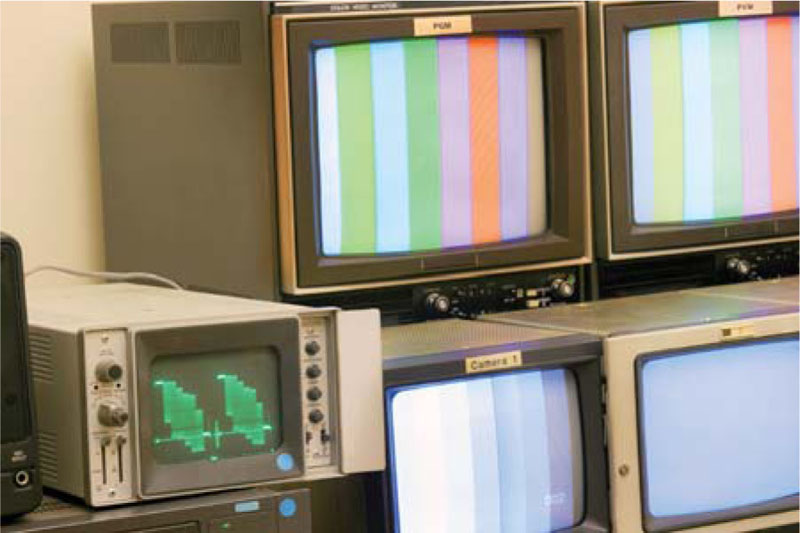
Testing During the Design Stage on Your Computer
The best situation when designing video graphics is to have a broadcast monitor hooked up to your system while you are designing the graphics. This will allow you to check for interlace flicker, safe-color concerns, and contrast issues while you design. There are several possible solutions for this setup; the right solution will depend upon your budget and available technology.
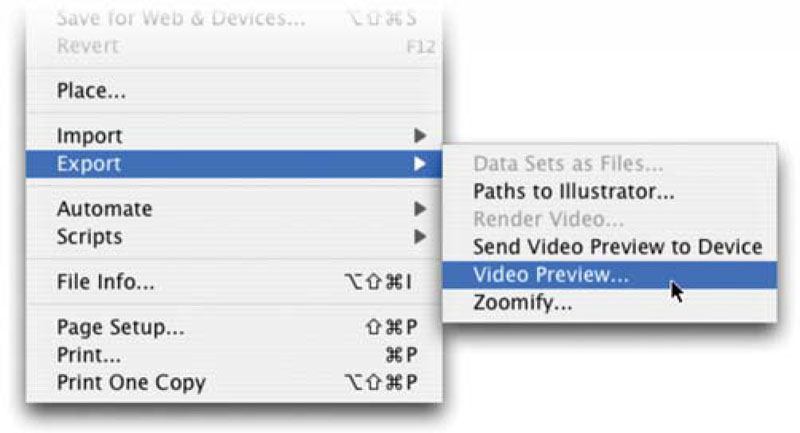
Video Preview Command
In Photoshop CS2, Adobe introduced the Video Preview command. This allows Photoshop to send a preview of the graphic over a FireWire cable to a DV device. Photoshop gives you several options for specifying aspect ratio.
Video Preview Tech In-Depth
 • The Video Preview plug-in only works if you are using RGB, Grayscale, or Indexed Color mode (but you should NEVER work in Indexed Color mode for video anyway).
• The plug-in will convert 16-bit images to 8-bit images on the fly (but will not function on a 32-bit image).
• Transparency data such as alpha channels are ignored.
Step 1. Attach a Fire Wire based device that uses the DV protocol to your computer. Then attach a broadcast quality display. Let the devices warm up for a minute before launching Photoshop.
Step 2. Launch Photoshop and open or create a video-sized document.
Step 3. To set up the Video Preview properties, choose File>Export> Video Preview …. This will give you full control over output options. For future outputs where nothing has changed in hardware, you can just choose File>Export>Send Video Preview to Device.
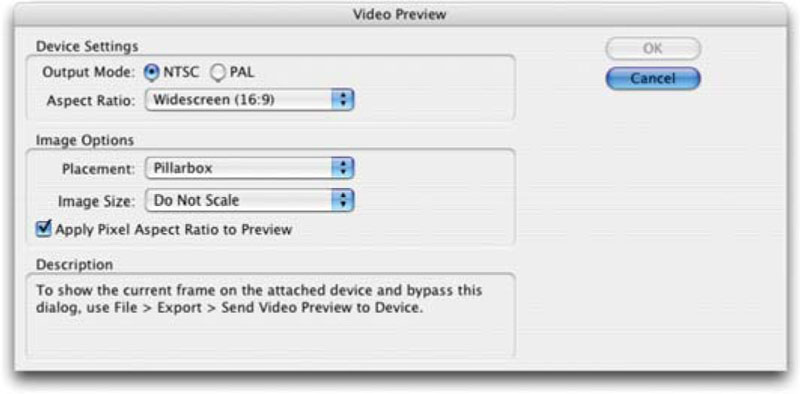
Step 4. In the Device Settings area, you can adjust the following options for a more accurate preview.
• Output Mode. You can choose NTSC or PAL to match your hardware. If you are seeing black patches, then you have likely picked the wrong standard.
• Aspect Ratio. Here you specify the aspect ration for the device you have hooked up (not of the Photoshop file). This setting is important, as it impacts the Image Options.
Frame Size Issues
 While the Video Preview plug-in works with all sizes of documents, only those that match the DV standard (such as NTSC DV, NTSC DV Widescreen, and PAL D1/DV) will appear at their full size. Others such as HD (or even NTSC D1) may need to be scaled to match your output format. Scaling can diminish the accuracy of the preview.
Step 5. In the Image Options area, you can adjust additional options that impact how the image is displayed when aspect ratios of graphics and monitors aren’t identical. Remember, the Placement options available will vary based upon the Aspect Ratio you set in Step 4.
• Center. This places the center of the image at the center of the screen. Any edges that fall outside the display edges of the video monitor will be cropped.
• Pillarbox. When a 4:3 image is shown on a 16:9 display, the image is centered. On the outside, gray bands appear to the left and right of the image. This option is only available if the device aspect ratio is set to Widescreen (16:9).
• Crop to 4:3. When a 16:9 image is shown on a 4:3 display, the image is centered. The left and right edges must then be cropped to discard the material that extends beyond the edge of the playback device. This option is only available if the device aspect ratio is set to Standard (4:3).
• Letterbox. When a 16:9 image is shown on a 4:3 display, the image is centered. This maintains the aspect ratio without distortion. On the outside, gray bands appear to the top and bottom of the image. This option is only available if the device aspect ratio is set to Standard (4:3).
• Crop To 14:9/Letterbox. This option is an alternative to displaying widescreen content on a 4:3 monitor. The widescreen image cropped to a 14:9 aspect ratio with black bands on the top and bottom of the image.
Step 6. You must next specify in the Image Size pull-down menu how you want document pixels to be scaled to match the output device.
• Do Not Scale. This is the most common choice. It will apply no vertical scaling to the image. The image must then be cropped using the methods addressed in Step 5.
• Scale To Fit Within Frame. The image frame will either increase or decrease. For example, a 16:9 image appears on a 4:3 display as letterboxed, and a 4:3 image appears on a 16:9 display as pillarboxed.
• Apply Pixel Aspect Ratio to Preview. Leave this checked to utilize the document’s own pixel aspect ratio settings.
Step 7. Click OK to invoke the Video Preview.
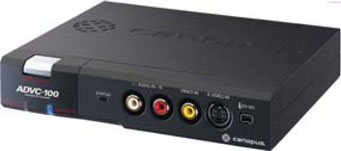
Need a FireWire Bridge?
Looking for a digital to * analog converter (also called a DA)? I highly recommend those from Canopus (www.canopus.com). They offer several different models with many features at a variety of price points.
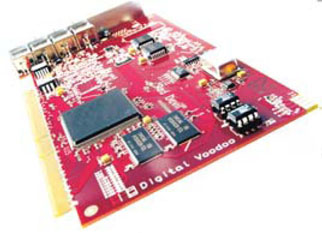
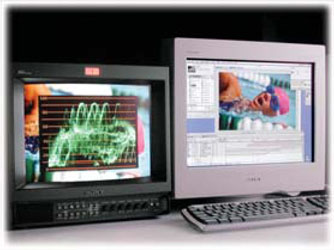
High-End Video Cards
There is no better way to preview your graphics than using a high-end video card and a broadcast monitor. You can purchase a video card for your system such as one made by DigitalVoodoo, BlueFish444, BlackMagic, or AJA. These cards not only give you video I/O for your editing system, but they also allow you to extend your desktop to the card and work correctly on a video display.
These solutions can be pricey, but they open up several possibilities. A video card with Serial Digital Interface or component output will allow you to check your graphics. Hands down, this is the best solution, but prepare to dig deep into your pockets. Cards will range between $800 and $14,000, depending on the types of inputs and outputs you want. If you already have a nonlinear edit system hooked up at your facility, you may just choose to harness its ability to output to a video monitor or a scope for testing purposes.
The extended desktop or mirroring option will vary based on your video card manufacturer. Many will ship with their own specialty software to extend Photoshop’s capabilities. Others depend upon additional software, such as Synthetic Aperture’s Echo Fire.
Digital Voodoo manufactures several popular video cards designed for video editors and broadcast designers.
Low-End Video Cards and Laptops
The proliferation of computers with video ports is on the rise, due in part to features like Media Center from Microsoft and Front Row from Apple. Additionally, several laptops come with AV or S-Video ports. These are primarily designed so that business-people can send presentations out to a TV.
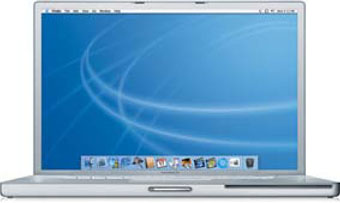
These types of connections allow you to plug in an S-Video cable. You can then check your Displays or Monitors control panel to enable the port. You may have to restart your machine. If you have enough VRAM, you may be able to drive the main screen and video monitor simultaneously.
Step 1. Hook the video card up to a consumer television.
Step 2. Set Photoshop to Full Screen Mode (press ![]() two or three times).
two or three times).
Step 3. To remove palettes, press the Tab key.
Step 4. You can now output and test your graphics on consumer equipment, which is where your audience will probably see them.
These cards do not necessarily scale the video properly and may have interlace issues. There is also a chance that the luminance/chrominance will be slightly off. But even with those negatives, this method is still a better option than not previewing on a television.
Software Solutions for Checking Graphics
If you have the budget, there is extra software you may want to add to extend Photoshop’s capabilities. These three tools overlap, so you will likely need only one of the three. They are arranged with the most full-featured (and expensive) first.
Echo Fire
This tool has long been regarded as an absolute essential. While Photoshop’s newer ability to send video out over FireWire slightly diminishes EchoFire’s value, it does not eliminate it by any means. Photoshop and After Effects users have the ability to send their work to a video monitor for immediate previews. With After Effects, this includes full-motion previews with audio. The plug-in works with Mac and PC FireWire devices or several cards from Digital Voodoo, AJA, Pinnacle Systems, Aurora, and Media 100.

Echo Fire offers a very flexible solution for video previews, for both Photoshop and After Effects.
Features that come in handy for Photoshop include:
• Video previews in Photoshop by pressing a key or from the Export menu.
• Ability to handle 4×3 and 16×9 aspect ratios.
• Direct overlays of a waveform monitor, vector scope, and test-pattern displays within Photoshop.
• A video-safe color picker.
• Proper handling of video interlace and color for accurate previews. You’ll find a full-featured demo on this book’s disc that will let you try it out for three days. If you like it, be sure to visit Synthetic Aperture’s site.
ScopoGigio
This flexible plug-in is cross-platform and works with both RGB and 601 video levels. It allows you to check a Waveform Monitor or Vectorscope right within Photoshop. The plug-in loads as a filter, and you invoke it by choosing Filter>Video>ScopoGigio. The dialog box opens and gives you the ability to set several different options. The filter cannot actually be applied; clicking OK merely dismisses the dialog box. For more information, visit http://www.metadma.com.

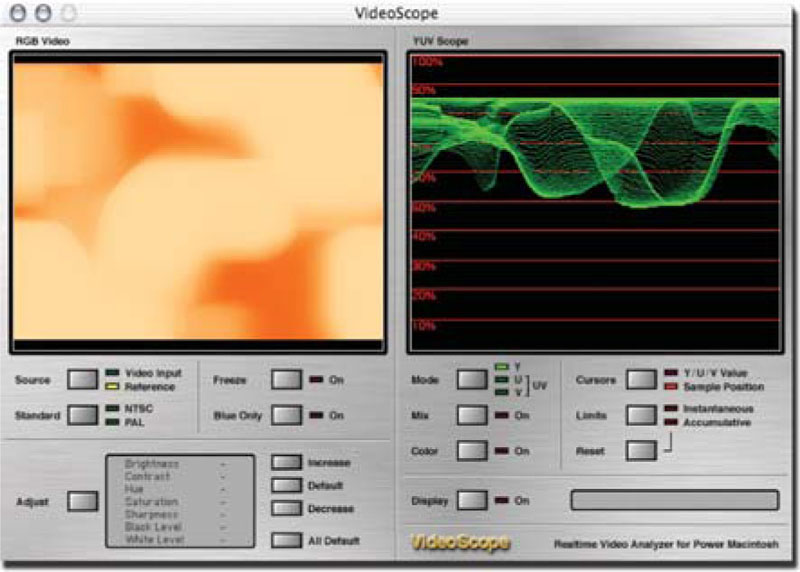
VideoScope
This Mac-only product is an affordable option, at only $30 US. It is designed to monitor video input; however, it works quite well to check graphics. You can drag and drop a graphic into the viewer monitor and then have access to a software-based waveform and vectorscope. It appears to be as accurate as several NLEs’ built-in scopes, but cannot fully replace a hardware-based scope. This application gives you the ability to use a software scope on systems that are not running a full NLE package. For more information, visit http://www.evological.com.
External Testing Options
If you are unable to attach a television or broadcast monitor to your computer system, external testing may be the way to go. You can always output your graphics to traditional media for testing on an external device.
VHS
There is absolutely no replacement for the least common denominator. If your graphics look good on VHS, they will certainly look good on beta or broadcast. Just batch import your graphics into an NLE and go straight to VHS. With the right video card, you may be able to go right out of your Mac or PC. Most video makers hate VHS for its low quality, but it is the “ultimate” test for all graphics.
DVD-RW/DVD-R
Have a DVD recorder? Chances are it shipped with all the software you need. Most DVD authoring applications will allow you to import full-screen graphics. Look for a slideshow feature to bring in a folder full of graphics.
The DVD-RW format is not as widely promoted. Discs cost about three times more than a burn-once disc. These have the benefit of being able to be reused hundreds of times. The DVD-RW discs generally take longer to burn, but you are likely only testing a small amount of data.
While the DVD+R format is relatively common, it is not as desirable. The discs are not as compatible as the DVD-R format. In fact, the DVD+R format is not recognized as a true DVD and does not feature the DVD logo.

Getting Client Approval
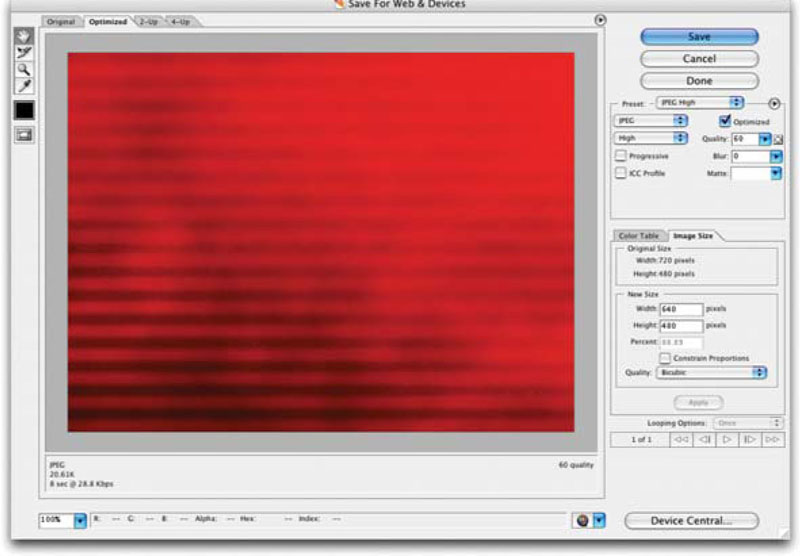
The Internet is proving to be a popular means to seek client approval. By harnessing Photoshop’s Save for Web command (File>Save for Web & Devices…), you can reduce the file size to a comfortably portable 60 KB. Be sure to stick with JPEG compression. The Save for Web feature will not alter your original file; all size and layer data is preserved. It also saves the file in the smallest format possible, automatically leaving off features such as image previews and custom icons, which just beef up file size and serve no purpose on the Internet.
Another great Web approval method is the Web Photo Gallery (File>Automate>Web Photo Gallery). This automation command allows you to instantly build an entire Web site with thumbnail preview pages and larger images to view online. Additional features like contact information and watermarking allow you to quickly get client feedback while protecting your content online. The Feedback templates offer an outstanding way to collect client comments and avoid confusion. For more on this great feature, see Chapter 11, “Automation.”
Save for Web Gets Better!
You can resize your Web approval graphics in the Save for Web dialog box.
1. Click on the Image Size tab.
2. Uncheck Constrain Proportions.
3. Size your non-square documents to square pixel for viewing on the Web. For example, 720×480 DV graphics become 640×480.
4. Click the Apply Button.
5. Specify the Compression and Save. Your Web-ready graphic is created, and your original layered document with non-square pixels is preserved.
How to Get NLE-specific Information
• Adobe: http://www.adobe.com/support/main.html
• Apple: http://www.apple.com/support
• Autodesk: http://www.autodesk.com/support/
• Avid: http://www.avid.com/support/index.html
• Canopus: http://www.canopus.com/support/
• Media 100: http://www.media100.com/support_training/
• Pinnacle Systems: http://www.pinnaclesys.com/support
• Sony Vegas: http://www.sonymediasoftware.com/
For both Web options, be sure to explain the concept of safe-title area to your clients. They may be bothered by “all that extra space around the edges.” The PowerPoint user in them will rise up and command you to fill every pixel with small, unreadable text. Fight the power!
Non-Square Pixels: When to Resize
At some point, you will need to make a conscious decision about non-square pixels and document size. How do you find out what size and Pixel Aspect Ratio (PAR) your NLE needs? The best piece of advice I ever received was RTFM (Read the Frickin’ Manual).
Every edit system expects that you will want to import graphics. Photoshop is the #1 choice for that need. Inside of every NLE’s manual or the online help section, you will find a section on Photoshop and still graphics. A quick visit to a manufacturer’s Web site will often have a PDF available for download as well.
But to show that I didn’t try to dodge this bullet, check out Appendix C, “Working with Other Applications.” You’ll find guides for several popular NLEs and motion graphics applications.
Photoshop CS or Later
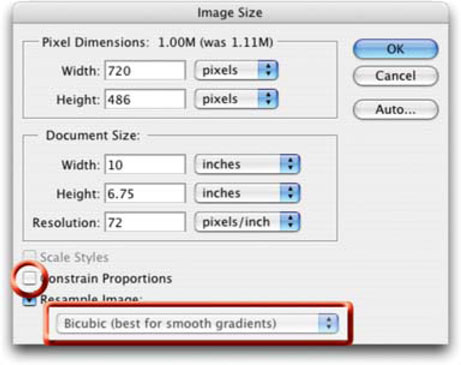
If you are working Photoshop CS or later, this question has gotten a lot easier to answer. Resize at the very beginning. You can choose to work with non-square pixels from the start when setting up a new document. You can also convert a logo, digital photo, or scanned image when you open it by pasting, dragging, or placing it into a document that has been set up for non-square pixels.
It’s a good idea to build your original NTSC graphics using the NTSC D1 720×486 template. This way the graphic can work for both Standard Definition and Digital Video purposes. If you have interlaced material, choose to crop two lines from the top and four from the bottom using the Canvas Size command (Image> Canvas Size). First anchor the bottom edge, and then crop two lines. Repeat the step, but anchor the top edge, and crop four lines. If the material is entirely created in Photoshop CS (with no interlace issues), just change the canvas size to 480.
What about PAL? PAL DV and D1 are both the same frame size—720 × 576.
Photoshop 7 or Earlier (Square Pixels)
If you are working with an earlier version of Photoshop (or choose to stick with square pixels out of habit), you have a little more work cut out for you. Every edit system is different, as is every version. You simply must keep up on what your manufacturer recommends for graphics. It would be impossible to keep this chapter 100% current because every NLE has a different upgrade cycle.
If you are working in an NTSC environment, design at 720×540 pixels. This way you have the option to go to DV or D1 at any time during the design process. The final step is to resize to a non-square pixel size. A 720×540 file resizes for D1 at 720×486. If you designed at 720×540 but need to go to DV first resize to 720×486, and then crop to 720×480.
If you are working with interlaced material, be sure to crop two lines from the top and four from the bottom using the Canvas Size command (Image>Canvas Size). First anchor the bottom edge, and then crop two lines. Repeat the step, but anchor the top edge, and crop four lines. If the graphic was entirely created inside Photoshop (with no interlace issues), just change the canvas size to 480.
Again, for PAL users, the PAL square pixel preset of 768×576 works for both D1 and DV.
Choosing the Right File Format
You used to have two choices for file formats that NLEs recognized. Macs took PICT files; PCs took TARGA files. That list has gotten significantly longer over the years to include virtually every file format that Photoshop can export. Here are six general tips:
1. There’s a reason that PICT and TARGA were the first video-friendly formats. Stick with them. Be sure to not add any compression, and use with the maximum bit size.
2. A layered TIFF file can also be useful. It will import into an NLE or motion graphics application as a flattened file. However, when you edit the file, all layers are intact. The layered TIFF supports all options that a PSD file does.
3. Just because you can import a .psd file doesn’t mean you want to. Most NLEs cannot handle blending modes and Layer Styles. Even After Effects chokes on some items. Be sure to selectively flatten items that don’t travel well.
4. Always save your design files. These are essential for future changes. Save a separate version using the Save A Copy option (now joined with Save As), which can be accessed by pressing ![]() .
.
5. Be sure to include an alpha channel if you have transparency. For more on alpha channels see Chapter 4, “What about Transparency?”
6. Avoid Web formats at all costs; these are delivery formats, not authoring formats. The compression artifacts will taint your project.
File Extensions
Repeat after me: “I will always use file extensions.” That two- or three-letter code is critical to preserving your file. The extension tells the computer (which is the least intelligent creation ever made) which application created the graphic and what can open it. Mac users have been historically lazy with extensions, because the Mac OS had written the file type into the header information. This does you no good if, for example, the file is copied to a PC-formatted disc, moves across a PC or UNIX network, or travels the Internet. Always use file extensions.
Not seeing your file extensions at all?
• Windows machines may have these turned off by default. Go to the Folder Options control panel and access the View pane. Disable the setting called Hide Extensions For Known File Types.
• Under OSX, you must access the Finder preferences. Choose Finder>Preferences. Click the Advanced button and check the box for Show all file extensions.
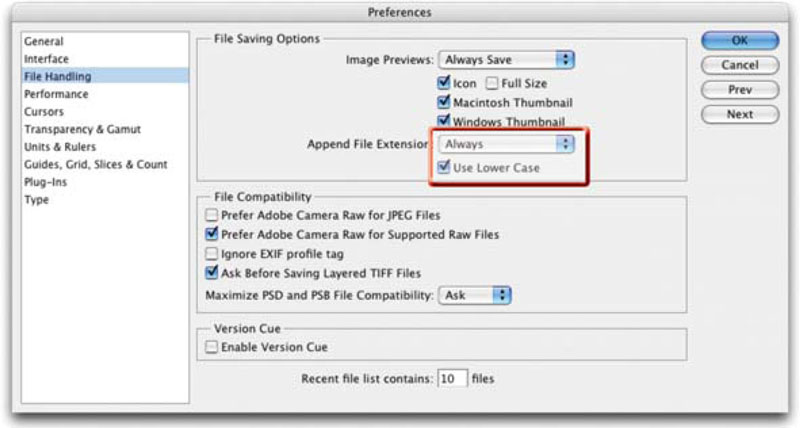
But what are all the file extensions? Don’t worry about it; simply tell Photoshop to always use them. Open the Preferences menu by pressing ![]() and access the File Handling options. Tell Photoshop to Append File Extension Always, and check the Use Lower Case checkbox. Problem solved; you can now work cross-platform.
and access the File Handling options. Tell Photoshop to Append File Extension Always, and check the Use Lower Case checkbox. Problem solved; you can now work cross-platform.
In our cross-platform world, file extension types are critical (especially for Mac users). Be sure to change your preferences to always append file extensions so that you don’t have to memorize a bunch of two- and three-letter codes.
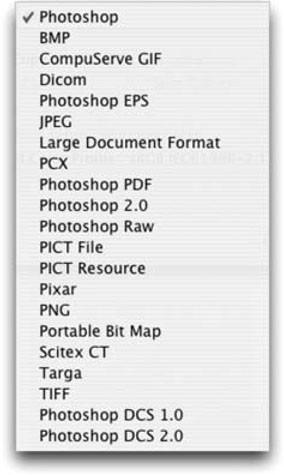
Common File Formats Used by the Video Industry
Photoshop supports many diverse file formats. As a tool that is used by video, print, Web, medical, and engineering professionals, it must offer several choices. Here are some common file formats used by video and motion graphics software.
Photoshop (.psd)
| Layers | X | 8-bit | X | 16-bit | X | 32-bit | X |
| Bitmap | X | Grayscale | X | Duotone | X | Indexed Color | X |
| RGB | X | CMYK | X | Lab | X | Multichannel | X |
*Not all color spaces work in 16- and 32-bit modes
The Photoshop format is the default file format; it supports all of Photoshop’s features. It’s a good idea to save your design files in this format for maximum editability. Additionally, many other software packages recognize Photoshop layers.
Cineon (.cin or .dpx)
| Layers | 8-bit | 16-bit | X | 32-bit | |||
| Bitmap | Grayscale | Duotone | Indexed Color | ||||
| RGB | X | CMYK | Lab | Multichannel |
The Cineon format is a common file format for digital film work. It is most often used in the motion picture industry. It is a subset of the ANSI/SMPTE DPX file format, which represents each color channel of a scanned film negative in a “10-bit log” format. Photoshop does not have a 10-bit space, so instead handles the images in 16-bit mode. The DPX file format is derived from the output file format of the Kodak Cineon film scanner. The Cineon format has been replaced by a related format called DPX.
OpenEXR (.exr)
| Layers | 8-bit | 16-bit | 32-bit | X | |||
| Bitmap | Grayscale | Duotone | Indexed Color | ||||
| RGB | X | CMYK | Lab | Multichannel |
The OpenEXR format is used by the visual effects industry for high dynamic range images. It was developed by Industrial Light and Magic and was released under an open source license.
The format supports multiple lossless or lossy compression methods. It is designed to supports both 16-bit and 32-bit images. Its primary benefit is that it allows for over 30 stops of exposure (which gives it incredible range of lights to dark). For much more information, see http://www.openexr.com/about.html.
Formats That Support Alpha Channels
Need to create a video-friendly graphic with an embedded alpha channel? You can choose from the following types:
• Photoshop
• PICT File
• Targa[RH1]
• TIFF
PICT (.pct)
| Layers | 8-bit | X | 16-bit | 32-bit | |||
| Bitmap | X | Grayscale | X | Duotone | Indexed Color | X | |
| RGB | X | CMYK | Lab | Multichannel |
The Macintosh Picture format is mostly widely used by video editors, especially those on Macintosh-based computers. Its popularity can be traced back to many software packages that historically required graphics to be in the PICT format. The PICT format is very effective at compressing large areas of solid color. This compression results in huge file savings for alpha channels, which are mostly black or white.
PNG (.png)
| Layers | 8-bit | X | 16-bit | 32-bit | |||
| Bitmap | X | Grayscale | X | Duotone | Indexed Color | X | |
| RGB | X | CMYK | Lab | Multichannel |
The Portable Network Graphics is growing in popularity with many computer manufacturers. It is becoming increasingly more common on the Internet, but not all browsers support it. The PNG format was created to be a patent-free alternative to GIF. Its major advantage is the PNG-24 file, which allows for 24-bit images (8 bits per channel) and embedded transparency. It is technically superior to GIF.
Targa (.tga)
| Layers | 8-bit | X | 16-bit | 32-bit | |||
| Bitmap | Grayscale | X | Duotone | Indexed Color | X | ||
| RGB | X | CMYK | Lab | Multichannel |
The Targa format was originally designed to be used with the Truevision® video board. The full name is in fact an acronym meaning Truevision Advanced Raster Graphics Adapter. The Targa format predates Photoshop.
TIFF (.tif)
| Layers | X | 8-bit | X | 16-bit | X | 32-bit | X |
| Bitmap | X | Grayscale | X | Duotone | X | Indexed Color | X |
| RGB | X | CMYK | X | Lab | X | Multichannel |
The Tagged-Image File Format is widely used to exchange files between applications and computer platforms. Additionally, TIFF is the one of the few formats to work in a bit depth of 8, 16, or 32 bits per channel. High dynamic range images can be saved as 32-bits-per-channel TIFF files.
Preserving Flexibility
While “done” is a four-letter word you like, it frequently leads to several others you may not want your mother to hear. Thanks to nonlinear editing and the Internet, nothing is ever done. It is always subject to tweaks, revisions, and repurposing. If you cut corners in the design and archiving stages, you will regret it later.
Never flatten your Photoshop Design files. Create a second copy for production purposes, or use the Save A Copy feature mentioned earlier. Chances are you archive your source tapes, project files, and EDLs for your video programs, not just the finished master. For the same reasons, you must save your Photoshop layered files.
Do not flatten the layers on your PSD design files.

• Thanks to Adjustment Layers, several of the image adjustments and filters previously used can now be applied to the layered file.
• Additionally, you can apply effects to a layer filled with 50% gray; this can then be blended with layers below it, providing an AE-style adjustment layer.
• Lastly, use the Copy Merged command to Flatten Visible Layers to an intermediate copy. This will allow several filter and blend mode combinations.
• Change the way you work, and it won’t be as much work to make changes.
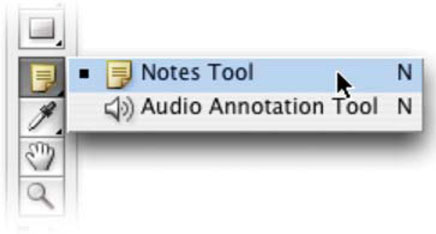
Annotation Tools
Annotating a file is a helpful way to insert “sticky notes” for later use. Photoshop offers two annotation options, one for notes and one for audio. The Audio option is generally a waste of file space, so stick with the Notes Tool ![]() .
.
What should you put into notes? Information such as fonts or colors used. It may also be helpful to specify which filters were used. Better yet, save an action for the look and include a note identifying it. Video treatments often drive the appearance of Web and print collateral materials. Follow the Golden Rule; make it easy for someone else to do their job, and the karma will return to you eventually.
What about clients? If they have Photoshop, they can easily add notes, but most clients don’t have (or understand) Photoshop. Save your file in the Portable Document Format (PDF). You can then open up the PDF in Adobe Acrobat Professional and enable comments for Adobe Reader. Then send the file to the client and ask them to add annotations. To bring these into Photoshop, choose File>Import>Annotations and identify the PDF file.
Archiving Your Work
Storage-media prices have fallen to incredible levels. A DVD-R disc can hold 4.4 GB and is priced less than $2 per disc. Don’t need that much room? CD-R discs have fallen in price to the point where you can find spindles on sale that end up being free after rebate. You have no economic reason not to save your work.

I keep binders with project files burned to CD-R and DVD-R. This proves invaluable for future projects for clients and for revisions. (Don’t ever believe “it’s done” actually means something.) To make the whole archive even more useful, enter the details of each disc into a database in a program like Filemaker Pro.
Several designers and companies I have worked with are nervous about giving clients all of the assets for a project. If you have a good relationship with the customer, you should at least be comfortable handing over your production files. If you are concerned about getting paid, hold onto things until the checks come in. Clients come back because of your creativity and level of service, not the fact that you hold their project’s assets hostage.
What to Archive
You should backup more than just your Photoshop files. Be sure to include the following:
• Fonts
• Original artwork
• Illustrator files
• After Effects files
• Source photos
Where To?
You made it through the final chapter. I’d like to say “Congratulations! You’re finished.” But you aren’t. “Congratulations, you’ve come a long way” would be better. As soon as you think you are a Photoshop expert, new tools will come out and technology will change. Just as a video edit is never perfect, you can tweak and twiddle in Photoshop for the rest of your life and there would still be magical possibilities left to discover.
Don’t Stop Learning
 Did you realize there are 12 full tutorials on the DVD-ROM and several video lessons? No rest for you!
What Should You Focus on Next?
The most important skill you can have in Photoshop is speed. Mastering keyboard shortcuts, utilizing Layer Styles and actions, and building up your own resource library are essential.
Be sure to visit www.PhotoshopforVideo.com for book updates as well as the podcast and free resources.
My goal is to make you fast, so I’ve included hundreds of keyboard shortcuts throughout the book. Make your way through each chapter once again and try to incorporate these time-savers into your normal workflow.
While you’re making your way back through, pay particular attention to Layer Effects and Actions, which are your two greatest time-savers. Collect these, build your own, and share them on http://www.adobe.com/exchange. Creating actions and styles should be a daily activity.
A large toolbox will serve you well as you go forward. Regularly archive your work to optical media. You should build your own stock image library, being sure to save valuable project sources. Start acquiring your own photos as well, harnessing the flexible power of a digital camera. When you have time to breathe, enroll in a photography class. In the meantime, shoot away. There’s a very thin line between creative and unusable.
And above all, keep in touch. Be sure to keep an eye on my blog and resource site at www.PhotoshopforVideo.com. You’ll find news, book updates, bonus videos, and articles. I update the site every week with new resources.
PROfile: Rachel Max

Max is originally Irish, born and raised in Dublin, but has considered herself fully assimilated to American culture since watching ‘Pee-Wee’s Big Adventure’ on video in 1997. Perhaps drawing inspiration from that unlikely source, Max is a professional animator and has been screening her work in festivals since 1999. Her films have won several awards and recognition.
Awards don’t pay bills, so Max also combines her love for animation and video into her day job as an animator and broadcast designer in NYC. Max is well-known in the After Effects community. She co-authored After Effects On The Spot and After Effects @ Work and has been featured in several other publications including Angie Taylor’s Creative After Effects 7. As much as she uses After Effects, Photoshop has an important role in her production pipeline.
“I use Photoshop for 90% of my design work. I use it to create storyboards and style frames for clients, to design menus in DVD Studio Pro, and to do illustration for my personal work.”
Max harnesses Photoshop’s speed to cut down on her rendering times for her motion work as well.
“I do a lot of preliminary compositing in Photoshop. If there are effects that I’m not actually animating, I’ll apply them in Photoshop and flatten the layer. This speeds up rendering in After Effects. The two programs work so well together now.”
Max has a few of her own favorite tricks to make Photoshop easier:
• She scrolls through blending modes with the ![]() or
or ![]() key combo
key combo
• When using the Crop Tool, she rotates it to straighten images or to select a new angle
• She uses the clone tool at 30% opacity for blending seams and blemishes
• She says actions are a huge timesaver (go to http://www.Adobe.com/exchange)
• Complete as many tutorials as you can (even if you are a power user).
The key to success for Max is continuous learning.
“Sometimes you can feel very overwhelmed by graphics and digital media programs,” said Max. “I’ve worked with top professionals who admit that although they use Photoshop 8 hours a day, 5–6 days a week, that they still don’t know how all the ins and outs. Never stop wanting to learn.”
To find out more about Rachel and see her work, visit http://www.rachelmax.com.