2
PIXELS: TIME FOR TECH
When computer graphics are created, they are either raster or vector images. Photoshop supports both types of images, and it is common to mix the two in a single project. Newer versions of Photoshop contain the vector type, giving it the ability to be resized and edited within Photoshop and After Effects. While all graphics for video end up as raster images, a clear understanding of the two categories will help you build, modify, and import artwork.
Pixel by Any Other Name
The pixel is the building block upon which our industry is based. The term pixel is a fusion of the words picture element, and it is aptly named. The word was coined to describe the photographic elements of a television image. Back in 1969, writers for Variety magazine took pix (a 1932 abbreviation of pictures) and combined it with element to describe how TV signals came together. Earlier reports exist of Fred C. Billingsley coining the word at NASA’s Jet Propulsion Laboratory in 1965. While the exact origins of the word may be disputed, the meaning is not. Use of the word pixel quickly caught on, first in the scientific communities in the 1970s and then the computer graphics industry in the mid-1980s.
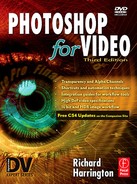
The pixel is the smallest amount of space that exists in our creative universe. Pixels contain color, and these colors combine to form images. Bitmaps (also called raster images) are used for continuous tone or photorealistic images. If you continue to zoom in on an image, you can eventually see the pixel grid that forms the image.
Pixels Build Pictures
 Picture elements, more commonly known as pixels, are the building blocks of the video industry. In Photoshop, you will edit pixels when working with your source photos and video frames.

To zoom:
• Use the Zoom tool.
• Press ![]() on Windows).
on Windows).
• To fill the screen, press ![]() .
.
To view at 100% magnification, press ![]()
![]() .
.
Raster images. When working with raster images, you edit pixels rather than shapes or objects directly. Proper selection techniques are important to get accurate results. Raster images are resolution-dependent in that they contain a specific number of pixels. Therefore, images will lose detail and appear jagged if they are scaled above 100% by a video software application. If you need to scale an object such as a logo or title within an edit or design session, bring it in at maximum screen size, and scale down rather than up. For achieving a documentary pan-and-zoom effect, a wide variety of plug-ins are available for most edit systems. The best solution, however, is to create the effect in Adobe After Effects (see Professional Motion Control “Photography” with After Effects and Photoshop on page 267).
Go Vector Logo, Go!
Always ask for the client logo as a vector file. It will give you greater flexibility when scaling. If you own Illustrator, splitting it up is easy.
Vector graphics. An understanding of vector graphics may seem out of place to many readers. Traditionally, artists turn to Adobe Illustrator to work with vector graphics. While it is still necessary to use Illustrator for complex vector editing, Adobe Photoshop now provides its own set of powerful vector tools.

Vector graphics are often used for corporate logos and print pieces. Vector graphics are resolution-independent because they are composed of lines and curves defined by mathematical objects called vectors. Vectors describe an image by its geometric characteristics or shapes. These vectors allow the file to be scaled to any size without losing detail or clarity. Adobe After Effects supports the use of vector graphics, and most motion graphic artists swear by vectors for achieving dramatic type effects involving scaling. Vector graphics are best used for shapes or logos, especially if scaling is involved.
Vector Type from Photoshop to After Effects
Recent versions of After Effects can convert Photoshop type to vector type. In After Effects choose Layer>Convert to Editable Text
Because video monitors represent images by displaying them as pixels along a grid, all vector graphics are rasterized at some point for use in video. Vectors still offer great flexibility, which makes them desirable during the initial design phase. They also are resolution-independent, an advantage if you ever need to take your work into a print environment.
Display Resolution
The quantity of pixels along the height and width of a raster image determines its screen (or display) size. Older computer monitors display 72 pixels per inch (ppi); newer monitors often display 96 ppi or higher. These display settings will often vary, ranging higher or lower, depending on your computer’s video card. In contrast, video monitors are not variable. Your video format will use a specific-sized graphic; you cannot pack extra pixels in or change the dimensions of your audience’s televisions. I’ll go deeper into setting up pixel dimensions and pixel aspect ratio later in this chapter.
In order to get the maximum quality out of Photoshop, you must understand video’s limitations. These limitations can be a hindrance, causing flicker on the screen if you improperly anti-alias fine details such as text or thin lines. They can also be a benefit. There are many affordable stock-photography collections available with low-resolution files. Additionally, filters and image-processing techniques are several times faster for video-sized images than print.
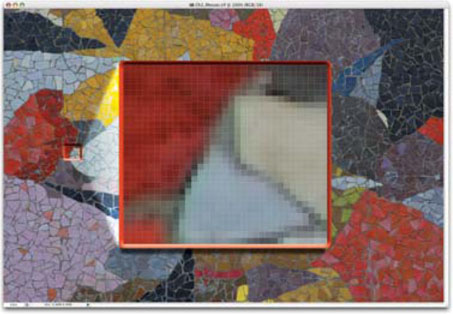
It is possible to view many more pixels on your computer at one time than will fit in a standard video frame. For example, a 15-inch monitor can be configured to display 800 pixels horizontally and 600 pixels vertically. An 800 × 600 image would appear to fill the screen. On a 21-inch monitor configured to the same display settings, the same image would appear to fill the screen, but each pixel would be significantly larger. Changing the monitor’s settings, however, could allow more pixels to fit on the screen, leaving empty space around our 800×600 image. However, while most computer monitors support multiple resolutions, television sets generally do not.
Check the display size in Photoshop. You’ll usually want to view images at 100%, so that you can make accurate decisions about the display quality of effects. If this is not possible, view in even increments of 50% or 25%, because computers are very good at dividing by two.
Smart Objects Preserve Vectors
If you choose File>Place to add a vector object to your Photoshop file, it will come in as a Smart Object (Photoshop CS2 or later). This will embed the vector file and give you infinite scaling ability within Photoshop. We’ll explore Smart Objects more in later chapters.
Display Size Does Matter!
 Be sure to view your image at 100% to make accurate decisions. If your monitor is not large enough, then view in even increments of 50% or 25%.
Image Resolution
The requirements of print differ greatly from those for video. It is necessary to work with a much higher quantity of pixels to produce satisfactory results when outputting to the printed page. On the flip side, most Web images are too small, as they have been optimized for fast download in a mosaic Web browser.
A common problem occurs when video professionals talk to their cousins in the print and Web worlds. Although all camps speak the same language, some unique terms are used that often result in confusion and extra work by both sides. The most common problem is resolution. Video makers may use the term pixels per inch (ppi); other industries use dots per inch (dpi) or lines per inch (lpi).
Right Size Fast
If you have an object loaded on the clipboard, the New Document dialog will automatically size itself to match.
Lines Per Inch (lpi)
Talk to a print professional and you’ll often hear the term lines per inch. This term derives from the traditional process where images with gradiated tones were screened for printing. This was done (traditionally) by laying film with dots over the image before the film was exposed. These days an imagesetter is used. A higher lpi means means smoother images.
| Output Method | Typical lpi |
| Screen printing | 35–65 lpi |
| Laser printer (coated paper) | 75–110 lpi |
| Newsprint | 60–85 lpi |
| Offset printing (coated paper} | 120–150 lpi |
| High-quality offset printing | 150–300 lpi |
Dots Per Inch (dpi)
A more common term is dots per inch (dpi), which refers to the number of dots that can fit into a one-inch by one-inch square area. Higher dpi generally means smoother images. Many printers in an average office setting can print 600 dpi or higher. This can lead to very professional-looking images. However, it is essential to remember that dots per inch is strictly a print term that refers only to a physical output. Dots per inch is not used when scanning or describing video graphics.
Video Graphics Have No dpi
There are no “dots per inch” (dpi) with video graphics. All that matters are the total pixels on screen.
Samples Per Inch (spi)
When using a scanner (flatbed or slide), the correct term is samples per inch. This term refers to the number of analog samples taken in order to convert the image into a digital file. A higher number of samples will increase the output quality of the digital file. However, too many samples can surpass the quality threshold for your output devices and simply be a waste of time and disk space. The samples per inch measurement is similar in theory to the sample rate of a digital audio file. The higher the number, the more accurate the sound.
Copyright: Krzysiekzpoczty/iStockphoto
Most scanners will say dpi in their packaging and documentation. What they meant to say is spi. Fortunately, the two numbers are a pretty clean exchange. Just be sure that you look at a scanner’s optical resolution (versus interpolated) when shopping. A resolution of 600 × 600 pixels or greater will suffice for nearly all video work.
Pixels Per Inch (ppi)
The last measure of image resolution is pixels per inch. This measurement measures how many pixels fit on the screen. Because a video monitor is a fixed resolution, increasing the ppi will not improve quality. Rather, it will result in image detail being clipped or an overall softening as the pixels are resampled.
So What are Megapixels?
Start shopping for a digital still camera and you’ll be bombarded with megapixels. If you listen to most salespeople, you’ll be misled as to what megapixels really are and just how many are needed. You’ll need to understand megapixels so you can make smart shooting decisions or instruct those that are acquiring images for your project. A megapixel is a unit of storage and describes the total number of pixels in an image.
In the strictest sense, a megapixel is one million pixels. This is a very common term used to desribe just how many pixels a particular camera can capture with its sensors. For example, if a camera can capture pictures at 3872×2584, it is referred to having 10 megapixels (3872 × 2584 = 10,005,248). If you were to print that picture on paper at 300 ppi (pixels per inch), it would roughly be a 13" × 8.5" print.
How many megapixels do you need for video? It all depends on how the pixels are meant to be used. If you plan to do a large zoom or just reposition the photo, all 10 megapixels may be needed. On the other hand, a 1920×1080 HD video frame needs only a 2.1-megapixel camera to capture the minimum required pixels.
Looking for an easy-to-use megapixel calculator? I highly recommend http://web.forret.com/tools/megapixel.
Print Resolution
In print, using too low of a resolution results in pixelization— output with large, rough-looking pixels. Using too high a resolution image increases processing time and storage requirements and slows the output. Video and print pros have very different definitions of full size and high quality.
If you translate a 648×486 television screen into inches, it would be approximately 9 × 6.75 inches. At 72 ppi, the file size is approximately 900 kilobytes. If you asked a print professional for the same size image at high quality, you would likely get a file in the range of 4 to 60 megabytes. This is because print professionals often use resolutions of 150 to 600 ppi, depending upon output requirements.
Copyright: Jami Garrison/iStockphoto
Be sure to specify image resolution when working with outside artists and clients, or you will spend a lot of wasted time down-sampling images. Print-ready images will quickly eat up your disk space and are difficult to transport electronically due to their large size. Filters and image adjustments take longer on large images, especially if you are used to video or Web work. The only advantage to this extra information is that you can have more control over cropping and scaling of the final photo. Unless I plan on doing dramatic moves on an image in After Effects, I request outside artists to provide me with images at 200 ppi for standard-definition video; this involves the least work for all parties.
Web Resolution
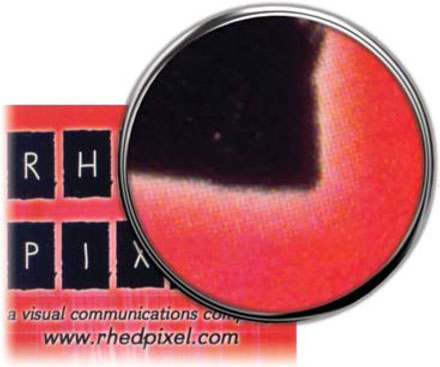
High-resolution images won’t always be your problem, though. With the proliferation of image-rich Web sites, clients are often providing artwork directly from Web sites. While this is a convenient way to find things, it offers many problems. Web images are a low-resolution medium. While Photoshop builds Web and video images at 72 ppi by default, it is rare to find full-screen Web graphics, due to download times. Larger images tend to be sliced up as well, making it difficult to reformat them for video. The worst problem, however, is compression.
Web graphics generally employ three file types: GIF, JPEG, and PNG. These compression schemes discard information; especially color detail, to achieve smaller file size. The Graphics Interchange Format (GIF) is most commonly used to display indexed-color graphics. Indexed color supports only 256 colors and should never be used for video source material.
Copyright: Guy Erwood/iStockphoto

The Joint Photographic Experts Group (JPEG) format is extremely common. It can be found in Web pages and digital cameras. Most Web images are highly compressed and do not hold up well when reformatted for video. Digital cameras that use at least a 2.1-megapixel system and are set to high or fine quality can produce acceptable results. Be careful when working with JPEGs; they may be set to CMYK or grayscale color modes. It is necessary to convert these to RGB before using them in a video program, or unpredictable color changes may occur.
Web Formats are Great…
Web formats are great… for the Internet! Don’t use JPEG, GIF, or PNG in your video projects. If you have to use a Web format, choose PNG-24. It is the most versatile of all the Web formats and even supports transparency.
The least likely format you may encounter on the Web is PNG. The Portable Network Graphics (PNG) format can be used for lossless compression and for display of images on the World Wide Web. There are two varieties of PNG, 8-bit (PNG-8) and 24-bit (PNG-24). These two formats support RGB, indexed color, and grayscale modes, as well as interlacing. Of all the Web formats, the PNG-24 is most desirable (least awful) for video purposes. The file size of a PNG file is significantly larger than GIF or JPEG. This will give you more information to work with. PNG files are very uncommon because older Web browsers do not support them and the large file size deters many Web designers.
Avoid Web graphics at all costs. Both you and the client will be very disappointed with the results when using a Web-ready graphic. If clients insist that the Web-ready format is all that’s available, dig deeper. Ask them for a business card. If their logo is on that card, then it must exist in a print-ready format (somewhere). Ask who designs the cards or how they get additional cards at work. After a phone call or two, you will have the appropriate .eps or .ai file.
Get Access to PNG-24
To access the PNG-24 format, choose File> Save for Web. This great format can store transparency with no need to manually create an alpha channel. Check your NLE or compositing application to see if a PNG file will work.
Salvaging Web Images for Use in Video
One of the worst things to happen to graphic artists was the proliferation of Web pages for corporate clients and associations. Firms are moving virtually all of their assets on to the Internet and have placed such emphasis on their Web sites that they have abandoned or lost track of traditional assets. It used to be far easier to get a high-quality, “camera-ready” ad slick with logos on it. Annual reports or brochures could always be found and scanned as well.
These days you ask for a logo and you get a 200×200 pixel GIF from the client’s Web site. These images should be avoided at all costs. No matter what your client says, the logo exists as a higher-quality file. If they have a business card, it exists. There are several approaches you can try before accepting Garbage In.
• Ask if there’s an in-house Web department or printer. Call these people and ask for a better logo. While you’re at it, ask for a style guide.
• Search the Web site for a press area. Many times high-quality logos are available for download to the media.
• Download an annual report or brochure as a PDF. Often times these are saved at 150 dpi or better (or even as vector files!). A PDF file can be opened and converted in Photoshop.
• Ask for the business card and scan it at as high a setting as you can. If you scanner has a de-screen filter, use it.
So how do you salvage these images? I have seen editors and art departments spend days recreating logos. In larger facilities, this ordeal is often repeated due to poor communication and archives. So always ask anyone remotely experienced in using a computer if they have ever done work for the client before. But if you must “salvage” a Web logo, remember this: Garbage In = Garbage Out. Vector programs as such as Adobe Illustrator—using its Live Trace feature—can help here, but it is very hard to pull something from a 50×50 pixel source. The results you get will be mediocre at best.
The fastest solution involves “up-rezzing” via the image size command (Image>Image size). Computers are good at duplication, so blow the logo up 200% and choose Nearest Neighbor as the Interpolation method. The resulting image is soft, but may pass quality control. Some adventurous souls attempt to rebuild the text by font matching. If you know the name of the font used, this is a fair approach. If you are hunting, you will need a huge font collection and chances are you will get close, but not exactly right. You do not want to be to blamed when the “logo police” arrive.

Understanding Bit Depth
The last area that affects the quality of your image is bit depth (also known as pixel depth or color depth). The bit depth measures how much color is available for displaying or printing. Greater bit depths mean more information is available to describe the color (which leads to greater accuracy).
Explore Bit Depth
 If you’d like to examine the following three images, they are in the chapter’s folder on the DVD-ROM. Be sure to try various adjustments from the Image menu.
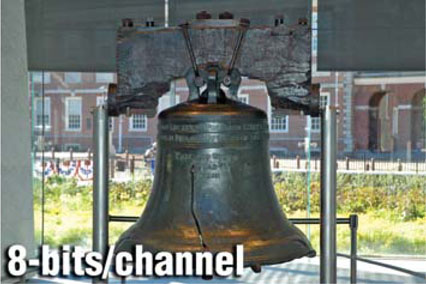
8-Bits/Channel
The most common bit depth is 8-bit. This mode has 256 possible values per color channel (2 to the eight power). This is the most common mode used by video editing applications (although some are starting to offer 10- and even 12-bit editing). For these higher-end systems you will want to build in 16-bit mode.
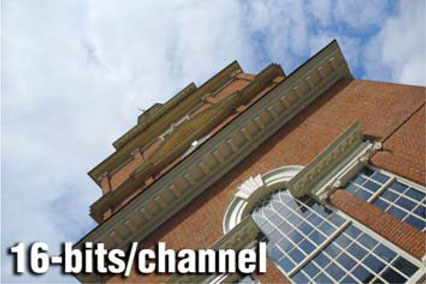
16-Bits/Channel
The 16-bit mode produces greater color fidelity (though file size tends to double.) Starting with Photoshop CS2, you can build layered files in 16-bit mode. Additionally, many motion graphics and 3D applications can work with 16-bit files. One downside is that not all filters and adjustments will work in 16-bit mode.
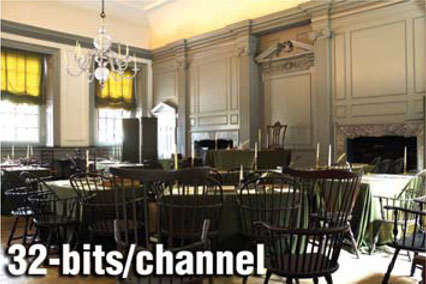
32-Bits/Channel
A 32-bit image is often referred to as a high dynamic range (or HDR) image. These images cannot be captured with a single exposure, but are created by merging multiple exposures of an image. Some 3D applications also work with HDR images (for example the Open EXR format from Industrial Light & Magic shows great promise for the special effects industry). Photoshop has limited support for 32-bit processing, but this is an expanding area you should keep an eye on.
Computer and Video Issues
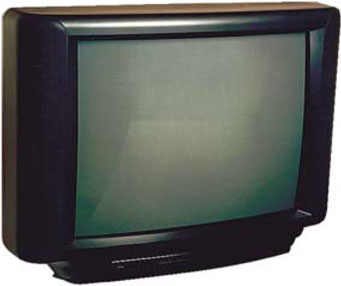
Video traces its history to early pioneers such as John Logie Baird, who managed to record a recognizable human face on video in 1925. The first microcomputer appeared in 1960, developed by Digital Equipment, priced at a mere $120,000 (it did include a keyboard and mouse). These two technologies existed very independently of each other for many years. All computer pixels are square in their native format. Professional video applications often use pixels that are nonsquare.
The National Television Standards Committee, known as the NTSC, has set the standard that television fits to the 4×3 aspect ratio. This is often interpreted by video boards as an image that is 648×486 pixels. Those countries that use the PAL format use boards that work with images that measure 768×576 square pixels. If designing for square systems, it is easy because no conversions are necessary.
Of course, if you offer a standard, it will be broken. In an effort to pack more pixels and increase resolution, the ITU-R BT 601 video standard was developed. It is often called “D1” (after the D1 format invented by Sony in 1986 that was the first component digital format available). In NTSC, the native “board” size of a D1 frame is 720×486 nonsquare pixels. The PAL format uses 720 × 576 nonsquare pixels.
Video Standards
NTSC: The National Television Standards Committee developed the North American broadcast standard in 1953. The group is jokingly referred to as “Never Twice the Same Color.”
PAL: Developed in the early 1960s, the Phase Alternate Line format is the standard for most of Europe. The group is sometimes called “Peace At Last.”
This format has evolved into the Digital Video (DV) standard, which is employed in the consumer DV format as well as DVCAM and DVCPRO tape and DVD authoring. The native size for DV frames is 720×480 nonsquare pixels for NTSC (six less than the D1 format). The PAL DV format is identical to the standard PAL format and remains unchanged at 720 × 576 nonsquare pixels. These pixels are played back on analog televisions, which must display them as square pixels at the 4×3 aspect ratio.
Houston, we have a problem.
Discussing pixel aspect ratio is about as much fun as going to a great art museum and spending all your time discussing the doorknobs. Yes, they too are important, but hardly interesting. Please bear with me as I try to resolve this dilemma in a clear and orderly fashion. I will simplify as much as possible without neglecting essential intricacies.
Go Deeper into Video Pixels
 Looking for a more scientific (and mathematical) version? The Quick Guide to Digital Video Resolution and Aspect Ratio Conversions takes a much deeper look at the issues. You can find it at http://lipas.uwasa.fi/~f76998/video/conversion/. Be warned though; while it may be quick, it’s not easy.
Design versus Production
You will most often have two distinct versions of your Photoshop files; one for design and one for production. Your design files include all of your layers, vector type, blend modes, and layer effects. These are meant to be editable in the future so you can make client changes.
Production files on the other hand are meant to be imported into your NLE/Compositing Application/DVD authoring environment. These often contain flattened layers and must have their layer effects merged as well. Production files are often saved into a portable (easy to move across applications and platforms) format such as PICT or TARGA. By employing the two-format method, you will ensure maximum flexibility and compatibility.
Pixel Aspect Ratio
Remember, video is displayed on standard televisions at a 4×3 aspect ratio. Even video that has a different native size must be eventually converted. Natively, an NTSCD1/DV pixel is taller than it is wide, approximately 0.9 to 1. PAL pixels on the other hand are wider than tall, 1.07 to 1.

Many video edit systems, as well as Adobe After Effects, can work with square pixel images, ensuring that they display correctly throughout the editing stage. These video applications must resize square pixel graphics to conform to digital video’s nonsquare pixel shape. To avoid this problem, however, many designers choose to manually stretch or interpret their images within Photoshop, which offers powerful interpolation tools that produce exceptional scaling. Before going any further, let me say three things:
• First, there are many conflicting opinions on what size to build graphics and what application to use when resizing them. These opinions are all based on combinations of facts and circumstances, so make sure you understand both before choosing a method.
• Second, read the manual that shipped with your editing software because different companies have their own procedures for each editing system. I will attempt to address the most common workflows, but it is a good idea to keep up with changes in your video software.
• Third, if using Photoshop CS or later, you will generally choose to build your graphics with the nonsquare pixel presets. Notable exceptions will be some flavors of HD or if building graphics for use in After Effects 3D space.
A standard square and NTSC D1 pixel.

With those three points made, I will present your options for building graphics that will work for most users on most systems.
Step 1: Determine the native size of your video frame
Frame size can be found in your NLE’s manual, or you can export out a single frame.
• If you are working with a traditional (switcher-based) analog system, the frame is likely equates to 648×486 for NTSC or 768 × 576 for PAL (using square pixels).
• Most hardware-dependent nonlinear systems that are capturing sources such as Beta SP use the ITU-R BT 601 format (often referred to as D1). The native size is 720×486 non-square pixel image for NTSC or 720 × 576 nonsquare pixel image for PAL.
• In the last few years, many DV solutions have appeared, including DVCPRO and DVCAM. These use a 720×480 nonsquare pixel image for NTSC and 720 × 576 nonsquare pixel image for PAL.
• HD frame sizes vary greatly and are impacted by both format 720p versus 1080i as well as acquisition formats such as DVCPRO HD and HDV.
Video #2 Working with Document Presets
See the Working with Document Presets video tutorial on the DVD-ROM.
The following table sheds some light on the various native sizes you’ll encounter.
Standard Definition
| Format | NTSC Native Size | PAL Native Size |
| D1 | 720×486 | 720×576 |
| DV | 720×480 | 720×576 |
High Definition
| Format | Native Size |
| HD 720p | 1280×720 |
| HD1080i | 1920×1080 |
| HDV 1080i | 1440×1080 |
| DVCPRO HD 720p | 960×720 |
| DVCPRO HD 1080i | 1280×1080 |
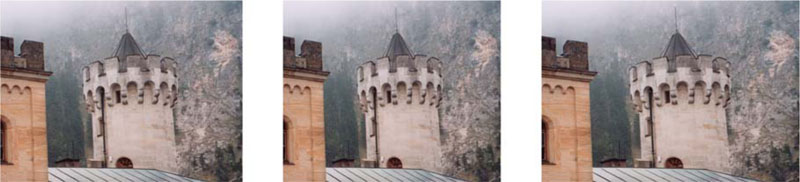
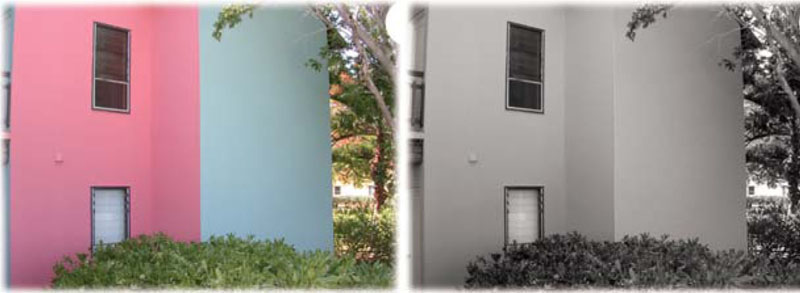
(Left) Original image viewed viewed in NTSC D1 editing system such as Avid Media Composer. (Middle) Same image viewed in Photoshop with NTSC standard (with no Pixel Aspect correction). (Right) Same image viewed in Photoshop with PAL standard (with no Pixel Aspect correction).
Step 2: Design your graphics in Photoshop
Depending on your version of Photoshop, your technique will vary. Starting with Photoshop CS, Adobe has offered the monumental change of nonsquare pixel support. Despite this support, not everyone will choose to use nonsquare pixels. Reasons vary but include tradition, resistance to change, or established workflows.

Method #1: Using Photoshop’s Nonsquare Pixels
Since Photoshop CS, Adobe supports nonsquare pixels…. Life is good!
• Create all new documents using the built-in templates that match your edit system. This can be found in the New Image dialog box File>New or by pressing ![]() . The list of presets has continued to grow and currently stands at 15 for Photoshop CS3.
. The list of presets has continued to grow and currently stands at 15 for Photoshop CS3.
• If working with square pixel images (such as those from scanners, stock photo collections, or digital cameras) be sure to correctly interpret the pixels. This can be done in three ways:
• Drag the square pixel images into a nonsquare document. Photoshop will convert the square pixels to match your current document’s settings.
• Open an image and select it by choosing Select>All then press ![]() to copy it to your clipboard. Paste the square pixel images into a nonsquare document by pressing
to copy it to your clipboard. Paste the square pixel images into a nonsquare document by pressing ![]() .
.
• Place square pixel images into a nonsquare document by choosing File>Place. The image will be added as a Smart Object, which can be scaled with greater flexibility.
• If you are working with a frame grab or exported frame from a video editing application that uses nonsquare pixels, you will likely need to identify it to Photoshop. After opening the image, choose Image>Pixel Aspect Ratio and select the right preset for your country and screen shape.
Document Checkup
You can quickly find out the details of a document by ![]() +clicking (
+clicking (![]() +click) on the Document Info bar.
+click) on the Document Info bar.

Method #2: Using Photoshop 7 (or Earlier)/Square Pixel Method
If you are designing your graphics in Photoshop 7 (or earlier), you are using square pixels. When a design is finished, you then need to resize your graphic for video usage and force the pixel aspect ratio to change.
There are two major camps: those who recommend stretching horizontally and those who prefer vertically. In the spirit of The Sneetches by Dr. Seuss, I’ll call them the ’Zontals and the Verts.
The ’Zontals argue that it is best to maintain the same number of scan lines throughout. This is usually done by using an image size such as 648×486 for NTSC D1. This method helps maintain fine details, such as text, by not compressing them. Using this approach, the final image is stretched horizontally to 720×486 (Image>Image Size, Constrain Proportions unchecked) to fill the video screen. Eventually this image will be squeezed back when playing back on televisions.
Every edit system and manufacturer has unique requirements. Be sure to see Appendix C for specific suggestions for leading editing and motion graphics applications.
The Verts counter that it is always better to shrink raster images than to blow them up. For example, by employing a 720 × 540 image in Photoshop, the files can be scaled down (as opposed to up). Before saving the file out for video editing, the file must be resized (Image>Image Size, Constrain Proportions unchecked). The 720×540 file is squeezed vertically to 720×486. This vertical stretch will be counteracted by the horizontal stretch when the image is transferred to video.
Square Pixel Graphic Sizes for Standard Definition
| Format | 4×3 Aspect Ratio (Square Pixels) | 16×9 Aspect Ratio (Square Pixels) | Native Size Nonsquare Pixel |
| NTSC D1 | 648×486 or 720×540 | 864×486 | 720×486 |
| PAL D1 | 768×576 or 720×540 | 1024 × 576 | 720×576 |
| NTSC DV | 648×480 or 720×534 | 864×480 | 720×480 |
| PAL DV | 768×576 or 720×540 | 1024 × 576 | 720×576 |
* You will see varying numbers depending on which manufacturers documentation you look at. For example, Apple recommends for NTSC D1 Widescreen 853 × 486 while Adobe recommends 864 × 486. The differences are very minor (approximately 1%) and will not be visible to the naked eye
There are strengths to both the Vertical and Horizontal arguments if you need to design with square pixels. Because DV is having such an impact, I recommend designing at 720×540, using a 4×3 aspect ratio if you’re stuck in an older version of Photoshop. This size also works for PAL graphics as well. After resizing to the Native Nonsquare size you just need to crop for DV output. Since DV lacks six lines of information (480 versus 486).
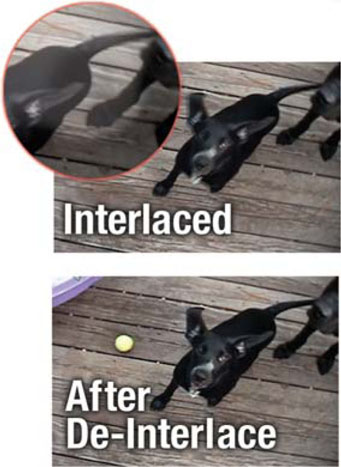
With NTSC video, the image updates 60 times per second. These fields reduce image flickering by refreshing every other line. To clean up an exported video frame, you will likely need the De-Interlace filter.
Interlaced Displays
Interlacing video is another leftover technology meant to serve as a temporary fix. When television was invented, it was decided that 30 frames per second generated smooth motion. However, it took 60 images per second to reduce flicker. The problem is that the broadcast signal could not hold that much information without significant softening, and the slow speed of phosphors in the tube produced banding.
In order to maintain a relatively crisp picture, the solution of interlacing was decided upon by the first National Television Standards Committee in 1940. By showing half an image 60 times per second, both goals could be met. The electron beam would scan across the tube, painting every other line. It would then return to the top and paint the remaining lines. These alternating lines are often identified by field dominance, and are referred to as upper (or odd field first) or lower (or even field first). This solution solved the problem between bandwidth, flicker, and smooth motion.
Choose to create new fields by interpolation; field elimination is a subjective choice.

It’s important to note that only analog televisions are interlaced. If your video is intended for traditional output, you need to keep this in mind. Standard analog televisions display interlaced video, but newer digital televisions may show progressive scan (or non-interlaced). If you are designing for Web or CD output, you will work with non-interlaced video. Interlacing is not a big issue when you start your graphic in Photoshop, but becomes very important when importing video freeze frames or working in Adobe After Effects. In Photoshop it is important to avoid lines thinner than 3 pixels, or you will definitely introduce flicker to the image. Be sure to choose an anti-aliasing method for fine details such as text as well.
If you import a freeze frame from a source with fast motion, you will likely have visible fields (areas where the two frames of video mixed and a jagged result appears). If this happens, you can choose to run the De-Interlace filter (Filter>Video>De-Interlace). You will have the choice of keeping the odd or even field, as well as creating the replacement through duplication or interpolation. This step is especially important for broadcast designers who are working with freeze frames. If your video contains movement (and you didn’t remove interlacing during export from the NLE), you will definitely see the need for this filter. Many lower-cost digital cameras will show a similar problem because they use a similar, image-capture device. It is a good idea to run this filter on video freeze frames every time if the work is to be done in Photoshop.
When animating your graphics in After Effects, interlacing provides smoother movement between frames. The render times are longer, but the quality is worth it. You need to do nothing different inside of Photoshop; just make sure to turn on Field Rendering in After Effects’ render settings. In fact, make it part of your presets in After Effects by modifying your output module settings.
Anti-aliasing
Did you ever play with Lego building blocks as a child? Perhaps you noticed how hard it was to build an arch or a curve. The best you could achieve still had noticeable stair stepping. Guess what, pixels are just like those building blocks. Curved or diagonal lines will not look good at low resolutions, and you must soften the edge.
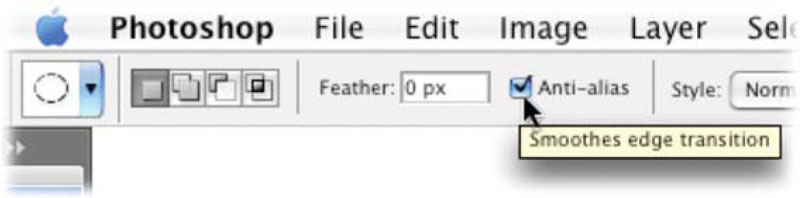
By choosing to use an anti-aliasing method, Photoshop will generate smoother results—especially when using selection tools (such as the magic wand or lasso tools) or vector-based type. Anti-aliasing works by softening the color transition between edge pixels.
Since only the edge pixels are changed, you lose no detail in the image itself. Anti-aliasing is a useful option for creating text, making selections for filters, or copying and pasting. It will be a recurrent topic throughout this book. You can adjust the anti-aliasing for many tools directly in the Options bar. You must apply this option before a selection is made.
RGB versus Y, R-Y, B-Y Color
As if the nonsquare pixels, aspect ratios, interlacing, and anti-aliasing weren’t enough, let me present our next problem. Photoshop works in the RGB color space. Each pixel you see on your monitor is comprised of light being emitted by a red, a green, and a blue phosphor placed closely together. Our eyes perceive that light as a single-colored dot, or pixel. These red, green, and blue components are referred to as channels. More on channels and channel operations in later chapters.
HSB Sliders
Many editors choose to look at HSB sliders (hue, saturation, and brightness). This color model is very compatible with RGB and allows you to examine color information in a more videolike manner.
So what’s the problem? Televisions use the same red, green, and blue phosphors, right? Not exactly. Television signals are not transmitted or stored in RGB due to our final leftover problem. Initially, television was black and white. These images were actually a grayscale signal consisting of only one channel that contained the brightness information (known as luminance or luma). In an effort to keep consumers happy, color television was made backwards compatible. An RGB broadcast would not work on a black-and-white television, so broadcasters chose (and still use) the Y, R-Y, B-Y color space. The Y is the luminance information, while the two Cs represented the color components (hue and saturation). These three signals would combine to form the composited pixels.
Apple’s Final Cut Pro system can warn you when your pixels are not broadcast-safe. Go back to Photoshop and fix the original photo when this happens. Otherwise, you have additional rendering.

How does this affect you? Don’t worry too much about the engineering side, but realize that colors will look different on a television screen than they do on a computer monitor. The color shift is minor, but present. There is no setting in Photoshop to correct this. The best solution is to have an NTSC or PAL video monitor connected to your system. If a television monitor is not an option, periodically test your graphics by importing them into your NLE, then outputting to tape or a video monitor.
RGB versus 601 Mapping
Photoshop and video handle luminance values differently. When working in Photoshop, black is an absolute black and white is an absolute white. Photoshop assigns a value of 0 to black and a value of 255 to white. There is no allowance for anything beyond this range. This process is referred to as computer graphics or RGB mapping. Adobe Photoshop and After Effects both work with RGB mapping.
RGB mapping assumes that video black (NTSC 7.5 IRE, PAL 0mV) is assigned a value of 0, and video white (NTSC 100 IRE, PAL 700mV) a value of 255. If you import or export video from your edit system as RGB, signals above or below this range will be clipped.
601 mapping.

The ITU-R BT.601 digital video standard (commonly referred to as 601 mapping) does not handle black and white as absolutes. It is allowable to go above “white” and below “black.” One reason for this is super-black, which places a darker black in areas that are meant to be luma keyed. Many hardware-based switchers will use a luma key, instead of tying up two channels of a still store to use the fill and alpha matte. This luma key will allow for a real-time downstream key during mobile- and studio-based video production. Video cameras also allow a videographer to shoot beyond 100 IRE, giving the user some overshoot in the captured signal, which can be corrected during editing or playback.
601 mapping specifies that video black (NTSC 7.5 IRE, PAL 0mV) is assigned a value of 16, and video white (NTSC 100 IRE, PAL 700mV) a value of 235. This allows for reasonable footroom and headroom in the signal.
When importing or exporting your frames, it is important to use a consistent color mapping method. Most digital nonlinear editing systems now handle RGB levels correctly without any conversion on your part. The default presets will correctly map 100 on the RGB scale to 100 IRE. Each manufacturer calls things by a slightly different name (for example on an Avid you would import with RGB levels, on Final Cut Pro you would use the default setting to process Maximum White as White option). Be sure to see your NLE owner’s manual for proper details.
If you are working with 601 levels (such as for an analog video switcher), I suggest you label the files as such. Just add 601 to the file name of graphics prepared with 601 compliant levels. For more on broadcast-safe color, see Chapter 9, “Color Correction: How to Get It Right.”
“Print-Worthy” Frame Grabs
One of the most common requests I hear is the desire to take frame grabs from video and format them for use in print. Unfortunately, the mediums just don’t mix very well. Remember, in order to capture between 24 to 30 frames per second, a small image is grabbed. Depending on your format, you end up with around 640×480 square pixels of information. If you condense these pixels to a print resolution of say 300 ppi, you get a print size of about 2×1.5 inches—slightly larger than a postage stamp, but not very useful for most printing jobs.
In Photoshop, we can “up-rez” an image through the Image Size command (Image>Image Size). Since this information does not currently exist, the computer will attempt to interpolate the information. I recommend that you switch pixel dimensions to percent, and then up-rez exactly 200% using the nearest neighbor interpolation method. Are the results great? No. But they are acceptable for some uses. You should consider taking the image to a service bureau and getting it outputted on a dye-sublimation printer, which produces photolike output from smaller resolution files.
An excellent Photoshop plug-in called Genuine Fractals uses advanced processing to generate high-quality files from low-quality sources. You can find out more information at http://www.ononesoftware.com.
Luminance and Saturation
Color choice has two issues, broadcast-safe and good taste. Many excellent books are available to assist you with color choice. The principles of a color wheel and selecting harmonious colors are worth your time to study. To get you started, I’ve included a demo of Color Theory, a Photoshop plug-in, on the disc. Color Theory helps you select color combinations that look good on video. Use this as a starting point to selecting good colors.
Superblack (aka, Zero Black)
A pure luma value of 0 IRE, which falls below the legal limit of 7.5 IRE for NTSC broadcasting. It is often used for luma-keying, a process of transparency generation that would not tie up a second channel of a switcher (for the matte) in order to perform a key.
Unfortunately, video is a limited medium with a limited color palette. You need to learn which colors look good on video and, even more importantly, which colors look good on DVDs played back on $39 players. It is a good idea to test your graphics often on a vectorscope and waveform monitor, especially for your first few years of working in Photoshop. For more on testing graphics, see Chapter 13, “The Road to the NLE.”
To make things simpler, here’s a crash course in building your own “big box of crayons.” Here are a few color rules to keep in mind:
• Certain colors do not look good on video. Reds have a tendency to bleed on screen; light yellows look like a dog used your TV as a fire hydrant.
• Oversaturated colors will cause problems. Consumer televisions ship with the saturation and red tones turned up too high. You can’t tell the customers that they’re wrong (even if their TVs are), so turn down the saturation on bright colors. Muted colors will become more vibrant once they make it out to televisions.
• Avoid extremely dark colors. On video, there is very little difference between indigo, charcoal, and slate. Dark tones tend to gravitate towards black in the viewer’s eyes.
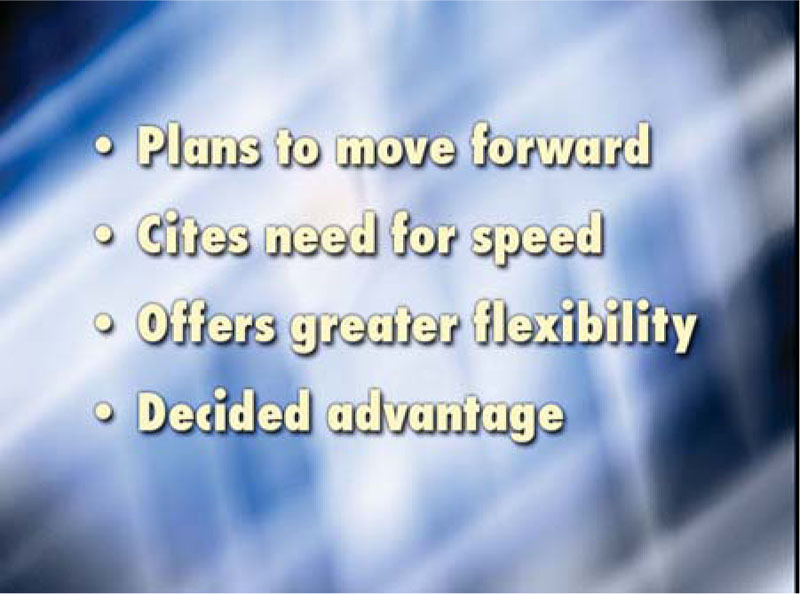
• Maintain proper contrast. Some viewers will view your work on black-and-white sets; others may be color-blind. Even those with perfect eyes will have a hard time seeing a difference in grayscale contrast between certain color combinations such as blue and purple or red and green. Print your graphics out in grayscale, tape them on the wall, and stand back 15 feet. Can you read it clearly?
• Avoid “pure” white. It will bloom on screen, making it difficult to read. Use off-white, especially for text. Also stroke the text with a contrasting color. For more on making readable text, see Chapter 5, “Some Words on Words, Logos, and Symbols.”
• Not all graphics need to be full chroma. Using one color— for example, a base blue—with multiple shades, with darker and lighter accents, often looks very good. Duotone effects, where a grayscale image has a new color mapped to it, often look good as well.
• When in doubt, use the NTSC Colors filter (Filter>Video> NTSC Colors) to check your work. But do not rely on the NTSC color filter to fix problems as it produces visible banding. See Chapter 9, “Color Correction: How to Get It Right” for more information.
Without proper contrast, details may be difficult for your audience to perceive. Combinations such as red and green do not offer sufficient contrast. To test your graphic, use a Saturation Adjustment Layer to desaturate your composition.
A gradient map is identical to After Effects’ Colorama filter. Both provide a great way to map new colors to an image and give it identity.

“Whiter than White”
Cameras have extra headroom in capturing luminance. These values beyond broadcast white may need to be adjusted in the edit environment to bring the video signal in compliance with broadcast standards.
Working with Document Presets
Depending on which version of Photoshop you have, there are presets to use for standard canvas sizes. The newer your version of Photoshop, the more accurate and complete your choices are.
Online Color Wheel
If you need to try out different color combinations, be sure to try Kuler from Adobe labs (kuler.adobe.com). This flash-based application lets you browse a wide variety of designer created color schemes as well as create your own. It supports all the major rules from Analogous to Shades. The controls are beautifully designed and the entire application really inspires creativity. In order to access it, you will need a live connection to the Internet.
Photoshop CS3’s Presets
Photoshop CS3 refines the document-preset system. When you choose the create a new document (File>New . .) you are presented with a similar window to past versions. However, you now must specify a category in the Preset List (in this case Film & Video). Photoshop then offers 10 standard-definition presets, 5 high-definition presets, and 4 film resolution presets.
These templates include nonsquare pixel support, as well as safe-title overlays. By default they are set to the proper RGB color mode and to the more widely accepted 8 Bits/Channel mode. You can of course change to 16 Bits/Channel mode before clicking OK.

Photoshop CS and CS2’s Presets
Video presets with support for nonsquare pixels launched with Photoshop CS. Adobe initially offered 9 presets for both standard and high-definition video. With Photoshop CS2, Adobe expanded support for HD documents and brought the total of presets to 10. These presets can be picked from a dropdown menu when you create a new document ![]() .
.
You can access templates NTSC and PAL systems, Standard or Widescreen, and 601, DV/DVD, or HDTV. These templates were a well deserved addition to Photoshop (especially since it started its life as a tool for touching up video and film frames).

Photoshop 7’s Presets
In an effort to make life easier, Photoshop 7 introduced preset document sizes. These can be picked from a dropdown menu when you create a new document ![]() . You have the choice between NTSC and PAL sizes, Standard or Widescreen, and 601, DV/DVD, or HDTV. These presets are useful, but they have a few flaws.
. You have the choice between NTSC and PAL sizes, Standard or Widescreen, and 601, DV/DVD, or HDTV. These presets are useful, but they have a few flaws.

First, always check your Image menu. Photoshop presents you with five choices; RGB is the correct one. The second problem: no title- or action-safe guidelines. Action-safe shows the portion of the frame that should show on all TVs. Title-safe is the area in which titles should be created to minimize any text crowding at the edges. If you want to manually add these, the safe-action area is 10% of the original image, and the title-safe area is 20% of the original frame size.
Step 1. Create a new video-sized document.
Step 2. Turn on rulers by pressing ![]() .
.
Step 3. Right-click on the rulers and change the units to Percent.
Step 4. Add eight guides total—four horizontal and four vertical. Add them at 5%, 10%, 90%, and 95%.
Photoshop Toolbox is a CD with actions, tutorials, royalty-free graphics, and tutorials that teach and assist Photoshop users in designing graphics for video. Tools for Television PRO is a standalone application that adds a video-specific palette to Photoshop that provides productivity tools such as template creation, automatic alpha channel creation, frame grabbing from live video, and automated creation of titles and other video-related graphics. Look for a sample of the actions and a demo of both (as well as a special upgrade offer) on this book’s DVD-ROM.

If you are using Photoshop 7 (or earlier) and don’t want to create your own safe-title document, then I recommend the Tools for Television Photoshop Toolbox (http://www.toolsfortelevision.com). This solution provides actions for creating safe-title documents (and many other cool things as well). The entire sets add up to only 704 kilobytes, far smaller than even a single template graphic. They work extremely well and are very accurate. You can find a demo for Tools for Television (as well as a discount offer) on the disc.
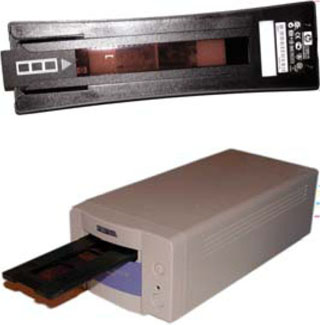
Advice When Scanning
A common way to get images into Photoshop involves using a scanner. There are scanners for traditional photos as well as specialized scanners or adapters for slides and negatives. The good news is that scanners are almost as common as inkjet printers and the prices have fallen drastically. A video pro can get a perfectly acceptable USB-powered scanner that is cross-platform for $100. Sure, you can spend more and get more, but chances are you scan only a few items per project. Here are a few tips to keep in mind about scanning images.

• Before scanning an image, install the software needed by your scanner provided by the manufacturer.
• The most important thing to remember when scanning is to be consistent. In a multiuser environment, this means posting the scanning guidelines on the scanner lid. A little consistency goes a long way in speeding up workflow.
• Ensure that the scanner is lying flat, or you may get misregistered scans.
• Use a gentle glass cleaner whenever smudges appear. Spray the cleaner on the soft cloth, and then wipe the scanner bed down.
• Make sure your photos are clean before scanning. Never write on the back of photos; instead write on a Post-It note and then adhere it to the back.
• Align your photos on the scanner. Use the edges to help you maintain parallel edges on your photos. If you get crooked photos, use the automation command File>Automate>Crop and Straighten Photos.
• If your scanner allows you, set the white and black points before scanning. Think of this as a white and black balance that you would do with a video camera. This will produce the best tonal range. You can then use Photoshop’s color correction tools to adjust the white and black points as well as make additional color changes.
• If you are scanning in previously printed items such as newspapers, magazines, books, or inkjet prints, you will likely get a moiré pattern. This noise is caused when Photoshop scans the small spaces between the previously printed dots. Most scanners have a de-screen filter in their software. If available, use it when scanning previously printed items. If this is not available, run the Median filter at a low value (Filter> Noise>Median).
• If you are scanning three-dimensional objects, place a piece of clear glass or plastic on top of your scanner’s tray to protect it from scratches. You can also remove the scanner’s lid and place a shadow box or black cloth on top of large objects.
• Scan at the quality you need. For video, scan so you have approximately 4000 by 3000 pixels. This is generally enough pixel information so you can zoom in for corrections. This will also allow you to crop at a later time, or perform motion control in After Effects or your nonlinear editing system. Remember, you can go down, but you can’t go up.
• Save to uncompressed formats such as TIFF, PICT, or Targa for maximum compatibility and disk space usage. The PSD format is great for layered files, but is not as efficient for single layered files. Always use the appropriate file extension for your file type.
• Routinely check your manufacturer’s Web site for new drivers. This software improves upon how well your scanner interfaces with Photoshop. The updates are generally free.
• If your scanner malfunctions, power down your system, and check your cable connections. When satisfied, power up the scanner first and restart your computer. If the problem is not fixed, check for new drivers.
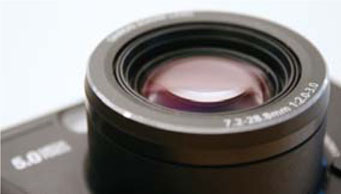
Working with Digital Cameras
Digital cameras are generally more expensive than their analog companions. Remember though that you can get by with a camera resolution as low as a 2.1 megapixels. The convenience offered by a digital camera might just help you make a deadline. The elimination (and cost) of developing and scanning makes these a viable choice for video pros. I encourage you to add a digital still camera to your video production equipment; it will come in handy both in the field and back in the office.
Using Raw Files
If you are in the market for very high quality, take a look at cameras that support raw file formats. When digital cameras first launched, manufacturers settled upon JPEG files as a compromise. Storage options were very expensive and JPEGS are very small files. These days though, JPEG is being replaced by raw files.
Newer digital cameras (usually pro models) offer newer formats that capture the raw image data. These new formats offer several benefits over shooting JPEG. Most raw files have a depth of 12 Bits/Channel instead of the 8 used by JPEG. This higher rate allows for a greater tonal range. This gives you better exposure for shadows and highlights.

Camera raw files can be two to six times larger than JPEG files. This extra data is used to hold more image data. This can reduce, or even eliminate, compression artifacts. However, that extra space can take longer for the files to write to the memory card. If you aren’t currently acquiring images using a raw file format, I highly encourage you to switch.
Raw Takes More Space
Camera raw files can be two to six times larger than JPEG files; they also require additional processing with the Adobe Camera Raw interface. For more on the Camera Raw.
Importing Digital Photos
There are two major ways of acquiring images from a digital camera. The first involves plugging the camera in with a USB cable. Usually this cable is included with a camera, but a spare is easy to come by at most computer stores. The advantage of this method is that there is no need to purchase additional hardware. The primary disadvantages of this method are that it ties up the camera. It is also easy to damage the delicate ports on the camera by frequently plugging the cable in.
You can purchase stand-alone memory card readers that can read one or multiple formats. Some allow you to read only, which is fine for copying files. Others allow you to read and write, which is helpful for erasing the memory card when you are done copying. A wide variety of manufacturers sell USB card readers priced between $25 to $60; check the packaging for compatibility. Laptop users with a PC slot can purchase an effective card adapter for around $25 for most formats.
Video #3 An Overview of the Camera Raw Interface
To see the Adobe Camera Raw interface in action, be sure to check out the book’s DVD-ROM for a video tutorial.
A Better Bicubic
Newer versions of Photoshop offer two additional versions of Bicubic Sharpening. You can choose Bicubic Sharper for better results when shrinking an image. If you are going to attempt to up-res an image, then be sure to choose Bicubic Smoother.
Managing Digital Photos
As your digital library continues to grow (and grow) you will need to turn to a digital asset management solution. Depending upon your budget and the volume of photos you have, take a closer look at the following solutions:
• Adobe Lightroom: This catalog and imaging solution is provided for both Macs and PCs. It is targeted to towards imaging professionals.
• Adobe Photoshop Album: This catalog solution is targeted towards less savvy or budget-conscious users.
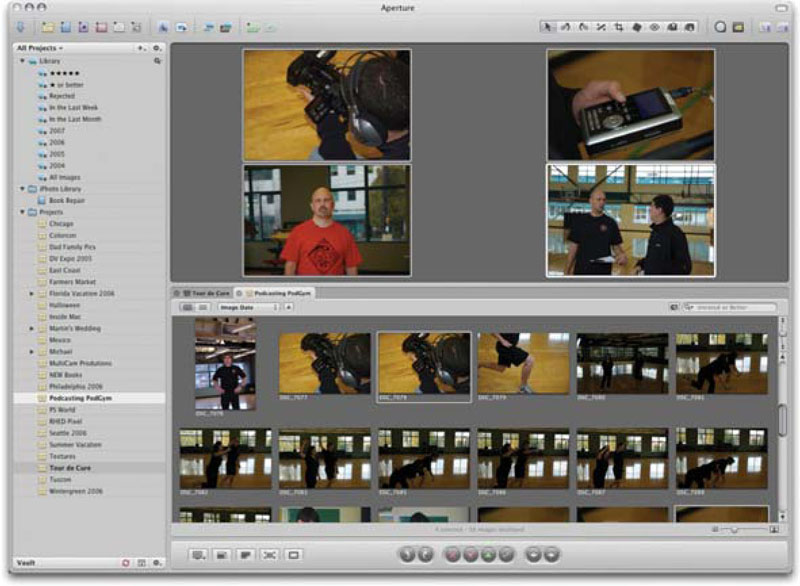
• Apple Aperture: This cataloging application is designed to harness the power of modern Macintosh computers. It offers several flexible options for managing and processing digital photos.
• Apple iPhoto: This solution works well for the Mac (and it’s bundled with new machines as part of the iLife suite). You can also modify iPhoto’s preferences so that double-clicking a photo opens it in Photoshop.
Resizing Commands
If you have an existing image, chances are great that it’s not sized correctly for video. You will need to take in account pixel aspect ratio as well as canvas size. To change the size of an image, you can use the Image Size or Canvas Size menu commands or use the Crop tool for the adjustment. These three choices can be used individually or in combination to achieve the desired results.
Image Size Command
The Image Size command (Image>Image Size…) lets you permanently reassign the total pixel count, as well as resolution, for a particular image. It is critical to make sure the Resample Image box is checked; otherwise you will not be able to change the document size. It is best to use bicubic interpolation for resizing most images.
Leave the Constrain Proportions box checked, or you will introduce additional squeezing. You are concerned with the pixel dimensions, so look at the total pixel count in the top boxes. Many editors choose to specify the resolution as 72 pixels per inch, although this is not necessary.

Canvas Size Command
The canvas size is your work area. Canvas size adjustments are a way to crop or extend the canvas of the work area. When you first launch the Canvas Size command, you are likely to see measurements in inches. The key is to change the units of measurement to pixels. You can temporarily change the units of measurement to pixels (with the drop-down lists) or permanently change your units of measure in Units and Rulers in the Preferences area (see Chapter 1).

Once you are measuring in pixels, type in the desired size and specify an anchor point. The anchor point tells Photoshop whether you want to keep the image centered or expand/crop from a particular edge. Photoshop will either contract or expand based upon the input values. It is possible to extend the border of an image, particularly on a source with portrait aspect ratio. In this case, the empty space surrounding the image would be filled by the background color.
Pixels are All that Matters
Pay close attention to the pixel dimensions when sizing an image. The document size does not matter for video purposes.
Crop Tool
The Crop tool is the fastest way to size an image for video. Cropping is a way to remove parts of an image permanently in order to create a focal point. Additionally you can use the Crop tool to resize an image.
You can perform a crop two ways. The first is to make a selection with one of the selection tools (such as the Rectangular Marquee). You then choose Image>Crop. Most users find that the Crop tool provides better control. You can select it by pressing the letter C on your keyboard. Draw to make a selection then click the commit check mark in the options bar (or press the ![]() key).
key).
Resizing an Existing Image
Let’s get some hands-on practice using two techniques. The first technique, the Power Crop, works for all versions of Photoshop. The second technique, the Nonsquare Place, requires Photoshop CS or later.
Video #4 Resizing in Action
See the Image Resizing video tutorial on the DVD-ROM.
Power Crop
It’s very easy to size a graphic using the Crop Tool. The Power Crop technique will let you crop and size in one step. Let’s give it a try; open up a photo of your own or use the photo Ch2_Size1. tif in the chapter’s folder on the DVD-ROM. If working with a square pixel source (even if working in Photoshop CS), be sure to crop with one of the square pixel presets.
Nondestructive Crop
Did you know that you can crop without permanently discarding image data? Simply double-click on the Background Layer and name it before you initiate the Crop. Then, after marking the crop, click the Hide radio button in the Options Bar and click Apply.
Step 1. Select the Crop tool in the Tool Box or press C.
Step 2. In the options bar, type in the square pixel size for your video editing system. For this sample project use 720 px × 540 px. Be sure to enter px after each number so Photoshop knows you are measuring in pixels.

Step 3. Click and drag in the upper left corner of the image and drag diagonally towards to lower right corner. Highlight the area of the image you’d like to keep. When you drag to crop the image, your box will constrain to the proper aspect ratio. This allows you to resize and crop in one step. The shielded (darkened) areas will be cropped when you press ![]()
![]() or click on the Commit button in the Options bar. To toggle the shielded area off, press the forward slash
or click on the Commit button in the Options bar. To toggle the shielded area off, press the forward slash ![]() .
.
Step 4. To convert to nonsquare pixels, you can choose Image> Image Size…. Uncheck the Constrain Proportions box and enter the correct height in nonsquare pixels (in this case 486 px). If you are unsure of the correct heights, see page 34.
Nonsquare Place
If you are working with Photoshop CS (or newer), you can use the Place command and a nonsquare preset to create video graphics. This method takes as much time, but doesn’t require you to remember document sizes.

Step 1. Create a new document using a video preset. For this example use the NTSC D1 document sized 720×486.
Step 2. Choose File>Place … in the dialog box to navigate to an image you’d like to use. If you need an image, use the file Ch2_Size2.tif on the DVD-ROM. Select the image and click Place.
Step 3. The image is added to the canvas with control handles for sizing. Hold down the ![]() key to constrain proportions and the
key to constrain proportions and the ![]() key to scale from the center. You can drag the image around to reposition it on the screen.
key to scale from the center. You can drag the image around to reposition it on the screen.
Step 4. Press the ![]() key or click the Commit button in the Options Bar. The image is sized and its pixel aspect ratio is converted to match the open document.
key or click the Commit button in the Options Bar. The image is sized and its pixel aspect ratio is converted to match the open document.
Final Advice
I have sat in workshops where the entire time has been eaten up by conversations on frame size and pixel aspect ratio. We seem to accept our frame rates of 29.97 fps (or 25 fps) with little question. But the mixing of square and nonsquare pixels is often mind-boggling. Pixel aspect ratio is the most boring and inflexible aspect of designing graphics for video. You can choose to fully understand it, use templates, or keep a list of presets and notes next to your computer. Whatever it takes, accept it, embrace it, use one of the aforementioned techniques consistently, and move on. On behalf of you, the reader, let’s get to the fun stuff!
Speed Up Cropping
To make things even <ieq> easier, harness the power of Photoshop’s Preset Manager. You can create tool presets that already have the values for a tool loaded. In fact, on the DVD-ROM you’ll find a file called VideoCrop.tpl in the chapter’s folder. Locate your Tool Presets folder (Adobe Photoshop CS3>Presets >Tools) and copy in the file. The next time you launch Photoshop, the different aspect ratios required for video will be available from the Tool Presets tab or a drop-down menu in the Options bar.
Hands On | 02
Creating Custom Backgrounds—with Glen Stephens
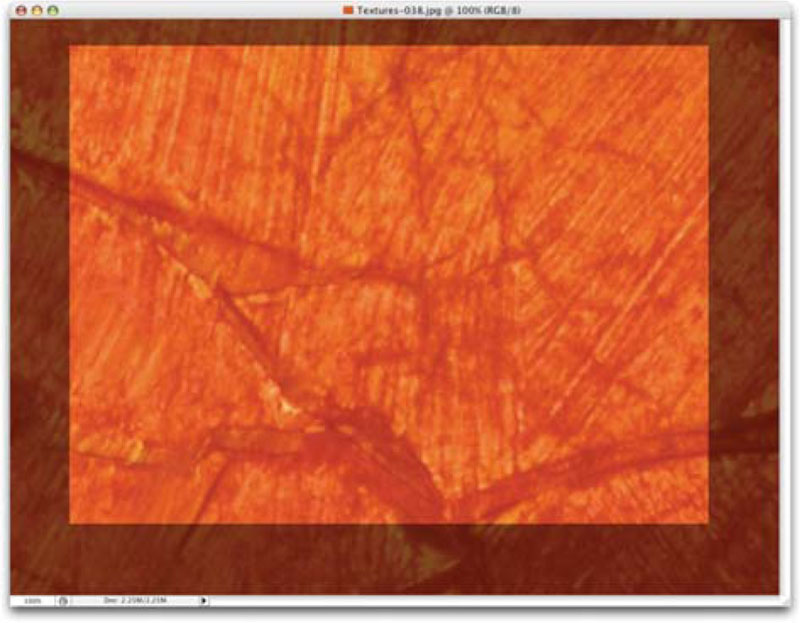
By combining multiple grayscale textures using blend modes, new textures can be generated. Using blending modes ensures several different looks based upon the randomness of mixing your textures together. These looks can then be colorized or further modified to create entirely new backgrounds that are well-suited for video. In fact a texture library can be used to quickly create DVD menus, lower-thirds, or full-screen graphics.

You’ll find several textures on the DVD-ROM that can be used to create all new backgrounds. Be sure to complete this tutorial, then utilize the many textures to create our own backdrops.
You’ll find Exercise 02 on the DVD-ROM.
PROfile: Angie Taylor

Angie Taylor’s animations, visual effects and motion graphics have been a regular fixture on European screens for many years. She’s produced work for a broad range of clients including the BBC and Channel 4 in the UK. She has worked alongside some of the most innovative directors in the UK including John Williams and Chris Cunningham. Last year she created visual effects for John Williams’ ground-breaking short film, “Hibernation” which picked up awards at the Edinburgh International Film Festival and the Rhode Island Film Festival, among others.
Angie is currently taking a year out from production work and writing to focus on a personal project. She has written and designed characters and plots for an animated series and is in the process of art direction and storyboarding with an aim to getting it commissioned.
Angie works from her home-based studio in Brighton, a vibrant seaside city on the south coast of England well known for its population of creative businesses and individuals. She also commutes into central London to work on a freelance basis for other production companies.
“Most of the work I’ve undertaken has been for television although I am now getting into film work,” said Angie. “I use a Mac desktop system to design and produce my animations, although most of my work is done on my MacBook Pro. Brighton has the first wireless seafront in the UK so I can work in any bar or café on the beach whilst sipping coffee and watching the world go by.”
“I try to provide plenty of variety in terms of graphic style. You need to always push forward and endeavor to improve on what you’ve already done, exploring new methods and techniques constantly. For example, I’ve just recently been trying out a Cintique from Wacom to draw my characters with. It’s introduced a whole new perspective to my work, although it’s not quite portable enough to take to the beach!”
The flexibility of desktop systems has allowed Angie’s business to grow and adjust to economic change. “Working on desktop systems opens up a lot in terms of being able to have more than one designer working on some of the bigger projects. Rather than having one person working on a Henry or Flame, I can sub-contract other freelancers and have two or three people working on their own desktop systems.”
Despite her mastery of everything desktop video has to offer, Angie Taylor took a roundabout path to the video industry. After earning an honors degree in sculpture and drawing, she set off for London to be a prop maker for the television and theatre industry.
“As a result I visited various special effects departments and was fascinated by them. At that time computers in that field were still in the very early stages.”
“One thing led to another and, for a time, I became involved in producing original artwork for the music industry as well as deejaying in the London club scene. Then one day, one of the record companies sent me to a graphic design studio. From across a crowded room I saw a guy using Photoshop on a Mac to composite my images together. It was love at first byte!”


“I’d used music sequencers when I was deejaying, which led me to think that surely you could sequence images in the same way? A friend then acquainted me with Photoshop and After Effects on a Mac and I’ve worked with them ever since.”
Angie is an expert at combining Photoshop and After Effects together to produce unique results. Angie has written a successful book entitled “Creative After Effects 7” which contains several interactive tutorials that teach the techniques she uses in her everyday work.
Angie is also a regular demo artist for Adobe and Apple, as well as a popular presenter of After Effects and Photoshop in Europe and the United States. If you ever get a chance to see Angie present, her creativity and expertise burst through.
Angie says that dreaming about possibilities really opens up her video work. “I like to learn the software inside out so that I really know what its capable of,” said Taylor. “I have a natural inquisitiveness about how things work and this takes me beyond the everyday functions of an application and into the nitty-gritty.”
Angie puts Photoshop through its paces. She uses it to prepare images for TV broadcast as well as to draw her characters for her layer-based animations. She also employs its powerful Vanishing Point tool, Healing Brush, and Photomerge features to create background and scenes for her animations. Angie is quite adept at designing multi-layered templates, creating backgrounds and textures which are used on-screen by clients requiring professional graphics to give their edits a more polished finish. She regularly uses Photoshop to design menus and graphics for DVDs as well as for her own Web sites.
When asked to define a Photoshop Power user, she replied: “It’s somebody who really understands fundamentals like channels and paths; and who knows how to control and manipulate images without losing vital information. They would constantly push the tools to do new and interesting things, discovering original techniques and driving the software forward.
“I have an obsession for knowing what every single menu item does in a software application,” said Taylor. “If I find an item that I don’t understand, I delve into the Help files to find out; if that doesn’t help I get onto the user forums. It’s amazing how quickly you learn the software if you develop an obsession like mine!”
Angie also offered a few of her favorite keyboard shortcuts to speed up your Photoshop work:
• Use ![]() to load default colors of black and white for masking
to load default colors of black and white for masking
• Use the ![]() button to toggle between black and white when in Quick Mask mode.
button to toggle between black and white when in Quick Mask mode.
• Hold down the ![]() when making a selection to move the selection.
when making a selection to move the selection.
• ![]() to place a selection onto a new layer Taylor stressed that the key to success in this field is to “Work
to place a selection onto a new layer Taylor stressed that the key to success in this field is to “Work
• bloody hard and love what you do.” She also said that being flexible, comfortable and knowledgeable with your tools would keep your clients coming back for more.
“Clients are encouraged to sit with me in the preliminary stages, experimenting and interjecting ideas here and there,” said Taylor. “I think it’s important to deliver on time, especially when you're a one-stop-shop or a freelancer. People need to depend on you and you need to prove yourself a little more than the big production companies do.”
To see more of Angie’s work, visit: