18
GAME STATE, MENUS, SOUNDS, AND SPECIAL EFFECTS
In this chapter, we’ll add the concept of state to Schoolhouse Skateboarder. The state of a game is what mode the game is in, such as whether the game is running or has ended and is waiting to start again. Up until this point, the game was always running, and it immediately started over when it ended. Keeping track of the game’s state will allow us to add a simple menu system to show when the game is over. We’ll also add some sounds to the game and create some special effects using a particle emitter.
TRACKING GAME STATE
First we’ll create an enum that lists the various states the game can be in. Add this new enum inside the GameScene class, just after the BrickLevel enum:
GameScene.swift
enum BrickLevel: CGFloat {
--snip--
}
// This enum defines the states the game may be in
enum GameState {
case notRunning
case running
}
Note that this enum is placed inside the GameScene class because it won’t be needed by any other class outside of GameScene. Unlike the enum we created for BrickLevel, this enum doesn’t have a raw value. This enum just contains the cases we need to create a GameState data type, and we don’t need to associate any values with each case. When the app is first started, the state will be notRunning. While the game is being played, the state will be running. When the game has ended and is waiting to start over, the state will be set back to notRunning. Putting these states in an enum makes it easier to expand the game in the future and add more states. For example, if we added a pause button, we could add a paused case to this enum.
Next, we need a class property to track the current value of the game’s state. We’ll call it gameState and put it in the GameScene class just after the brickLevel declaration, as shown here:
var brickLevel = BrickLevel.low
// The current game state is tracked
var gameState = GameState.notRunning
// Setting for how fast the game is scrolling to the right
This new variable, gameState, will track what state the game is in. We set its initial value to notRunning since that’s the state we want the game to be in when the app first starts.
When the game starts, we need to set our gameState to running. Add this line to the startGame() method:
func startGame() {
// When a new game is started, reset to starting conditions
gameState = .running
resetSkater()
And when the game ends, we want to make sure we set the state back to notRunning. Add this line to the gameOver() method:
func gameOver() {
// When the game ends, see if the player got a new high score
gameState = .notRunning
if score > highScore {
Now that we have a variable to keep track of our game’s state, we need to do something with it. If you run the game right now, you’ll see that a new game still starts immediately after the current game ends.
To get the game to actually stop, first remove the startGame() method call from the gameOver() method so it doesn’t automatically start a new game:
func gameOver() {
--snip--
if score > highScore {
--snip--
}
startGame() // ← Remove this line of code
}
If you run the game now, a new game will not automatically start when the skater falls off the screen. Instead, the bricks will continue moving. To make game updates stop when the game is over, add this code to the update(_:) method:
override func update(_ currentTime: TimeInterval) {
if gameState != .running {
return
}
// Slowly increase the scrollSpeed as the game progresses
Now our game loop won’t do anything unless the game is running. This is because the method ends at the return keyword and all the following code won’t be executed. Run the game again, and you should see everything stop when the skater falls down or gets pushed off the screen. This isn’t a very friendly game-over screen, though. We need to add a menu system to tell the player that the game is over and let them know they can tap to start a new game.
ADDING A MENU SYSTEM
We’ll add two menu screens to the game: one that appears at the start of the game to instruct the player to tap to play and another that appears at the end of the game to let them know the game is over.
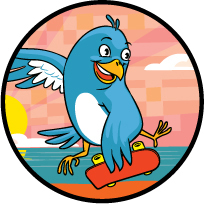
To add the menu screens, we’ll create a new class called MenuLayer. Then we’ll create one MenuLayer object for each screen, so we’ll end up with two MenuLayer objects in total. The class will be a subclass of SKSpriteNode, and we’ll use it to display messages on the screen, such as “Tap to play” or “Game Over!” This MenuLayer class will essentially be our menu system for the game. Figure 18-1 shows how our completed menu screens will look.

Figure 18-1: The “Tap to play” menu layer will be shown when the app is first run, and the “Game Over!” layer will be shown once the game ends.
Menu screens usually have multiple options for the user to pick from, but ours will just be used to display simple messages. If we were going to add an option such as the ability to turn sounds on or off, this menu layer would be a good place to do that, too.
CREATING THE MENULAYER CLASS
To make the MenuLayer class, create a new class by right-clicking (or CONTROL-clicking) the SchoolhouseSkateboarder folder in the Project navigator and selecting New File…. Choose the iOS Source template called Cocoa Touch Class. Name the new class MenuLayer, make it a subclass of SKSpriteNode, and choose the default file location to create the new file. Your new class should look like this:
MenuLayer.swift
import UIKit
class MenuLayer: SKSpriteNode {
}
Just like when we created the Skater class, the first thing we need to do is change the import statement to the following:
import SpriteKit
Now create a new method inside the MenuLayer class that will allow us to display messages:
// Tells the MenuLayer to display a message and to
// optionally display a score
func display(message: String, score: Int?) {
}
This method will be used to present messages—such as “Game Over!”—in a menu layer. It will also allow us, if we wish, to display the player’s score, which we’ve defined as an optional. First, let’s add the code that creates the main message label. Add this code inside the display(message:score:) method:
func display(message: String, score: Int?) {
// Create a message label using the passed-in message
➊ let messageLabel: SKLabelNode = SKLabelNode(text: message)
// Set the label's starting position to the left of the menu layer
➋ let messageX = -frame.width
➌ let messageY = frame.height / 2.0
messageLabel.position = CGPoint(x: messageX, y: messageY)
➍ messageLabel.horizontalAlignmentMode = .center
messageLabel.fontName = "Courier-Bold"
messageLabel.fontSize = 48.0
messageLabel.zPosition = 20
self.addChild(messageLabel)
}
This code should look familiar because it’s very similar to the code we wrote in the setUpLabels() method in the GameScene class to create the score labels. At ➊, we create a label using the message parameter that was passed in to the method as the text to display. Next we determine the starting position of the label. We’ll use an action to animate the label moving from the left side of the screen to the center of the screen. In order to do that, we need to first set its position off the screen to the left.
At ➋, we use -frame.width as the x-position to set the label one full screen’s width to the left. At ➌, we use frame.height / 2.0 as the y-position to set the label vertically in the center of the screen. We also want this label to be centered horizontally within its frame, so that when we move the label to the middle of the screen, it will be perfectly centered. To do this, we set the label’s horizontalAlignmentMode to .center at ➍. Now that we’ve positioned the label, we set its font, font size, and zPosition and add it as a child of the MenuLayer.
Using Actions to Animate the Label
There’s a reason we gave the label an x-position to place it off to the left side of the screen and a y-position to place it vertically in the middle of the screen. We want to add some flair by having the label zoom onto the screen! Add this animation code to the display(message:score:) method:
MenuLayer.swift
self.addChild(messageLabel)
// Animate the message label to the center of the screen
➊ let finalX = frame.width / 2.0
➋ let messageAction = SKAction.moveTo(x: finalX, duration: 0.3)
➍ messageLabel.run(messageAction)
}
The line at ➊ calculates the final x-position where the label should move in order to end up at the center of the screen. The line at ➋ creates a new object called an SKAction. In SpriteKit, you can use an SKAction to do a huge number of interesting things with nodes—everything from spinning around and fading out to moving along a path. Here we’re using moveTo(x:duration:), which creates an action to move a node to a new x-position. We pass in the finalX position that we calculated before and give it a duration value. The duration value tells the action how long the animation should take. We want the label to zoom onto the screen pretty fast, so we set a short duration of 0.3 seconds.
Finally, the line at ➌ tells the message label to run this action. Actions that you create describe what a node should do, but nothing will happen until you tell a node to run that action.
Table 18-1 describes some common action methods.
Table 18-1: Common SKAction Methods
SKAction method |
What it does |
move(to:duration:) |
Moves the node to a new location |
moveTo(x:duration:)
|
Moves the node to a new x-position, keeping the same y-position |
moveTo(y:duration:) |
Moves the node to a new y-position, keeping the same x-position |
move(by:duration) |
Moves the node by a given amount from its current location |
rotate(toAngle:duration:) |
Rotates the node to a new angle |
rotate(byAngle:duration:) |
Rotates the node by a given angle amount |
resize(toWidth:height:duration:) |
Resizes the node to a new width and height |
resize(byWidth:height:duration:) |
Resizes the node by the amounts given |
scale(to:duration:) |
Scales the node to a new scale; for example, if the node was originally at a scale of 1.0 (the default), scaling it to 2.0 would double its size |
fadeIn(withDuration:) |
Fades in the node |
fadeOut(withDuration:) |
Fades out the node |
playSoundFileNamed(_:waitForCompletion:) |
Plays a sound file, such as a .wav file |
sequence(_:) |
Sequences multiple actions together |
As you can see, there’s quite a lot you can do with an SKAction! You’ll notice that many of the SKAction methods have a to version and a by version, such as move(to:duration:) and move(by:duration:). The to version of an action just does the action no matter what the state of the node was originally. For instance, if you want to move a sprite to a new location, say to the middle of the screen, you would use the to version and set the new location. The node will move to the location regardless of whether it was originally offscreen, onscreen, or to the left or right of the new location. If you want to make the node move according to where it is already positioned, you would use the by version of the action. For instance, if you wanted to make a sprite move 50.0 to the right of its current position, you would use move(by:duration:) with an x amount of 50.0.
Now that we have the message label set up, let’s add the code to optionally display a score label so the player can see their final score at the end of each game.
Optionally Showing a Score Label
In our display(message:score:) method, the score parameter is optional. So we need to check if it exists before we can display the player’s score on the game-over screen. If the score was passed in and is not nil, then we’ll show a score label that animates in from the right side of the screen. If the score parameter doesn’t exist, then the score label won’t be created. Add this code to the display(message:score:) method:
MenuLayer.swift
class MenuLayer: SKSpriteNode {
// Tells the MenuLayer to display a message and to
// optionally display a score
func display(message: String, score: Int?) {
--snip--
messageLabel.run(messageAction)
// If a score was passed in to the method, display it
if let scoreToDisplay = score {
// Create the score text from the score Int
let scoreString = String(format: "Score: %04d", scoreToDisplay)
let scoreLabel: SKLabelNode = SKLabelNode(text: scoreString)
// Set the label's starting position to the right
// of the menu layer
➊ let scoreLabelX = frame.width
➋ let scoreLabelY = messageLabel.position.y - ![]()
messageLabel.frame.height
scoreLabel.position = CGPoint(x: scoreLabelX, y: scoreLabelY)
scoreLabel.horizontalAlignmentMode = .center
scoreLabel.fontName = "Courier-Bold"
scoreLabel.fontSize = 32.0
scoreLabel.zPosition = 20
addChild(scoreLabel)
// Animate the score label to the center of the screen
➌ let scoreAction = SKAction.moveTo(x: finalX, duration: 0.3)
scoreLabel.run(scoreAction)
}
}
}
The code for the score label is practically identical to the code for the message label. The only difference is that the label is first positioned with an x-position just off the right edge of the menu layer ➊ and a y-position that is just below the message label ➋. Just like the messageLabel object, after the scoreLabel object is created and added as a child of the MenuLayer class, it’s animated to the center of the screen via an SKAction ➌.
DISPLAYING THE MENU LAYERS WHEN NEEDED
Now that we have the MenuLayer class set up, we need to actually use it to make the menu layers. The first time we want to show a menu layer is right when the application starts. We don’t want the game to just automatically start anymore. Instead, we want the player to see a menu screen asking them to tap the screen to start playing. So, in the didMove(to:) method of the GameScene, remove the line of code that calls the startGame() method, and add this code in its place to display a menu layer:
GameScene.swift
override func didMove(to view: SKView) {
--snip--
view.addGestureRecognizer(tapGesture)
startGame() // ← Remove this line of code
// Add a menu overlay with "Tap to play" text
➊ let menuBackgroundColor = UIColor.black.withAlphaComponent(0.4)
➋ let menuLayer = MenuLayer(color: menuBackgroundColor, size: frame.size)
➌ menuLayer.anchorPoint = CGPoint(x: 0.0, y: 0.0)
menuLayer.position = CGPoint(x: 0.0, y: 0.0)
menuLayer.zPosition = 30
menuLayer.name = "menuLayer"
➍ menuLayer.display(message: "Tap to play", score: nil)
addChild(menuLayer)
}
This code makes a new MenuLayer object with the message “Tap to play” displayed in its label. Now, instead of the game starting right away, this message will be displayed. The line at ➊ creates a UIColor using black as a starting point and then applies an alpha component of 0.4 to it. Alpha sets how transparent something is on a scale from 0.0 to 1.0. If we set an alpha of 0.0, then the color would be fully invisible or transparent. An alpha of 0.5 makes a color half transparent, like a sheer fabric. An alpha of 1.0 means that the color is completely opaque—not transparent at all. For the menu layer, setting a partially transparent background color will make it look like the menu text is on top of the game. This line just sets up the UIColor. In order to actually make the screen darken, we need to apply the color to the MenuLayer object.
The line at ➋ creates a new MenuLayer object by passing in the color we created and setting the object’s size equal to the size of the scene’s frame. This makes the menu layer as big as the game scene so it can completely cover it when shown.
The line at ➌ sets the anchorPoint of the menu layer node to (0.0, 0.0). As you learned in Chapter 14, these coordinates set the anchor point in the node’s lower-left corner. Next we set the position of the menu layer to (0.0, 0.0) as well. Because the menu layer and the scene are the same size, we can ensure that the menu layer fits perfectly over the scene by pinning both the anchor point and the position at (0.0, 0.0).
The line at ➍ calls the display(message:score:) method on our new menuLayer. We pass it the string "Tap to play" for the message that will animate onto the screen, and we pass nil for the score. We don’t want this screen to display a score, because the player doesn’t have one yet. Run the game now, and you should see the “Tap to play” menu layer appear.
There’s one other time we need to display a menu layer: when the game ends. Add the following code to the gameOver() method:
func gameOver() {
--snip--
if score > highScore {
--snip--
}
// Show the "Game Over!" menu overlay
let menuBackgroundColor = UIColor.black.withAlphaComponent(0.4)
let menuLayer = MenuLayer(color: menuBackgroundColor, size: frame.size)
menuLayer.anchorPoint = CGPoint.zero
menuLayer.position = CGPoint.zero
menuLayer.zPosition = 30
menuLayer.name = "menuLayer"
menuLayer.display(➊message: "Game Over!", ➋score: score)
addChild(menuLayer)
}
This menu layer is just like the one we created for the start of the game, except it has a different message ➊ and we pass in the player’s score ➋. So when the game ends, the screen will display both the “Game Over!” message and the score the player achieved in that game.
REMOVING THE MENU LAYER
When the player taps on the screen while on the “Tap to play” menu, we want the game to start playing. However, our game is still set up only to make the skater jump when the player taps on the screen. Let’s update the handleTap(_:) method so that the skater jumps only when the game is running and, if a menu is being shown, the menu disappears and a new game starts.
Change the handleTap(_:) method to look like this:
GameScene.swift
func handleTap(tapGesture: UITapGestureRecognizer) {
➊ if gameState == .running {
// Make the skater jump if player taps while she is on the ground if skater.isOnGround {
skater.physicsBody?.applyImpulse(CGVector(dx: 0.0, dy: 260.0))
}
➋ } else {
// If the game is not running, tapping starts a new game
➌ if let menuLayer: SKSpriteNode = childNode(withName: "menuLayer") ![]()
as? SKSpriteNode {
➍ menuLayer.removeFromParent()
}
➎ startGame()
}
}
First, we wrap the jumping code inside an if statement that makes sure the gameState is equal to .running ➊. If the game is not running, then the skater shouldn’t jump!
Next, we add an else block ➋ to handle what should happen when the player taps but the game is not running. Right now we have only two game states, running and notRunning. So if the game is not running, it must be showing a menu layer.
Inside this else block, we need to get a reference to the menu layer by asking the scene for its child node by name. Both times when we created a new MenuLayer object, we set its name property to "menuLayer" so that we could retrieve it by this name using the childNode(withName:) method. We do that here with an if-let statement ➌. Inside the if-let statement, we remove the menu from its parent ➍, which will make the menu disappear.
Finally, to close out this else block, we call startGame() ➎. That should do it—run the game now, and you should have a fully functioning menu system!
MAKING SOUNDS
While our new menu system has improved our game a lot, we can make it even more fun for players by adding some cool sound effects. Adding sound effects to a SpriteKit game is easy. It takes only one line of code to play a sound, and the right sound effects can really bring a game to life. But first we need to add the sound files to the project. We’ve prepared a couple of .wav files—one to play when the player jumps, and one to play when the player collects a gem.
ADDING THE SOUND FILES
Download the sound files you’ll need from the book’s web page at https://www.nostarch.com/iphoneappsforkids/. Once the download is complete, you’ll have a folder named ch18-sounds inside your Downloads folder with all the files you need.
To add the sound files to your project, you’ll need to drag them from Finder into Xcode and drop them in the Project navigator, near Assets.xcassets. Once you drop them, an Import Options window will pop up. Make sure Copy items if needed is checked, as shown in Figure 18-2.

Figure 18-2: Import options for the sound files
You should now see two new files in the Project navigator: jump.wav and gem.wav. Now that the sound files have been added to the project, they are ready to be used in the game.
PLAYING THE SOUNDS AT THE RIGHT TIME
First let’s add the code to play jump.wav when the player jumps. Add this line of code to the handleTap(_:) method:
GameScene.swift
func handleTap(tapGesture: UITapGestureRecognizer) {
if gameState == .running {
// Make the skater jump if player taps while she is on the ground if skater.isOnGround {
skater.physicsBody?.applyImpulse(CGVector(dx: 0.0, dy: 260.0))
run(SKAction.playSoundFileNamed("jump.wav", ![]()
waitForCompletion: false))
}
}
Since we already have a spot in the code where the player taps to make the skater jump, all we do is run an action on the scene to play the right sound file. The SKAction method playSoundFileNamed(_:waitForCompletion:) is given the name of the .wav file to play. We set waitForCompletion to false. This property would only matter if we were sequencing multiple actions together. Since we aren’t in this case, we set it to false. You’ll see an example of sequencing multiple actions together when we create a particle emitter in the next section.
To play gem.wav when the player collects a gem, add this line of code to the didBegin(_:) method:
func didBegin(_ contact: SKPhysicsContact) {
--snip--
updateScoreLabelText()
run(SKAction.playSoundFileNamed("gem.wav", ![]()
waitForCompletion: false))
}
}
}
Now when the player collects a gem by touching it, in addition to getting 50 extra points, they’ll hear the gem sound play. Run the game and see how it sounds.
SHOOTING SPARKS
Now it’s time to learn about something that will make our game even more exciting: particle emitters. A particle emitter is used in games to create special effects—snow, rain, fire, explosions, and more! You add a particle emitter to a game scene, and it shoots out (or emits) particles. The particles can be any image, such as a snowflake, a blob, or a bit of fire, and the particle emitter will shoot them out in whatever speed, direction, and quantity you tell it to. For example, to create an explosion, you can tell a particle emitter to emit fire particles in all directions at once. Or you can tell a particle emitter to emit snowflakes that drift downward from the entire top edge of the screen. For Schoolhouse Skateboarder, we’ll add a particle emitter that shoots sparks out from the bottom of the skateboard whenever the skater lands on the ground, because that’ll look cool.
Luckily, Xcode has a fantastic built-in way to create particle emitters. CONTROL-click the SchoolhouseSkateboarder folder in the Project navigator and choose New File…. Then select iOS, scroll down to find the Resource section, choose SpriteKit Particle File, and click Next.
Xcode will ask you which particle template to use. There are a handful of templates to choose from, and each one will give you a pretty good starting point for the type of effect you want to create. Since we’re making sparks for the skateboard, pick Spark and then click Next.
When Xcode asks for a filename, change it to sparks.sks, make sure your project folder is already selected, and then click Create.
Now you should see a particle emitter shooting out sparks in every direction! This is the built-in particle editor, and we’ll use it to make these sparks look more like sparks that might shoot out from the wheels of the skateboard. First, as shown in Figure 18-3, make sure the utility pane is displayed.

Figure 18-3: Displaying the particle editor utility pane
Part of the fun of the particle editor is that you can play around with the settings and see what interesting emitters you can make. For the skateboard sparks, we’ve already done this and found some settings that look right. Update the emitter’s values in the right pane so they match Table 18-2. For any values not listed in the table, make no changes.
Table 18-2: Particle Emitter Settings to Create Skateboard Sparks
Setting |
Value |
Emitter, Birthrate |
1000 |
Emitter, Maximum |
100 |
Lifetime, Start |
0.3 |
Position Range, X |
75 |
Angle, Start |
180 |
Angle, Range |
10 |
Alpha, Speed |
–3 |
Scale, Start |
0.1 |
When you’re done making the value changes for this emitter, it should look like Figure 18-4.

It’s amazing how many different special effects you can create with a particle emitter just by tweaking these settings. Table 18-3 explains what each setting does.

Figure 18-4: Sparks emitter settings
Table 18-3: Particle Emitter Settings
Setting |
Description |
Name |
Can be set so that the emitter may be accessed later via childNode(withName:). |
Background |
Can be set in the .sks editor to make it easier to see the particle emitter you’re working on. This color is ignored when you create the emitter in your game code. |
Texture |
The image file that should be used as the particles. SpriteKit will provide a basic spark.png image as the default when you create a new spark particle emitter, but you can use any image you want. |
Lifetime, Start |
How long, in seconds, each particle should be visible after it is emitted. |
Lifetime, Range |
The amount of variation in a particle’s lifetime. A value of 0 means all particles have the lifetime specified in “Lifetime, Start,” whereas a value of 1.0 means that particle lifetimes are allowed to vary, randomly, by up to 1.0 second. |
Position Range, X |
The range of x-positions where the particles should spawn. A value of 0 means the particles will all spawn from the exact same x-position. A value of 100.0 means the particles should be allowed to spawn randomly over an x-position range of 100.0. |
Position Range, Y |
The range of y-positions where the particles should spawn. A value of 0 means the particles will all spawn from the exact same y-position. A value of 100.0 means the particles should be allowed to spawn randomly over a y-position range of 100.0. |
Position Range, Z |
The range of z-position spawning for particles. Apple has marked this property as deprecated, which means it’s an old property that should no longer be used. |
Angle, Start |
The angle at which to shoot the particles out, in degrees, where 0 is straight to the right, 90 is up, 180 is left, 270 is down, and 360 is right. Any valid CGFloat value may be used for the angle. |
Angle, Range |
The amount of variation in the emission angle. |
Speed, Start |
The speed at which the particles should be emitted. |
Speed, Range |
The amount of variation in emission speed. |
Acceleration, X |
How much the particles should speed up in the x-direction after they’re emitted. A positive value means to accelerate to the right, and a negative value means to accelerate to the left. |
Acceleration, Y |
How much the particles should speed up in the y-direction after they’re emitted. A positive value means to accelerate upward, and a negative value means to accelerate downward. |
Alpha, Start |
How transparent the particles should be when they’re emitted. Valid values are any CGFloat between 0.0 and 1.0, where 0.0 means completely transparent, and 1.0 means completely opaque. |
Alpha, Range |
The amount of variation in alpha transparency. |
Alpha, Speed |
How quickly the alpha transparency should change over the particle’s lifetime. |
Scale, Start |
The starting scale, or size, of the particles. A value of 1.0 means normal-sized, not scaled up or down at all. A value of 2.0 means double-sized, 0.5 means half-sized, and so on. |
Scale, Range |
The amount of variation in particle scale, or size. |
Scale, Speed |
How quickly the scale of the particles should change. |
Rotation, Start |
The rotation of the particles. For a texture like the spark.png default texture, rotation won’t be noticeable. But if you used the skater.png image as the texture, you would notice that 0.0 is right side up, and 180.0 is upside down. Any valid CGFloat value is allowed. |
Rotation, Range |
The amount of variation in particle rotation. |
Rotation, Speed |
How quickly the rotation of the particles should change. |
Color Ramp |
How the tint color of each particle should change over the particle’s lifetime. You can specify that the particles should start off as green, for example, turn blue, and then end up yellow before finally disappearing. |
Blend Mode |
Allows you to set how the colors of overlapping particles should be blended together. |
You may have noticed that when you chose the Spark template, a new image file was added to the Project navigator, spark.png. This is the default image of a single spark that’s used by a sparks emitter. You can change the image in the emitter settings and have an emitter that shoots flowers or anything you want. But for now, we’ll leave it as sparks.
In the Project navigator, also notice there is a sparks.sks file. This file describes the emitter we just created. So to use this emitter in our game, we just have to write some code that references this file. Switch to Skater.swift and add the following method inside the Skater class below the existing setupPhysicsBody() method:
Skater.swift
func setupPhysicsBody() {
--snip--
}
func createSparks() {
// Find the sparks emitter file in the project's bundle
➊ let bundle = Bundle.main
➋ if let sparksPath = bundle.path(forResource: "sparks", ofType: "sks") {
// Create a Sparks emitter node
➌ let sparksNode = NSKeyedUnarchiver.unarchiveObject ![]()
(withFile: sparksPath) as! SKEmitterNode
➍ sparksNode.position = CGPoint(x: 0.0, y: -50.0)
➎ addChild(sparksNode)
}
}
This code references the sparks.sks file that we created by looking it up in the project’s bundle—the grouping of files and assets that make up the project—and uses it to create an emitter, or SKEmitterNode, called sparksNode. In order to access the sparks.sks file, which is part of the project, we need to get a reference ➊ to the application’s main bundle, where all the files in the project will be. Once we have the bundle, we call its path(forResource:ofType:) method ➋ to get the file location, or path, of the sparks.sks file. The line at ➌ creates an SKEmitterNode named sparksNode with the help of the sparks.sks file we created, by calling NSKeyedUnarchiver.unarchiveObject(withFile:). This function can convert certain files, such as .sks files, into Swift objects.
Once the sparksNode is created, we set its position ➍ and then add it as a child of the skater sprite ➎. Since this emitter will be a child of the skater sprite, it will move around with the skater as if it were glued to her. More importantly, it’s very easy to position the emitter so that it’s on the bottom of the skater sprite. We simply set its position to (0.0, -50.0), which places it on the bottom middle of the skater.
Just like any other SpriteKit node, once we’re done with the emitter, we should remove it. This sparks emitter should take only half a second or less to finish shooting a few sparks. After that, we need to remove it so it’s not taking up memory and other system resources. Add this code to the new createSparks() method:
func createSparks() {
--snip--
if let sparksPath = bundle.path(forResource: "sparks", ofType: "sks") {
--snip--
addChild(sparksNode)
// Run an action to wait half a second and then remove the emitter
➊ let waitAction = SKAction.wait(forDuration: 0.5)
➋ let removeAction = SKAction.removeFromParent()
➌ let waitThenRemove = SKAction.sequence([waitAction, removeAction])
➍ sparksNode.run(waitThenRemove)
}
}
Earlier, we used actions to animate some labels and play some sounds. There’s another cool thing we can do with actions: we can sequence them together. That means we can have a node automatically perform a series of actions, one after the other. We’ll make some variables first to store the actions we want to sequence in order to make the code easier to read. The line at ➊ creates waitAction using SKAction.wait(forDuration:), which tells the node to wait for 0.5 seconds before moving on to the next action. The line at ➋ creates our next action, removeAction, which tells the node to remove itself from its parent.
The line at ➌ creates a waitThenRemove action, which is a sequence of those other two actions. To create a sequence action, we call SKAction.sequence() and pass it an array of SKActions. Since we already created waitAction and removeAction, we simply put them in an array using square brackets, like this: [waitAction, removeAction]. We only need two actions in our sequence, but there is no limit to how many actions you can string together this way. Finally, we simply tell the sparksNode to run that sequence of actions ➍, and we’re done.
Particle emitters, once created and added to the scene, are always emitting particles. Any actions you perform on an emitter will happen in addition to what the node is already doing, which in this case is emitting sparks. So if you animated a particle emitter to move across the screen, you wouldn’t be changing the way the particles behave, you’d just be changing where the particles are emitted from.
Now that we have a way to create sparks for the skateboard, we just need to add the code to decide when to actually call this createSparks() method.
Switch back to GameScene.swift, and update the first half of the didBegin(_:) method to look like this:
GameScene.swift
func didBegin(_ contact: SKPhysicsContact) {
// Check if the contact is between the skater and a brick
if contact.bodyA.categoryBitMask == PhysicsCategory.skater && ![]()
contact.bodyB.categoryBitMask == PhysicsCategory.brick {
➊ if let velocityY = skater.physicsBody?.velocity.dy {
➋ if !skater.isOnGround && velocityY < 100.0 {
➌ skater.createSparks()
}
}
skater.isOnGround = true
}
Since we already have code to determine when the skater hits the ground, we just added an if statement to check if:
• The skater is not already on the ground (notice the exclamation point before skater.isOnGround, meaning we’re checking if she is not on the ground since ! reverses the meaning of a Boolean value).
• The skater is going down, not up.
Since the skater’s physics body is an optional and we can’t compare an optional to a number like 100.0, we first need to unwrap the skater body’s y velocity, as shown at ➊. Next, the line at ➋ checks that the skater is not already on the ground and that her y velocity is less than 100.0. If both of these are true, then we call the skater’s createSparks() method ➌ in order to show the sparks emitter.
We check which direction the skater sprite is moving by looking at her physics body’s velocity in the dy direction. For velocity, dx means the horizontal direction (positive values are right and negative values are left), and dy means the vertical direction (positive values are up and negative values are down). To check if the skater is going down, technically we should check if her y velocity is less than 0.0. But we are checking if it is less than 100.0, because sometimes when she first hits the bricks, her y velocity is slightly positive as she bounces off the bricks. So using a check for velocityY < 100.0 ensures we’ll always see the sparks when she hits the ground.
If both of the if conditions are met, then sparks will fly off of the skater’s skateboard, as shown in Figure 18-5.

Run the game now, and enjoy the cool-looking sparks whenever the skater lands on the ground!
NOTE
Schoolhouse Skateboarder is now complete! Remember that the final project files are available from https://www.nostarch.com/iphoneappsforkids/, so you can compare yours to double-check that everything is in the right place.
WHAT YOU LEARNED
In this chapter, you learned a number of ways to make a game more professional. You learned about game state and why it’s important to keep track of what state your game is in. You added a simple menu system to the game and used actions to animate the labels. Then you learned how to add sound effects to your game. Finally, you learned about particle emitters and used one to shoot sparks from the bottom of the skateboard.