
JIRA lets users create comments on issues. As we have already seen, you will be able to create comments when assigning an issue to a different user. This is a very useful feature that allows multiple users to collaborate to work on the same issue and share information. For example, the support staff (issue assignee) may request more clarification from the business user (issue reporter) by adding a comment to the issue. When combined with JIRA's built-in notification system, automatic e-mail notifications will be sent to the issue's reporter, assignee, and any other users watching the issue. Notifications will be covered in Chapter 7, E-mails and Notifications.
By default, all logged-in users will be able to add comments to issues they can access. Perform the following steps to add a comment to an issue:
- Browse to the issue you wish to add a comment for.
- Click on the Comment option in the Issue menu bar. This will bring up the Comment input section.
- Type a comment into the text box. The text box will adjust its size as you type.
- Click on the Add button to add the comment:

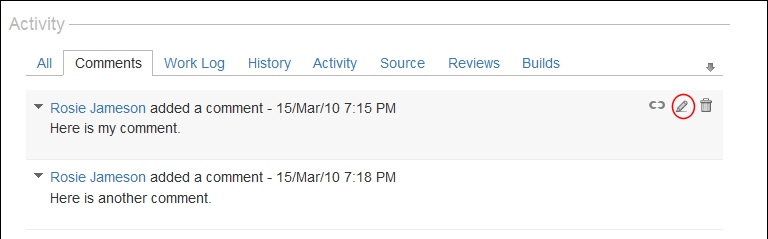
Once a comment has been added, the comment will be visible in the Comments tab in the Issue Activity section:

After you have added your comment to an issue, you can edit its contents, security settings, and delete it altogether. To edit or delete a comment, simply hover over the comment and the comment management option will appear to the right-hand side:
From time to time, you will want to refer other people to a comment you have made previously. While you can tell them the issue and let them scroll down to the bottom until they find your comment amongst hundreds of others, JIRA allows you to create a quick permalink to your comment that will take you directly to the comment of interest.
Perform the following steps to create a permalink for a comment:
- Browse to the comment you wish to permalink.
- Hover over the comment to bring up the comment management options.
- Click on the permalink icon. This will highlight the comment in pale blue.
You will now notice that your browser's URL bar will look something similar to http://sample.jira.com/browse/DEMO-1?focusedCommentId=10100&page=com.atlassian.jira.plugin.system.issuetabpanels:comment-tabpanel#comment-10100 (notice the focusedCommendId section after the issue key). Copy and paste that URL and give it to your colleagues; once they click on this link, they will be taken directly to the highlighted comment.