Cindy Patrick
App Stacking Artistry + Multi-App Magic
App Stacking Artistry
BY CINDY PATRICK
Artist, Photographer
New Jersey, USA
Schooled in alternative photographic processes, mobile devices and the App store have allowed this artist to create without hesitation. Well known in the iPhone art community, here she demonstrates the use of multiple apps to arrive at her eloquent visual destinations.

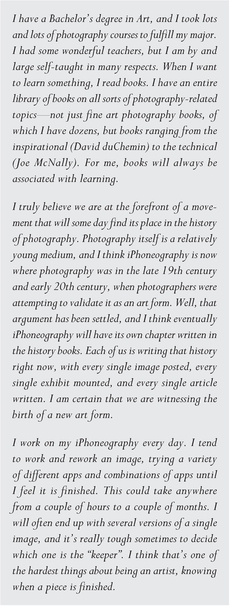
Solitude
I captured the original scene using “Classic PAN” to achieve the panoramic format. I then brought the image into “Artista Sketch” and created a sketch of the scene. I layered the original image with the sketch in “Iris Photo Suite” and adjusted the color using the WWII filter. I then opened “Diptic” and selected a three-window layout. Normally, you would put three different images into the three window panes, but here I put the same image into the three panes and adjusted them until I was satisfied with the way the edges matched up. Finally, I took the triptych into “King Camera” and added the “grunge” texture.

In Quiet Waters
I captured the original scene using “Classic PAN” to achieve the panoramic format. Two layers were required to make the final image. To create the first layer, I took the original into “BlurFX” and blurred the entire scene, erasing part of the blur in the grass to allow some detail to show through. For the second layer, I took the original into “Artista Sketch” and created a sketch of the scene. The two layers were then brought into “Iris Photo Suite” where they were blended using the Soft Light setting. I then applied a grunge filter to add some texture (this was the Old Wood filter). The image was then brought into “Vintage Scene” to give it an antiqued look and to add the border effect.


Waiting for the Perfect Wave
I captured the original scene using “Classic PAN” to achieve the panoramic format. Two layers were required to make the final image. To create the first layer, I took the original into “BlurFX” and blurred everything but the figures in the water. For the second layer, I took the original into “Artista Sketch” and created a sketch of the scene. The two layers were then brought into “Iris Photo Suite” where they were blended using the Soft Light setting. Finally, the color was adjusted by using the Cross Process filter.
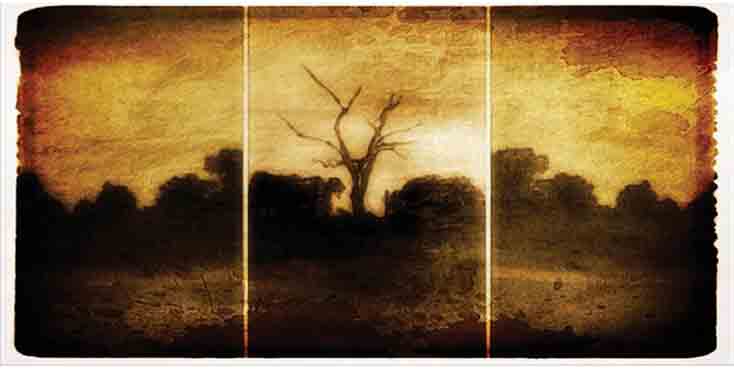
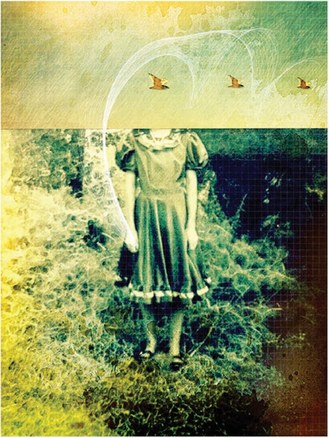
Where Do I Begin?
This is a self-portrait, something that’s rare for me, but fun to do on occasion! I captured the original using the “Native iPhone 4 Camera”. I first took the image into “BlurFX” to blur out the background and to soften all of my facial features except my eyes. I then brought the image into “Decim8” and simply played around with the random settings until I achieved something I liked. (That‘s often how I use “Decim8”, although you have full control over the settings.) I then took the image into “Filter Mania” (which crops the image into a square) and applied the Grunge filter to finish it off.

At Pharaoh's Gate
This was actually a fairly simple one to create. I captured this image at a carnival at night using “Slow Shutter”. I took the original into “AutoPainter II” and made a sketch of it using the Felt Tip setting. Finally, I brought the image into “Iris Photo Suite” and applied a grunge filter.
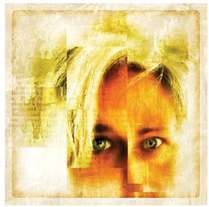
Whilst Waves Marked Time
This was a combination of three images I shot using the “Slow Shutter” app. I brought each image individually into “Lo-Mob” and added the slide border effect to each one. Lastly, I combined them into a triptych using the “Diptic” app.
Fly Away Home
This is a very special image to me because I created it in memory of my Mom, who died of Alzheimer’s Disease. I started by taking a picture with my iPhone 4 of an old photo of her as a young girl. I opened that photo in “Juxtaposer” and combined it with a photo of a bird in flight. While in “Juxtaposer”, I cloned the bird, ending up with three birds instead of one. Next, I brought that image into “Artista Sketch” and made a sketch of it. I then opened both images in “Iris Photo Suite” and blended them together using the Soft Light setting. I also adjusted the color using the Cross Process filter. Next, I opened the image in “PictureShow” and added the grid texture, which is visible in the lower right corner. Wanting a little more texture, I opened the image in “King Camera” and applied one of the texturizer filters. Lastly, I decided to add the swirl using “Flowpaper”.
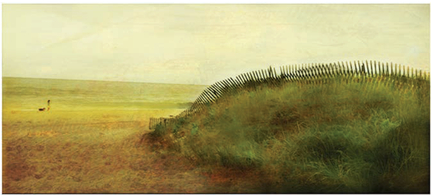
No Dogs Allowed on the Beach
I captured the original scene using “ClassicPAN” to achieve the panoramic format. Two variations were required to make the final image. First, I took the original into “BlurFX” and blurred everything but the figure and the dog, and saved the result to the camera roll. Then I took the original into “Artista Sketch” and created a sketch of the scene and saved that to my camera roll as well. The two variations were opened in “Iris Photo Suite”, where I blended them using the Soft Light setting. I then applied a grunge filter to add some texture (Old Wood filter).

Great Concentration Is Required to Catch Plastic Fish
I captured the original image using the “Native iPhone 4 Camera”. I cropped it square using “Photoshop Express” to eliminate some distracting elements. Two layers were required to make the final image. To create the first layer, I took the original into “BlurFX” and blurred everything except the boys. For the second layer, I took the original into “AutoPainter II” and created a sketch of the scene using the Felt Tip setting. The two layers were then brought into “Iris Photo Suite”, where they were blended using the Soft Light setting. Finally, I applied a grunge filter to add some texture (this was the Old Wood filter).


Midday at Grand Central Station
I captured the original image using “Slow Shutter”. I then brought the image into “Artista Sketch” and created a sketch of the scene. I layered the original image with the sketch in “Iris Photo Suite” and adjusted the color using the Cross Process filter. Finally, I brought the image into “ScratchCamFX” to add some scratches and adjust the color a bit more.

CINDY PATRICK
Artist, Photographer
New Jersey, USA
As an artist, I’ve always been much more interested in making images than taking photographs. My passion is for creating images that express how I feel about a subject rather than depicting the world around me in a purely representational way.

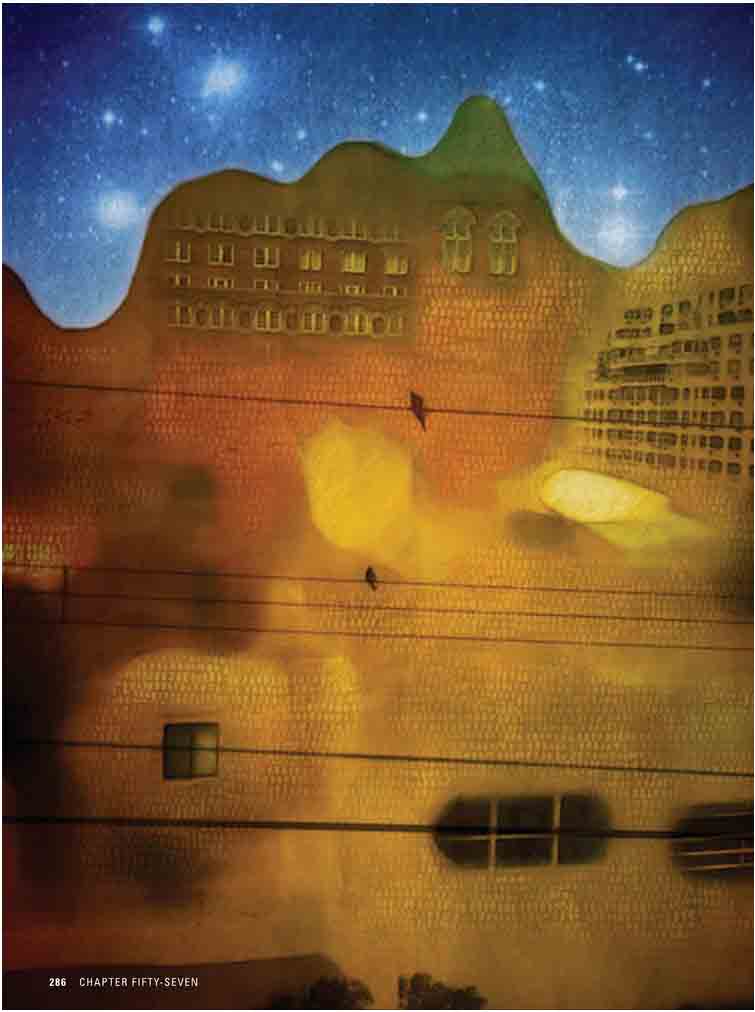
Step 1
I started with two iPhone photos: the main photo, a shot of some buildings from a hotel window in New York City, and another of two birds on a wire.


Step 2
I brought the photo of the buildings into “BlurFX” and blurred everything, erasing the blur in some places to reveal the windows.

Step 3
I then brought that image into “Image Blender”, and blended it with the image of the birds.

Step 4
I then brought that image into “Artista Sketch” and made a monochromatic grungy textured sketch of it.

Step 5
I brought the images from Steps 3 and 4 into “Iris Photo Suite” and layered them together using the Soft Light blending mode.

Step 6
I then brought the image into Tiffen’s “Photo fx Ultra” and added a blue grad filter to the sky to add some drama.

Step 7
Next, I brought the image into “PhotoCopier” and applied the Klee filter to give some texture to the buildings, taking the image into the realm of Klee’s imagery.

Step 8
I brought the images from Steps 5 and 6 into “Iris Photo Suite” and layered them, which allowed me to erase the Klee filter from the sky and window areas of the buildings, thus applying the Klee filter very selectively at varying opacity.
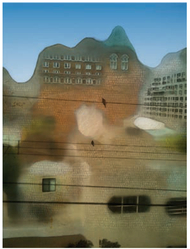
Step 9
Next, I brought the image into “ScratchCamFX” and added some texture and adjusted the color to make it more saturated.

Step 10
I then brought the image into “Weather Photo Effects”, where I applied one of the Space filters.

Step 11
Lastly, I brought the images from Steps 9 and 10 back into “Iris Photo Suite” and placed them on separate layers, which allowed me to erase the Space filter from everything except the sky.