
David Scott Leibowitz
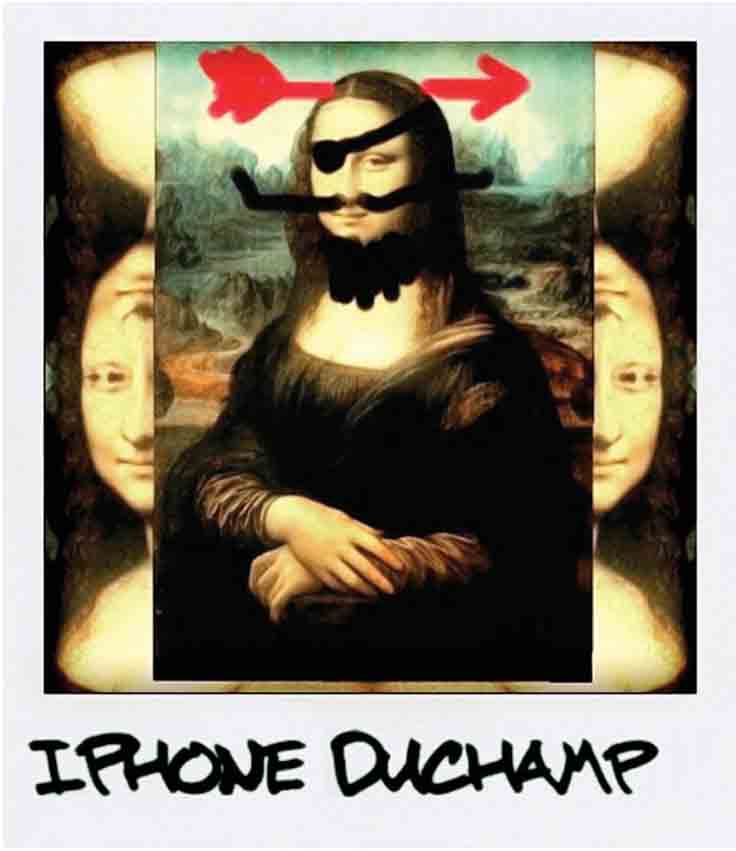
iPhone Duchamp
iPhone Duchamp
BY DAVID SCOTT LEIBOWITZ
Artist, Technician, App Developer
New Jersey, USA
Like any new art form, mobile digital art is evolving technically, with the introduction of new apps every day, and philosophically, with artists from different perspectives and different cultures coming to the medium. In this tutorial, we will take a screenshot of the most famous painting on earth, and use four apps, “Kaleido”, “iDoodle”, “Collage”, and “Polarize”, to create an image that demonstrates new techniques and conveys a new philosophy.
Step 1
Open the app “Art”, an education application that has text information and images such as this, Leonardo da Vinci’s Mona Lisa or La Giaconda (1507).

Step 2
A screen grab on the iPhone or the iPad is accomplished by holding the sleep button and the home button simultaneously, until you hear a click and see a flash. After the flash, you can now find the image in your camera roll and open it in any photo/art app.
Step 3
The screen grab was opened in the app “Kaleido”, where you adjust the effect by swiping one or two fingers across the screen. I saved a number of variations to the camera roll and decided on using this variation as the background image.

Step 4
The original screen grab is opened in the app “iDoodle2”, where basic paint brushes are used to supply the graffiti, in the spirit of Dadaist Marcel Duchamp’s famous L.H.O.O.Q. or Joconde aux Moustaches (1919). The image is then saved to the camera roll.


Step 5
Open the app “Collage” and open the two previously saved elements. Position the foreground image on top of the background as shown, then save it to the camera roll.

Step 6
The comp from Step 5 is opened in the app “Polarize”, which adds the tint of an old Polaroid SX-70 and a classic white SX-70 frame.
Its caption feature looks as though it were hand-written with a Sharpie, which completes the piece in the true, irreverent spirit of Duchamp.
BY DAVID SCOTT LEIBOWITZ Artist, Technician, App Developer New Jersey, USA
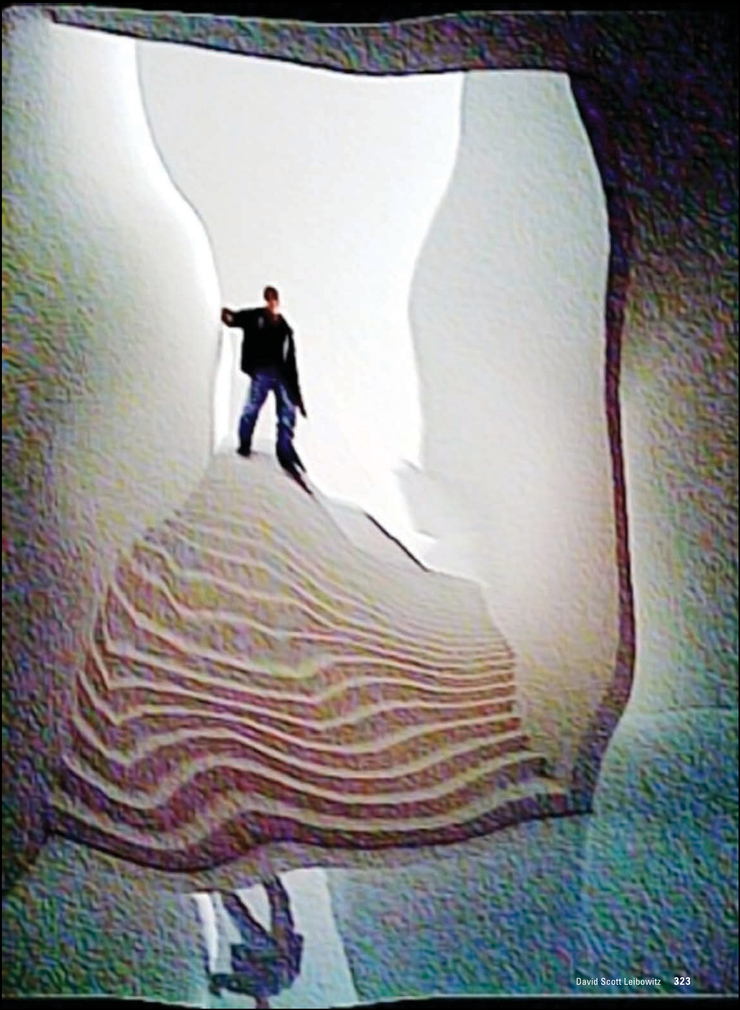
This example starts with a good photograph taken on a film set. It always helps in any photo/art endeavor to start with something good. This sounds simplistic, but I’ve found it to be true, that greatness in everything requires a strong foundation. The steps involved to get to final artwork are but a few, so I’ve included many alternative final images. First, you’ll see how a combination of image and apps produces results that hit that dreamlike, surrealist part of the brain in ways that cannot be predicted. After that, we’ll explore a host of alternative creative opportunities.
Step 1
Open the photo in the app “Face Melter” from the camera roll. Use one finger to push and twirl, or two fingers to pinch or expand: the photo is in a liquid state and can be moved around. You can modify the tool to return selected areas to their original state.

original Photograph.
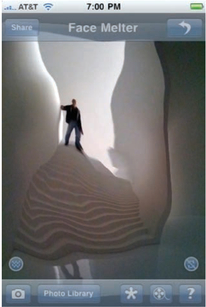
“face Melter” Screenshot.

Step 2
Save the altered image to the camera roll using the Share/Save to Device command.
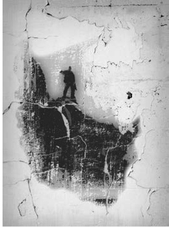
These are three variations I created from the original photograph. The image on the previous page is my favorite for subliminal reasons, but it also has a clarity that makes it simple and compelling.

Step 3
The altered photo is opened in the app “ezimba”, which provides hundreds of looks and presets. This is a combination of the presets Impressionist Sketch and Lightly Painted, and I also blended in “ezimba” to get the grainy, textured look that finalizes the piece.
When you break up photographic lines, the brain of the viewer ceases to perceive the image as a photograph, a lesson learned in the 1970s by pushing fluid SX-70 emulsion around. I added some major grain texture and some dreamlike color to depict this surreal environment.


BY DAVID SCOTT LEIBOWITZ Artist, Technician, App Developer New Jersey, USA
I created a surrealist collage using three original photographs, a screenshot from Safari and the apps “Collage” and “Juxtaposer”. Half the lesson is: if you can think of it, you can do it, the tools are there, even if it’s imagining you are exploring a cat’s subconscious.

original iPhone photograph, shot out the window of my car driving over the Midtown Bridge in hackensack, nJ.
Step 1
I begin by cropping the original in the app “Collage”. I open the river view image and, using two fingers, expand the image to fill the vertical frame as shown. I make sure to think about the horizon line. It’s right now I need to visualize the final framing, so I can leave room for the foreground elements.

This is the base image on which we will build our final collage.
Step 2
Still in “Collage”, add sleeping Milo image to the base image and change its level of transparency to 60 percent. I size it so the top edge of the Milo frame lines up perfectly with the shoreline for a perfect transition. Save the file to the camera roll.

original photo, Milo Milowitz dreaming kitty dreams.

Step 3
Open the second photo in the app “Face Melter”. Pinch with two fingers, or push with one to move Milo’s features and create this version below, “Evil Milo”. Save the file to your camera roll.
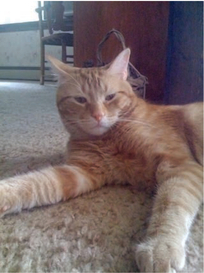
Second iPhoto of Milo, charming home-wrecker, destroyer of antiquities.

Step 4
Open the app “Juxtaposer”, and open the background image from Step 2. When prompted, open “Evil Milo” as the top image. Using the eraser, subtract everything from the image but the cat. By zooming in using a two-fingered motion. you can cut a very precise shape, in this case one evil-looking cat.

Step 5
Still in the app “Juxtaposer” and using the same two-fingered motion, I resize the cat and then save the cat as a stamp. First I position the top cat layer to the right and, using the “Stamp Top Image” command, repeat the evil cat element and position it slightly to the left. Repeat this step two more times, then save this version to your camera roll.

Step 6
I open Safari, search “Gettysburg Address”, and find one in Abe Lincoln’s handwriting. Capture a screenshot, using the home button and sleep button on the iPhone or iPad. The screenshot is saved to your camera roll.


Step 7
I open the previous screenshot in the app “Collage” and zoom in with my fingers so it fills the frame. (This Lincoln’s Gettysburg Address is what appeared to Milo in his nightmare.) Then I add the saved version from Step 5, slightly skewed to throw the composition off balance. Remember, I am going for surrealism here, so I don’t want the viewer to get too comfortable.

Step 8
I change the level of transparency of the top image to 50 percent. I’m looking to depict a cat’s nightmare, so ambiguity rules.

Step 9
I add the same final saved image from Step 5, smaller, skewed even more this time and now at 100 percent transparency, to complete the final collage. Sometimes, adding more than one off-balance element creates a newfangled balance to the final composition.
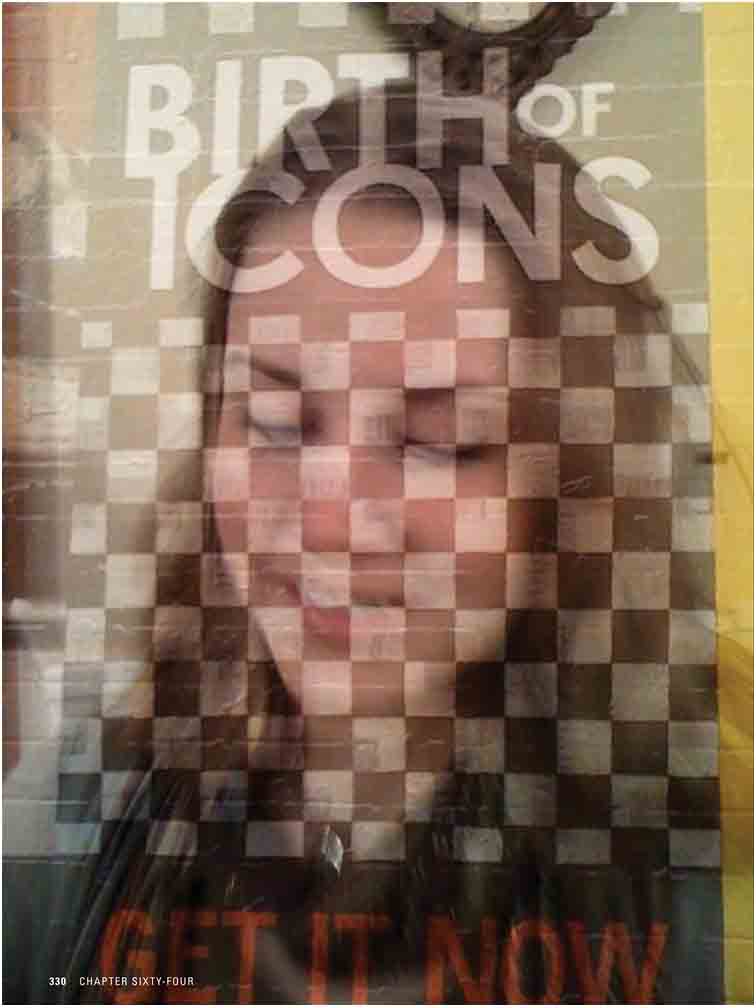
Off the Wall Graphics and a Beautiful Girl
BY DAVID SCOTT LEIBOWITZ Artist, Technician, App Developer New Jersey, USA
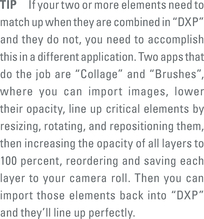
Combining elements in the app “DXP” can create simple yet beautifully effective design.

original photographs of wall posters found wandering the city streets provide a constant source of beautiful graphic elements.
The app “DXP” allowed me to load both of the images above into the app and change the way they were combined. These images lined up perfectly, and were combined using the Soft Light method to create the final piece.
If you create lots of collage, then gathering graphic elements becomes a way of life. Combining these elements with a beautiful face is almost like cheating, but artists have been doing it since the earliest human artistic endeavors.

original photo of my niece who even here, in a bad, out-of-focus image, manages to look beautiful.


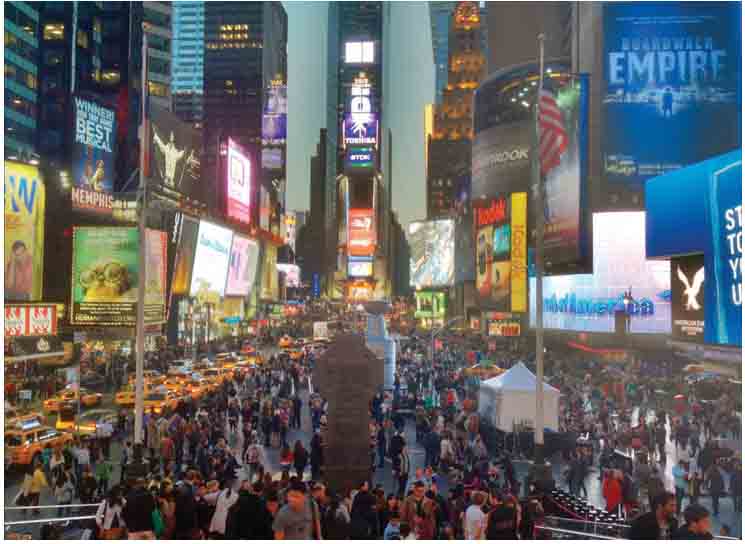
Apps (Times) Squared
BY DAVID SCOTT LEIBOWITZ Artist, Technician, App Developer New Jersey, USA
Creating art in Times Square is like shooting fish in a barrel. At first, it overwhelms your senses and then it’s like butter.
After three years of writing this book, the day before my final deadline I decided to have some fun and create a chapter in my favorite place on earth. Enjoy!
Magic hour in Times Square (opposite) is perfect for the app “Pro HDR”. HDR stands for high dynamic range, capturing details in the highlight areas of the photo first, then a second exposure to capture the details in the shadows. The app combines the two exposures, as shown above, creating a photo that is closer to the way we actually see the world around us.
I opened the image below in the app “PhotoViva” where I painted it using abstract and cloning brushes to add and subtract brush strokes and original details. The functionality of this app allows me to rework my photographs the exact same way I’ve done it for almost twenty years in the desktop application “Painter”.


Tourist with Statue of Liberty, painted in “Photoviva”.

The app “Photastic HD” has a vast array of selective particle controls.

The app “Photosynth” allows you to create seamless, 360 degree images. Within “Photosynth”’s viewer and their website, this 2D image can be navigated immersively, like “Quick-Time VR”.
The app “Tiny Planets” creates stereographic projections from your photos (right). Twenty years ago, you would have needed a supercomputer to accomplish this effect.


The app “3D Photo” allows you to map your photos onto various 3D shapes or grids.


The app “Luminancer” has multiple modes and settings to control the amount of image lag in your photos.

The photo was painted onto this 3D cube in the app “123D Sculpt”.

The app “3D PhotoCut” allowed me to isolate this colorful NYC character from a very busy background.


Named “You Gotta See This!”, this app creates Hockney-esque collages by pointing your mobile device up and down and all around to capture the scene.