
Retrieving Information from Time Machine
Now that you know how to back up your system, it’s time to learn how to retrieve that information should you ever need to do so. Let’s see how to restore individual items and even an entire drive.
Restoring individual files
Time Machine lets you restore individual files and folders that you may have lost or of which you want to get previous versions. To do so, follow these steps:
1. Open Time Machine by clicking its icon in the Dock or press ![]() +Shift+A, and then double-click its icon in the Applications folder.
+Shift+A, and then double-click its icon in the Applications folder.
2. Time Machine opens and you see a Finder window, similar to that shown in Figure 14.13.
3. Use the timeline on the right side of the screen (or the arrows next to it) to navigate through time to the date the item you need was backed up.
4. Browse the files in the Finder window to find the item you want to retrieve.
5. Select the item in the Finder window and then click Restore in the bottom-right corner of the Time Machine window. The file is zipped forward in time to today and Time Machine closes. You have to admit, that’s one of the coolest things you’ve ever seen on a computer!
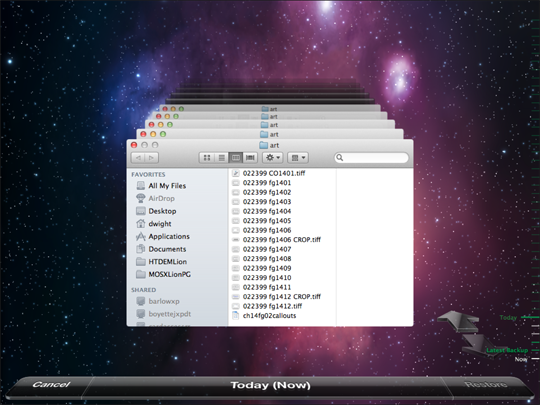
14.13 Traveling through time!
Restoring an entire drive
Time Machine lets you restore an entire drive, which, on its own, is worth the price of upgrading to Mountain Lion. This saves you countless hours because you don’t have to reinstall the OS or all of the applications you had on your system. To restore a drive, follow these steps:
1. Connect your backup drive to the Mac.
2. Choose Apple menu→Restart, and then press and hold ![]() +R while your Mac restarts.
+R while your Mac restarts.
3. Select your language from the Language Chooser and click Continue (the arrow).
4. Perform one of the following depending on the type of backup drive from which you are restoring your system:
• If backing up from an external drive (hard drive, USB flash, and so on), select it and click Continue.
• If backing up from a network drive, select it and click Connect to Remote Disk.
• If backing up from a Time Capsule, select your AirPort network using the AirPort menu on the menu bar, select your Time Capsule, and then click Connect to Remote Disk.
5. Type your name and password to connect to your backup drive if required and then click Connect.
6. Choose the date and time for the backup you want to restore and follow the instructions from that point to finish the restoration process. This can take a while, but not nearly as long as starting from scratch.