
Working with Widgets
Mountain Lion includes an application called Dashboard that affords you another fun way to customize your Mac. With Dashboard, you can access and manage a multitude of widgets to track packages, get driving directions, browse the Yellow Pages, check stocks, see the latest weather forecasts, find out what movies are playing at your local multiplex, play Sudoku, and the list goes on. Widgets are one of those rare things that make your life easier and are cool to use at the same time. In the next few sections, I show you how to access, use, customize, and even create your own widgets.

If you have a Mac laptop with a multitouch trackpad, or if you have the Magic Trackpad for your desktop Mac, simply swipe three fingers from left to right to flick over to the Dashboard screen!
To open Dashboard and see the default set of running widgets, do one of the following:
![]() Click the Dashboard icon in your Dock.
Click the Dashboard icon in your Dock.
![]() Press F4 if you have a newer keyboard, or F12 if your keyboard is a bit older.
Press F4 if you have a newer keyboard, or F12 if your keyboard is a bit older.

Newer Mac keyboards, including those on newer laptops, may use F4 instead of F12. However, on laptops you can use fn+F12 to achieve the same functionality. Consult the documentation that came with your keyboard or laptop for more information.
In the main body of the screen, you see the four widgets that Mountain Lion runs out of the gate: Calculator, Calendar, Weather, and World Clock. These are very basic widgets that you can use to get your feet wet in the world of widgetry (yes, I just coined that term). To get a quick feel for using a widget, click the Calculator to bring it to the forefront, and then use your mouse to perform calculations on the widget’s virtual keypad, or use your keyboard to type information.
Don’t like the placement of the widgets on the screen? Move them wherever you want by clicking anywhere on a widget and then dragging it to the preferred location.
Notice the plus sign (+) in the small circle that appears in the lower-left corner of the screen when you activate Dashboard. Click it to open the widget launchpad. This grants access to all the widgets that Mountain Lion so graciously includes. It also allows you to change those you have running.
Peruse the widget launchpad until you see a widget that strikes your fancy, and then click to open it. When you click the widget you want to open, Dashboard drops it on your screen.
To close any widget, click the minus sign (-) in the lower-left corner of the screen and then click the X in the upper-left corner of the widget. Dashboard even has a neat effect for this action — the widget is sucked into the X until it disappears. If that’s not cool enough for you, hold down the Shift key while clicking the X to watch it disappear in slow motion.
The Mountain Lion preinstalled widgets
Because there are quite a few widgets that come preinstalled on Mountain Lion, I want to give you a quick synopsis of what’s available and what each one can do. Table 2.4 spells out the details.


Setting preferences in widgets
Many widgets require a bit of customization to effectively utilize them. For example, Movies doesn’t do you much good if you live in Auburn, Alabama, if it only gives you showtimes and theaters in Cupertino, California. Stocks won’t be of much assistance either if you want to see what a hot new stock is doing but all you get are the default stocks set up in the widget.
Let’s use Weather to illustrate how to edit the preferences of a widget:
1. Press F4 (or F12 on an older keyboard) to open Dashboard.
2. Position your mouse pointer over the lower-right corner of the Weather widget to see the Information button, which is a lowercase “I” (i) (see Figure 2.13).

2.13 Click the Information button to open a widget’s preferences, if available.
3. Click the Information button to flip the widget over to see its available preferences. Make the preference changes you desire, and then click Done.
4. The widget should now reflect the changes you made to its preferences.
Not all widgets give you the option of adjusting their preferences, so don’t beat yourself up if you can’t seem to find the elusive Information button.
Finding more cool widgets
So far, the only widgets you’ve been privy to are those that come with Mountain Lion, but I’m about to change that. There are hundreds of widgets that have been developed, and some of them may be exactly what you’re looking for.
One of my favorite places to find new widgets is the Apple website (more on that in a moment), but you can also find widgets by simply performing a search on Google for OS X widgets.
To get new widgets the quick and easy way, do the following:
1. Press F4 (or F12 on an older keyboard) to open Dashboard.
2. Click the plus sign (+) in the lower-left corner of your screen to open the widget launchpad.
3. Click More Widgets at the bottom of the window. Safari automatically whisks you away to the Apple Dashboard Widgets website, shown in Figure 2.14. Here you can browse massive amounts of available widgets created by developers and regular users alike.
4. Use the Widget Browser to find one you want to try. You may need to scroll down slightly on the page to see the browser.
5. Click Download to have Safari download the widget.
6. Click Install when prompted to open your new widget in Dashboard. If Mountain Lion tells you that the widget can’t be opened because it’s from an unidentified developer, click OK, find the downloaded widget file (Safari puts them in the Downloads folder by default), and hold down the Option key while clicking the widget icon to open it. Click the Open button when prompted, enter an admin username and password, click Modify Settings, and finally click the Install button to install the widget. That security stuff is a barrel of fun, isn’t it?
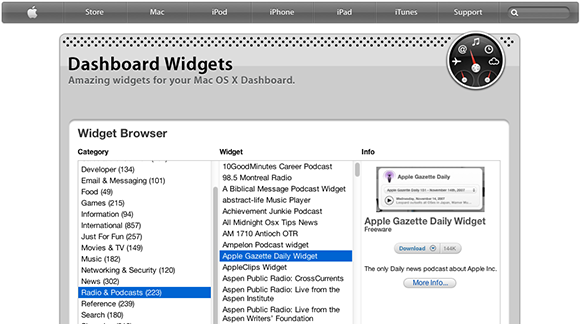
2.14 The Apple website is a one-stop shop for your Dashboard widget needs.
Creating your own widgets using Web Clips
A neat feature in Dashboard is the ability to create your own widgets using clips of web pages. This is a great feature for tracking information from a website without having to constantly navigate to it to check its status. For example, you can see the most popular available widgets on the Apple Dashboard Widgets website without browsing to the site. You can simply view the list in Dashboard, as shown in Figure 2.15, by pressing F4 (or F12 on an older keyboard).
To create a widget using Web Clips, do the following:
1. Press F4 (or F12) to open Dashboard.
2. Click the plus sign (+) in the lower-left corner of the screen, and then click the Web Clip icon in the widget bar.
3. Click the Safari icon in the Web Clip Widget window to open Safari. If Safari’s window doesn’t open, simply press F4 to exit Dashboard and select Safari’s icon in the Dock.
4. Type the address of the website you want to use to create your widget. In this example, I use www.apple.com/downloads/dashboard/.
5. Choose File→Open in Dashboard. The web page darkens and you are presented with a selection box, as shown in Figure 2.15.
6. Position the selection box over the section of the web page you want to use for your widget, and then click to select the area. You can drag the handles that appear around the selection box to adjust the selected area.
7. Click Add in the upper-right corner of the Safari window (in the purple bar). Safari passes the selection on to Dashboard, where your new widget is created.

2.15 Place the selection box over the part of the web page that you want to use for your widget.
Uninstalling third-party widgets
Mountain Lion comes fully stocked with a great set of widgets, but there are a lot of them. Those you never use may just take up real estate on your screen. If you install other widgets, as discussed earlier in this chapter, there are even more icons to browse through in the widget launchpad. Dashboard provides a handy way to uninstall third-party widgets:
1. Press F4 or F12 to open Dashboard.
2. Click the plus sign (+) in the lower-left corner of your screen to open the widget launchpad.
3. Click the minus sign (-) in the lower-left corner of your screen. The widget icons begin to jiggle about like jumping beans and a small X appears in the upper-left corner of the icons of third-party widgets, as shown in Figure 2.16.
4. Click the small X in the upper-left corner of the third-party widget you want to uninstall, and click the Delete button when asked to confirm the deletion.

2.16 Click the small X in the upper-left corner of a widget’s icon to uninstall it.