
Chapter 7. Structuring and Deploying an Application
We’ve covered all the basics of arranging a WPF-based user interface and hooking it up to logic. Now it’s time to see how to package it up as an application. There’s no single canonical way to structure a WPF application. WPF supports standard Windows desktop applications that take full advantage of the local computer, web-based applications that can still provide an interesting experience despite being restricted by Internet zone security, and a lot of other variations on these themes.
To help you explore the differences between each type of application (rather than just read about them), this book’s source code contains a collection of sample “Photo Gallery” applications. Each variation of the Photo Gallery corresponds to each application type covered here.
Standard Desktop Applications
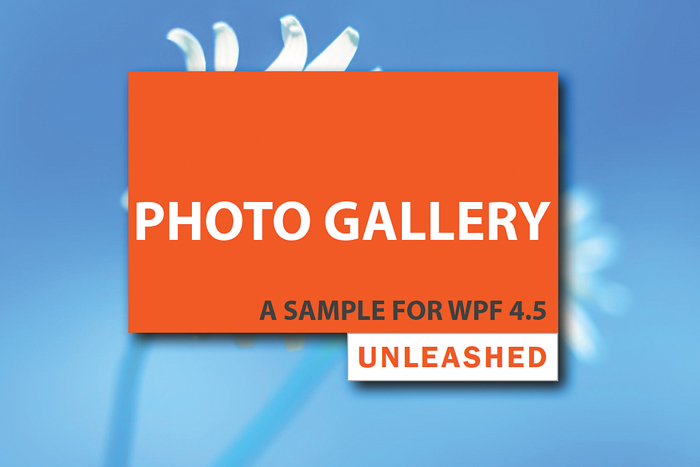
A standard Windows desktop application runs locally on your computer and displays its user interface in one or more windows. Figure 7.1 shows the “standard” version of the Photo Gallery application.

When you create a new WPF Application project in Visual Studio, several files are generated for you. Most of them are familiar to .NET developers, such as AssemblyInfo.*, Resources.*, and Settings.*. But the WPF-specific meat of the project can be found in App.xaml and MainWindow.xaml (along with their corresponding code-behind files). These contain the Application and Window objects that are central to this type of application. (In older versions of Visual Studio, the MainWindow.xaml file is called Window1.xaml instead.)
The Window Class
Window is the main element that traditional applications use to contain their content. A WPF Window is really just a Win32 window under the covers. The operating system doesn’t distinguish between windows with WPF content and windows with Win32 content; it renders the chrome the same way for both, both appear in the Windows taskbar in the same manner, and so on. (Chrome is another name for the nonclient area, which contains the Minimize, Maximize, and Close buttons, among other things.)
Therefore, Window provides a straightforward abstraction for a Win32 window with a handful of simple methods and properties. After instantiating a Window, you can call Show to make it appear, Hide to make it disappear (which is the same as setting Visibility to Hidden or Collapsed), and Close to make it disappear for good. Despite being a Control, Window’s Win32 dependency means that you cannot do certain advanced things like apply a transform to it.
Window’s appearance can be controlled with properties such as Icon, Title (which is used as its caption), and WindowStyle. Its position can be controlled via the Left and Top properties, or you can set WindowStartupLocation to CenterScreen or CenterOwner to get more sophisticated behavior. In short, you can do just about everything you’d expect with Window by setting properties: Set Topmost to true to give it “always on top” behavior, set ShowInTaskbar to false if you don’t want the typical item to appear in the taskbar, and so on.
A Window can spawn any number of additional Windows by instantiating a Window-derived class and calling Show. But it can also designate any of these additional Windows as child Windows. A child Window is just like any other top-level Window, but it automatically gets closed when the parent is closed and minimized when the parent is minimized. Such a Window is sometimes called a modeless dialog.
For a Window to make another Window its child, it must set the child Window’s Owner property (of type Window) to a reference to itself, but only after the parent has been shown. It can enumerate its children via a read-only OwnedWindows property.
Every time a Window becomes active or inactive (for example, from the user flipping between windows), a corresponding Activated and Deactivated event is raised. You can also attempt to force a Window to become active by calling Window’s Activate method (which behaves like the Win32 SetForegroundWindow API). You can prevent a Window from automatically being activated when it is first shown by setting its ShowActivated property to false.
Listing 7.1 contains portions of the MainWindow class defined by the Photo Gallery application.
LISTING 7.1 Portions of MainWindow.xaml.cs Related to Window Management
public partial class MainWindow : Window
{
public MainWindow()
{
InitializeComponent();
}
protected override void OnClosing(CancelEventArgs e)
{
base.OnClosing(e);
if (MessageBox.Show("Are you sure you want to close Photo Gallery?",
"Annoying Prompt", MessageBoxButton.YesNo, MessageBoxImage.Question)
== MessageBoxResult.No)
e.Cancel = true;
}
protected override void OnClosed(EventArgs e)
{
base.OnClosed(e);
// Persist the list of favorites
...
}
protected override void OnInitialized(EventArgs e)
{
base.OnInitialized(e);
// Retrieve the persisted list of favorites
...
}
...
void exitMenu_Click(object sender, RoutedEventArgs e)
{
this.Close();
}
...
}
MainWindow calls InitializeComponent in its constructor to initialize the part of the Window defined in XAML. It then takes action on the Closing, Closed, and Initialized events. But it does this by overriding Window’s OnEventName methods rather than attaching event handlers to each event. It’s conventional for managed classes to expose protected OnEventName methods corresponding to each event, and WPF classes follow this convention. The end result is the same whether you override the method or attach an event handler, but the overriding mechanism tends to be a bit faster. The .NET Framework designers also felt that the override approach is a more natural way for a subclass to handle base class events.
Warning: Don’t forget to call InitializeComponent!
This was mentioned in Chapter 2, “XAML Demystified,” but it’s worth repeating: If you don’t call InitializeComponent in the constructor of any class that has corresponding compiled XAML, the object will not get constructed correctly. That’s because all the runtime processing of the compiled XAML happens inside this method. Fortunately, Visual Studio automatically generates calls to InitializeComponent, so it should be hard to accidentally omit.
The Closing event is raised when someone attempts to close the Window, whether it’s done programmatically or via the user clicking the Close button, pressing Alt+F4, and so on. Any event handler can veto the closure, however, if it sets the Cancel property in the passed-in CancelEventArgs object (the same one used by Windows Forms for the same purpose) to true. Inside this listing’s OnClosing method, the user is presented with a confirmation dialog, and the closing is canceled if the user clicks the No button. In this example, the dialog is just an annoyance because there’s no data for the user to potentially save. But a typical usage of this event is to prompt the user to save some data that he or she hasn’t already saved. If the closing process is not vetoed, the Window is closed, and the Closed event (which can’t be canceled) gets raised.
In Listing 7.1, MainWindow handles Closed to persist the list of favorite folders that the user might have designated while running the application. It also handles the Initialized event to retrieve that persisted list and update the user interface appropriately. (The upcoming “Persisting and Restoring Application State” section shows the code that does this.) The listing ends with an event handler for the File, Exit menu, which closes the Window when selected.
The Application Class
Now, the application simply needs an entry point to create and show the Window. You might expect to write a Main method as follows, given a MainWindow class as defined in Listing 7.1:
public static void Main()
{
MainWindow window = new MainWindow();
window.Show();
}
This is incorrect for two reasons. First, the main thread in a WPF application must run in a single-threaded apartment (STA). Therefore, Main must be marked with an STAThread attribute. More importantly, Show is a nonblocking call; it shows the Window (by calling the Win32 ShowWindow API) and then immediately returns. But the call to Show is the last line of Main, so the application then exits. The result is MainWindow flashing on the screen for a fraction of a second!
![]() FAQ: Please tell me that I did not just read the words single-threaded apartment! Isn’t that a legacy COM thing?
FAQ: Please tell me that I did not just read the words single-threaded apartment! Isn’t that a legacy COM thing?
Yes, apartments are a COM mechanism. And like previous Win32-based user interface frameworks (including Windows Forms), WPF requires the main thread to live in a single-threaded apartment. This is mainly the case to enable seamless interoperability with non-WPF technologies (the topic of Chapter 19, “Interoperability with Non-WPF Technologies”). But even without the interoperability requirement, the STA model—in which developers don’t need to worry about correctly handling calls from arbitrary threads—is valuable for making programming with WPF easier. When an object is created on an STA thread, it can be called only on that same thread.
WPF enforces that many of its APIs (on DispatcherObject-derived classes) are called from the correct thread by throwing an exception if the call comes from any other thread. That way, there’s no chance of accidentally calling such members from the wrong thread and only seeing intermittent failures, which can be incredibly hard to debug. At the same time, WPF provides an easy mechanism for multiple threads to communicate with the UI thread, as discussed in a later sidebar.
If you don’t know anything about COM and don’t want to deal with threading, don’t worry. Simply mark your Main method with STAThread and forget about these rules!
To prevent Main from instantly exiting after showing MainWindow, you need to tell the application to dispatch messages from the operating system to MainWindow indefinitely until it has been closed. These messages are the same Windows messages that Win32 applications are built on: WM_PAINT, WM_MOUSEMOVE, and so on. Internally, WPF must handle these messages to run on Windows. In Win32, you would write a loop (called a message loop or message pump) that processes incoming messages and sends them to the appropriate window procedure. In WPF, the easiest way to accomplish the same task is by using the System.Windows.Application class.
Using Application.Run
Application defines a Run method that keeps the application alive and dispatches messages appropriately. So the previous Main implementation can be corrected as follows:
[STAThread]
public static void Main()
{
Application app = new Application();
MainWindow window = new MainWindow();
window.Show();
app.Run(window);
}
Application also defines a StartupUri property that provides an alternative means of showing the application’s first Window. It can be used as follows:
[STAThread]
public static void Main()
{
Application app = new Application();
app.StartupUri = new Uri("MainWindow.xaml", UriKind.Relative);
app.Run();
}
This implementation of Main is equivalent to the previous one because the instantiation of MainWindow and the call to Show is done implicitly by Application. Notice that MainWindow is identified only by the name of the XAML source file as a uniform resource identifier (URI) and that an overload of Run is called that doesn’t need an instance of Window. WPF’s use of URIs is explained in Chapter 12, “Resources.”
The reason for having the StartupUri property is to enable this common initialization to be done in XAML instead. Indeed, the Visual Studio template for WPF Application projects defines an Application-derived class called App in XAML and sets the StartupUri property to the project’s main Window. For the Photo Gallery application, the content of App.xaml is as follows:
<Application x:Class="PhotoGallery.App"
xmlns="http://schemas.microsoft.com/winfx/2006/xaml/presentation"
xmlns:x="http://schemas.microsoft.com/winfx/2006/xaml"
StartupUri="MainWindow.xaml"/>
StartupUri can be set with a simple string, thanks to a type converter for Uri.
The corresponding code-behind file—App.xaml.cs—simply has the InitializeComponent call:
using System.Windows;
namespace PhotoGallery
{
public partial class App : Application
{
public App()
{
InitializeComponent();
}
}
}
This is the most common approach for structuring a standard WPF application and showing its main Window. Note, however, that if you have nothing custom to add to the Application code-behind file, you can omit it altogether.
![]() FAQ: Where’s the Main method in my WPF application?
FAQ: Where’s the Main method in my WPF application?
When you create a WPF Application project in Visual Studio, the generated project has no Main method, yet it still runs as expected! In fact, if you attempt to add a Main method, you get a compilation error telling you that it is already defined.
Application is special-cased when it is compiled from XAML, because Visual Studio assigns the XAML file the build action ApplicationDefinition. This causes a Main method to be autogenerated. For the Photo Gallery application, this entry point can be found inside App.g.cs:
[System.STAThreadAttribute()]
public static void Main() {
PhotoGallery.App app = new PhotoGallery.App();
app.InitializeComponent();
app.Run();
}
The App.g.cs file is hidden by Visual Studio unless you select Show All Files in the Solution Explorer.
![]() FAQ: How do I retrieve command-line arguments in my WPF application?
FAQ: How do I retrieve command-line arguments in my WPF application?
Command-line arguments are typically retrieved via a string array parameter passed to Main, but the common way to define WPF applications doesn’t allow you to implement the Main method. You can get around this in two different ways. One way is to forgo defining an Application-derived class in XAML, so you can manually define the Main method with a string array parameter. The easier way, however, is to simply call System.Environment.GetCommandLineArgs at any point in your application, which returns the same string array you’d get inside Main.
Another option for doing custom startup logic (whether command-line processing, custom splash screen behavior, and so on) is to change the build action of your Application-derived class from ApplicationDefinition to Page. This enables you to provide your own Main method. After you perform your custom logic inside Main, you can create and run the Application instance with the same three lines of code that would have been generated inside App.g.cs.
Other Uses for Application
The Application class is more than a simple entry point and message dispatcher. It contains a handful of events, properties, and methods for managing common application-level tasks. The events, which are typically handled by overriding the OnEventName methods in an Application-derived class (such as the Visual Studio–generated App class), include Startup and Exit, Activated and Deactivated (which behave like Window’s events of the same names but apply to any of Application’s Windows), and even SessionEnding, a cancellable event that occurs when the user logs off or shuts down the computer. The data passed with this event tells you whether it was raised due to logging off or shutting down, via a ReasonSessionEnding enumeration.
Because applications often have multiple windows, Application defines a read-only Windows collection to give you access to all open Windows. The initial Window is given a special designation and can be accessed via the MainWindow property. This property is read/write, however, so you can give any window the special designation at any time.
Warning: Don’t rely on a fixed index in the Windows collection!
Windows are added to Application.Windows in the order in which they are initially shown, and they are removed from the collection when they are closed. Therefore, the index of a given Window inside the collection can change over the lifetime of an application. You should not assume that Windows[2], for example, is always going to reference the same Window!
By default, Application exits (that is, the Run method finally returns) when all Windows have been closed. But this behavior can be modified by setting the ShutdownMode property to various values of the ShutdownMode enumeration. For example, you can make Application exit when the main Window (designated by the MainWindow property) exits, regardless of the state of other Windows. Or, you could make Application continue to run until its Shutdown method is explicitly called, even if all Windows have been closed. This behavior is handy for applications that want to “minimize” to the Windows notification area.
One very handy property on the Application class is the Properties collection. Properties, much like application state or session state in ASP.NET, is a dictionary for conveniently storing data (as key/value pairs) that can easily be shared among Windows or other objects. Rather than define public fields or properties on your Application-derived class, you might want to simply store such data in the Properties collection. For example, Photo Gallery stores the filename of the currently selected photo in Properties as follows:
myApplication.Properties["CurrentPhotoFilename"] = filename;
and it retrieves the filename as follows:
string filename = myApplication.Properties["CurrentPhotoFilename"] as string;
Note that both the key and value are of type Object, so they are not constrained to be strings.
Tip
Application-level tasks are usually performed from code within Windows, requiring various Windows in an application to obtain a reference to the current Application instance. Fortunately, you can easily get access to this instance with the static Application.Current property. So the myApplication variable in the preceding code snippets can be replaced with Application.Current:
Application.Current.Properties["CurrentPhotoFilename"] = filename;
![]() FAQ: How can I create a multiple-document interface (MDI) application using WPF?
FAQ: How can I create a multiple-document interface (MDI) application using WPF?
The WPF classes don’t have built-in support for creating MDI user interfaces, but Windows Forms classes do. Therefore, you can use the interoperability techniques discussed in Chapter 19 to get MDI in a WPF application. But please don’t! MDI interfaces don’t get to take full advantage of multiple monitors or window management features such as snapping. If you want to avoid multiple top-level Windows, you could consider creating a tabbed interface (really just this century’s version of MDI), for which WPF has built-in support.
![]() FAQ: How can I create a single-instance application using WPF?
FAQ: How can I create a single-instance application using WPF?
The classic approach to implementing single-instance behavior still applies to WPF applications: Use a named (and, therefore, operating system-wide) mutex. The following code shows how you can do this in C#:
bool mutexIsNew;
using (System.Threading.Mutex m =
new System.Threading.Mutex(true, uniqueName, out mutexIsNew))
{
if (mutexIsNew)
// This is the first instance. Run the application.
else
// There is already an instance running. Exit!
}
Just be sure that uniqueName won’t be chosen by other applications! It’s common to generate a globally unique identifier (GUID) at development time and use that as your identifier. Of course, nothing prevents a malicious application from creating a semaphore with the same name to prevent such an application from running!
It is often desirable to communicate the command-line arguments to the running instance rather than silently exiting the duplicate instance. The only functionality in the .NET Framework for this is provided by the Microsoft.VisualBasic.ApplicationServices.WindowsFormsApplicationBase class which, despite its name, is usable from any .NET language and with WPF. Alternatively, the first instance could open an RPC channel and then any new instances can try to connect to it in order to communicate this information.
Showing a Splash Screen
Ideally there would be no need for a splash screen, but sometimes an application takes a bit of time to show its main window after being launched—especially the first time it is launched in a user’s session (called cold start time). WPF includes special functionality for adding a splash screen to an application.
The splash screen that is enabled by this support is an image that appears instantly when the application is launched and fades out when the main window appears. Although you are able to use a PNG file with transparency to achieve non-rectangular shapes or effects such as shadows, you can’t use animated content (such as an animated GIF). You can’t use any kind of dynamic content or WPF elements, as the splash screen is shown before WPF has even finished loading. (Otherwise, it could take as long to display the splash screen as it would have taken to display the main window!) Therefore, you can’t produce fancy Office-style splash screens with animations and updating status text with this support. However, you can produce a nice experience with almost no effort.
To take advantage of this support in Visual Studio, simply select Splash Screen (WPF) in your WPF project’s Add New Item dialog. (If you’re still using Visual Studio 2008, you can download the same item template for from http://codeplex.com.) This adds an image to your project with the build action SplashScreen that you can customize as desired. That’s all there is to it! Figure 7.2 shows the splash screen for the Photo Gallery example application.
Another way to accomplish this is to simply add the desired image to your project and then set its build action to SplashScreen. This is the easiest approach in the older Visual Studio 2008 SP1, as it doesn’t require any additional download. Or, to have a little more control over the splash screen, such as dynamically selecting the image or setting a maximum amount of time for the splash screen to show, you could use the System.Windows.SplashScreen class. This class contains a few simple APIs for creating, showing, and hiding the splash screen.
Creating and Showing Dialogs
Windows provides a set of common dialogs (modal subwindows) that you can leverage to handle common tasks such as opening/saving files, browsing folders, choosing fonts or colors, and printing. You can also create your own custom dialogs with the same modal behavior. (In other words, the dialog doesn’t let you return to the current Window until you’ve dismissed it.)
Common Dialogs
WPF provides built-in exposure to a few of the common dialogs with classes that expose their functionality in a handful of straightforward methods and properties. Note that WPF does not natively render these dialogs; it internally calls Win32 APIs to show them and communicate with them. This is good because it means that the dialogs remain consistent with the version of the operating system on which your application is running.
Tip
Both Windows Forms and WPF define managed classes that wrap Windows common dialogs. But in WPF, not all the dialogs have corresponding classes. (Windows Forms has ColorDialog, FontDialog, and FolderBrowser, whereas WPF does not.) Therefore, the easiest way to use these omitted dialogs is to reference System.Windows.Forms.dll and use the managed classes defined by Windows Forms.
Using a built-in common dialog is often just a matter of instantiating it, calling its ShowDialog method, and then processing the result. For example, Photo Gallery uses PrintDialog to print photos as follows:
void printMenu_Click(object sender, RoutedEventArgs e)
{
string filename = (pictureBox.SelectedItem as ListBoxItem).Tag as string;
Image image = new Image();
image.Source = new BitmapImage(new Uri(filename, UriKind.RelativeOrAbsolute));
PrintDialog pd = new PrintDialog();
if (pd.ShowDialog() == true) // Result could be true, false, or null
pd.PrintVisual(image, Path.GetFileName(filename) + " from Photo Gallery");
}
If you ever find yourself considering writing your own custom dialog for which a common dialog is already provided by Windows, please abandon those thoughts immediately. Besides being inconsistent with most Windows applications, your dialog would undoubtedly lack features that certain users expect and would fall further behind with each new version of Windows. Just look at all the features that the built-in File Open dialog has: searching; special support for things like favorite places, libraries, and HomeGroup; multiple views with a rich set of columns to display/sort/filter; a preview pane; and much more. It also has features that are not directly visible, such as tracking what file(s) it opens to help populate recent and frequent file lists used in places such as Jump Lists.
Custom Dialogs
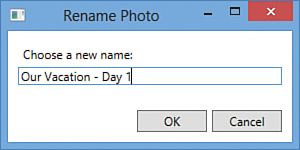
Although writing your own common dialog is a bad idea, applications often have good reasons to show their own custom dialogs, such as the simple Rename Photo dialog used by Photo Gallery, pictured in Figure 7.3.
In WPF, creating and using such a dialog is almost the same as creating and using a Window. In fact, such dialogs are just Windows, typically with a little extra handling for returning what’s known as a dialog result.
To show a Window as a modal dialog rather than a modeless window, simply call its ShowDialog method instead of Show. Unlike Show, ShowDialog is a blocking call (so it doesn’t exit until the Window is closed), and it returns a nullable Boolean (bool? in C#). Here is how Photo Gallery consumes its custom RenameDialog:
void renameMenu_Click(object sender, RoutedEventArgs e)
{
string filename = (pictureBox.SelectedItem as ListBoxItem).Tag as string;
RenameDialog dialog = new RenameDialog(
Path.GetFileNameWithoutExtension(filename));
if (dialog.ShowDialog() == true) // Result could be true, false, or null
{
// Attempt to rename the file
try
{
File.Move(filename, Path.Combine(Path.GetDirectoryName(filename),
dialog.NewFilename) + Path.GetExtension(filename));
}
catch (Exception ex)
{
MessageBox.Show(ex.Message, "Cannot Rename File", MessageBoxButton.OK,
MessageBoxImage.Error);
}
}
}
When you develop a Window that you know will be used as a dialog (such as RenameDialog), you typically want the ShowDialog method to return true if the action enabled by a dialog is successful and false if it is unsuccessful or canceled. To control what gets returned by this method, simply set Window’s DialogResult property (of type bool?) to the desired value. Setting DialogResult implicitly closes the Window. Therefore, RenameDialog’s OK button could have an event handler like the following:
void okButton_Click(object sender, RoutedEventArgs e)
{
this.DialogResult = true;
}
Or it could simply have its IsDefault property set to true, which accomplishes the same behavior without any procedural code.
Persisting and Restoring Application State
A standard desktop application can have full access to the computer (depending on user security settings), so there are many options for storing data, such as using the Windows Registry or the local file system. But an attractive alternative to these classic approaches is to use the .NET Framework’s isolated storage technology. Besides being easy to use, the same techniques work in a number of environments, such as in a Silverlight application or a XAML Browser Application (covered later in this chapter).
Photo Gallery uses the code in Listing 7.2 to persist and retrieve the user’s favorites data to and from isolated storage.
LISTING 7.2 Portions of MainWindow.xaml.cs Related to Isolated Storage
protected override void OnClosed(EventArgs e)
{
base.OnClosed(e);
// Write each favorites item when the application is about to close
IsolatedStorageFile f = IsolatedStorageFile.GetUserStoreForAssembly();
using (IsolatedStorageFileStream stream =
new IsolatedStorageFileStream("myFile", FileMode.Create, f))
using (StreamWriter writer = new StreamWriter(stream))
{
foreach (TreeViewItem item in favoritesItem.Items)
writer.WriteLine(item.Tag as string);
}
}
protected override void OnInitialized(EventArgs e)
{
base.OnInitialized(e);
// Read each favorites item when the application is initialized
IsolatedStorageFile f = IsolatedStorageFile.GetUserStoreForAssembly();
using (IsolatedStorageFileStream stream =
new IsolatedStorageFileStream("myFile", FileMode.OpenOrCreate, f))
using (StreamReader reader = new StreamReader(stream))
{
string line = reader.ReadLine();
while (line != null)
{
AddFavorite(line);
line = reader.ReadLine();
}
}
...
}
The IsolatedStorageFile and IsolatedStorageFileStream classes are in the System.IO.IsolatedStorage namespace. All data stored in isolated storage is physically located in a hidden folder under the current user’s Documents folder.
Tip
For an even simpler way to persist and retrieve application settings, check out the Visual Studio–generated Settings class (under PropertiesSettings.settings). This mechanism stores data in an application configuration file and provides strongly typed access.
Deployment: ClickOnce Versus Windows Installer
When you think of deploying standard desktop applications, you probably think of a setup program that places the relevant files in the Program Files directory (or a user-chosen directory), registers the necessary components, adds itself to the installed programs list under Control Panel, and perhaps adds Start menu or desktop shortcuts. You can do all these things with a WPF application by using Windows Installer technology. Visual Studio contains a “Setup and Deployment” project type for doing just that.
ClickOnce, however, is a more recent and simpler installation technology (introduced with the .NET Framework 2.0). It’s an attractive option for installations that don’t need the full power of Windows Installer. Visual Studio exposes ClickOnce functionality via a wizard accessed from the Build, Publish menu. If you don’t have Visual Studio, you can use the Windows SDK, which has two tools for using ClickOnce: the mage.exe command-line tool and the mageUI.exe graphical tool.
In short, Windows Installer has the following benefits over ClickOnce:
![]() Supports customized setup user interfaces, such as showing an end user license agreement (EULA)
Supports customized setup user interfaces, such as showing an end user license agreement (EULA)
![]() Can give control over where the files are installed
Can give control over where the files are installed
![]() Supports arbitrary code at setup time via custom actions
Supports arbitrary code at setup time via custom actions
![]() Supports installing shared assemblies in the Global Assembly Cache
Supports installing shared assemblies in the Global Assembly Cache
![]() Supports registration of COM components and file associations
Supports registration of COM components and file associations
![]() Supports machine-wide installation (that is, the program is available for all users)
Supports machine-wide installation (that is, the program is available for all users)
![]() Supports offline installation from a CD/DVD
Supports offline installation from a CD/DVD
ClickOnce has the following benefits over Windows Installer:
![]() Contains built-in support for automatic updates and rolling back to previous versions.
Contains built-in support for automatic updates and rolling back to previous versions.
![]() Provides two installation models: a web-like experience where the application is addressed via a URL in a web browser and appears to “go away” when it is closed (although it is still cached for future use) and a more traditional experience where the application can have a Start menu shortcut and show up in Control Panel’s list of installed programs.
Provides two installation models: a web-like experience where the application is addressed via a URL in a web browser and appears to “go away” when it is closed (although it is still cached for future use) and a more traditional experience where the application can have a Start menu shortcut and show up in Control Panel’s list of installed programs.
![]() Guarantees that installation doesn’t affect other applications because all files are placed in an isolated area, and no custom registration can be done.
Guarantees that installation doesn’t affect other applications because all files are placed in an isolated area, and no custom registration can be done.
![]() Practically guarantees a clean uninstallation because no custom code could be run during installation. (Full-trust applications still have the power to leave artifacts on the computer while they run.)
Practically guarantees a clean uninstallation because no custom code could be run during installation. (Full-trust applications still have the power to leave artifacts on the computer while they run.)
Tip
Many people don’t realize that ClickOnce can still be used even if an application contains unmanaged code, as long as the main executable isn’t entirely unmanaged. You might need to alter some aspects of the unmanaged code, however, for this to work. For example, if COM objects are registered, you would need to set up registration-free COM instead.
![]() Integrates with .NET code access security, enabling users to run applications without having to trust them completely.
Integrates with .NET code access security, enabling users to run applications without having to trust them completely.
Navigation-Based Desktop Applications
Although the concept of navigation is usually associated with web browsers, many Windows desktop applications implement some sort of navigation scheme, such as File Explorer and Windows Media Player.
The first version of Photo Gallery, represented in Figure 7.1, has hand-crafted and primitive navigation functionality for traversing photos and returning to the main gallery screen. It turns out, however, that WPF has a lot of built-in infrastructure for adding rich navigation to an application with minimal effort. With these features, it becomes trivial to implement an application that can browse and navigate content like a web browser.
Although the title of this section makes it sound like the choice of using navigation impacts the design of your entire application, the truth is that navigation support can be integrated into an otherwise-traditional application as little or as much as you want. And even if you don’t want to expose a browser-style user interface, you can still use the navigation support to structure your application more like you would structure a website. For example, you can organize various pieces of user interface in separate pages identifiable via URIs and use hyperlinks to navigate from one to another. Or you can just use navigation simply for a small chunk of an application or component, such as a wizard.
This section examines these features and highlights some of the changes made to the “standard” version of Photo Gallery to leverage them. Adding navigation to a WPF application doesn’t change the discussions in the previous section about deployment, persisting data, and so on. Instead, it involves becoming familiar with a few additional elements, such as NavigationWindow and Page.
Pages and Their Navigation Containers
When using navigation in WPF, content is typically organized in Page elements. (Page is basically a simpler version of the Window class.) Page elements can then be hosted in one of two built-in navigation containers: NavigationWindow or Frame. These containers provide a way to navigate from one page to another, a “journal” that keeps track of navigation history, and a series of navigation-related events.
![]() FAQ: What’s the difference between NavigationWindow and Frame?
FAQ: What’s the difference between NavigationWindow and Frame?
They have almost identical functionality, except that NavigationWindow functions more like a top-level browser, whereas Frame functions more like an HTML FRAME or IFRAME. Whereas NavigationWindow is a top-level window, Frame can fill an arbitrary (but rectangular) region of its parent element. A Frame can be nested inside a NavigationWindow or inside another Frame. By default, NavigationWindow has a bar along the top with Back/Forward buttons and Frame does not, but you can add or remove this bar on either element by setting the ShowsNavigationUI property on the Page it contains. In addition, NavigationWindow has a ShowsNavigationUI property and Frame has a NavigationUIVisibility property for enabling or disabling this bar, regardless of Page settings.
The navigation-enabled version of Photo Gallery changes Application’s StartupUri to point to the following NavigationWindow:
<NavigationWindow x:Class="PhotoGallery.Container"
xmlns="http://schemas.microsoft.com/winfx/2006/xaml/presentation"
xmlns:x="http://schemas.microsoft.com/winfx/2006/xaml"
Title="Photo Gallery" Source="MainPage.xaml">
</NavigationWindow>
The MainPage.xaml referenced by the NavigationWindow has a Page root that contains all the content that the original MainWindow.xaml previously had:
<Page x:Class="PhotoGallery.MainPage"
xmlns="http://schemas.microsoft.com/winfx/2006/xaml/presentation"
xmlns:x="http://schemas.microsoft.com/winfx/2006/xaml"
Title="Photo Gallery" Loaded="Page_Loaded">
...Application-specific content...
</Page>
Similarly, the code-behind in MainPage.xaml.cs corresponds to the code-behind that was previously in MainWindow.xaml.cs. The main code difference in MainPage.xaml.cs is that the OnClosing and OnClosed logic has been moved back to the Window level because Page doesn’t have these methods (nor would it be appropriate to invoke them every time the Page goes away).
As seen in Figure 7.4, the introduction of NavigationWindow and Page into Photo Gallery doesn’t appear to add much—just a new bar at the top of the window with (disabled) Back and Forward buttons. But it sets up the application to navigate to other content within the same container, which is covered next.

Of course, having an extra bar along the top of this application looks a bit ridiculous. An application such as Photo Gallery would be better served by implementing custom Back and Forward buttons that hook into NavigationWindow’s built-in navigation functionality. For example, the Click handler for the Back button could call NavigationWindow.GoBack, and the Click handler for the Forward button could call NavigationWindow.GoForward.
Tip
WPF’s navigation containers can hold more than Pages; they can also hold HTML files (from the file system or from the Internet)! You can even navigate back and forth between WPF content and HTML content, using techniques described in the next section.
A Page can interact with its navigation container by using the NavigationService class, which exposes relevant functionality regardless of whether the container is a NavigationWindow or a Frame. You can get an instance of NavigationService by calling the static NavigationService.GetNavigationService method and passing the instance of the Page. But even more easily, you can simply use Page’s NavigationService property. For example, you can set a title that is used in the drop-down menu associated with the Back and Forward buttons as follows:
this.NavigationService.Title = "Main Photo Gallery Page";
Or you can refresh the current Page as follows:
this.NavigationService.Refresh();
But Page also contains a few of its own properties that control the behavior of the parent container, such as WindowHeight, WindowWidth, and WindowTitle. These are handy because you can easily set them within the XAML for the Page.
Navigating from Page to Page
The purpose of using navigation is to progress from one page to another, whether in a predetermined linear sequence (as with a simple wizard), a user-driven path through a hierarchy (as with most websites), or a dynamically generated path.
You can perform navigation in three main ways:
![]() Calling the
Calling the Navigate method
![]() Using
Using Hyperlinks
![]() Using the journal
Using the journal
Calling the Navigate Method
Navigation containers support a Navigate method that enables the current page to be changed. You can call Navigate with an instance of the target page or a URI that points to it:
// Navigate to a page instance
PhotoPage nextPage = new PhotoPage();
this.NavigationService.Navigate(nextPage);
// Or navigate to a page via a URI
this.NavigationService.Navigate(new Uri("PhotoPage.xaml", UriKind.Relative));
The Page specified by a URI could be a loose XAML file or a compiled resource. (Chapter 12 explains how such URIs work in WPF.) The root element of this XAML file must be a Page.
If you want to navigate to an HTML page, you must use the overload of Navigate that accepts a URI. Here’s an example:
this.NavigationService.Navigate(new Uri("http://www.adamnathan.net/wpf"));
Using Hyperlink
For simple navigation schemes, WPF provides a Hyperlink element that acts much like hyperlinks in HTML. You can embed Hyperlinks inside a TextBlock element and, as with the HTML AREA (or A) tag, the content is automatically rendered as a clickable hyperlink that navigates the current page to the desired target page. This target page is specified via Hyperlink’s NavigateUri property (the analog to the href attribute in HTML). For example, the following XAML gets rendered as shown in Figure 7.5:
<TextBlock>
Click <Hyperlink NavigateUri="PhotoPage.xaml">here</Hyperlink> to view the photo.
</TextBlock>
Hyperlink, therefore, is really just a more-wordy version of the HTML A tag. Although it can be used programmatically like any other WPF element, its purpose is for simple HTML-like links where the target page is known in advance.
Tip
If you want to combine the flexibility of programmatic navigation with the convenience of Hyperlink’s automatic text formatting, you can use Hyperlink with a dummy NavigateUri value, then handle Hyperlink’s Click event and call Navigate however you desire inside this handler.
![]() FAQ: How can I have a link in an HTML page that navigates to a WPF Page?
FAQ: How can I have a link in an HTML page that navigates to a WPF Page?
Hyperlinks in HTML work automatically, but there’s no way to give an HREF value that points to a compiled WPF Page. Instead, you can use a technique similar to the previous tip to achieve HTML-to-WPF navigation: Use a sentinel value as the HREF value, listen to the Navigating event, and then dynamically change the target by calling Navigate yourself. (Navigating and other events are examined in the next section.) Depending on the nature of the desired HTML and WPF interaction, you might also want to consider creating a XAML Browser Application or a loose XAML page (or think about using Silverlight instead). These options are discussed at the end of this chapter.
Tip
Hyperlink supports more complex functionality, similar to HTML hyperlinks. For example, to navigate a single Frame in the presence of multiple Frames, set Hyperlink’s TargetName property to the name of the desired Frame. To navigate to a section of a Page (like using # anchors in HTML), simply append a # and a name to the URI. The name can be the name of any element on the target page.
Using the Journal
Both navigation containers have a journal that records navigation history, just like a web browser. This journal provides the logic behind the Back and Forward buttons shown in Figure 7.4. Internally, it maintains two stacks—a back stack and a forward stack—and uses them as shown in Table 7.1.

The Back and Forward actions can be initiated by the user or invoked programmatically by calling the navigation container’s GoBack and GoForward methods (after calling CanGoBack or CanGoForward to avoid an exception by trying to pop an empty stack).
NavigationWindow always has a journal, but Frame might not have its own journal, depending on the value of its JournalOwnership property. It has the following settings:
![]() OwnsJournal—The
OwnsJournal—The Frame has its own journal.
![]() UsesParentJournal—The history is stored in the parent container’s journal or not at all if the parent doesn’t have a journal.
UsesParentJournal—The history is stored in the parent container’s journal or not at all if the parent doesn’t have a journal.
![]() Automatic—Equivalent to
Automatic—Equivalent to UsesParentJournal if the Frame is hosted in either of the two navigation containers (NavigationWindow or Frame), or OwnsJournal otherwise. This is the default value.
When Frame gets its own journal, it also gets the built-in navigation buttons. But if you don’t want them, you can set NavigationUIVisibility to Hidden.
Tip
When navigating to a Page via a URI (whether done by calling the Navigate method or by using Hyperlink), a new instance of Page is created, even if you’ve already visited it. Therefore, you need to maintain your own state (via static variables or Application.Properties, for example) if you want a page to “remember” its data. (When calling an overload of Navigate that accepts a Page instance, of course, you’re in control of whether a new or old instance is used.)
In the case of journal navigation, however, you can force a Page to reuse the same instance by setting its JournalEntry.KeepAlive attached property to true.
Tip
A Page can opt out of the journal by setting its RemoveFromJournal property to true. This can be appropriate for pages representing a sequence of steps that shouldn’t be randomly visited after the transaction is complete.
![]() FAQ: Web browser–like Back and Forward actions are handled by the journal, but how do I implement Stop and Refresh?
FAQ: Web browser–like Back and Forward actions are handled by the journal, but how do I implement Stop and Refresh?
There’s no built-in user interface for Stop and Refresh buttons, but navigation containers have ways to easily accomplish these actions.
To stop a pending navigation at any time, you can call the navigation container’s StopLoading method.
To refresh a page, simply call the navigation container’s parameterless Refresh method. This acts identically to calling Navigate with the URI or instance for the current page, except that the data passed to the Navigating event contains the NavigationMode.Refresh value, in case any event handlers want to customize their behavior in this situation.
Navigation Events
Regardless of whether navigation occurs via Navigate, Hyperlinks, or the journal, it is performed asynchronously. A number of events are raised during the navigation process that enable you to display a rich user interface or even cancel navigation.
Figures 7.6 and 7.7 show the progression of navigation-related events when the first page is loaded and when navigation occurs from one page to another.

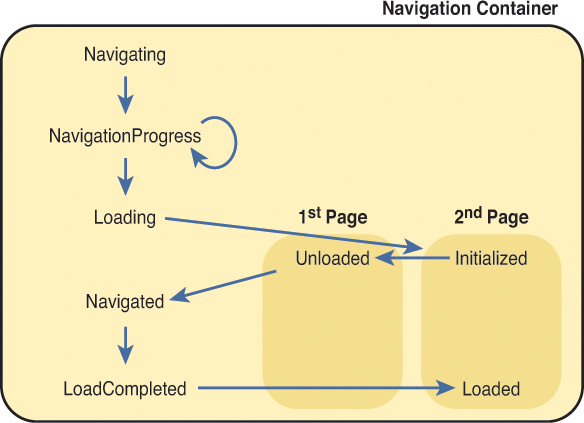
NavigationProgress is raised periodically until Navigated is raised. One event that isn’t shown is NavigationStopped. This event is raised instead of LoadCompleted if the navigation is canceled or if an error occurs.
Tip
A navigation container raises the events shown in Figures 7.6 and 7.7 when navigation occurs within itself (including child containers). But Application also defines these events, enabling you to handle them in one place for all navigation containers within the Application.
Warning: Navigation events aren’t raised when navigating from one HTML page to another!
The WPF navigation events are raised when navigating from one WPF Page to another, from a WPF Page to an HTML page, and from an HTML page to a WPF Page. However, these events are not raised when navigating from one HTML page to another HTML page. Such HTML-to-HTML navigation also doesn’t appear in the journal.
Passing Data Between Pages
When an application employs navigation for more than just document browsing, it likely needs to pass data from one page to another. HTML-based web applications might encode such data as URL parameters or use server-side variables. In WPF, you can use a variety of techniques for sending or returning data.
Sending Data to Pages
WPF supports a scheme similar to URL parameters via overloads of the Navigate method that accept an extra object parameter. There’s an overload for the version that accepts a Page instance and an overload for the version that accepts a Uri. You can pass anything you want via this object parameter (a simple data type, an array, a custom data structure, and so on), and it is sent to the target page. Here’s an example:
int photoId = 10;
// Navigate to a page instance
PhotoPage nextPage = new PhotoPage();
this.NavigationService.Navigate(nextPage, photoId);
// Or navigate to a page via a URI
this.NavigationService.Navigate(
new Uri("PhotoPage.xaml", UriKind.Relative), photoId);
For the target page to receive this data, it must handle the navigation container’s LoadCompleted event and check the ExtraData parameter of the event argument:
this.NavigationService.LoadCompleted += new
LoadCompletedEventHandler(container_LoadCompleted);
...
void container_LoadCompleted(object sender, NavigationEventArgs e)
{
if (e.ExtraData != null)
LoadPhoto((int)e.ExtraData);
}
A simpler scheme of passing data, however, is to use the basic version of Navigate that accepts a Page instance and define a constructor on the target page that accepts the custom data (using as many parameters as you want). This looks like the following for the Photo Gallery example:
int photoId = 10;
// Navigate to a page instance
PhotoPage nextPage = new PhotoPage(photoId);
this.NavigationService.Navigate(nextPage);
For this to work, PhotoPage has a constructor defined as follows:
public PhotoPage(int id)
{
LoadPhoto(id);
}
An advantage of this approach is that the parameters can be strongly typed, so PhotoPage doesn’t need to check that the passed-in data is non-null or an integer. The type system guarantees it!
A third approach is to globally share the data in the Application object’s Properties collection, discussed earlier in the chapter. Here’s an example:
// Navigate to a page by instance or URI
Application.Properties["PhotoId"] = 10;
this.NavigationService.Navigate(...);
The target page can then check the value from anywhere in code that gets executed after Navigate is called:
if (Application.Properties["PhotoId"] != null)
LoadPhoto((int)Application.Properties["PhotoId"]);
This might be the desired approach if you want to share the data between multiple pages (rather than explicitly pass it from page to page). However, just like the first scheme, it lacks the convenience of type safety.
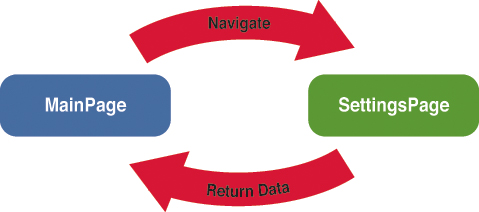
Returning Data from Pages with PageFunction
Perhaps you want the user to navigate to a page, take some action, and then automatically return to a previous page that can act on the action (and, therefore, must receive data from the latter page). A classic example for this is a settings or options page. You could simulate this behavior by navigating forward to the old page and passing the data using the first two of the three schemes just discussed. This process is illustrated in Figure 7.8.

This can be awkward, however. If you’re navigating via URI, you’d need to manually reconstruct the state of the new instance of MainPage to match the old instance. Furthermore, navigating forward to simulate the action of navigating back causes undesirable effects in the journal without manually manipulating it.
Instead, you could share the data globally (via Application.Properties) and have the target page call the navigation container’s GoBack method to return to the previous page. This works but is a bit sloppy because of the global (and typeless) sharing of data that might be relevant to only two pages rather than to the entire application.
Therefore, WPF provides yet another mechanism to “return” data to the previous page in a type-safe manner and automatically navigate back to it, as illustrated in Figure 7.9.
This can be accomplished with a funny-named class called PageFunction. A PageFunction is really just a Page (because it derives from Page), but it acts like a function because of its mechanism for returning data.
Visual Studio has a template for creating a new PageFunction just like it does for Page. Here’s what you get when you choose Page Function (WPF) via Visual Studio’s Add New Item dialog:
<PageFunction
xmlns="http://schemas.microsoft.com/winfx/2006/xaml/presentation"
xmlns:x="http://schemas.microsoft.com/winfx/2006/xaml"
xmlns:sys="clr-namespace:System;assembly=mscorlib"
x:Class="MyProject.PageFunction1"
x:TypeArguments="sys:String"
Title="PageFunction1">
<Grid>
</Grid>
</PageFunction>
Notice the use of the TypeArguments keyword. PageFunction is actually a generic class (as in PageFunction<T>), where the type argument represents the type of the return value. For the PageFunction shown, the returned value must be a string. Although the use of generics makes defining a PageFunction a little trickier, the benefit is the type safety that is lacking from some of the earlier schemes.
Because PageFunction derives from Page, you can navigate to it just as you would with any other page:
PageFunction1 nextPage = new PageFunction1<string>();
this.NavigationService.Navigate(nextPage);
To receive the return value, the source page must handle PageFunction’s Return event:
nextPage.Return += new ReturnEventHandler<string>(nextPage_Return);
...
void nextPage_Return(object sender, ReturnEventArgs<string> e)
{
string returnValue = e.Result;
}
Notice that the same generic argument also applies to the ReturnEventHandler and ReturnEventArgs types. This enables the event argument’s Result property to be the same type as the data returned by the PageFunction (a string in this case).
The PageFunction can return data by wrapping it in the ReturnEventArgs type and calling OnReturn, which it inherits from the base PageFunction class:
OnReturn(new ReturnEventArgs<string>("the data"));
Gadget-Style Applications
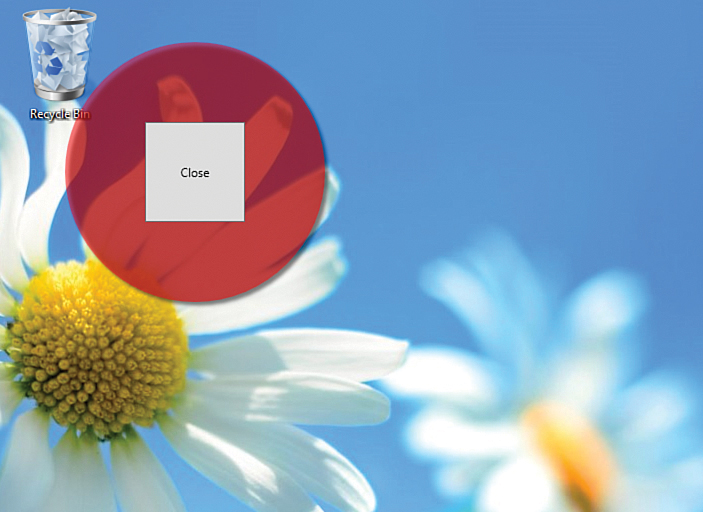
WPF makes it easy to create nonrectangular top-level windows. With this support, you could give an otherwise-standard application custom chrome with a more fun shape. Or you could create a smaller gadget-style application that looks like a custom object “floating” on the desktop.
To take advantage of this support, just do the following:
1. On the Window, set AllowsTransparency to true. (If you’re doing this programmatically, it must be set before the Window has been shown. Otherwise, you’ll get an InvalidOperationException.)
2. Set the Window’s WindowStyle to None, which removes all the chrome. (Any other setting combined with AllowsTransparency="True" results in an InvalidOperationException.)
3. Set the Window’s Background to Transparent. This prevents the content from being surrounded by an opaque rectangle.
4. Decide how you want the user to move the Window around and call Window’s DragMove method at the appropriate place to enable it. Technically, this is not a requirement, but an application that can’t be moved is not going to please users.
5. Consider adding a custom Close Button so the user doesn’t have to right-click the Windows taskbar in order to close the application. This is especially important if you set ShowInTaskbar to false!
Here is a XAML file for such a Window, which contains a translucent red circle and a Close Button:
<Window x:Class="GadgetWindow"
xmlns="http://schemas.microsoft.com/winfx/2006/xaml/presentation"
xmlns:x="http://schemas.microsoft.com/winfx/2006/xaml"
Height="300" Width="300"
AllowsTransparency="True" WindowStyle="None" Background="Transparent"
MouseLeftButtonDown="Window_MouseLeftButtonDown">
<Grid>
<Ellipse Fill="Red" Opacity="0.5" Margin="20">
<Ellipse.Effect>
<DropShadowEffect/>
</Ellipse.Effect>
</Ellipse>
<Button Margin="100" Click="Button_Click">Close</Button>
</Grid>
</Window>
DropShadowEffect, covered in Chapter 15, “2D Graphics,” is added to give the circle a bit more visual polish. This Window uses the following code-behind file:
using System.Windows;
using System.Windows.Input;
public partial class GadgetWindow : Window
{
public GadgetWindow()
{
InitializeComponent();
}
void Window_MouseLeftButtonDown(object sender, MouseButtonEventArgs e)
{
this.DragMove();
}
void Button_Click(object sender, RoutedEventArgs e)
{
this.Close();
}
}
To enable the Window to be moved, the handler for MouseLeftButtonDown simply calls Window.DragMove. DragMove handles the rest of the logic automatically. Figure 7.10 shows this little application in action.
XAML Browser Applications
WPF supports the creation of applications that run directly in a web browser. They are called XAML Browser Applications (XBAPs), but WPF Browser Applications would be a more appropriate name. XBAPs have become less attractive over time as Silverlight has gained more of WPF’s power and HTML5 has become a great alternative, but they still serve a purpose of delivering partial-trust WPF content in a browser, without any prompts getting in the way.
![]() FAQ: Do XAML Browser Applications work on any operating system or in any web browser?
FAQ: Do XAML Browser Applications work on any operating system or in any web browser?
No. Unlike Silverlight applications, XBAPs require the full .NET Framework (3.0 or later) and therefore run only on Windows. They are also only supported in Internet Explorer (or any program that hosts the Microsoft WebBrowser ActiveX control) and Firefox (with the .NET Framework 3.5 or later). Starting with the .NET Framework 4.0, Firefox support requires an add-on to be explicitly downloaded and installed.
Creating an XBAP isn’t much different from creating a standard desktop application, as long as you stay within the subset of the .NET Framework available from partial-trust code. The main differences are as follows:
![]() Not all features in WPF or the .NET Framework are accessible (by default).
Not all features in WPF or the .NET Framework are accessible (by default).
![]() Navigation is integrated into the browser.
Navigation is integrated into the browser.
![]() Deployment is handled differently.
Deployment is handled differently.
This section drills into these three aspects of XAML Browser Applications.
So how do you create a XAML Browser Application? If you have Visual Studio, you simply follow these steps:
1. Create a new XAML Browser Application project in Visual Studio. (Visual Studio appropriately calls it a WPF Browser Application instead.)
2. Create the user interface inside a Page and add the appropriate code-behind logic.
3. Compile and run the project.
If you don’t have Visual Studio, you can still use MSBuild on project files with the appropriate settings, as described in the Digging Deeper sidebar.
Digging Deeper: How XAML Browser Applications Work
There’s nothing XBAP-specific about the source files generated by Visual Studio. The key is in a handful of settings in the project file, such as these:
<HostInBrowser>True</HostInBrowser>
<Install>False</Install>
<TargetZone>Internet</TargetZone>
The project file also contains a few settings to make the debugger launch PresentationHost.exe rather than the output of the compilation.
A standard executable is generated, but it does nothing if it is run directly because the infrastructure quits if it detects that it’s not hosted in a web browser. In addition to the EXE file, two XML files are generated:
![]() A
A .manifest file, which is a ClickOnce application manifest
![]() An
An .xbap file, which is simply a ClickOnce deployment manifest (typically seen with the .application extension for non-XBAPs)
And that’s it. XBAPs are really just online-only ClickOnce applications, but with some special handling by WPF for the browser-integrated experience.
Warning: Beware of ClickOnce caching!
XBAPs are based on ClickOnce technology, which has caching behavior that can be confusing during development. For maximum performance, a ClickOnce application is stored in a cache when first run. Subsequent requests to run the application go to the cache unless the application’s version number changes. (As with isolated storage, the ClickOnce cache is implemented as a hidden folder under the current user’s Documents folder.)
Therefore, if you make a change to an application, recompile it, and then run it, you won’t see the result of your changes if you don’t also change the version number! The default Visual Studio settings increment your version number each time you recompile (because of the AssemblyVersion("1.0.*") marking in the AssemblyInfo source file), so you won’t encounter this issue unless you give your application a fixed version number.
If you find incrementing the version number on recompilation to be unacceptable, you can clear the cache at any time, using the mage.exe tool in the Windows SDK. Just run mage -cc at a command prompt. Or you can execute the following command without requiring the SDK to be installed:
rundll32 %windir%system32dfshim.dll CleanOnlineAppCache
Limited Feature Set
For a simple WPF application, you can change a few project settings, recompile, and run it just fine as a XAML browser application. But WPF applications usually aren’t so simple. What complicates developing a XAML browser application is that XBAPs run as partially trusted in the Internet zone, so not all APIs work in this context. For example, if you try to convert the standard Photo Gallery application to an XBAP, you’ll quickly find that a call such as the following throws a (very verbose) security exception:
// Whoops! Partially trusted code is not allowed to get this data!
AddFavorite(Environment.GetFolderPath(Environment.SpecialFolder.MyPictures));
The .NET Framework’s code access security blocks the call because it requires FileIOPermission, which is not granted to the Internet zone by default. (Note that individual users could expand the set of allowed permissions in their Internet zone, but they are not likely to do so, nor should they do so, because of the security risks.)
For most people, figuring out what works and what doesn’t in the Internet zone is a process of trial and error. Some features don’t work because of their inherently insecure nature—for example, arbitrary access to the local file system or Registry, interoperability with unmanaged code, or launching new Windows. (You can use Popup elements, but they won’t extend past the Page’s bounds.) But some other features that aren’t allowed in the Internet zone aren’t obvious because the restriction is a result of implementation details. Other features may be restricted depending on the host browser. For example, WPF does not allow its WebBrowser control to be used in an XBAP when the XBAP is hosted in Firefox.
Tip
If you want to share the same code between a full-trust standard application and a partial-trust XBAP, it’s helpful to be able to determine which state you’re in at runtime so you can adapt to your environment. This can be done with the static BrowserInteropHelper.IsBrowserHosted Boolean property in the System.Windows.Interop namespace.
Despite the limitations, there is still a lot of functionality to take advantage of in the Internet zone. You still can display rich text and media, read/write to isolated storage (up to 512 KB), and open arbitrary files on the host web server. You can even launch the browser’s standard File, Open dialog to interact with local files (with the user’s explicit permission). This is done with Microsoft.Win32.OpenFileDialog as follows:
string fileContents = null;
OpenFileDialog ofd = new OpenFileDialog();
if (ofd.ShowDialog() == true) // Result could be true, false, or null
{
using (Stream s = ofd.OpenFile())
using (StreamReader sr = new StreamReader(s))
{
fileContents = sr.ReadToEnd();
}
}
Tip
Another difference between a XAML Browser Application and a standard Windows desktop application is the way in which parameters (or, really, any external data) are passed in. One simple approach is to send URL parameters to the HTML page hosting an XBAP and then have the XBAP call BrowserInteropHelper.Source to retrieve the complete URL (including parameters). Another approach is to store the information in a browser cookie and then retrieve the cookie by using the Application.GetCookie method.
![]() FAQ: How do I enable my own components to run in the Internet zone?
FAQ: How do I enable my own components to run in the Internet zone?
You use the same mechanism that applies to all .NET components: If you mark an assembly with the AllowPartiallyTrustedCallers attribute and install it into the Global Assembly Cache (which can be done only if the user trusts your code and decides to run it), any of the assembly’s public APIs can be called by any XBAP.
Note that marking an assembly with AllowPartiallyTrustedCallers should never be taken lightly. Any security bug or design flaw that makes it inappropriate for the Internet zone could open up your users to a severe security hole. And if that happens, they might never trust code from you again!
![]() FAQ: How do I create a full-trust XAML Browser Application?
FAQ: How do I create a full-trust XAML Browser Application?
If you want to take advantage of functionality that requires a higher level of trust yet still want to be integrated into a browser, you can configure an XBAP to require full trust. The two actions to enable this are a bit convoluted, however:
1. In the ClickOnce application manifest (app.manifest), add Unrestricted="true" to the PermissionSet XML element, as in the following example:
<PermissionSet class="System.Security.PermissionSet" version="1"
ID="Custom" SameSite="site" Unrestricted="true"/>
2. In the project file (with the .csproj or .vbproj extension), change this:
<TargetZone>Internet</TargetZone>
to this:
<TargetZone>Custom</TargetZone>
You can also make this change inside Visual Studio’s project properties user interface on the Security tab.
After you do this, deploying and running your XBAP in the Local Computer zone should work just fine. It’s also possible to run such a full-trust application in the Internet zone, but only if users list you (or, more specifically, the certificate used to sign the manifest) as a trusted publisher.
Integrated Navigation
All Pages in XBAPs are implicitly hosted in a NavigationWindow. In Firefox, you see the typical bar with Back and Forward buttons. This is usually not desirable because many XBAPs don’t take advantage of navigation. And if they do, having separate Back and Forward buttons right below the browser’s Back and Forward buttons is clumsy. To disable this unwanted navigation bar, you can set ShowsNavigationUI to false on your Page.
Fortunately, Internet Explorer (versions 7 and later) merge the NavigationWindow’s journal with the browser’s own journal, providing a much slicker experience. The separate navigation bar is not shown, and WPF journal entries automatically appear in the browser’s Back/Forward list, right along with web pages.
Tip
The journal integration in Internet Explorer 7 and later applies only to the top-level Page. If you host an XBAP in an HTML IFRAME, you still get the navigation bar unless you set ShowsNavigationUI to false on the WPF Page.
Deployment
Deploying an XBAP is as easy as deploying any other ClickOnce application. It’s a matter of using Visual Studio’s publishing wizard (or the Mage tool in the Windows SDK) and copying the files to a web server or file share. (The web server must also be configured to serve the content correctly.)
The most compelling thing about XBAPs is the fact that users can install and run them simply by navigating to a URL, with no plug-in required (in the case of Internet Explorer). In addition, unlike with other ClickOnce applications, no security prompts get in the way, assuming that you don’t create an XBAP that needs nonstandard permissions. (So you don’t even have to “click once” to view such an application!)
![]() FAQ: There are no security prompts when running an XBAP? Isn’t that a huge security issue?
FAQ: There are no security prompts when running an XBAP? Isn’t that a huge security issue?
As with any other software features, there is some risk of enabling a security breach just by being enabled. But with the multiple layers of security from Windows, Internet Explorer, and the .NET Framework, the WPF team is confident that users are safe from hackers who would try to use the XBAP mechanism to circumvent security. For example, the .NET Framework enforces a sandbox on top of the sandbox already enforced by Internet Explorer. And although this amount of security should be enough in theory, WPF goes one step further and removes additional operating system–level privileges from the host process token (such as the ability to load device drivers), just in case all the other layers of security are somehow breached.
Tip
Similar to Silverlight, XBAPs are the key to using WPF content in diverse environments. For example, Windows Media Center enables developers to plug in HTML. By hosting an XBAP in an HTML page, you can create a WPF Media Center application simply by creating an appropriate XBAP!
Downloading Files on Demand
ClickOnce provides support for on-demand downloading of files in an application, so you can design a small application that loads quickly and then downloads additional content as needed, based on arbitrary logic. This support is a great remedy for large XBAPs that would otherwise be slow to load, and it can apply to other types of applications as well.
To take advantage of this support, you can assign a set of loose files in a project to a download group in Visual Studio. This functionality can be found under Publish, Application Files in the project’s Properties page. You can then programmatically prompt the download and be notified when it completes by using a few APIs in the System.Deployment.Application namespace (in System.Deployment.dll).
Listing 7.3 demonstrates how this might be done to display a custom progress user interface while the application’s main content loads. The application is assumed to start by loading Page1, whose code-behind file is the content of Listing 7.3. (The specific user interface presumed to be defined in XAML is irrelevant.) Page1 initiates the download of any files assigned to a download group called MyGroup and then navigates to Page2 (which presumably uses some of these downloaded files) when the download is complete.
LISTING 7.3 Using ClickOnce Support for On-Demand Download
using System;
using System.Windows.Controls;
using System.Windows.Threading;
using System.Deployment.Application;
public partial class Page1 : Page
{
public Page1()
{
InitializeComponent();
}
protected override void OnInitialized(EventArgs e)
{
base.OnInitialized(e);
if (ApplicationDeployment.IsNetworkDeployed)
{
// Handle the event that is raised when the download of files
// in MyGroup is complete.
ApplicationDeployment.CurrentDeployment.DownloadFileGroupCompleted +=
delegate {
// We're on a different thread, so invoke GotoPage2 on the UI thread
Dispatcher.BeginInvoke(DispatcherPriority.Send,
new DispatcherOperationCallback(GotoPage2), null);
};
ApplicationDeployment.CurrentDeployment.DownloadFileGroupAsync("MyGroup");
}
else
{
// We're not running in the context of ClickOnce (perhaps because
// we're being debugged), so just go directly to Page2.
GotoPage2(null);
}
}
// Navigates to Page2 when ready. Accepts and returns an object simply
// to match the signature of DispatcherOperationCallback
private object GotoPage2(object o)
{
return NavigationService.Navigate(new Uri("Page2.xaml", UriKind.Relative));
}
}
The download support applies only when the application is run over the network (not locally under a debugger), so the listing first calls ApplicationDeployment.IsNetworkDeployed to determine whether to rely on it. If the application is not network deployed, all files are present locally, so the code immediately navigates to Page2. Otherwise, the download is prompted by calling DownloadFileGroupAsync. Before that call, however, an anonymous delegate is attached to the DownloadFileGroupCompleted event so the navigation can be initiated as soon as the download finishes. ApplicationDeployment defines additional events, in case you want to expose more fine-grained progress during the download process.
Loose XAML Pages
If the .NET Framework 3.0 or later is installed, Internet Explorer can navigate to a loose .xaml file just like a .html file and render it with WPF. Therefore, in certain environments, XAML can be used as a richer form of HTML, with better support for layout, text, graphics, and so on. It’s a bit limiting in that you can’t use any procedural code in loose XAML and such pages can be rendered only on Windows. Still, this support can be interesting for experimentation.
Despite the lack of procedural code, you can still create pretty powerful dynamic user interfaces in loose XAML, thanks to data binding (covered in Chapter 13, “Data Binding”). Figure 7.11 shows the loose XAML version of Photo Gallery, which displays a static set of pictures from the web server but uses data binding to keep the snazzy zoom feature.

![]() FAQ: Why do I get “This application type has been disabled” when I try to view a loose XAML page?
FAQ: Why do I get “This application type has been disabled” when I try to view a loose XAML page?
This happens if the file was downloaded from elsewhere, as with the example that comes with this book. You must unblock the file by right-clicking it in File Explorer, choosing Properties, and then clicking the Unblock button.
Tip
If you want your website to take advantage of the richness of loose XAML but still want to show HTML to users who aren’t able to view XAML, you can maintain two versions of your content and adaptively pick the appropriate one. This is easy to do by checking the user agent string for content such as “.NET CLR 3.5.” That said, I’ve never seen a website go through the hassle of doing this. Adaptively adding Silverlight to your website would be a much better choice.
Tip
To mix HTML and loose XAML content, simply host one or more .xaml files in IFRAMEs on an HTML page.
Summary
WPF’s rich support for building applications covers all the basics needed by a Windows desktop application and extends into areas such as web browser–like navigation and web browser–hosted content. As demonstrated by the Photo Gallery source code that accompanies this book (available from the website, http://informit.com/title/9780672336973), you can sometimes apply the same user interface implementation to everything from a traditional desktop application to a code-less “rich web page.”
The deployment of an application can be fast and easy in each case examined in this chapter. The only wrinkle is the prerequisite of having the right version of the .NET Framework installed. Fortunately, with WPF 3.0 installed by default with Windows Vista, WPF 3.5 installed by default with Windows 7, and WPF 4.0 installed by default with Windows 8, this prerequisite is less of an issue if you don’t require the most recent version of the .NET Framework.