
Access Lesson 1: Microsoft Access 2013 Jumpstart

In this lesson, you will get a general introduction to Access 2013. You will learn some terminology and basics of database design, the user interface, and some of the software’s critical features. Finally, you will learn how to use the Help application.
Starting up
You will work with files from the Access01lessons folder. Make sure that you have loaded the OfficeLessons folder onto your hard drive from www.digitalclassroombooks.com/Office2013. If you need further instructions, see “Loading lesson files” in the Starting up section of this book.
What is Access?
Access is a database program that allows you to store and organize your data in useful ways through reports, forms, and webpages. It is available in certain editions of Microsoft Office, but you can also purchase it separately.
Access is a relational database program that uses related tables to store, organize, and retrieve data. You can use Access locally on your computer or through the Internet. Access is used by small and large companies throughout the world to store their data and make it accessible in useful ways.
Ways to use Access
You can use Access to create, modify, and manage databases through any of the following tasks:
- • Creating a new database from scratch or based on a template.
- • Establishing relationships between types of information.
- • Adding data to a database through a table or through a form.
- • Designing forms for data entry or viewing information.
- • Importing data into Access from other programs or linking to external data sources.
- • Running filters and queries on the database to extract relevant data.
- • Generating reports to emphasize and present different portions of your data.
Database basics
Access 2013 is a software database program that allows you to organize a collection of data. This includes the data’s storage, query, retrieval, and maintenance of information. Databases are used to organize data from company customer addresses and phone numbers to company products and parts.
Databases and spreadsheets serve similar purposes; however, they are also different. If your data can be easily entered, stored, viewed, extracted, and managed within a spreadsheet, it is best to keep the information within Microsoft Excel. An example would be a small staff directory that includes items such as Last Name, First Name, Office, Phone Number, Department, and Start Date. However, when your data becomes more complicated, Access might be a better tool for managing the data.
Basic database terminology
The terms described in this section are frequently used when discussing databases, and it’s useful to understand them before starting to work with an Access database.
Databases are made up of objects. With these objects, you can perform specific tasks. Below is a list of the main objects available in Access:
- • Table: the most important and foundational object in an Access database. Tables store data in records and fields, which correspond to rows and columns, respectively. The data is usually about a particular category of things, such as employees or orders.
- • Query: a question that you ask about the data stored in a table. Queries can also make a request of the data or perform an action such as a filter on the data. A query can bring data together from multiple tables to serve as the source of data for a form or report.
- • Form: an object where you place controls for taking actions or for entering, displaying, and editing data in fields. Access objects resemble online forms. They are primarily used for viewing information from database tables and also for entering data into tables.
- • Report: a printout of your database information that’s formatted and organized according to your specifications. Examples of reports are sales summaries, phone lists, and mailing labels.
Tables are the most important object in your database because this where all the information in your database is stored. The other database objects access the tables to organize, report, and perform different actions to the information contained therein. This is why a solid understanding of tables is critical to using Access and understanding how the other database objects work in conjunction to the tables.
Below are two important terms you need to understand about database tables:
- • Field: a table column or category. For example, a FirstName field would likely be found in an Employees table.
- • Record: a set of fields containing data for a single entry and appearing in one row of a database table.
Database design tips
Database design can be complex and require a high degree of advanced designing skills and background that can take a great deal of time and training to obtain. However, for basic database design, you can start with the following tips:
- • Plan, plan, plan! You should never rush into creating the components of a database. We highly recommend that you gather as much information as possible from individuals who will be using the database. Examples of important components to plan are: the types of tables that are needed, the table fields, how the tables are related, etc.
- • Create a sketch of the database tables on a piece of paper, and use lines and arrows to show how they’re related.
- • Each table should have only one purpose; for example, one table will be used to keep track of orders, another to keep track of customers, yet another to keep track of employees, etc.
- • Avoid duplication of data; for example, don’t add Customer fields to the Orders table. Redundant data increases the size and complexity of your database, increases the likelihood of data entry or retrieval errors, and slows the speed of the database.
Quick tour of Access 2013
Understanding the capabilities of Access helps you understand and use the program more effectively. Before you start using a database, you need to either open an existing one or create a new blank database. You will create a new blank database, so that you can overview database’s user interface in the next section.
Opening an Access 2013 file
1 To open Access, choose Start > Programs > Microsoft Office > Microsoft Access 2013.
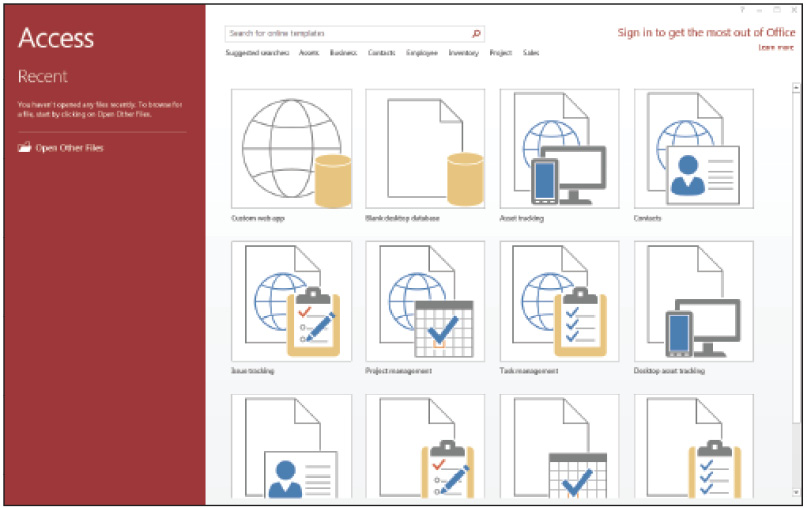
Backstage view of Access 2013.
Access 2013 opens in Backstage view, where you can create a new database, open an existing database, and view featured content from Office.com. Backstage view is described in more detail in the next section.
You can always access Backstage view, even when working in a database, by clicking the File tab.
2 At the bottom left of the Access opening screen, click Open Other Files.
3 From the Open screen, click Computer > Browse to the Access01lesson folder, and Open NorthWindTradersCompanyDatabase.
 You can get out of the Backstage view by pressing ESC on your keyboard or by clicking the Back button (the circle button with the left facing arrow in it at the top of the Backstage menu.)
Access 2013 components
The Access 2013 interface has the following main components:
- • The Ribbon: this bar across the top of the interface contains several tabs, which in turn contain groups of commands that are visible on all tabs, except File.
- • Backstage view: this view appears by default when you launch Access 2013; it’s comprised by the group of commands available on the Ribbon’s File tab.
 The File tab always has a colored background, even when it is not the active tab. You can identify the active tab by the borders on either side of it.
- • The Navigation pane: the area on the left side of the interface that displays lists of database objects when a database is open. You can use it to open and organize database objects.
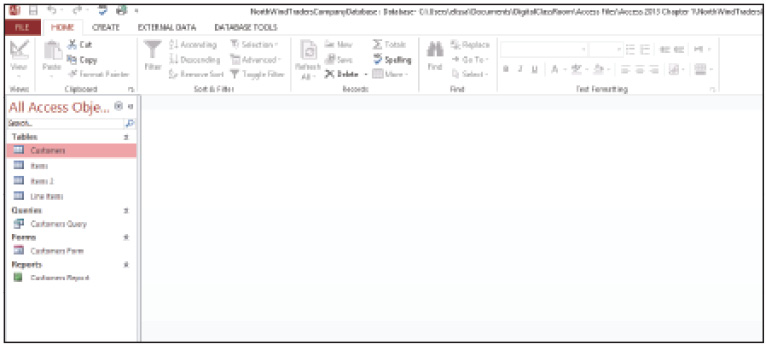
NorthWindTradersCompanyDatabase, showing an open Navigation pane.
Let’s examine these components in more detail.
The Ribbon
The Ribbon is divided into tabs, and within each tab there are groups of commands. The Ribbon replaces the traditional menus that existed across the top of the screen and the toolbars that were found in older versions of Microsoft Office. The primary Ribbon tabs for Access 2013 are File, Home, Create, External Data, and Database Tools.
The Access 2013 ribbon is divided into tabs.
There are times when different Ribbons open in Access depending on your current task in the software. These are called Context Ribbon tabs. The Table Tools and Fields and Tables are Context Ribbon tabs that only open when you are adding or editing records in an Access table. When you close the Access table or switch to a different view, the Fields and Tables Ribbon tabs turn off.
You can also hide and show the Ribbon by double-clicking the active command tab, making it easy to maximize your workspace as needed.
To show the Ribbon:
1 Notice the Ribbon and its tabs divided into groups of commands.

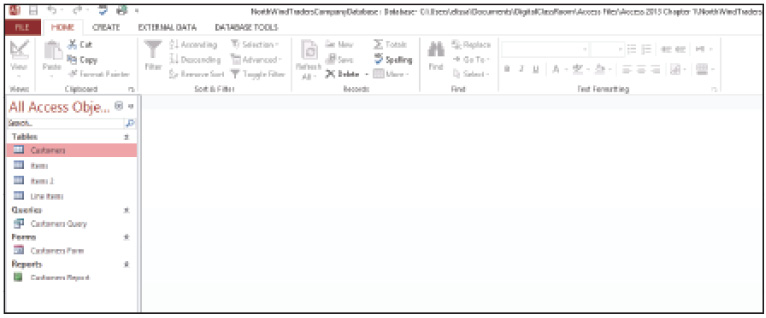
The Ribbon in full view, showing groups of commands.
2 Hide the Ribbon by double-clicking the Home tab.

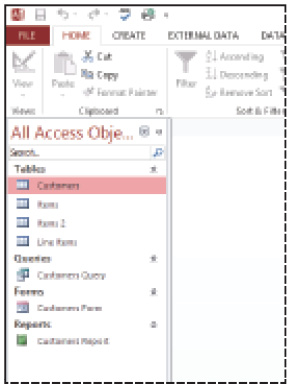
The Ribbon with its command groups hidden.
3 Show the Ribbon by clicking the Home tab again.
You have successfully toggled the Ribbon by clicking the active tab. You can also toggle the Ribbon by clicking the Minimize/Expand arrow button in the upper-right corner.
Backstage view
Backstage view is the first view you see after you launch Access 2013. It contains information and commands that affect an entire database, such as the following: opening and saving a database; a list of recently opened databases; tabs for database information, recent databases, and database creation. You can also launch the help system and manage options in Backstage view.
Navigation pane
The Navigation pane, which replaces the Database window of some older versions of Access, is located on the left side of the Access 2013 interface when a database is open.
The Navigation pane allows you to view and manage the database’s objects, and is customizable.
 A database’s objects include items such as tables, queries, forms, and reports.
You can toggle the Navigation pane just as you did with the Ribbon. Although the result is the same, the procedure is slightly different. You’ll toggle and examine the Navigation pane in more detail after you’ve opened a database that contains some actual data.
4 Choose File > Close to close this file.
Exploring a database
Now that we’ve covered some introductory information, we’ll examine a database and discover how it works.
To open a sample template:
1 Click the File tab to get back into Backstage view.
2 From Backstage view, select New, and then click the Contacts category located next to the Suggested Searches.
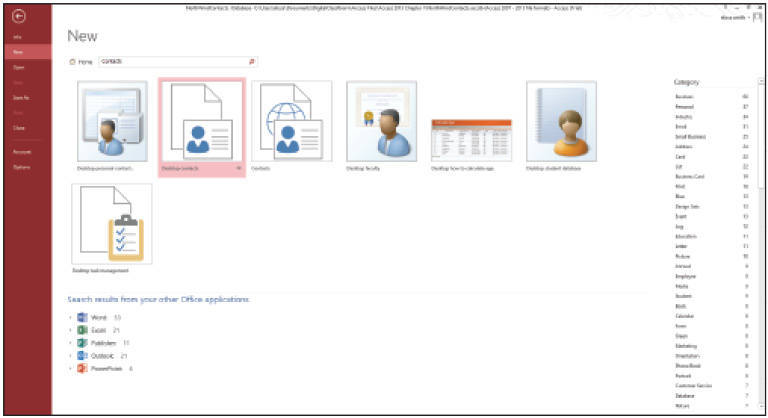
Choose the Desktop contacts template.
3 Select Desktop contacts. Then, in the Desktop contact box, type CustomerContacts for the File Name. Click the small folder icon, browse to the Access01lessons folder and click OK. (You need to save the new database with a file name before you can start using it.)
4 Click Create. If the tutorial box Getting Started with Contacts opens up, click the Close button in the top-right corner. The database opens and the Home Ribbon tab is currently open.
 You might see a Security Warning at the top of the screen. If so, click Enable Content.
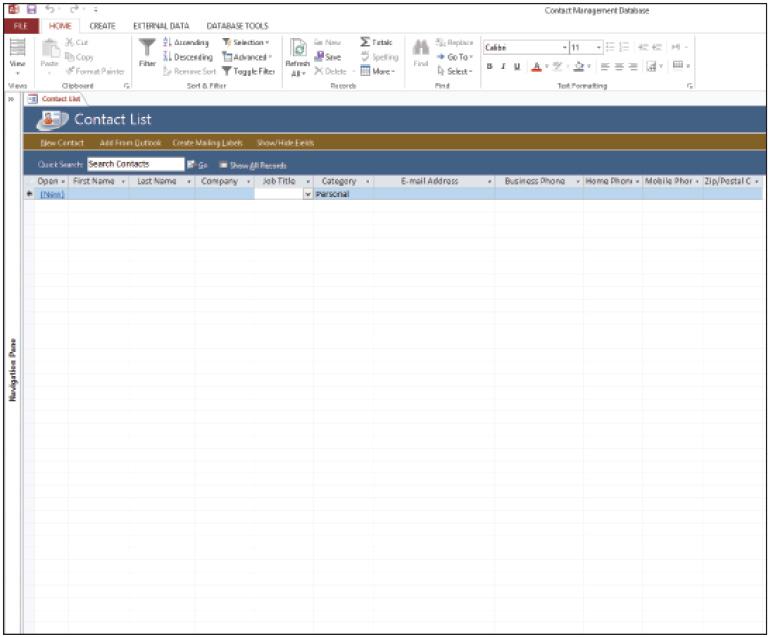
The contacts database, showing a collapsed Navigation pane on the left side.
Let’s explore the Navigation pane. Just as is the case with the Ribbon, you can show or hide the Navigation pane to get more or less room to view individual database objects.
To show or hide the Navigation pane:
1 If the Navigation pane is closed, click the Open/Close button (![]() ) in the upper-right corner to view the contents.
) in the upper-right corner to view the contents.
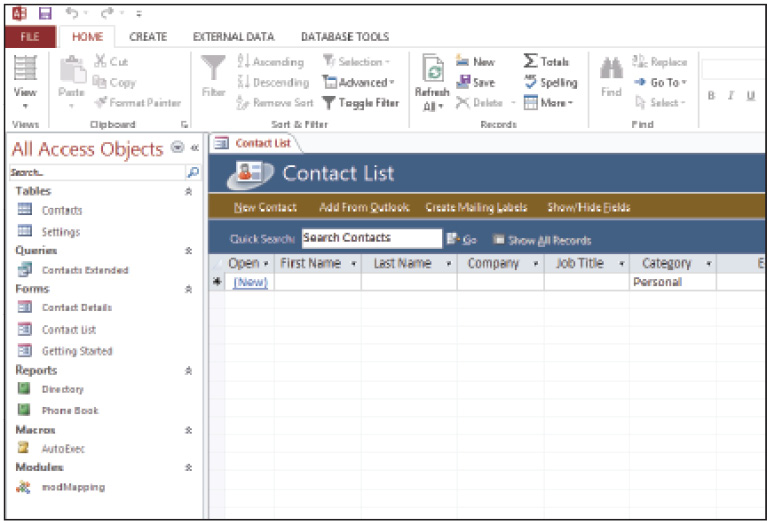
Click the Open/Close button to expand or collapse the Navigation pane.
2 Click the Open/Close button a second time to close the Navigation pane. It doesn’t quite disappear, but it collapses to show only the title bar of the pane.
3 Click the Open/Close button again to restore the Navigation pane.
 You can alter the Navigation pane’s width by clicking and dragging its right border.
The Navigation pane displays the database’s objects. The default view shows all the main categories, which are Tables, Queries, Forms, Reports, Macros, and Modules. The database’s different objects are listed under their appropriate headings. Your database can contain as many objects as necessary to manage your information.
You will use the Search text box at the top of the Navigation pane to search for a specific object.
To search for an object in the Navigation pane:
1 On each heading in the Navigation pane, click the down-arrow to show objects. You will need to scroll down to access all the headings.
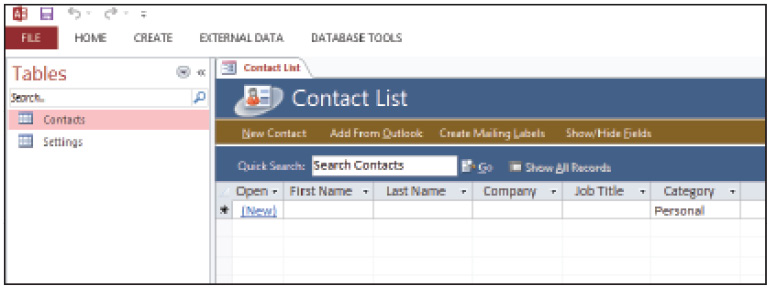
2 Type contact list in the Search text box.
As you type, objects that contain this text begin to appear in the Navigation pane below, until only objects containing the exact same spelling remain.

The Search engine will instantly finds objects that match the text you type.
3 Delete the text in the Search text box, either by clicking the Clear Search String icon (![]() ) to the right of the Search text box, or by pressing the Delete or backspace key on your keyboard. This will turn the Navigation pane back to showing all your database objects.
) to the right of the Search text box, or by pressing the Delete or backspace key on your keyboard. This will turn the Navigation pane back to showing all your database objects.
There may be times when you only want to change the view in the Navigation pane or only view one specific category of object to arrange the appearance of the objects in the Navigation pane. In such a case, do the following:
1 Click the down-arrow button in the upper-right corner of the Navigation pane.
The Navigation pane shows that the Object Type and All Access Objects are checked. This means that all the database’s objects are currently showing in the Navigation pane.
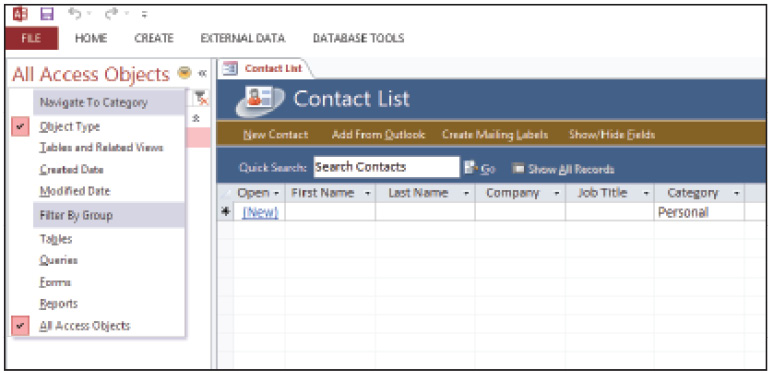
Use the Navigation pane to choose how objects are displayed and organized.
2 Change the Navigation pane to show tables by clicking Tables in this drop-down menu. Only Table database objects appear in the Navigation pane.
The Navigation pane configured to display only Tables.
3 Click the down-arrow button again and change the display settings back to All Access Objects. The Navigation pane will again show all the categories of database objects.
Double-click an object to open it or access more options by right-clicking an object.
To manage objects in the Navigation pane:
1 Right-click an object, such as Contacts, to open a context menu.
The menu lists several options, depending on the object. For a table, these options include such items as Open, Design View, Import, and Export. (For more details about Importing, see Lesson 2, “Getting Started with Microsoft Access 2013.”) The important thing to remember is that you can right-click objects to perform actions or to view information.

The context menu lists many options for managing items in the Navigation pane.
2 Choose File > Close to close this file.
Working with records
Now that you’ve become familiar with basic database components, you can begin working with database tables. We’ll use the Customers table in the NorthwindTradersCompanyDatabase database to search for, sort, add, and delete a record.
Searching for a record
There will be times when you need to locate a specific record in a table, and it can become especially critical if your table contains thousands of records.
To search a table for a record:
1 Choose File > Open and navigate to the Access01lessons folder. Double-click NorthwindTradersCompanyDatabase to open the file.
2 Double-click the Customers table listed in Navigation pane, or right-click the Customers table and select Open. The Customers Table opens in the middle of your screen and looks like a table or spreadsheet with rows and columns.
3 With the Customer table opened, press Ctrl+F or click the Find button ( ![]() ) in the Home tab Ribbon (Editing group). The Find and Replace dialog box appears.
) in the Home tab Ribbon (Editing group). The Find and Replace dialog box appears.
4 In the Find What text box, type Chris Long.
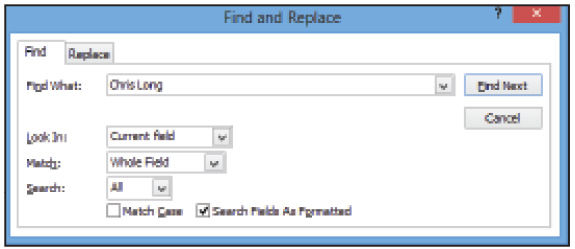
The Find and Replace window appears.
5 From the Look In drop-down menu, select Current document.
6 Click the Find Next button on the right side of the box.
Access highlights the record and the specific cell containing the name Chris Long. If you press the Find Next button again, a dialog box appears telling you that no more search items were found. There is only one occurrence of the name Chris Long in the Customers table. Click OK to close the box.
7 When you are finished using Find and Replace, click Cancel to close it.
Sorting records
Notice that the Customers table is sorted in order by the Customer Number field, which is the first field on the far left side of the table. You can choose to sort by other fields in the table.
To sort records:
1 Click the drop-down arrow on the right side of the Store Name column heading.
2 From the drop-down list that appears, select Sort A to Z.
The records are now sorted by StoreName, not by ID.
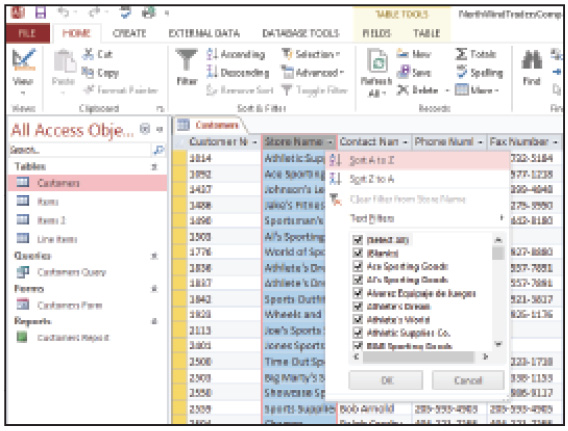
Sort Records in Store Name column in Ascending Order.
Adding and deleting records
There are times when you might need to add or delete records from a database table, and this section explains how.
Adding a record
There are a few different ways to add new records to a table. The first is to click in the very last row of the table, where there will be a star to indicate that the row is blank (note that you might need to scroll down to find it if your table has a lot of records). To add a new record, just start typing in this blank row.
If you don’t want to scroll to the very bottom of the table, which might be particularly inconvenient if the table has numerous records, you can add a new record by right-clicking any row.
To add a record by right-clicking:
1 Right-click the Record Selector (the leftmost square) of any row.

Add a record regardless of your present location in a table.
2 From the context menu that appears, choose New Record. This will automatically move your mouse cursor down to the bottom row of the table. Note that the mouse cursor is blinking in the Customer Number field of the last row.
 You can move to the next field by clicking in it with your mouse, or pressing tab, enter, or the right arrow key on your keyboard.
3 Add three records with the following Customer Numbers: 7001 7002 7003
Deleting a record
To delete a record:
1 Right-click the Record Selector (the leftmost square) of the record that you want to delete. (For practice, choose one of the records that you added in the previous exercise.)
2 Click Delete Record. A Warning box appears asking whether you are sure you want to delete the record, since the activity can’t be undone. (This means that you Undo button will not work after the record is deleted.) Click Yes to delete.
Customizing the Quick Access Toolbar
The Quick Access Toolbar provides convenient, one-click access to your favorite tools. Initially, the toolbar in the document displays the Save, Redo, and Undo options, and the Customize Quick Access Toolbar button.
You will customize the toolbar to include the Quick Print and Spell Check buttons. If you have completed some of our other Microsoft Office lessons, you will already be familiar with this process.
![]()
The Quick Access Toolbar.
To customize the Quick Access Toolbar to include the Quick Print and Spelling commands:
1 Click the Customize Quick Access Toolbar button and from the drop-down menu, choose Spelling.
The Quick Access Toolbar now contains the Quick Print and Spelling commands.
![]()
The new command is now added to the Quick Access Toolbar.
2 To remove a command, right-click it, and then choose Remove from Quick Access Toolbar.
Getting help
Microsoft Access contains a Help system designed to help you quickly get answers to questions regarding your Access database.
1 Press the F1 key or click the Help button ( ![]() ) in the top-right corner of the Access screen. The Help System appears.
) in the top-right corner of the Access screen. The Help System appears.

Get help by pressing F1 or clicking the Help button.
2 To close the Help box, click the X button (![]() ) in the top-right corner.
) in the top-right corner.
Ending an Access session
You can close Access by doing the following:
1 Click the File tab and then Save.
2 Click the Close button (![]() ) located in the upper-right corner of the program.
) located in the upper-right corner of the program.
Self study
1 Customize the Quick Access Toolbar beyond what you learned in the previous steps. Explore the More Commands option to discover the different customization options.
2 Customize the Ribbon by right-clicking it. Add some different shortcut buttons to it to change its functionality and appearance.
3 Customize the database objects that appear in the Navigation pane and practice expanding and collapsing it.
Review
Questions
1 What do records and fields correspond to in a database table?
2 How do you customize the Quick Access Toolbar?
3 What does the Navigation pane show a list of?
Answers
1 In spreadsheet terminology, records and fields correspond to rows and columns, respectively.
2 You can customize the Quick Access Toolbar by clicking the Customize Quick Access Toolbar button.
3 The Navigation pane shows a list of all objects in an open database.