
Word Lesson 3: Beginning Text and Layout Operations
At its heart, Word 2013 is a tool for light-to-medium page layout. In this lesson, you’ll perform a variety of common text editing tasks, work with Styles and Style Sets, and see how text and images work together.
What you’ll learn in this lesson:
- • Entering, editing, and manipulating text elements
- • Adding headers and footers to your document
- • Dressing your text with Styles tools
- • Working with Word’s visual layout tools
Starting up
In this lesson you will work with files from the Word03lessons folder. Make sure that you have loaded the OfficeLessons folder onto your hard drive from www.digitalclassroombooks.com/Office2013. If you need further instructions, see “Loading lesson files” in the Starting up section of this book.
Working with text in Word
Over the decades, MS Word has grown into a complex desktop publishing tool. Most of what you’ll do with Word 2013 is just entering and editing text. But in a graphical application such as Word, text is as much a visual element as any image – so this lesson moves right from basic text entry and formatting to working with visual page elements.
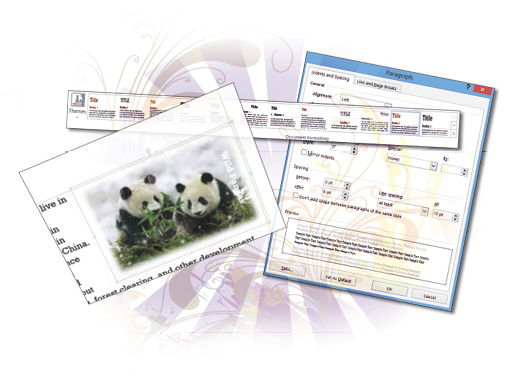
To begin, open two files in your Word03lessons folder and look over them: word03a.docx and word03b.docx. The first is a draft info sheet on pandas; the second includes revised text from a colleague to be inserted into the info sheet. In this lesson, we’ll tighten the prose in the info sheet, experiment with some layout changes, and better integrate the image and caption into the flow of the text.
Paragraph and character formatting
In Word 2013, a piece of text consists of a series of characters (letters, numbers, symbols) that are formatted one way or another. You control every aspect of the text’s appearance: font (typeface), size, spacing, emphasis (italics, bold, underline), vertical and horizontal alignment, justification (i.e., how smooth is the edge of a block of text), indentation, and more.
You can alter the formatting of an individual character, word, or line. When you select one word from a line and press Ctrl+I, you change it to italic type. The rest of the line remains as it was. In contrast, you can’t double-space a single word without doing the same to its entire paragraph. Word 2013 treats italics and line spacing differently; the former is one variety of character formatting, and is handled by the controls in the Home > Font group; the latter is paragraph formatting, found in Home > Paragraph.
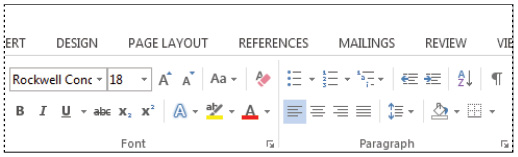
Word’s basic formatting palette.
Crucially, Word 2013 treats character and paragraph formatting commands differently in the Edit window. Let’s see how:
1 Switch to word03b.docx. Open the Home tab.
2 Move your cursor just to the left of the word Edits, but don’t select any text.
3 Click Home > Font > Underline (or press Ctrl+U).
The Underline icon is selected, but nothing happens to the text that’s already on the page. You’ve told Word to switch to Underline text, but there’s nothing selected, so the Underline command will only be applied to the text you type next.
4 Type Important and press the spacebar.
This is an important lesson for later: a blank space is a character just like a number, letter, punctuation mark, or symbol, and Word knows to underline blank spaces just the same. It does look foolish, but you can fix it by highlighting this space and deselecting Underline.
5 Click Home > Paragraph > Align Right (Ctrl+R). Move the cursor to the end of the line and type —please update.
6 Triple-click the word Edits and click Center (Ctrl+E).
Word applies paragraph formatting to the entire paragraph, whether you click somewhere in the line or select one or more words in it. The same applies to the rest of the formatting commands.
Spacing
Word’s standard text spacing is meant to be readable on-screen and in print, but if you need to adjust the amount of whitespace between lines of text, the Home > Paragraph > Line Spacing command offers a plethora of options. Clicking the icon reveals a drop-down menu; selecting Line Spacing Options from the menu brings up the Indents and Spacing tab of the Paragraph Formatting dialog box. The numbers in the Spacing group refer to the space between lines of a paragraph; the larger the number, the more room Word leaves between lines in a paragraph. You can mouse over the options in the menu for a Live Preview of the different settings.

Fine-tune text block formatting in the Paragraph Settings dialog.
Spacing between paragraphs is set with the Page Layout > Paragraph commands. The spacing is measured in points, just like font size; 12 point (pt.) of space atop a paragraph leaves about as much room as a line of normal text. You can also control pre and post-paragraph spacing with the Line Spacing Option screen.
The Line and Paragraph Spacing command affects a single paragraph, or every paragraph in that Style; if you want to set spacing defaults for your entire document at once, use the Design > Document Formatting > Paragraph Spacing tool.
Styles, themes, and live preview
Now take a look at word03a.docx. It contains several headings (Habitat, Diet, Status, and more) formatted in a different font, size, and color from the body text. Individually reformatting each heading would be a hassle; it’s much easier to tell your word processor that the current text is a heading and to format this like the other headings. This is accomplished through the use of Styles—one of the most important features of Word 2013.
1 Open the Home tab. A gallery of Styles appears.
2 Click several different pieces of text in your document, and their various Styles will be highlighted in the gallery: Heading 1 and Heading 2 for the top line and paragraph headings, respectively; Caption for the Figure 1 caption; Normal for the body text.
3 Open the Design tab. Click Design > Themes to see that Wood Type is selected—that’s the current document Theme, which sets colors, fonts, and more.
4 Under the Document Formatting options, you can see that Lines (Simple) is selected. That’s the current Style Set for your document—a collection of styles chosen to work well together visually.

A gallery of Style Sets for the current theme.
To see how to work efficiently with Styles, let’s make some changes to the look of our document—both line-by-line and globally. We’ll begin by drawing a little more attention to the headings in our document.
1 Mouse over the style sets in the Design > Document Formatting gallery to see the names of each style set. Select the Lines (Stylish) style set.
Note that when you mouse over an entry in the Style Set gallery, the appearance of your document changes to show the new style; this is Word’s Live Preview feature at work. The new style set isn’t applied until you click a gallery entry.
2 Click the paragraph heading, Habitat, and then select Home > Paragraph > Align Right (or press Ctrl+R). The heading is now flush with the right margin; Word treats the heading as a paragraph consisting of a single word, and then reformats the entire paragraph.
3 Double or triple-click the same heading. A mini toolbar will appear with commonly used character and paragraph-formatting commands.
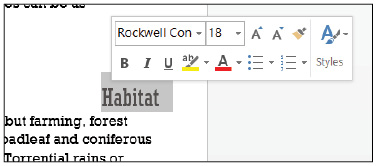
The mini formatting toolbar appears by default when you select a text block.
 Double-clicking selects a single word; triple-clicking selects an entire paragraph.
4 Use the font size drop-down in the mini toolbar to set the Habitat heading to 18 pt. type.
5 Right-click the Heading 2 entry in the Home > Styles gallery and select Update Heading 2 to Match Selection.
First, we modified the heading style for one paragraph heading from Lines (Simple) Heading 2 (which sets font, color, size, and so on) to Lines (Simple) Heading 2 + right-justify + 18pt. We then instructed Word to make the same changes everywhere it finds the Heading 2 style, tweaking alignment and size, but leaving font and color the same.
To ensure that our top-level heading stands out from the paragraph headings, we’ll make one more change to Heading 2 using the Modify Style tool.
6 Right-click the Heading 2 entry in the Styles gallery and chose Modify.
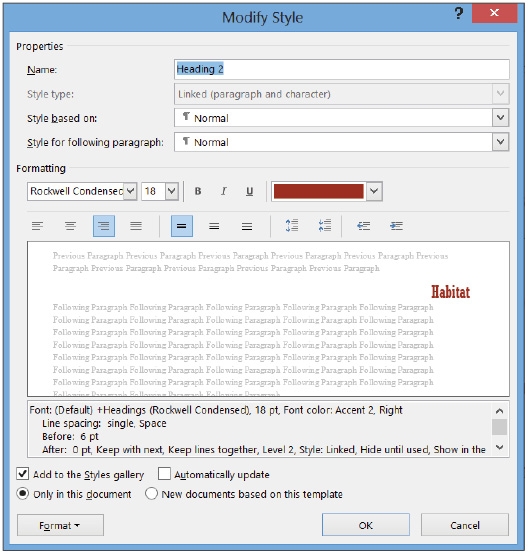
Modify Style dialog box.
7 In the drop-down color menu, select Gray-50%-Text 2 (top row, fourth from the left), and check Automatically update. Click OK.
8 Choose File > Save As. Navigate to the Word03lessons folder, and save the file as word03a_work.
Selecting Automatically update makes a change to all Heading 2 text in this document only. Yes, the right-justified headings look terrible atop short, wide text blocks; we’ll switch to a compact two-column layout later in the lesson to make the headings more readable.
Styles in Word can be put to a wide array of uses; in Lesson 4, “Structuring Complex Documents,” you’ll take advantage of Word’s heading styles to structure a document with many sections. In the meantime, go ahead and experiment with modifying Styles to tweak the look of your document.
Cut, copy, and paste
The most frequently used commands in Word are Cut, Copy, and Paste. In theory, they’re very simple: select some text, duplicate it or remove it to memory, and then insert the stored text somewhere else. But remember, Word can format text at the character and paragraph levels, and when you paste Heading 3 + non-theme color text into the middle of a Caption + italics line, you have to work with the application to decide exactly how that Paste action should work.
What happens when your clipboard contains, not a string of text from a Word document, but an entire Excel spreadsheet? Or an image with a caption in a font that’s not installed on your computer? In this section, we’ll look at options built into Word to cover most cut/copy/paste situations.
Paste options
We can take advantage of Live Preview to see how Word’s Paste Options work.
1 Switch over to word03b.docx and select the text from the word Habitat through the end of the file.
2 Switch to word03a_work.docx. Select the Habitat heading and paragraph.
3 Click Home > Clipboard > Paste (or press Ctrl+V). The replacement text will overwrite the original, and a mini toolbar will appear with a clipboard icon. Click the mini toolbar to bring up Paste Options.
4 Mouse over each Paste Option in turn. Live Preview will show the available options for pasting the replacement text.
The Paste Options toolbar offers four choices for handling a Paste action:
- • Keep Source Formatting inserts the pasted text into your document as-is, preserving its character and paragraph formatting. In this situation, where consistent look and feel is important, this is obviously the wrong choice.
- • Merge Formatting will apply the style of the destination text to the pasted text; in this case, it chooses Heading 2 (the first style in the selected text from the info sheet) and applies that to the entire pasted selection. That makes sense for simple pastes, but not for pasting in a heading and paragraph, as we’re doing.
- • Use Destination Styles is the default behavior for Word 2013 when pasting text from a Word document. All our source text uses the Normal style, so Word simply applies the formatting that the Normal style has in the Style Set Lines (Stylish).
- • Keep Text Only is useful for tasks such as converting a table to straight text. It eliminates all formatting from the source text: italics, centering, bullets, and more. In the present instance, Keep Text Only produces the same output as Merge Formatting, but that won’t always be the case.
As you can see, Word has no way of knowing that our first line is a paragraph heading unless we use a heading style; the application treats our Paste as two paragraphs of Normal text. The default Paste behavior is fine; we can manually fix the heading style.
5 Press Ctrl, then S to accept Use Destination Styles paste option, then press Escape to dismiss the Paste Options minibar. Then select the lone word Habitat and switch its style to Heading 2.
Copying a look: Format Painter
Sometimes you want to grab, not the content of a text selection, but its formatting. This happens often enough that Word has a ready-made command for it: Home > Clipboard > Format Painter. To use it, select the text whose format you’re grabbing, click Format Painter (or press Ctrl+Shift+C), and then click the text to which you want to apply the format (or press Ctrl+Shift+V).
Format Painter is especially valuable when you want to match to colored/resized text, but don’t want to manually tweak multiple formatting options. It does not copy over the Style of the source text, just its look (so you can Paint a single sidebar to appear as a header without botching your document outline).
A paste to fit every taste
Word 2013 offers you fine-grained control over the behavior of the Paste command.
1 Click Home > Clipboard > Paste > Set Default Paste.
2 In the Options screen, scroll to Cut, copy, and paste.

Word’s Paste feature is extremely customizable.
Here you can set the default behavior of Word for a variety of text-handling situations. Note the difference between Pasting within the same document and Pasting between documents when styles conflict. By default, Word assumes that when moving text around in a single document, you want to preserve its style: you wouldn’t want to change the order of two paragraphs and realize you’ve accidentally turned one into a header. Similarly, when pasting data from another Word document, Word won’t interfere with the Style Set you’re working with.
If the Paste Options toolbar gets in your way, you can turn it off from this same options screen. Finally, if you want to see the technical aspects of the Paste command, which invisibly adjusts word and paragraph spacing every time you move text around, click the Use smart cut and paste settings button. These options are meant for advanced users with specific workflow needs; there’s no need for you to change these settings now, but it’s helpful to know where to find them.
3 Click OK to commit changes and close the Word Options dialog box.
Working with columns
In the Page Layout tab, you’ll find Word’s Columns tool. By default, it provides five modes: one, two, and three-column text, and two asymmetrical two-column layouts. You can use more columns if you need to. Word uses newspaper-style multi-column layouts: text flows from left to right, and lines accumulate top to bottom within a column; the text starts on the next page only when all the columns on the current page are filled.
In other words, Word’s text columns do not fill up independently of one another. For example, you wouldn’t create a two-column layout with Spanish text on the left and an English translation on the right, and fill them in separately. For layouts built on parallel text streams of that sort, you’d use a specialized layout tool like InDesign (or even an older copy of WordPerfect).
Switching to a multi-column layout dramatically changes the feel of the text on-screen and on the page; it will give our info sheet an encyclopedia look.
1 Open word03a_work.docx if it is not already open. Press Ctrl+A to Select All, including the panda image and caption.
2 Select Page Layout > Columns > Two.

Two-column layout radically alters the document’s look and feel.
You can now use Undo (Ctrl+Z) and Redo (Ctrl+Y) to toggle back and forth between the one and two-column layouts. The line beneath the top heading stretches across the left-hand column only; there’s less whitespace, yielding a denser layout; crucially, the sub-headings stand out much more in a two-column format. However, the image and caption use absolute placement on the page, rather than adjusting to the change in text flow, and no longer work in the new layout. We’ll fix them next.
Text boxes and images
In previous lessons, we’ve encountered images, tables, and text boxes: design elements that are separate from the flow of text in a document. The relationship between text and non-text objects is of great interest to designers, and will be studied in more detail in a later lesson. Here, we’ll work with a simple text box, the panda caption, and see how it integrates into the flow of our document text.
Placing text boxes and images
The caption beneath the panda image is formatted as a text box. We’ll make several changes to its content and appearance, use the Group tool to link it to the image and streamline our workflow, and then place the photo and caption together.
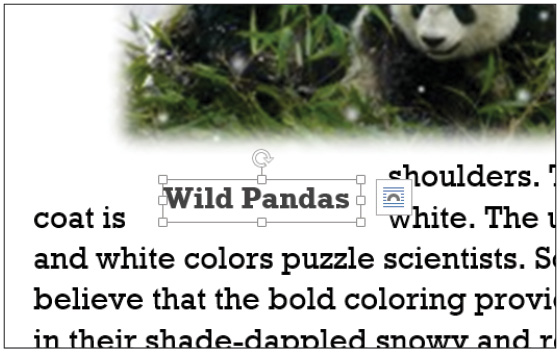
1 Click the Figure 1: Pandas in the Wild text. The outline of the text box appears, along with the Layout Options icon, several handles (small white boxes) to resize the text box, and a handle above to rotate the box.
2 Press Ctrl+A (Select All). Change the text to Wild Pandas.
3 Click one of the handles on the right-hand side of the box, and then drag it to the left until it’s tight with the word Pandas, without causing the text to wrap. This resizes the text box, which now takes up only as much space as it needs.
Resize the text box.
No surprises so far: the text box can be resized as an image, and its content is (initially) an editable text such as any other on the page. Now we’ll work on positioning and orientation.
4 With the text box still selected, click Format > Arrange > Align > Use Alignment Guides if it is not already checked.
5 Drag the rotation handle clockwise until the text runs straight up and down: a 90 degree rotation. When you’re close to 90 degrees, the box will seem to stick a little bit.
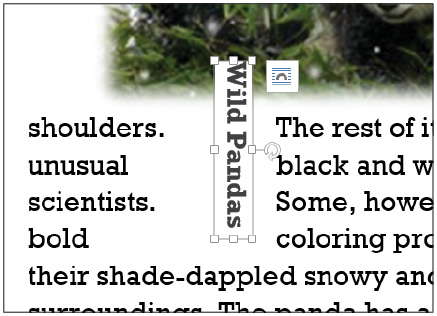
Rotating a text box: Word treats 90˚ as a likely target amount.
6 Click the dotted line around the text box to select the box (rather than the text inside it), and drag it over the pandas, positioning it near the image’s rightmost edge.
7 Finally, triple-click once more on the Wild Pandas text itself. (The text box will rotate temporarily so the text is readable.) The formatting pop-up menu appears; set the text color to white. Then click Drawing Tools > Format > Shape Fill > No Fill.
This series of commands yields a transparent text box with white text running vertically atop the right-hand edge of our panda image. No Fill allows anything that is beneath the text box to show. For more precise control over rotation, we could select the text box and use the Drawing Tools > Arrange > Rotate tool.
8 Without deselecting the text box, Ctrl+click the panda image. Both the panda image and the text box are selected.
9 Click Drawing Tools > Format > Arrange > Align > Align Middle (not Center). The centers of the picture and caption both snap to the same invisible horizontal line, aligning the two objects. Then click Format > Arrange > Group > Group. Only a single selection box remains: the one around the image/caption pair.

Grouped (L) and ungrouped (R) objects in Word.
The caption is nicely placed atop the image, and by Grouping them together, we’ve told Word to move and modify them together, making complex layout tasks somewhat easier. This is just a temporary change; we haven’t modified the original image and can use Format > Arrange > Group > Ungroup at a later time if we need to separate image and caption.
To close, we’ll move the image to the right spot on the page. At this point, the Alignment Guides will come into play.
10 Zoom out to around 70% size using the slider on the bottom-right corner of the window, then drag the image to the top of the Habitat section, along the column’s right-hand edge. When the image is in position, green lines will appear along its top and right edges, indicating that it’s flush against the margin and aligned with the top of the paragraph.

Alignment Guides let you target page and object borders and centers with precision.
The Alignment Guides feature for Word 2013 appear when you line up two objects in some way: their edges or centers at the same horizontal or vertical position.
Inserting an object directly into a paragraph
In this lesson, we’ve worked only with absolute positioning: moving the image and caption freely around the page, forcing the text to flow around them. It’s a little tricky, but it gives precise control over the layout of a document. Another way to position objects in a Word document is to insert them directly into the text flow. If you’ve used previous editions of Word, you’ve probably used this method of placement. Note the difference in presentation:
1 Click the panda image, and then click the Layout Options pop-up menu when it appears.
2 Select the In Line with Text layout method.
3 Drag the image to a different spot in the document.
In a sense, Word treats your image as an unusually large piece of text, and places it on the text baseline just as any other word. There’s no Live Preview either: Word just reflows the paragraph around the image. In this case, the output is terrible: the image is too big to sit comfortably on a line with text. In other circumstances, such as placing a sparkline (a word-sized miniature infographic), In Line with Text is the right insertion mode.
4 Choose File > Save or press Ctrl+S to save your work.
Self study
This lesson touches on a wide range of subjects, especially in the Text Boxes section. But because Office 2013 is built to provide a consistent experience across applications, the techniques in this lesson will stay useful throughout this book. Here are a few suggestions for further experimentation:
1 The Home > Font and Home > Paragraph groups offer a wide array of formatting tools. Try different character formatting options such as superscript and glowing/reflected text, and then experiment with the options for creating bulleted and numbered lists. Remember that a bullet-point entry is just Normal text drawn to look a little different from standard prose.
2 A text box is almost, but not quite, a miniature page. Ungroup your panda image and caption, and then use Cut (Ctrl+X) and Paste (Ctrl+V) to get the image into the text box. Which page layout options are unavailable within a text box? Try duplicating your entire panda info sheet within a text box; use Format > Shape Styles to give it a colored outline; and then insert this mini page as a sidebar into the original info sheet.
3 Word actually offers one more powerful and flexible method for placing objects. When you move an image or text box around the page, a little anchor icon in the left margin moves with it: the Object Anchor, which lets you choose to pin the image or text box to a specific paragraph in your document. Select the panda image, and then click Layout Options > See More. Try toggling the Lock anchor and Move object with text check boxes, and then moving that paragraph of text around the document.
Review
Questions
1 Which command copies the formatting information from a text selection?
2 If you select a single word in a line and set its spacing to 2.0, what does Word do?
3 How many characters are italicized in the string the cow’s pajamas?
Answers
1 The command that copies the formatting information from a text selection is: Home > Clipboard > Format Painter.
2 If you select a single word in a line and set its spacing to 2.0, Word sets the entire paragraph’s spacing to 2.0.
3 There are seventeen characters in the supplied phrase; spaces are invisible characters.