
JIRA is a very powerful and flexible application. You have seen how you can customize its functionalities by building new fields, screens, workflows, notifications, and permission rules. Apart from the major areas we have covered up until now, there are some other useful features that you can customize.
You can change the appearance of JIRA, so that its look and feel will be more consistent with other web applications that you have in your organization. You can also select the language JIRA will use to display its content, perform quick backups, and restore with the built-in tools. Finally, we will take a look at how you can extend the power of JIRA through custom add-ons.
In this chapter, we will cover the following topics:
- How to customize JIRA's look and feel
- General administration options in JIRA
- Backing up and restoring data in JIRA
- How to keep search index in sync with data
- Extending JIRA's functionalities through custom add-ons
While the default appearance that is configured with JIRA upon installation is sufficient for most intents and purposes, organizations often require their applications and websites to be branded to have a standardized look and feel. JIRA allows for this level of flexibility by allowing you to configure its colors, date representations, and even lets you add a logo to it:

As an example, the preceding screenshot shows a branded version of JIRA to demonstrate what you can do with its look and feel configurations:
- Browse to the JIRA administration console.
- Click on Look and Feel under the User Interface section. This will bring up the Look and Feel Configuration page.
From this page, you will be able to customize the color, logo, and date format settings of your JIRA instance.
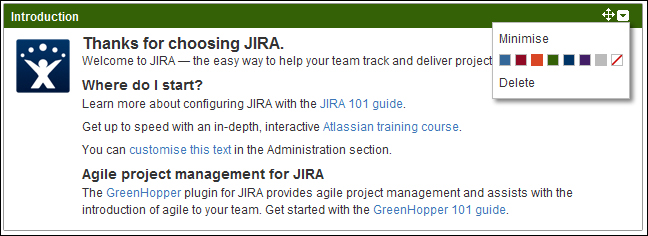
People often say that a picture is worth a thousand words, and a logo is usually the first thing when it comes to branding a website. JIRA lets you assign a logo, which will be displayed at top of every page in JIRA:
- Browse to the Look and Feel Configuration page.
- Specify the URL or the file path (on the JIRA server) of your logo image under the Logo section.
- Specify the width and height of the image.
- Click on the Update button to set your logo.
Once you have set your logo, JIRA will display the logo in the preview section with your specified dimension. The logo will be applied immediately at the top left-hand corner.
JIRA divides its user interface into a number of elements, and each element can be assigned its own color. For example, you can set a different color for the top navigation bar and the hyperlink colors. This allows you to have a degree of flexibility to configure the color of JIRA to be more consistent with your organization's branding standards:
- Browse to the Look and Feel Configuration page.
- Click on the Edit Configuration link at the bottom of the page. This will allow you to edit the look and feel settings.
- Specify the colors for each component/section under the Colours section. You can either specify the hexadecimal color code directly or use the color picker to select the color you want:

The preceding screenshot shows a breakdown of the different sections in JIRA and what color options will be applied:
|
Color option |
Description |
|---|---|
|
The background color of the top bar (where the logo image is displayed). | |
|
The background color of the text that sits inside the top bar when highlighted (hovered over). | |
|
The color of the text that sits inside the top bar. | |
|
The color of the text that sits inside the top bar when highlighted. | |
|
The color of the horizontal line between the top bar and the navigation bar. | |
|
The background color of the bar that contains the navigation links, such as Dashboard and Administration. | |
|
The color of the vertical dotted line between each menu item in the navigation bar. | |
|
The color of the text links in JIRA. | |
|
The color of the text links in JIRA when selected. | |
|
The color of the text headings in JIRA. |
In Chapter 9, Searching, Reporting, and Analysis, we introduced dashboards and gadgets in JIRA. A gadget's color is independent to the rest of JIRA. As a matter of fact, JIRA allows the administrator to create a set of colors for users to pick from. Perform the following steps to create your custom color set:
- Browse to the Look and Feel Configuration page.
- Hover over the color you want to change under the Gadget Colors section, and click on the color icon.
- Specify the colors for your gadgets. The first color (Color 1) will be the default color for all the gadgets, without a color selected:
After saving your set of gadget colors, they will be made available for users to select from. For gadgets that do not have a color selected, the default color will be applied automatically.
Another aspect of JIRA's look and feel that can be customized is how dates are displayed and entered. Different countries display dates differently. For example, some countries display dates in the month/day/year format, while others use the day/month/year format. JIRA allows you to set how you will like dates to be handled to better suit your environment.
JIRA follows the date format set by Java, the technology JIRA is built on. You can find the full explanation on the format at http://download.oracle.com/javase/6/docs/api/java/text/SimpleDateFormat.html:
- Browse to the Look and Feel Configuration page.
- Hover over the date-time setting you want to change, and click on the edit icon.
- Update the configuration value.
- Click on the Update button:

After you have updated the date/time format settings, all date and date-time fields in JIRA, such as due date, will adopt the new format to display dates, and users will be required to enter them in the new format.