There are two ways to create toolboxes in ArcGIS: script tools in custom toolboxes that we covered in the last recipe, and script tools in Python toolboxes. Python toolboxes were introduced in version 10.1 of ArcGIS and they encapsulate everything in one place: parameters, validation code, and source code. This is not the case with custom toolboxes, which are created using a wizard and a separate script that processes business logic.
A Python Toolbox is similar to any other toolbox in ArcToolbox, but it is created entirely in Python and has a file extension of .pyt. It is created programmatically as a class named Toolbox. In this recipe, you will learn how to create a Python Toolbox and add a custom tool. After creating the basic structure of Toolbox and Tool, you'll complete the functionality of the tool by adding code that connects to an ArcGIS Server map service, downloads real-time data, and inserts it into a feature class.
Complete these steps to create a Python Toolbox and create a custom tool that connects to an ArcGIS Server map service, downloads real-time data, and inserts it into a feature class:
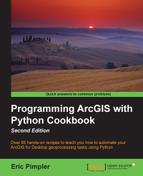
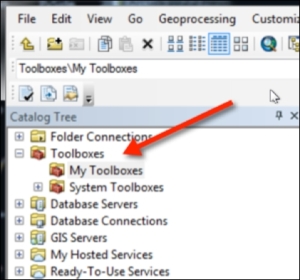
- Open ArcCatalog. You can create a python toolbox in a folder by right-clicking on the folder and selecting New | Python Toolbox. In ArcCatalog, there is a folder called Toolboxes and inside it is a My Toolboxes folder, as seen in this screenshot:
- Right-click on this folder and select New | Python Toolbox.
- The name of the toolbox is controlled by the file name. Name the toolbox
InsertWildfires.pyt: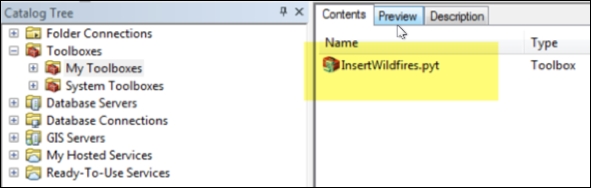
- The Python Toolbox file (
.pyt) can be edited in any text or code editor. By default, the code will open in Notepad. You can change this by setting the default editor for your script by going to Geoprocessing | Geoprocessing Options and going to the Editor section. You'll notice in the following screenshot that I have set my editor to PyScripter, which is my preferred environment. You may want to change this to IDLE or whatever development environment you are currently using. Please note that this step is not required though. As mentioned, by default, it will open your code in Notepad.
- Right-click on
InsertWildfires.pytand select Edit. This will open your development environment. Your development environment will vary depending on the editor that you have defined. - Remember that you will not be changing the name of the class, which is
Toolbox. However, you will rename theToolclass to reflect the name of the tool you want to create. Each tool will have various methods, including__init__(), which is the constructor for the tool along withgetParameterInfo(),isLicensed(),updateParameters(),updateMessages(), andexecute(). You can use the__init__()method to set initialization properties, such as the tool's label and description. Look for theToolclass and change the name toUSGSDownload. Also, set the label, and description, as seen in this code:class USGSDownload(object): def __init__(self): """Define the tool (tool name is the name of the class).""" self.label = "USGS Download" self.description = "Download from USGS ArcGIS Server instance" - You can use the
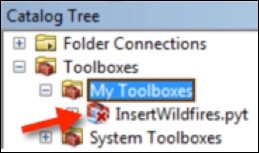
Toolclass as a template for other tools you'd like to add to the toolbox by copying and pasting the class and its methods. We're not going to do this in this particular exercise, but I wanted you to be aware of this fact. You will need to add each tool to thetoolsproperty ofToolbox. Add theUSGS Downloadtool, as seen in this code:class Toolbox(object): def __init__(self): """Define the toolbox (the name of the toolbox is the name of the .pyt file).""" self.label = "Toolbox" self.alias = "" # List of tool classes associated with this toolbox self.tools = [USGSDownload] - When you close the code editor, your Toolboxes should automatically be refreshed. You can also manually refresh a toolbox by right-clicking on the toolbox and selecting Refresh. If a syntax error occurs in your code, the toolbox icon will change, as seen in the following screenshot. Note the red X next to the toolbox.
- You shouldn't have any errors at this time, but if you do, right-click on the toolbox and select Check Syntax to display the errors, as seen in the following screenshot. Note that if you have an error, it may be different from the following example:

- Assuming that you don't have any syntax errors, you should see the following Toolbox/Tool structure:

- Almost all tools have parameters, and you set their values in the tool dialog box or within a script. When the tool is executed, the parameter values are sent to your tool's source code. Your tool reads these values and proceeds with its work. You use the
getParameterInfo()method to define the parameters for your tool. IndividualParameterobjects are created as part of this process. Add the following parameters in thegetParameterInfo()method and then we'll discuss them:
Each
Parameterobject is created usingarcpy.Parameterand is passed a number of arguments that define the object.For the first
Parameterobject (param0), we are going to capture a URL for an ArcGIS Server map service containing current wildfire data. We give it a display name (ArcGIS Server Wildfire URL), which will be displayed in the dialog box for the tool, a name for the parameter, data type, parameter type (this is mandatory), and direction.In the case of the first parameter (
param0), we also assign an initial value, which is the URL for an existing map service containing wildfire data.For the second parameter, we define an output feature class where the wildfire data that is read from the map service will be written. An empty feature class to store the data has already been created for you. Finally, we added both parameters to a Python list called
paramsand return the list to the calling function - The main work of a tool is done inside the
execute()method. This is where the geoprocessing of your tool takes place. Theexecute()method, seen in the following code, can accept a number of arguments, including the tool (self), parameters, and messages:def execute(self, parameters, messages): """The source code of the tool. """ return - To access the parameter values that are passed into the tool, you can use the
valueAsText()method. Add the following code to access the parameter values that will be passed into your tool. Remember, as seen in a previously mentioned step, that the first parameter will contain a URL for a map service containing wildfire data, and the second parameter is the output feature class where the data will be written:def execute(self, parameters, messages): inFeatures = parameters[0].valueAsText outFeatureClass = parameters[1].valueAsText - At this point, you have created a Python toolbox, added a tool, defined the parameters for the tool, and created variables that will hold the parameter values that the end user has defined. Ultimately, this tool will use the URL that is passed into the tool to connect to an ArcGIS Server map service, download the current wildfire data, and write the wildfire data to a feature class. We'll do this next.
- Note that to complete the remainder of this exercise, you will need to install the Python
requests(refer to http://docs.python-requests.org/en/latest/) module usingpip(refer to https://pip.pypa.io/en/latest/installing.html). Do this now before proceeding to the next step. Installation instructions for bothpipandrequestscan be found at the links provided. - Next, add the code that connects to the wildfire map service to perform a query. In this step, you will also define the
QueryStringparameters that will be passed into the query of the map service. First, we'll import therequestsandjsonmodules by adding this code:import requests import json
- Then, create the payload variable that will hold the
QueryStringparameters. Notice that in this case we have defined awhereclause so that only the fires greater than5acres in size will be returned. TheinFeaturesvariable holds the URL:def execute(self, parameters, messages): inFeatures = parameters[0].valueAsText outFeatureClass = parameters[1].valueAsText agisurl = inFeatures payload = { 'where': 'acres > 5','f': 'pjson', 'outFields': 'latitude,longitude,fire_name,acres'} - Submit the request to the ArcGIS Server instance and the response should be stored in a variable called
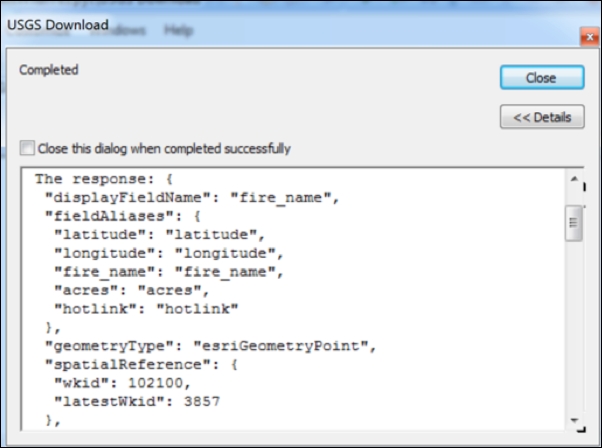
r. Print a message to the dialog indicating the response:def execute(self, parameters, messages): inFeatures = parameters[0].valueAsText outFeatureClass = parameters[1].valueAsText agisurl = inFeatures payload = { 'where': 'acres > 5','f': 'pjson', 'outFields': 'latitude,longitude,fire_name,acres'} r = requests.get(inFeatures, params=payload) - Let's test the code to make sure we're on the right track. Save the file and refresh your toolbox in ArcCatalog. Execute the tool and leave the default URL. If everything works as expected, you should see a JSON object output of the progress dialog. Your output will probably vary somewhat.
- Return to the
execute()method and convert the JSON object to a Python dictionary:def execute(self, parameters, messages): inFeatures = parameters[0].valueAsText outFeatureClass = parameters[1].valueAsText agisurl = inFeatures payload = { 'where': 'acres > 5','f': 'pjson', 'outFields': 'latitude,longitude,fire_name,acres'} r = requests.get(inFeatures, params=payload) decoded = json.loads(r.text) - Create an
InsertCursorby passing the output feature class defined in the tool dialog along with the fields that will be populated. We then start aforloop that loops through each of the features (wildfires) that have been returned from the request to the ArcGIS Server map service. Thedecodedvariable is a Python dictionary. Inside theforloop, we retrieve the fire name, latitude, longitude, and acres from theattributesdictionary. Finally, we call theinsertRow()method to insert a new row into the feature class along with the fire name and acres as attributes. The progress information is written to Progress Dialog and the counter is updated. Theexecute()method should now appear as follows: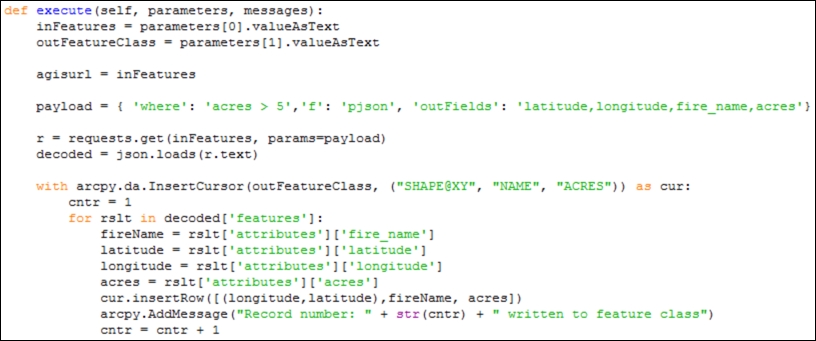
- Save the file and refresh your Python Toolbox if needed.
- You can check your work by examining the
c:ArcpyBookcodeCh6InsertWildfires_PythonToolbox.pysolution file. - Double-click on the USGS Download tool.
- Leave the default URL and select the RealTimeFires feature class in the WildlandFires geodatabase found in
c:ArcpyBookdata. The RealTimeFires feature class is empty and has fields forNAMEandACRES. - Click on OK to execute the tool. The number of features written to the feature class will vary depending on the current wildfire activity. Most of the time, there is at least a little bit of activity, but it is possible (though not likely) that there wouldn't be any wildfires in the U.S:

- View the feature class in ArcMap to see its features. You may want to add a
basemaplayer to provide a reference, as seen in this screenshot: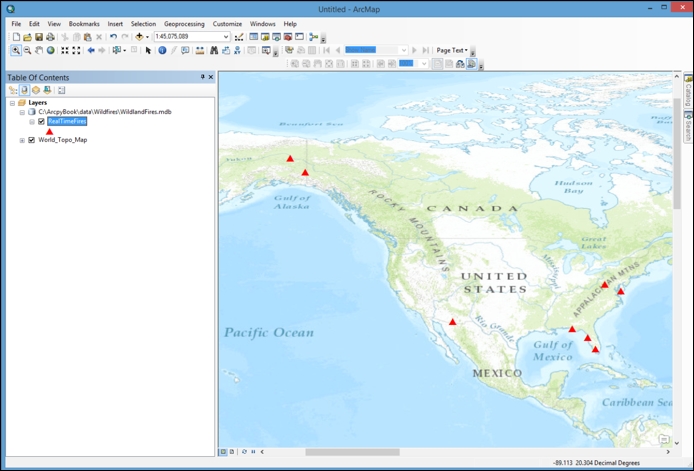
The newer style ArcGIS Python Toolbox provides a Python-centric way of creating your custom script tools. The older style of creating custom script tools in ArcGIS for Desktop uses a combination of Python along with a wizard-based approach to define various aspects of the tool. The newer approach provides a more straightforward method for creating your tools. All the tools that you create are contained within a Toolbox class that should not be renamed. By default, a single Tool class will be created inside Toolbox. This Tool class should be renamed. In this recipe, we renamed it USGSDownload. Inside the USGSDownload class, the getParameterInfo() and execute() methods are present, among others. Using the getParameterInfo() method, Parameter objects can be defined to hold input data. In this tool, we defined a Parameter to capture a URL for an ArcGIS Server map service containing live wildfire data and a second Parameter object to reference a local feature class to hold the data. Finally, the execute() method is triggered when the user clicks on the OK button in the tool. Parameter information is sent as an argument to the execute() method in the form of the parameters variable. Inside this method, a request to obtain the wildfire data from the remove ArcGIS Server instance is submitted using the Python requests module. The response is returned as a json object that is converted into a Python dictionary stored in a variable called decoded. The fire name, latitude, longitude, and acres are pulled out of the decoded variable and written to the local feature class using an InsertCursor object from the arcpy.da module. We'll cover the arcpy.da module in great detail in a later chapter of the book.