
You'll want to test add-ins before distributing them to your end users. To test these, you first need to install the add-in.
In the working folder of your add-in, the makeaddin.py script can be used to copy all files and folders to a compressed add-in folder in a working directory with the <working folder name>.esriaddin file format. Double-click on this .esriaddin file to launch the Esri ArcGIS add-in installation utility, which will install your add-in. You can then go into ArcGIS for Desktop and test the add-in. The custom toolbar or menu may already be visible and ready to test. If it is not visible, go to the Customize menu and click on Add-in Manager. The Add-In Manager dialog box lists the installed add-ins that target the current application. Add-in information, such as name, description, and image, which are entered as project settings, should be displayed.
- Inside the main folder for your add-in, there will be a Python script file called
makeaddin.py. This script creates the.esriaddinfile. Double-click on the script to execute and create the.esriaddinfile. This process is illustrated in the following screenshot:
- To install the add-in for ArcGIS for Desktop, double-click on the
Widlfire_Add-In.esriaddinfile, which will launch the Esri ArcGIS Add-In Installation Utility window, as shown in the following screenshot:
- Click on Install Add-In. If everything was successful, you should see the following message:

- To test the add-in, open ArcMap. Your add-in may already be active. If not, navigate to Customize | Add-In Manager. This will display the Add-In Manager dialog box, as shown in the following screenshot. You should be able to see the add-in that you created:

- If needed, select the Customize button. To add the toolbar to the application, click on the Toolbars tab and choose the toolbar you created:

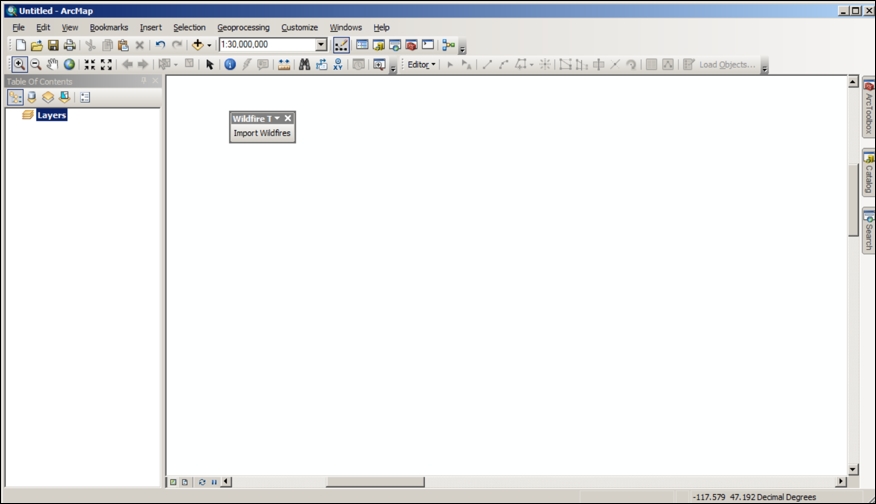
The add-in should now be displayed, as seen in this screenshot:
- Click on the button and in the dialog that is displayed, navigate to the
Wildfireslayers you created earlier inside theWildlandFires.mdb. Select and add them to the display:
Here, you will see the output of having selected one or more layers from the dialog:

The utility will place the add-in into a well-known folder discoverable by ArcGIS for Desktop. The locations of this folder are as follows:
- Windows 8:
C:Users<username>DocumentsArcGISAddInsDesktop10.3 - Vista/7:
C:Users<username>DocumentsArcGISAddInsDesktop10.3 - XP:
C:Documents and Settings<username>My DocumentsArcGISAddInsDesktop10.3
A folder with a unique globally unique identifier or GUID name will be created inside the well-known folder. The add-in will reside inside this unique folder name. This is illustrated in the following screenshot. When ArcGIS for Desktop starts, it will search these directories and load the add-ins:

The add-in will look similar to the following:
You can also use a private network drive to distribute add-ins to end users. The Add-In Manager in ArcGIS for Desktop adds and maintains lists of folders that can be searched for add-ins. Select the Options tab and then Add Folder to add a network drive to the list.