
The multisite feature allows us to create a network of WordPress sites. This feature is ideal for setting up student blogs and portfolios or creating a network of sites for instructors and teachers. A WordPress network is a group of individual sites on one shared instance of WordPress. With our multisite network, we act as the administrator, creating and controlling the accounts and sites.
In a WordPress network, each user receives his or her own WordPress installation, but no a shared codebase with a limited set of plugins and themes. A WordPress multisite network is different from multiauthor blogs, where multiple users are given access to a single site.
I have personally used WordPress multisite networks as a means of managing student blogs and portfolios. I have found blogs to be an effective way for students to curate and share class resources and links as well as an open space for students to write brief reflections on course content. WordPress acts as an effective portfolio tool, allowing students to create pages and posts containing a selection of work from the class. A multisite network serves as also an effective way to create department-wide websites, providing each faculty member his/her own site while only the site administrator is responsible for managing and updating the WordPress installation.
In this chapter, we will step through the process of creating a WordPress network. Once the network is installed, we will add sites, explore network management, share themes, and plugins across the network, more easily manage the network with plugins, and display network content on our site.
The server requirements of a WordPress network are the same as those needed to power an individual WordPress site. It is important to be aware that the additional sites created by the network will increase the amount of bandwidth used as well as the size of the database. If the network is larger than a few sites, contact the hosting company to ensure that your hosting package will be able to handle the extra load.
When creating a network, there are two types of site URLs from which we can choose:
- Sub-domain URLs are domain based and create URLs such as: http://samplestudent.example.org
- Sub-directory URLs networks are path based and create URLs such as: http://example.org/samplestudent
In order to use the sub-domain option, we must make changes at the server or hosting level and update the DNS configuration. For this reason, I recommend using the sub-directory option. The only requirement of the sub-directory network is that our primary site is already using permalinks, as discussed in Chapter 1, Installing and Configuring WordPress.
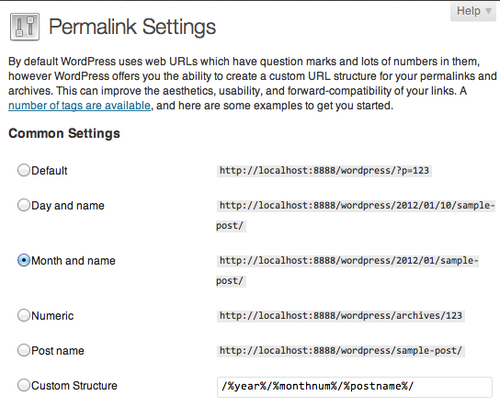
To turn permalinks on, visit Settings | Permalinks and select one of the Common Settings. I would recommend using the Month and name permalink setting.
Tip
If you choose to create a network from an existing WordPress site it is a good idea to first back up your site's database. Backups are covered in greater detail in Chapter 7, Site Management.