Regularly writing posts will keep students updated on the latest course news, assignments, and supplemental course materials. In this section we will create a new post that contains a video, update our site's Hello World post, and keep our posts organized by using categories and tags.
WordPress has made embedding videos from popular media sites such as YouTube or Vimeo a straightforward process. To begin, create a new post by hovering over the + New button in the admin toolbar and click on the Post button. Enter a descriptive title for the post within the title box.
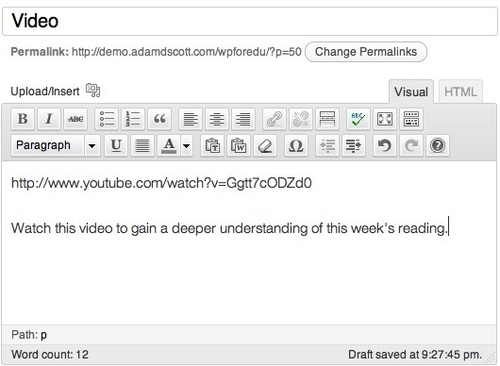
To embed the video from popular video services, click on the HTML tab above the post editor and paste the URL of the video's web page into the new post. Optionally, press on Return key, click on the Visual tab to return to the visual editor, and type a corresponding message for the post.
The following screenshot shows our video post as it appears in the WordPress Post editor:
The following screenshot shows the YouTube video post as it appears on our site:

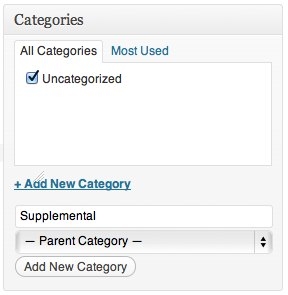
Assigning post Categories is a good way to organize and provide context for our posts. Categories are a means of classifying posts and are one of the key differentiators between posts and pages. Using categories can help students and site users easily find relevant and related information. By default WordPress assigns each post a category of Uncategorized. To add a category, type a category name of your choosing within the Categories box. As this post contains supplemental course material, we can assign it a Supplemental category.
In addition to our category, we can tag our post. While tags are similar to categories, they function as the specific keywords of an individual post. The use of tags can help organize small pieces of information across our site. As the sample post contains a video interview of an author discussing his book, our tags may be: video, interview, author name, and book title.
To add tags to a post, type the tag words into the Tags box with each tag separated by a comma.

Clicking on the Preview button from within the Publish box allows us to see how the post will appear on our site. If necessary, we can then return to the post editor to make additional adjustments or edits. Once the post is complete and ready to be published to the site, click on the blue Publish button.
By hovering over Posts in the left sidebar and choosing the All Posts option, we are able to see a list of each of our posts. By default WordPress comes with a single pre-written post, titled Hello World. Clicking on the name of the post will take us to the Edit Post page, allowing us to make changes to this post.
Since this is our site's first post, we may wish to keep it, but edit the post contents to serve as a more accurate introduction. To begin, edit the text with an appropriate welcome message for your students.
To add an image to this post, click on the Upload/Insert media icon directly above the post editor. We will be prompted to drag-and-drop files into the Add Media area or we may click on the Select Files button to find the appropriate image on our computer. Once the image has been uploaded, WordPress will allow us to edit the image or image options before placing it into our post.
Tip
Occasionally WordPress users will receive an error stating that the web server did not have permission to write to the uploads directory when attempting to upload an image or file for the first time. If you receive this error, consult the WordPress Codex for how to change file permissions ( http://codex.wordpress.org/Changing_File_Permissions).
Clicking on the Edit Image button will provide us with options to crop, rotate, or flip our image.

We can also adjust the Title, Alternate Text, Caption, Description, Link URL, Alignment, and Size. I would recommend always including Alternate Text for the image. Alternate Text should provide a brief description of the image for those who may have difficulty seeing it. This will increase the accessibility of our site for students and readers who are visually impaired and use a screen reader to access the information.
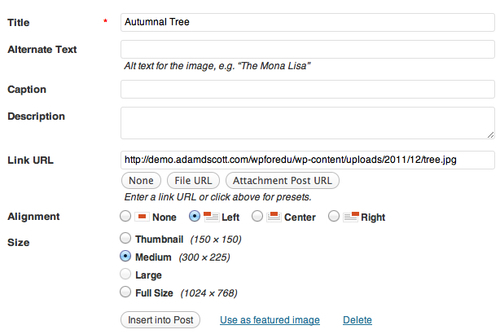
Note that size of the image is controlled by the media settings or may be set by the theme.
Once we have entered any necessary information and made any desired edits, we can add the image to our post by clicking on the Insert into Post button.
Before publishing the post, add an appropriate category such as Course News.
To preview our updated post, click on the Preview Changes button within the Publish box. If we are happy with our edited post, we can click on the Update button within the Publish box to post the newly revised version to our site.
As mentioned previously, assigning post Categories is a good way to organize and provide context for our posts. Categories can be seen as a means of classifying posts. Using categories can help students and site users easily find relevant and related information.
By default WordPress assigns each post a category of Uncategorized. The WordPress Categories page allows us to manage and edit our post categories.
From anywhere within WordPress, hover over Posts in the left sidebar and choose Categories from the drop-down menu. To add an additional category, enter a category name and click on the Add New Category button.

Optionally, we may also choose to add a Slug, Parent, or Description for the category. The Slug is a URL-friendly version of the category and by default will be all lowercase and free of spaces and symbols. If left blank, WordPress will automatically generate an appropriate slug for each category. For example, a category titled Research Paper will receive a category slug of research-paper.
The Parent drop-down menu allows us to create sub-categories that belong beneath other categories. For example, we may have a parent category entitled Assignment and create child categories titled Essay, Reading, and Research Paper.

If we choose, we may also enter a brief Description of the category, which is utilized by some WordPress themes.
By creating a variety of categories now, we can easily select an appropriate category when writing each post. For our sample site, the categories I have created are:
