
Just as themes and plugins can be used to enhance our own site, they can add value to sites across our network. As the network administrator, we have control over which themes and plugins our users can enable.
Tip
The ability to determine the available plugins and themes is one of the key advantages of running a WordPress network. The site administrator can preselect the themes and plugins that will be most useful to network users. This is significantly different from a standalone WordPress installation, where the user has total control over themes and plugins.
Network users will not be able to search and install their own themes. Instead, network administrators will need to install a selection of themes for site users to choose from. This allows our users to personalize the look and feel of their WordPress site while providing the administrator with the ability to pre-approve or limit the use of themes. Users will also be able to change theme options such as widgets, allowing them to customize the look and feel of their site further.
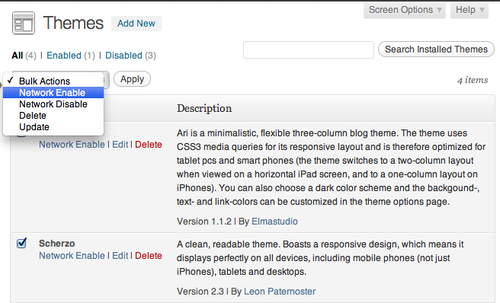
To enable themes:
- Log in to the Network Admin area.
- Download and install themes as covered in Chapter 2, Setting up our Class Site.
- Visit the Installed Themes page.
- Click on the Network Enable link below each theme that should be enabled.
Alternately, we may also choose to bulk enable themes by selecting the theme checkbox and choosing Network Enable from the Bulk Actions drop-down menu.
Before network users are able to use plugins on their individual site, we must enable the plugin administration menu. This will allow users to see the plugin page from within their individual WordPress site. In order to do this:
- Log in to the Network Admin area.
- Visit the Network Settings page, by clicking on Settings in the left sidebar.
- Scroll to the bottom of the screen and click on the checkbox next to Plugins in the Menu Settings.
- Click on the Save Changes button.

Once the plugin menu has been enabled for users, we can enable individual plugins across the network.
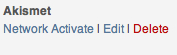
- Log in to the Network Admin area.
- Download and install plugins as covered in Chapter 3, Enhancing WordPress with Plugins.
- Visit the Installed Plugins page.
- Click on the Network Activate link below each plugin that you wish to enable.
Following these steps will install the plugin for all network sites. In order to actively use the plugin, users must still activate the plugin from their individual dashboard as described in Chapter 3, Enhancing WordPress with Plugins.