
There are thousands of WordPress plugins available, each designed to add a unique functionality to WordPress. In this section, I will cover a few of the plugins that are useful in an education setting. To find and install these plugins, visit the Add New Plugins page within WordPress and search for them by name.
WordPress comes with two plugins pre-installed, Hello Dolly and Akismet. The Hello Dolly plugin was created by Matt Mulenweg, the founding developer of WordPress, while Akismet is developed and maintained by Automattic, the company behind the commercially hosted WordPress.com. While these plugins come pre-installed with every new WordPress installation, they are not activated and there is no requirement to do so.
Hello Dolly is a fun plugin that adds a random lyric from Hello, Dolly to the admin screen. While this plugin may not have a practical application for a WordPress site, it allows us to grow in comfort activating or deactivating plugins.
For sites that allow comments, it is a good idea to use the Akismet plugin. Akismet is a plugin designed to prevent comment spam. According to Akismet.com, there have been well over forty billion spam blog comments, while there have only been five billion legitimate comments. If you have ever had a blog, you are most likely familiar with the overwhelming amount of spam that can accumulate within the comment section. Akismet automatically detects and filters out these spam comments.
To use Akismet:
- Activate the plugin.
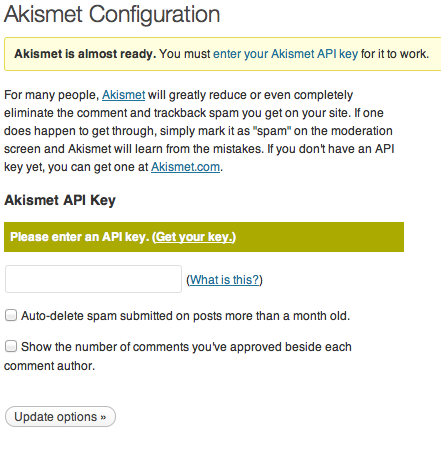
- Click on the You must enter your Akismet API key for it to work link that appears at the top of the screen or the Akismet Configuration link within Plugins in the left sidebar menu.
- Obtain an API key by following the Get Your Key link to http://akismet.com/WordPress.
- Choose a donation amount and follow the steps to create an API key.
- Once we have an API key, we can return to our WordPress installation, paste the key into the Akismet Configuration box, and click on the Update options button.
Tip
The Cost of Akismet
Akismet is free for non-profit, personal use, though we may choose to give a donation towards the continued development of this plugin. Akismet also offers a "Pro" plan for $5 per month with expanded features for personal users. Businesses or large institutions looking to employ Akismet will have to pay a larger fee, beginning at $50 per month.
With Akismet installed, we should see a significant decrease in the amount of spam comments and trackbacks that appear on our site.
As the use of WordPress in education continues to grow, many third-party developers have created plugins specific to the needs of educators.
ScholarPress Courseware is one of the most fully-featured education plugins available. In fact, a later chapter of this book will be dedicated to using the BuddyPress Courseware plugin. However, for users not interested in the social features of BuddyPress, the ScholarPress Courseware plugin still offers many benefits.
ScholarPress Courseware allows us to easily create a course schedule, post course assignments, and develop a course bibliography. This plugin was designed with higher education in mind, but could certainly be useful in a wide range of education settings. The plugin will create two new pages on our site, Bibliography and Schedule.
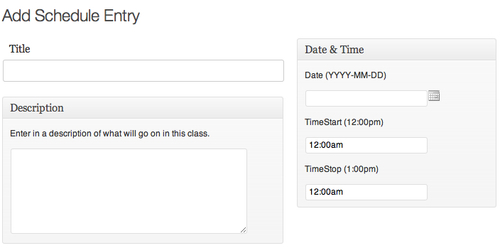
ScholarPress Courseware allows us to create a schedule of upcoming classes or assignment due dates.
The bibliography tool is designed to keep track of the books, articles, websites, videos, and more that are referenced in the class.

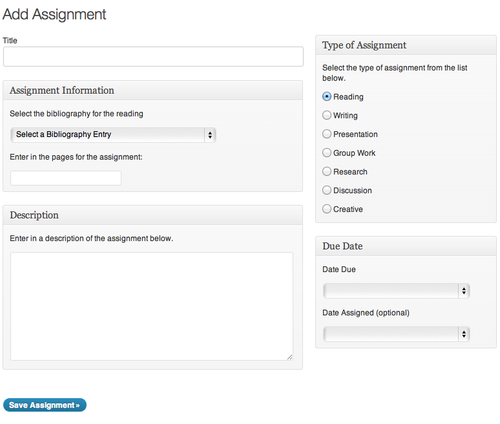
The Assignment page allows us to add detailed assignment information, which will then be posted to the Schedule page.
The WP Survey and Quiz Tool plugin enables us to create quizzes, surveys, and polls with an unlimited number of questions. Quiz questions can take on multiple formats including multiple choice, single answer, and free text.
To use the WP Survey and Quiz Tool to create a quiz:
- Install and activate the WP Survey and Quiz Tool plugin.
- Click on WPSQT in the left WordPress sidebar.
- Click on the Add New Quiz link at the top of the screen.
- Give the quiz a name and click on the Save Quiz button.
- In order to add questions, we must create at least one section in our quiz. Add as many sections as necessary to separate and organize the quiz content. Once we have finished adding sections, click on the Save button.

- To add quiz questions, click on the Question link to visit the Questions page. Click on the Add New Question button from the Questions page.
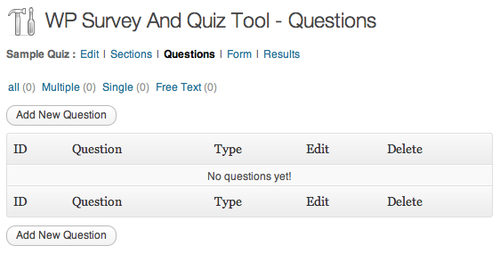
- Add a new question and select the type of response for the question (multiple choice, drop-down, or free text).
- For multiple choice and drop-down questions, enter the possible responses.
- Once the question is complete, click on the Save Question button.
- Continue adding questions as needed.
Once the quiz is complete, we will need to post it to our site. To embed the quiz, create a new page and add [wpsqt_quiz name=""] to the body of the page. Within the quotes enter the name of the quiz. For a quiz titled Quiz 1, the embed code would appear as [wpsqt_quiz name="Quiz 1"].

To view quiz results, hover over WPSQT in the sidebar and select the Quizzes option. Hovering over the name of a quiz will present us with a Results link. From the Results screen hover over the individual quiz title and click on the Mark link to access and assess the submitted answers.

Tip
If students are not registered users of your WordPress site, be sure to add a free text question requesting the student name. To learn more about user registration, consult the WordPress Codex (http://codex.wordpress.org/Users_Add_New_Screen).
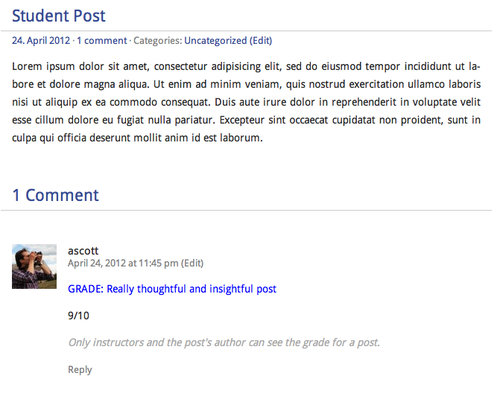
Grader is a plugin that allows site administrators to assign grades to individual posts through the post comments. The grade is only visible to the site administrator and post author. This is useful for a site where students are given accounts and contribute to the site with posts.
To assign a grade, the site administrator leaves a comment on the student written post beginning with the text @grade.
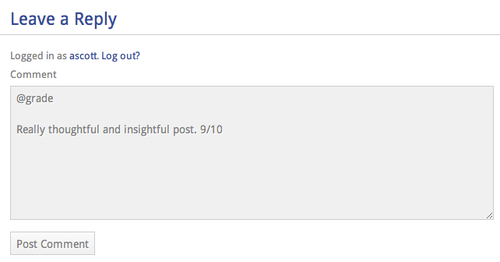
Using the @grade token creates a private comment that will only be visible to the site administrator and post author.
A WordPress site allows us to facilitate better communication between the instructor and students as well as encouraging student discussion. There are a number of plugins that add contact forms, improve the WordPress commenting system, and even add the ability to incorporate a discussion forum into our site.
Contact Form 7 allows us to add a simple contact form to our site. This will allow students and site visitors to easily contact a course instructor through e-mail. Contact Form 7 is typically one of the first plugins I install on any WordPress site.
To use Contact Form 7:
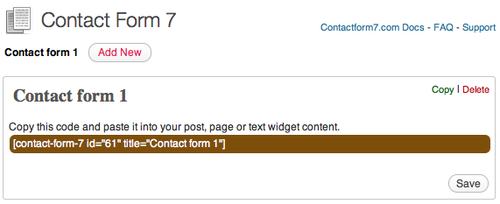
- Install and activate the Contact Form 7 plugin.
- Click on Contact in the left WordPress sidebar to visit the contact form settings page.
- The default contact form requests the sender's name, e-mail address, an e-mail subject, and an e-mail message. From this screen we can add fields to the form, edit the e-mail recipient, and change the e-mail message.
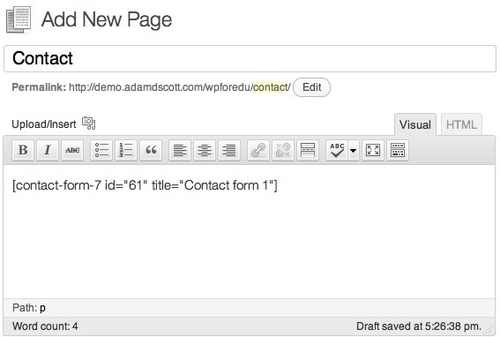
- To add the form to a page, copy the embed code at the top of the screen.
- Create a new page titled Contact, edit any existing page, or add a text widget and paste the contact form embed code.
With the Semi-Private Comments plugin enabled, site visitors will only be able to see the comments they themselves leave as well as those of the site administrator. This works by detecting a site visitor's IP address and only displaying the comments that have been made at that address. This plugin can be useful in scenarios where we want to encourage users to leave comments, but not for the use of discussion. Ensuring student privacy with the Semi-Private Comments plugin can lead to authentic student responses.
Note
Please note that environments where users' IP addresses change often, such as Wi-Fi networks or computer lab environments, can cause the IP address detection of the plugin to be less effective. In this scenario, the plugin also has the ability to work with registered WordPress users.
The IntenseDebate Comments plugin is in direct contrast to Semi-Private Comments, as it aims to increase discussion within the WordPress comment section. It works by allowing users to easily reply to comments, to like or dislike other comments, and subscribe to a comment thread through e-mail or popular RSS readers.
To set up IntenseDebate Comments, install and activate the IntenseDebate Comments plugin, visit the IntenseDebate page within the WordPress Settings and sign in to your WordPress.com account.
Similar to IntenseDebate Comments, Disqus provides an enhanced commenting system for our WordPress site. Disqus is used by popular websites such as CNN and Time.
Disqus allows us to:
- Collect and display Twitter tweets that mention a post from our siteDisplay comments in real time
- Embed media, such as images or video into comments
- Create a list of restricted words that cannot appear within the comments
- Have greater control over our site's comments with advanced comment moderation tools
In order to use Disqus on our site:
- Create an account at disqus.com.
- Install and activate the Disqus plugin.
- Click on the configure the plugin link or hover over Comments in the sidebar and choose the Disqus option.
- Log in with your Disqus account.
- Click the link to register a new site on the Disqus website.
- Follow the instructions on the Disqus website and select the appropriate commenting features.
- Return to your WordPress dashboard and select your domain from the Disqus settings page.
The bbPress plugin installs a lightweight discussion forum to our site. This is a great way for students to ask questions and respond to each other's ideas. In order for others to post, they will need to be registered site users. This can be done from the Users page or using the Add Multiple Users plugin mentioned later in the chapter.

It's no secret that students frequently engage in social networking. Adding course content to social networks is a great way to engage students. There are a number of WordPress plugins that allow us to easily incorporate social networks into our site.
WP to Twitter will automatically tweet anytime a new post is created. The plugin has a number of additional settings such as the ability to use a post's tags as hashtags and appending text to any tweet.
Simple Facebook Connect is a WordPress plugin that incorporates a wide range of Facebook integration into our site. Most importantly, the plugin will automatically post blog updates to a Facebook profile or fan page. One of the more interesting features is that the plugin will integrate comments left at Facebook.com back into our WordPress posts.
There are many other plugins that can improve the functionality of our WordPress site and increase student engagement. Using plugins we are able to incorporate event calendars, create a mobile version of our site, easily add WordPress users, and export our site's contents as a digital book.
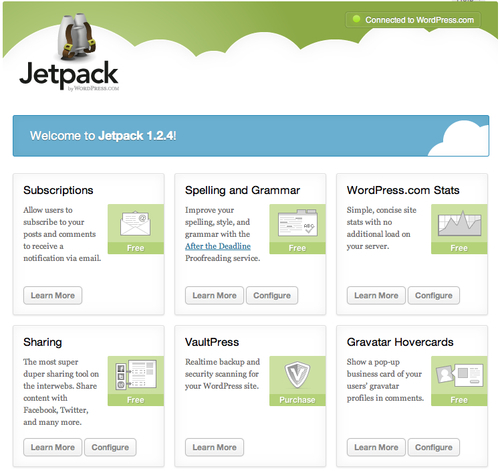
Depending on your web host, you may have seen banner ads throughout your WordPress installation advising you to employ the cloud-powered features of the Jetpack plugin. Jetpack allows us to add features to a self-hosted WordPress site that were previously only available to WordPress.com users.
The Jetpack plugin adds many additional features including:
- Installation of the Latex markup language, for writing math equations and formulas
- Site visitor statistics
- Spelling and grammar checks within the Post and Page editors
- The ability for site visitors to subscribe to new posts through e-mail
- A share button, allowing site visitors to easily share our posts through popular social networking sites
- Additional sidebar widgets, such as the ability to display images or a feed of Twitter updates
- The ability to easily create shortened URLs
- Pop-up gravatars for site authors and commenters
- The ability to easily embed media from a range of popular sites
To use Jetpack with our site, we will first need an account at WordPress.com. When signing up at WordPress.com, click on the signup for just a username link from the account sign up page. This will prevent us from creating an unnecessary blog.
- Activate the Jetpack plugin from our Plugins page.
- Click on the Jetpack link in the WordPress sidebar.
- Click on the Connect to WordPress.com link and enter your WordPress.com username and password.
- We may then configure each individual Jetpack feature from the Jetpack page by clicking on the Configure button.
The Calendar plugin incorporates an event calendar into our site. With an event calendar, we are able to list assignment due dates, class meeting times, exams, and more.
To add events to the calendar and manage calendar categories, visit the Calendar link in the left sidebar.
Once events have been added to the calendar, we can add it to a page by typing {CALENDAR} into the body of the page.
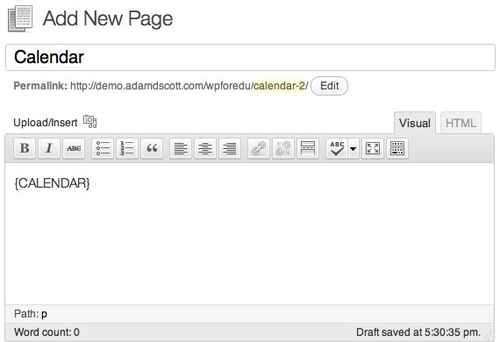
The calendar appears on our page as shown in the following screenshot:

In addition to the full page calendar, there is also an upcoming events widget that will display a list of upcoming events within any widget area of our site.
Mobile web browsing is growing at a rapid pace. There are currently 1.3 billion page views from mobile devices per year (http://www.zeldman.com/2011/12/14/why-mobile/). Some WordPress themes will nicely scale down to a mobile view, but for those that do not, there are several plugins that will create a mobile optimized version of our site.
WordPress Mobile Pack is one plugin that adds a mobile theme to your site. Site visitors will have the option of viewing the desktop version, if they prefer. The plugin also allows us to choose which widgets should appear in the mobile version of our site. The plugin also comes with four different color schemes, allowing us to roughly match the look of our desktop site.
If you are interested in allowing students to publish posts and content to your WordPress site or use the bbPress forums, Add Multiple Users for WordPress is an incredible time saver. This plugin allows us to add up to 50 users at a time, simply by entering names, e-mail addresses, and assigning a username.