
One of the killer features of BuddyPress is the ability to create Groups. Each Group has its own activity stream, allowing a subset of site users to communicate and collaborate. Only individuals enrolled in the group will be able to see and post to this activity stream. Groups are useful for separating the subsections of a course or to allow students to collaborate on a project.

To create a group:
- Visit the Groups page of our course website and click the Create a Group button.

- We will then be taken to the Details screen where we are prompted to name the group and provide a brief description. Clearly labeling and describing the groups will prevent students from requesting access to an incorrect group.
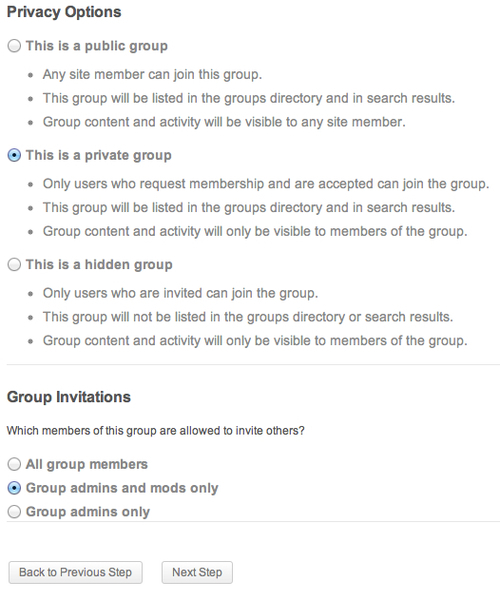
- The next step is to select an appropriate privacy option for the group. Choosing to set a group as Private will prevent non-group members from seeing the interactions of the group. From this screen we may also select who has the ability to add new members to a group. If we wish to retain control over the members of a group, set the Group Invitations option to Group admins and mods only.
- The Avatar screen allows us to select an image to represent the group. This is not necessary, but can be an easy way to differentiate groups.
- The Invites screen allows us to select site users from our friend list to be added to the group. Select the appropriate students and click on the Finish button.
..................Content has been hidden....................
You can't read the all page of ebook, please click here login for view all page.