
Creating a new site will provide a unique WordPress site for the specified recipient, such as a student or staff member. To create a new site from the Network Admin Dashboard, click on the Create a New Site link from the Right Now box. We may also create a new site from anywhere within the Network Admin area by hovering over Sites in the left sidebar and choosing the Add New option.
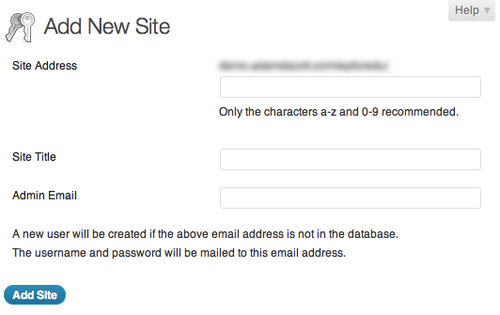
Once on the Add New Site page, complete the form by filling out the Site Address, Site Title, and Admin Email.
- Site Address: Enter the address of the new site into this text area. For a path based site, this would be the trailing slash. For example, if the new site was to be www.example.org/student1, simply enter
student 1. - Site Title: Give the site a title, such as the student or staff member's names
- Admin Email: The admin e-mail should be the e-mail address of the new site users
Once this is complete, the student or staff member will receive an e-mail with the site address as well as their login credentials. The user account will be the site address (such as student1) and the password will be randomly generated.
The first time a user logs in to their new site, they will not be prompted to create a new password. Instead, passwords can be changed by visiting the Profile Page.
- Hover over the user name/image at the top left of the screen, in the WordPress admin bar
- Choose the Edit My Profile option
- Enter a new password
- Click on the Update Profile button