Texture filters
![]()
A series of filters that gives the image a textured appearance as though it has been ironed onto a textured surface.
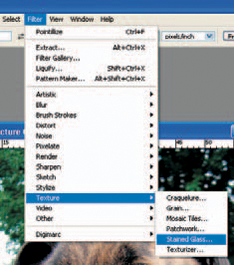
CRAQUELURE
Produces a fine patch of cracks that looks a little like flaking paint. Choose your image carefully!

GRAIN
Adds grain to an image making it look more like a traditional photograph. This is a useful mode to apply to make a digital camera image blend with a traditional shot and look more natural when combined. There’s a choice of grain types and the intensity and contrast can be controlled.
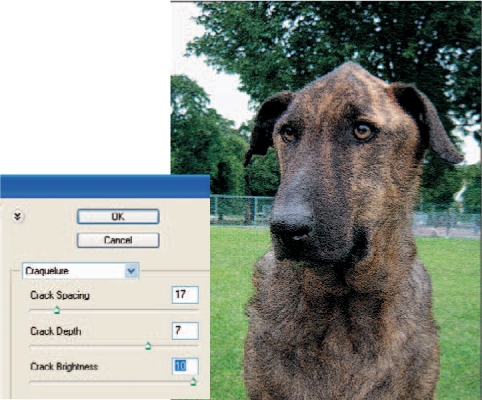
MOSAIC TILES
Breaks the image up into tiles separated by grout. The size of tiles can be adjusted along with the width and contrast of the grout.
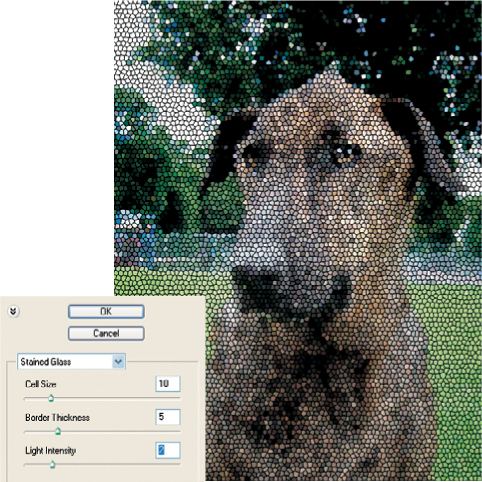
STAINED GLASS
Draws a series of irregular shaped cells over the image, outlined by the foreground color, and fills them with an average of the contained pixels. The cell and border size can be changed.
TIFF format (Tagged-Image File Format)
A versatile format that can easily be read by Macs and PCs using a variety of software programs. It supports CMYK, RGB, and grayscale files with Alpha channels plus Lab, indexed-color and Bitmaps without Alpha channels. TIFF files can be compressed, without any loss in quality, using the LZW method to gain storage space, but they’ll be slower to open and save.

PATCHWORK
Changes the image into a grid of colored squares. The colors produced are an average of all the enclosed pixels of each particular square. The size of grid can be changed and appears in varying depths to simulate a very realistic looking patchwork.
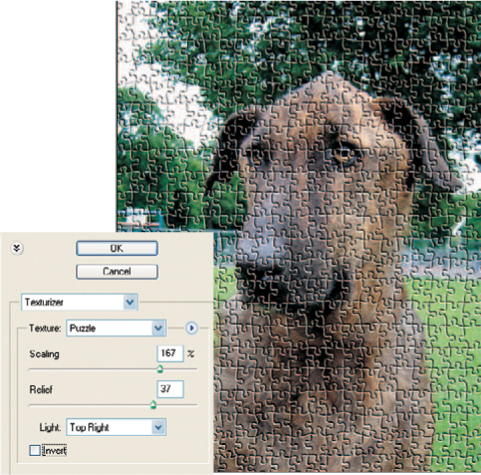
TEXTURIZER
Adds a texture to the image making it look like it’s printed on canvas or, like this example, a jigsaw puzzle.
Tiles filter
(See Stylize filters)
Tolerance settings
(See Magic Wand)
Threshold mode

Makes a normal grayscale or color image appear like a high contrast lith image by discarding all tones including grays and leaving just black and white.

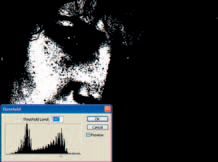
You can control where the black and white crossover points are using a slider on the Histogram. Go too far to the right and the image will look mostly black, too far to the left and it will look mostly white. A point mid way is usually best, but it does depend on the subject.


Tip
![]() Create a silhouette using the Threshold mode then go to Hue/Saturation and with Colorize selected make a color. This gives effects similar to those using graphic art papers in the darkroom such as Kentmere Kentona papers or bleach etch effects.
Create a silhouette using the Threshold mode then go to Hue/Saturation and with Colorize selected make a color. This gives effects similar to those using graphic art papers in the darkroom such as Kentmere Kentona papers or bleach etch effects.

Tolerance setting
Found in the Magic Wand options. It’s used to adjust the number of pixel color variations selected from the one the magic wand touches. If the tolerance setting is high more pixel colors will be selected. If it’s low fewer will be selected. Trial and error will help you determine what to set this to.
Tip
![]() Start small and work up or start big and work down until the wand is selecting more or less the area you want it to. Then adjust the tolerance to minimal setting and pick up wanted areas using the wand with the Alt key held down or remove parts of the selection with the wand and the Command key held down.
Start small and work up or start big and work down until the wand is selecting more or less the area you want it to. Then adjust the tolerance to minimal setting and pick up wanted areas using the wand with the Alt key held down or remove parts of the selection with the wand and the Command key held down.
Toolbox

The area on the desktop where all the tools are located. Ones with arrows have pull-out sections with a choice of alternative tools.
Most of the toolbox icons can be double clicked to bring up the palette options box.
The bottom two icons allow easy transfer from Photoshop CS to ImageReady CS.
Tool shortcut keys are given throughout this book on the separate entries for toolbar contents.
(See Appendix C)
Tip
![]() The tab key hides all the desktop palettes, including the toolbar. Hold down the Shift key while clicking on the Tab key to keep the toolbar on view, while you hide palettes.
The tab key hides all the desktop palettes, including the toolbar. Hold down the Shift key while clicking on the Tab key to keep the toolbar on view, while you hide palettes.
Tool presets
Store your favourite settings for Brushes, Crops and text styles to access them with ease from the preset menu.
(See Brushes)

Transform
![]()
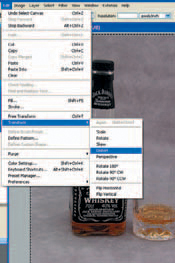
A series of options that lets you change the size, shape, and perspective of a selection as well as rotate and flip it either manually or numerically.
The selection appears with squares, or handles, in the corners that you drag to change the dimensions. It’s ideal for resizing an object when it’s copied and pasted into another image. You can also use it to stretch landscapes and give them a panoramic feel.
The area you want to change must be selected before you can use these modes.
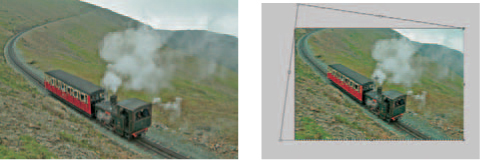
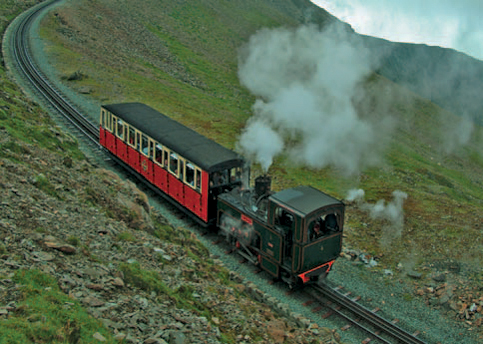
Transform→Distort was used here to create a slightly more dramatic looking perspective.
Whenever you shoot a subject from below it will appear to be leaning back and look like the top is thinner than the bottom. Use Transform→Perspective to pull the top outwards equally from both sides.

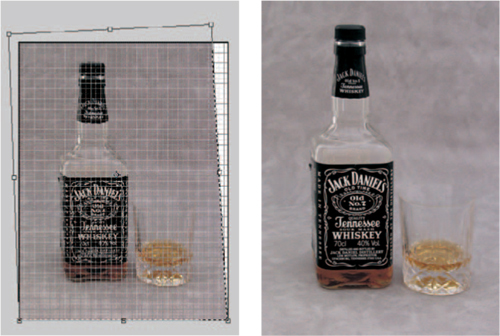
Studio photographers can’t always shoot from an angle that will ensure uprights are parallel. For this reason many commercial photographers use large format that allows perspective control. You can of course sort it out in Photoshop like this, using Transform→Distort.
Copy and resize your subject using Transform→Scale to create a more realistic looking perspective.
Take any ordinary landscape and stretch it using Transform→Scale to create a panoramic print.
Tip
![]() When making the image grow out of the canvas area increase the canvas beforehand to allow the new ‘stretched’ area to appear.
When making the image grow out of the canvas area increase the canvas beforehand to allow the new ‘stretched’ area to appear.
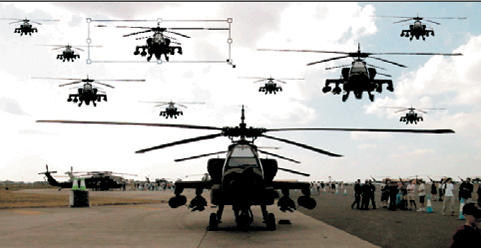
Transform Again
Remembers that last Transform that you applied and repeats the action. This is a useful option if you’re creating a composite picture and are pasting in and adjusting several elements.
Transparent layer
A layer with areas that contain no pixels, such as a new Layer, appears with a chequered pattern. Any subsequent layers that are merged will only be affected by the non-transparent areas. These are available in Photoshop’s PSD format and the TIFF format, but need to be merged if saved as JPEGs. Transparent areas are then replaced by white. Cutouts can be saved by converting to clipping paths which prevent the white background appearing on the document.
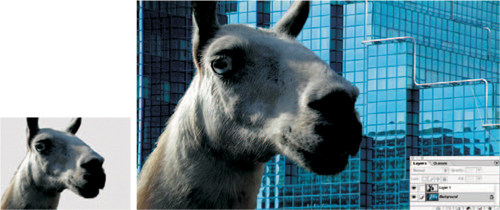
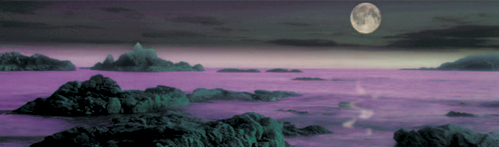
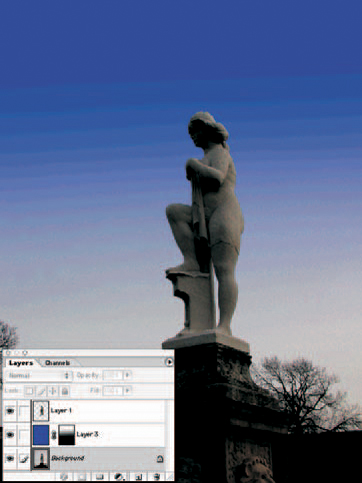
Transparency masks
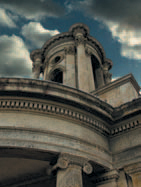
Use the Gradient Editor with the Transparency option selected to create a transparency mask. This can be used to help blend two layers or add a graduated filter effect to an image.
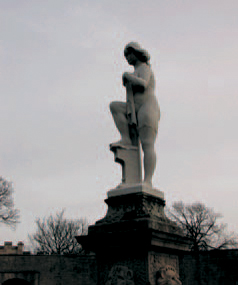
The original on the left was shot on an overcast day and could quite easily do with a lift. I copied the statue and pasted her on a new layer and then added a transparency mask as a new middle layer. A blue fill was added and the blue only shows through where the mask is clear.
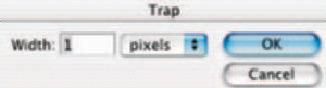
Trapping
![]()
Produces an overlap on colors by the amount of pixels you key in. The overlap prevents gaps appearing between CMYK colors if there’s a slight misalignment or movement of the printing plates. This technique is known as trapping and your printer will tell you if it’s needed and what values to enter in the Trap dialogue box.
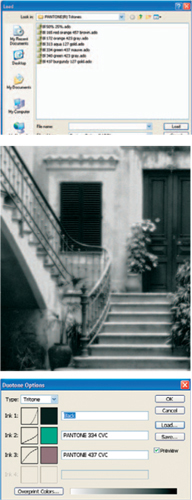
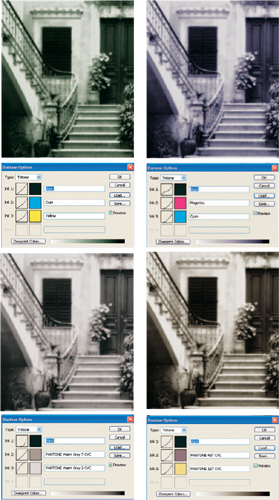
Tritones
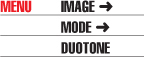
Part of the Duotones series using various color schemes from the presets folder in the Photoshop folder. The image first needs to be in grayscale before it can be converted to a Duotone.
Here are a few examples of an image that started life as a color photo taken on a Coolpix 995 digital camera. The image was layered with a diffuse glow version, flattened and converted to grayscale before it became a duotone/tritone.
(See Duotones and Quadtones)
TWAIN
TWAIN, or Technology Without An Interesting Name, is a file that comes with scanners that you place in the Mac’s Preferences folder or the TWAIN folder of the PC’s Windows Directory. To scan with in Photoshop go to File→Import→TWAIN Acquire. If more than one scanner is installed select the one you want first, File→Import→Select TWAIN Source. You can keep within Photoshop while scanning pictures. Once scanned the image appears in a new Photoshop document named Untitled. It’s wise to save this Untitled file straightaway, because if the computer crashes you’ll lose the file and will have to scan the photograph again.

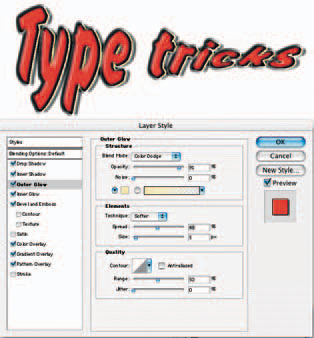
Type can be bent and shaped in any direction. First select a style and then drag the sliders to warp the text. Here I’ve illustrated Flag (left) and Arch (middle). You can then add a style using the Layer Style drop down options (right).
Type tool
Photoshop CS’s Type tool continues to improve making it even easier for designers to create stunning text treatments. As well as being able to call from the system’s usual font size, color and styles you can create type with selection borders using the Type Mask tool and fill with images or textures. Version 6.0 introduced vector-based type that you can increase in size without any jaggedness. This also offers more control so you can distort and bend the text alone or around objects. Photoshop CS adds the ability to add Text along a Path or Shape.
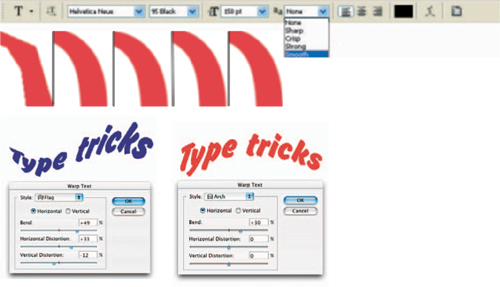
Photoshop 5.5 and 6.0 offered four Anti-alias options (None (off), Crisp, Strong and Smooth) rather than just on or off that you had in Photoshop 5.0’s palette. The options were joined by Sharp in version 7.0 and all five are accessed from the pull down menu. To indicate what difference you would see on a text curve I’ve magnified the top right of an elongated letter O. Left to right: None, Sharp, Crisp, Strong and Smooth.

Once you’re familiar with using the type warp tool you’ll be able to warp it to suit a shape that you place the type on. Here the type has been warped so it looks like it’s following the shape of the 3D sphere.

Photoshop CS has introduced a type to path option. First create a Path where you want the type to go then position the type tool over the path where you want the type to start. The Type tool cursor icon will show a path through the middle and when it does click to begin typing along the path. This works for shapes too.

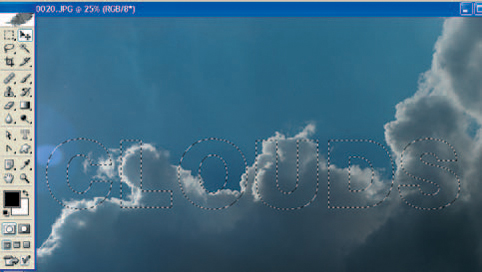
Use the Horizontal type mask tool if you want to create an instant selection around the letters you type. Then you can copy and paste so that the image appears in the letters and add a Layer effect such as a drop shadow or bevel as seen in the two examples below.

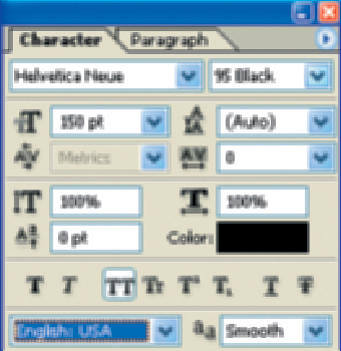
If you are using the Type tool to add a paragraph of text use the Bounding box option. With the Type tool selected click on the point where you want the text to start, hold the mouse down and drag. This creates a box that can be formatted to ensure the text appears as you prefer. You can change Character and Paragraph formatting.