
Configuring Claims Based Authentication for SharePoint 2010
You now configure claims based authentication in SharePoint 2010. The new web application will be able to authenticate using a Windows identity or custom identity. It is easy to configure claims based authentication in SharePoint 2010. The following Try It Yourself example enables the web application to use both forms based authentication and active directory authentication by configuring claims based authentication. The forms based authentication uses the System.Web.Security.SqlMembershipProvider class. You can easily use any other membership provider class and enable any custom mode of authentication.
To configure claims based authentication for SharePoint 2010, follow the next steps.
Try It Yourself: Configure Claims Based Authentication for a New SharePoint Web Application
1. Create an ASP.NET DB membership provider database. Open a Visual Studio 2010 command prompt and run the following command: aspnet_regsql.exe.
2. This opens the ASP.NET SQL Server Setup Wizard. Click Next. In the Select a Setup Option screen select the first option as shown in Figure 17.1 and click Next.

Figure 17.1. The ASP.NET SQL Server Setup Wizard
3. Select the server and database you want to use as the authentication store as shown in Figure 17.2 and click Next.
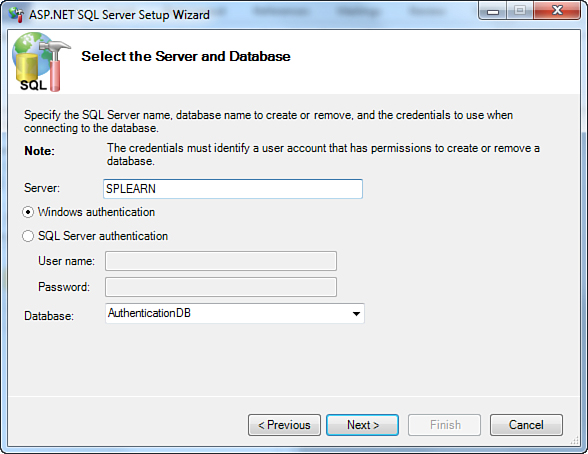
Figure 17.2. ASP.NET SQL Server Setup Wizard—Select Database
4. Click Next and the various database objects are created. Click Finish to close the wizard.
5. Now you need to create users in your database. The easy way is to create a blank ASP.NET web application (Figure 17.3) that connects to your database through the AspNetSqlMembershipProvider and add users through the Web Site Administration Tool. Create some users and you will be ready for the next steps to configure claims based authentication.

Figure 17.3. A new ASP.NET web application
6. Open the web.config and find the connectionStrings section. Add the following at the start of the connectionStrings section. Update the data source name with the correct name of your database server and the password with the correct password for the database server:
<add connectionString="Data Source=SPLEARN; Initial Catalog=AuthenticationDB; user id=sa;password=pass@word1"
name=" AuthenticationConnection"/>
7. Search for the membership provider by name AspNetSqlMembershipProvider and update the connectionStringName attribute to AuthenticationConnection.
8. Open the ASP.NET Web Site Administration Tool by going to the Project menu and then to ASP.NET configuration. This opens a web page as shown in Figure 17.4.
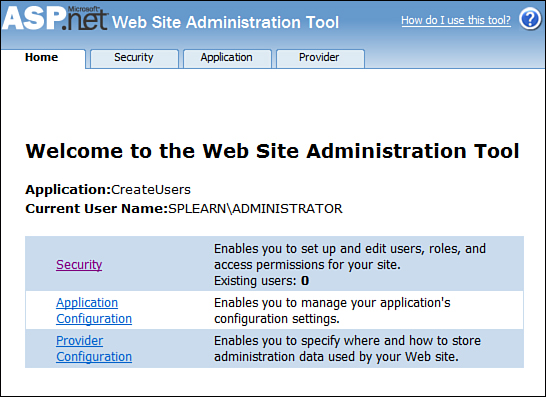
Figure 17.4. ASP.NET Web Site Administration Tool
9. Click the Security link. This opens a web page that allows you to create users as shown in Figure 17.5. Create a couple of users by entering the user name, password, email and other details.

Figure 17.5. ASP.NET Web Site Administration Tool—Add Users
10. Now create a new web application that will be configured to use claims based authentication. Browse to SharePoint 2010 Central Administration and go to Manage Web Applications under Application Management. Click the New button under the Web Applications tab in the ribbon.
11. The Create New Web Application dialog is displayed. Select Claims Based Authentication for the authentication type. Enter some appropriate port number. Leave the default settings for the Security Configuration section. These settings are shown in Figure 17.6.

Figure 17.6. New Web Application
12. In the Claims Authentication Types section select Enable Forms Based Authentication (FBA). Enter FBAMembershipProvider as the ASP.NET Membership Provider Name. The configuration is shown in Figure 17.7.
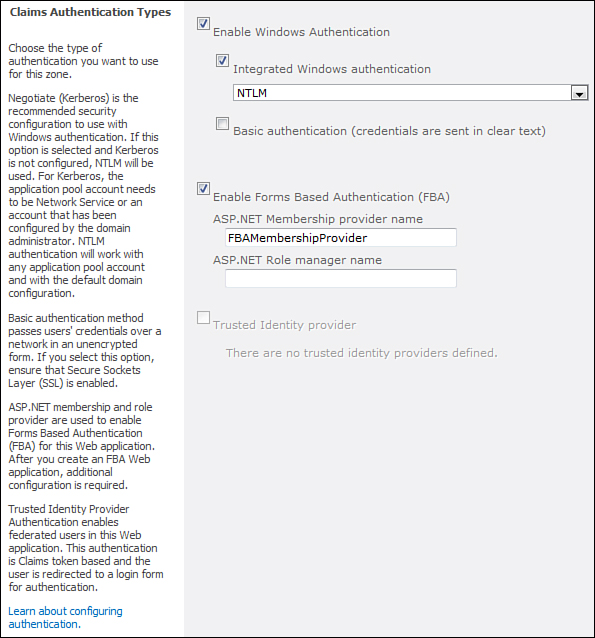
Figure 17.7. New Web Application—Configure Claims Authentication Type
13. Leave the rest of the settings as the default and click OK to create the new web application. Also create the top level site collection for the new web application.
14. You now need to update the web.config files of your web application so that it can connect to your membership provider. In addition you need to update the web.config for the SharePoint 2010 Central Administration and the STS. Open the web.config for the new web application and add the following tag after the configSections tag. Update the database name and the password as appropriate:
<connectionStrings>
<add connectionString="Data Source=splearn; Initial Catalog=AuthenticationDB; user id=sa;password=pass@word1"
name="AuthenticationConnection"/>
</connectionStrings>
15. Add the following tag at the end, inside the configuration/system.web/membership/providers tag and save the file:
<add name="FBAMembershipProvider"
type="System.Web.Security.SqlMembershipProvider"
connectionStringName="AuthenticationConnection"
enablePasswordRetrieval="false"
enablePasswordReset="true"
requiresQuestionAndAnswer="false"
requiresUniqueEmail="false"
maxInvalidPasswordAttempts="5"
minRequiredPasswordLength="6"
minRequiredNonalphanumericCharacters="0"
passwordAttemptWindow="10"
applicationName="/"/>
16. Open the web.config of the SharePoint 2010 Central Administration and add both the connectionStrings and the membership provider entries as you did for the new web application.
17. Finally open the web.config for the STS. This can be found at <14 Hive>14WebServicesSecurityToken. Add the following entry after the configuration tag:
<connectionStrings>
<add connectionString="Data Source=splearn; Initial Catalog=AuthenticationDB; user id=sa;password=pass@word1"
name="AuthenticationConnection"/>
</connectionStrings>
<system.web>
<membership>
<providers>
<add name="FBAMembershipProvider"
type="System.Web.Security.SqlMembershipProvider"
connectionStringName="AuthenticationConnection"
enablePasswordRetrieval="false"
enablePasswordReset="true"
requiresQuestionAndAnswer="false"
requiresUniqueEmail="false"
maxInvalidPasswordAttempts="5"
minRequiredPasswordLength="6"
minRequiredNonalphanumericCharacters="0"
passwordAttemptWindow="10"
applicationName="/"/>
</providers>
</membership>
</system.web>
18. Go back to SharePoint 2010 Central Administration and proceed to create a new site collection for your web application. Click the book icon next to the username field for the Primary Administrator or the Secondary Administrator. The Select People dialog appears. You can now see the Forms Auth section in it. Select the Forms Auth section and search for the user you created. The user is displayed in the list as shown in Figure 17.8.
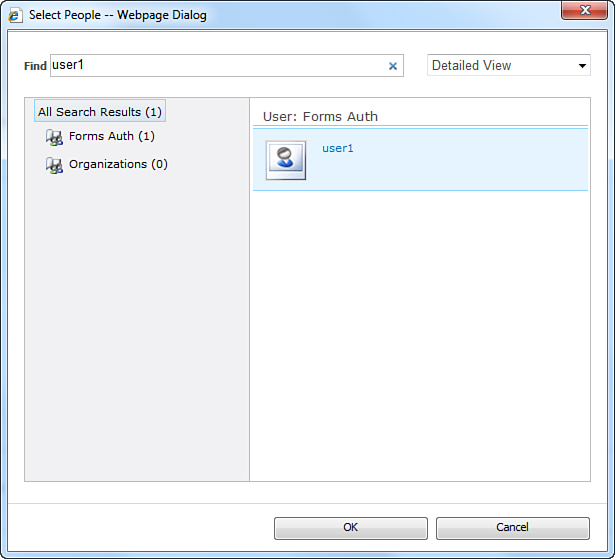
Figure 17.8. The Select People dialog
19. Select the user and click OK. Select a Windows user as the other site collection administrator as shown in Figure 17.9. Click OK to create the site collection.
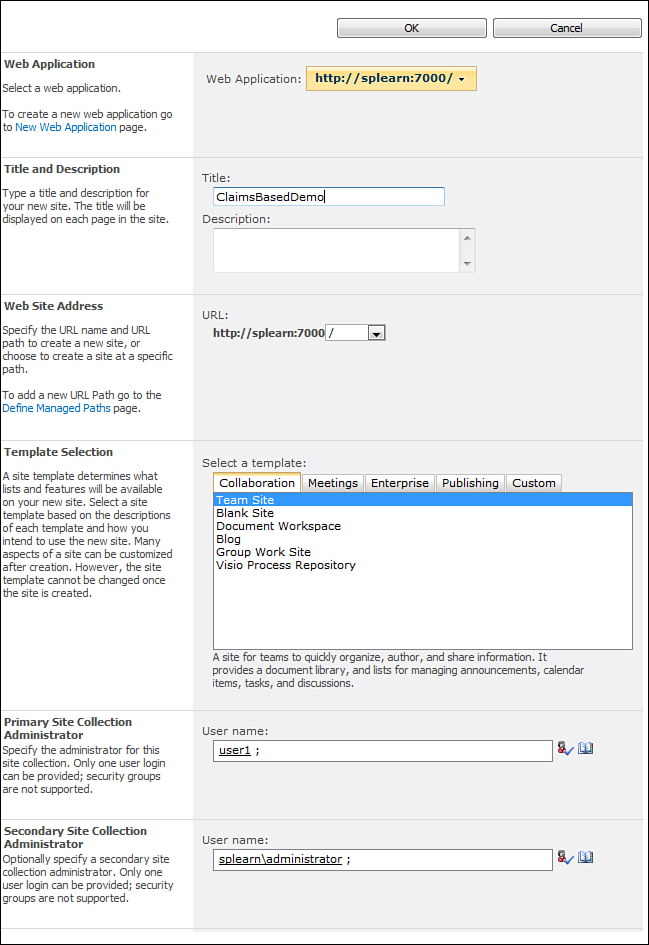
Figure 17.9. New site collection
20. Browse to the site collection once created. You see a Sign In page with a drop-down having options to either log in using Windows Authentication or Forms Authentication. This is shown in Figure 17.10.

Figure 17.10. Sign In page—claim authentication
21. If you select Forms Authentication you are redirected to an out of the box login form. Enter the username and password and click Sign In and you should be able to successfully log in to the site.
22. Sign out of the site and you are redirected to the Sign In page. This time select Windows Authentication and you can log in with the Windows credentials.